各位,对代码有疑问得可加群讨论193369905,小编承接各种AI小项目开发
**功能
人脸检测、识别(图片、视频)
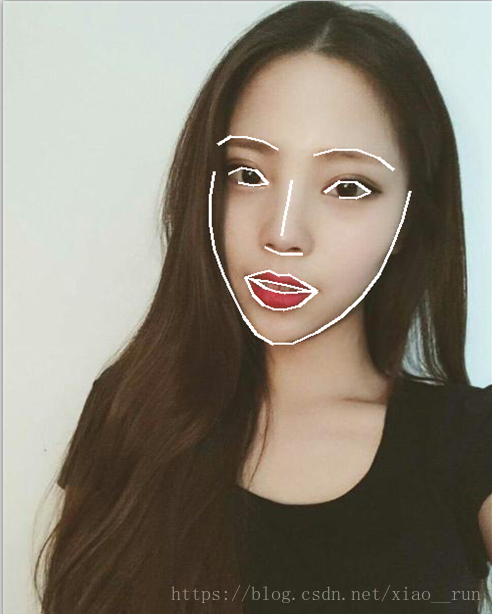
轮廓标识
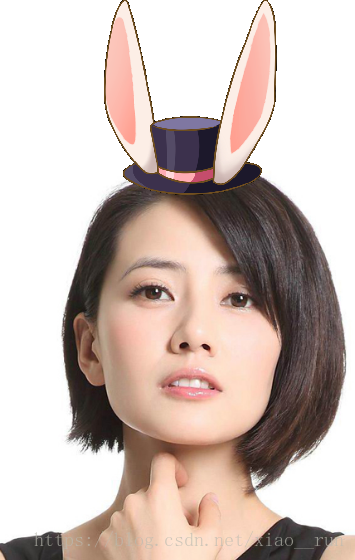
头像合成(给人戴帽子)
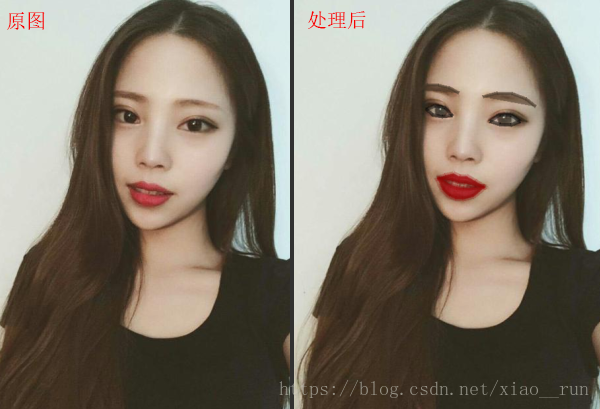
数字化妆(画口红、眉毛、眼睛等)
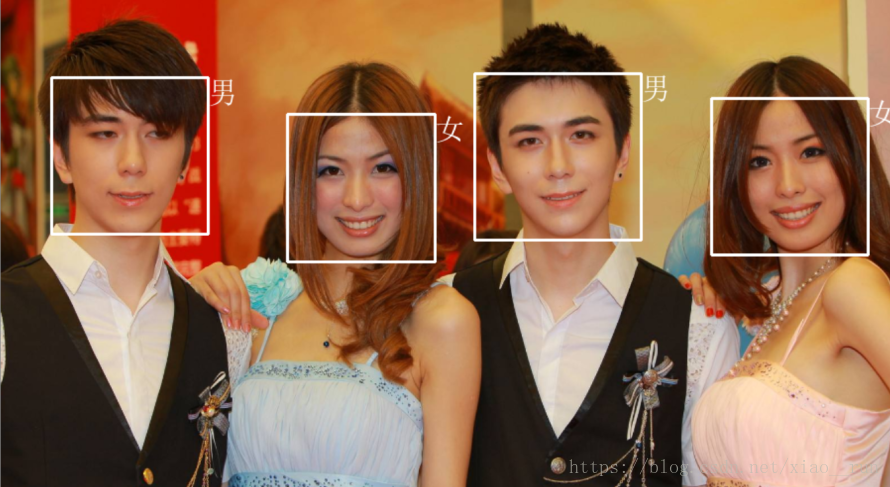
性别识别
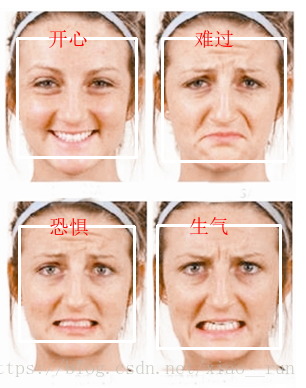
表情识别(生气、厌恶、恐惧、开心、难过、惊喜、平静等七种情绪)
视频对象提取
眼动追踪(待完善)
换脸(待实现)
**
Linux版环境搭建
Ubuntu 16.04
Python 3.6.5
Pip 10.0.1
Numpy 1.14.3
OpenCV 3.4.0
keras
Dlib 19.8.1
face_recognition 1.2.2
tensorflow 1.8.0
Tesseract OCR 4.0.0-beta.1
Ubuntu有一个好处就是内置Python环境,不需要像Windows那样在为Python环境折腾了,但要注意的是Ubuntu本身自带的apt-get和安装的pip的数据源是国外的,所以使用起来都很慢,一定要把apt-get和pip的数据源更换成国内的,请移步到:《Ubuntu apt-get和pip源更换》
正式安装
根据上面的提示,你已经配置好了开发环境,现在需要正式安装了,当然Ubuntu的安装也比Windows简单很多,只需要使用pip安装包,安装相应的模块即可。
安装Numpy
使用命令:pip3 install numpy
使用命令:python3,进入python脚本执行环境,输入代码查看numpy是否安装成功,以及numpy的安装版本:
import numpy

numpy.__version__
正常输入版本号,证明已经安装成功。
如图: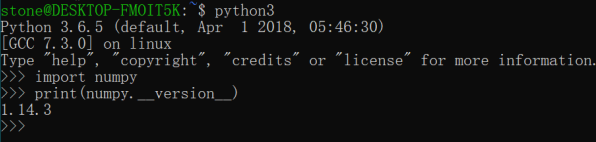
安装OpenCV
OpenCV的安装在Ubuntu和numpy相似,使用命令:
pip3 install opencv-python
使用命令:python3,进入python脚本执行环境,输入代码查看OpenCV版本:
import cv2

cv2.__version__
正常输入版本号,证明已经安装成功。
功能预览
1、绘制脸部轮廓
2、人脸68个关键点标识

3、头像特效合成
4、性别识别
5、表情识别
6、数字化妆
下面贴出表情识别得代码吧,各位玩嗨
#coding=utf-8
#表情识别

import cv2
from keras.models import load_model
import numpy as np
import chineseText
import datetime

startTime = datetime.datetime.now()
emotion_classifier = load_model(
    'classifier/emotion_models/simple_CNN.530-0.65.hdf5')
endTime = datetime.datetime.now()
print(endTime - startTime)

emotion_labels = {
    0: '生气',
    1: '厌恶',
    2: '恐惧',
    3: '开心',
    4: '难过',
    5: '惊喜',
    6: '平静'
}

img = cv2.imread("img/emotion/emotion.png")
face_classifier = cv2.CascadeClassifier(
    "C:\Python36\Lib\site-packages\opencv-master\data\haarcascades\haarcascade_frontalface_default.xml"
)
gray = cv2.cvtColor(img, cv2.COLOR_BGR2GRAY)
faces = face_classifier.detectMultiScale(
    gray, scaleFactor=1.2, minNeighbors=3, minSize=(40, 40))
color = (255, 0, 0)

for (x, y, w, h) in faces:
    gray_face = gray[(y):(y + h), (x):(x + w)]
    gray_face = cv2.resize(gray_face, (48, 48))
    gray_face = gray_face / 255.0
    gray_face = np.expand_dims(gray_face, 0)
    gray_face = np.expand_dims(gray_face, -1)
    emotion_label_arg = np.argmax(emotion_classifier.predict(gray_face))
    emotion = emotion_labels[emotion_label_arg]
    cv2.rectangle(img, (x + 10, y + 10), (x + h - 10, y + w - 10),
                  (255, 255, 255), 2)
    img = chineseText.cv2ImgAddText(img, emotion, x + h * 0.3, y, color, 20)

cv2.imshow("Image", img)
cv2.waitKey(0)
cv2.destroyAllWindows()
化妆功能代码
#coding=utf-8
#数字化妆类
import face_recognition
from PIL import Image, ImageDraw

#加载图片到numpy array
image = face_recognition.load_image_file("img/ag.png")

#标识脸部特征
face_landmarks_list = face_recognition.face_landmarks(image)

for face_landmarks in face_landmarks_list:
    pil_image = Image.fromarray(image)
    d = ImageDraw.Draw(pil_image, 'RGBA')

    # 绘制眉毛
    d.polygon(face_landmarks['left_eyebrow'], fill=(68, 54, 39, 128))
    d.polygon(face_landmarks['right_eyebrow'], fill=(68, 54, 39, 128))
    d.line(face_landmarks['left_eyebrow'], fill=(68, 54, 39, 150), width=5)
    d.line(face_landmarks['right_eyebrow'], fill=(68, 54, 39, 150), width=5)

    # 绘制嘴唇
    d.polygon(face_landmarks['top_lip'], fill=(150, 0, 0, 128))
    d.polygon(face_landmarks['bottom_lip'], fill=(150, 0, 0, 128))
    d.line(face_landmarks['top_lip'], fill=(150, 0, 0, 64), width=8)
    d.line(face_landmarks['bottom_lip'], fill=(150, 0, 0, 64), width=8)

    # 绘制眼睛
    d.polygon(face_landmarks['left_eye'], fill=(255, 255, 255, 30))
    d.polygon(face_landmarks['right_eye'], fill=(255, 255, 255, 30))

    # 绘制眼线
    d.line(
        face_landmarks['left_eye'] + [face_landmarks['left_eye'][0]],
        fill=(0, 0, 0, 110),
        width=6)
    d.line(
        face_landmarks['right_eye'] + [face_landmarks['right_eye'][0]],
        fill=(0, 0, 0, 110),
        width=6)

pil_image.show()
#性别识别
#coding=utf-8
#性别识别

import cv2
from keras.models import load_model
import numpy as np
import chineseText

img = cv2.imread("img/gather.png")
face_classifier = cv2.CascadeClassifier(
    "C:\Python36\Lib\site-packages\opencv-master\data\haarcascades\haarcascade_frontalface_default.xml"
)
gray = cv2.cvtColor(img, cv2.COLOR_BGR2GRAY)
faces = face_classifier.detectMultiScale(
    gray, scaleFactor=1.2, minNeighbors=3, minSize=(140, 140))

gender_classifier = load_model(
    "classifier/gender_models/simple_CNN.81-0.96.hdf5")
gender_labels = {0: '女', 1: '男'}
color = (255, 255, 255)

for (x, y, w, h) in faces:
    face = img[(y - 60):(y + h + 60), (x - 30):(x + w + 30)]
    face = cv2.resize(face, (48, 48))
    face = np.expand_dims(face, 0)
    face = face / 255.0
    gender_label_arg = np.argmax(gender_classifier.predict(face))
    gender = gender_labels[gender_label_arg]
    cv2.rectangle(img, (x, y), (x + h, y + w), color, 2)
    img = chineseText.cv2ImgAddText(img, gender, x + h, y, color, 30)

cv2.imshow("Image", img)
cv2.waitKey(0)
cv2.destroyAllWindows()