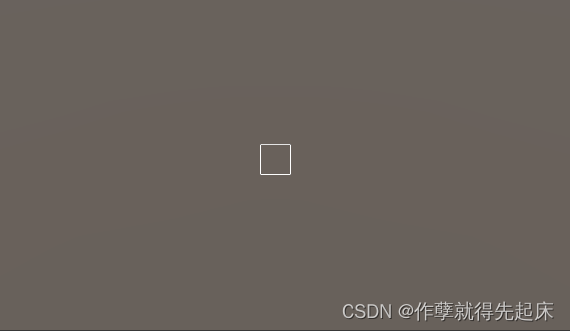
先制作选框:
创建一个Image,给Sourece Image随便添加一张方形图片,如果添加圆的出来就是圆,这个看情况而定,然后勾掉Fill Center这样就镂空了
这种框选一般都是作为组件存在所以代码要做成单例类,默认情况下隐藏选框,在鼠标托拽时也要修改宽高,在需要时也要显示出来故此代码如下:
    public RectTransform rectTransfrom;//这个对象是创建image选框,关联上即可

    public static UIMgr Instance//单例
    {
        get;
        private set;
    }

    // Start is called before the first frame update
    void Start()
    {
        Instance = this;
    }

    // Update is called once per frame
    void Update()
    {

    }

    public void SetRectangle(Vector2 pos,Vector2 size)
    {
        rectTransfrom.gameObject.SetActive(true);//显示对象
        rectTransfrom.position = pos;//中心点位置赋值
        rectTransfrom.sizeDelta = size;//长宽赋值
    }

    public void HideRectangle()
    {
        rectTransfrom.gameObject.SetActive(false);//隐藏对象
    }
在进行操作时要想两个问题:
1、什么时候显示和隐藏
2、显示时如何跟随鼠标进行计算
        if (Input.GetMouseButtonDown(0)) //当鼠标按下去时进行显示并且进行计算
        {
            _isDrang = true;//显示
            _startPos = Input.mousePosition;//实时获取鼠标位置(开始位置)
        }

        if (_isDrang)
        {
            _endPos = Input.mousePosition;//实时获取鼠标位置(结束位置)

            Vector2 center=(_startPos+_endPos)/2; //中心的位置
            var size = new Vector2(Mathf.Abs(_endPos.x-_startPos.x),Mathf.Abs(_endPos.y-_startPos.y));//绝对值算边框 长 宽
            UIMgr.Instance.SetRectangle(center,size);//这个目标对象要做单例,将数据传递,显示对象
            _selectRect= new Rect(center-size/2,size);//为框选目标对象做准备,获取框选范围
        }
当鼠标抬起时
         if (Input.GetMouseButtonUp(0))
        {
            _isDrang = false;//对象归正
            UIMgr.Instance.HideRectangle();//隐藏对象
       }
接下来时选中目标对象:
先给目标个组件:要单例 获取选中的目标对象并返回
注意这里的对象要是选中目标的父级对象进行关联,通过父级查找子集对象进行选中,在这一步相当于是获取了所有可选中对象进行遍历查找,通过直接获取父级对象缩小了我们遍历查找的范围,这样再某种程度上节约了性能。
 public Transform[] GetAllSelectsUnites()
    {
        List<Transform> result = new List<Transform>();
        foreach (Transform trans in Solider)
        {
            result.Add(trans);
        }

        return result.ToArray();
        //下面被注释掉的是简写,与上面意思一致(用rider的)
        //return Solider.Cast<Transform>().ToArray();
    }
然后返回到框选操作中:
             var  allUnity=GameMgr.Instance.GetAllSelectsUnites();//这里是上面的单例组件
            var mainCamera = Camera.main;//获取相机组件,不建议在这里获取性能不好
            foreach (var unit in allUnity)//遍历所有返回对象
            {
                var screenPos =mainCamera.WorldToScreenPoint(unit.position);//选取相机视角内对象,进一步节省性能
                if (_selectRect.Contains(screenPos))//从框选范围内选取所有对象
                {
                    Debug.Log(unit.name);//测试输出对象名称
               }

}如果不使用图片进行画框操作还可使用GL进行,此方法还可进行划线等相关绘制操作,代码如下(如需框选选中目标,请结合Demo,请注意此代码需要与相机关联)
    [SerializeField] Material _glMat;//引入材质
    [SerializeField] Color _gcolor=Color.green;//设定颜色

    bool _drawing;//控制开关

    Vector3 _starPost,_endPost;//开始位置、结束位置(坐标)

    void Start()
    {

    }

    // Update is called once per frame
    void Update()
    {
        if(Input.GetMouseButtonDown(0))//如果点击
        {
            _drawing=true;
            _starPost=Input.mousePosition;
        }
        if(Input.GetMouseButtonUp(0))//如果抬起
        {
            _drawing=false;
            _endPost=Input.mousePosition;
        }
    }

    private void OnPostRender() //生命周期函数在update之后调用
    {
        if(!_drawing)
        {
            return;
        }

        _glMat.SetPass(0);//设置着色器编号
        GL.PushMatrix();//将模型、视图和投影矩阵保存到矩阵堆栈顶部。

        GL.LoadOrtho();//Helper 函数,用于设置正交投影。

        GL.Begin(GL.LINES);//开始绘制,决定以什么样式进行绘制
        GL.Color(_gcolor);//设定颜色

        //计算四角顶点
        Vector3 otherPostOne=new Vector3(_starPost.x,Input.mousePosition.y);
        Vector3 otherPostTwo=new Vector3(Input.mousePosition.x,_starPost.y);
        //添加顶点
        GL.Vertex(ScreenToWorldPos(_starPost));
        GL.Vertex(ScreenToWorldPos(otherPostOne));
        GL.Vertex(ScreenToWorldPos(_starPost));
        GL.Vertex(ScreenToWorldPos(otherPostTwo));
        GL.Vertex(ScreenToWorldPos(Input.mousePosition));
        GL.Vertex(ScreenToWorldPos(otherPostOne));
        GL.Vertex(ScreenToWorldPos(Input.mousePosition));
        GL.Vertex(ScreenToWorldPos(otherPostTwo));

        //结束(告诉gl结束)
        GL.End();
        GL.PopMatrix();//将模型、视图和投影矩阵在矩阵堆栈顶部移除。

    }


    //将坐标进行转换,使它符合要求,不大于1,不小于0
    Vector3 ScreenToWorldPos(Vector3 screenPos)
    {
        return new Vector3(screenPos.x/Screen.width,screenPos.y/Screen.height);
    }