基础说明
HashMap 是一个散列表,它存储的内容是键值对(key-value)映射。
HashMap 实现了 Map 接口,根据键的 HashCode 值存储数据,具有很快的访问速度,最多允许一条记录的键为 null,不支持线程同步。
HashMap 是无序的,即不会记录插入的顺序。
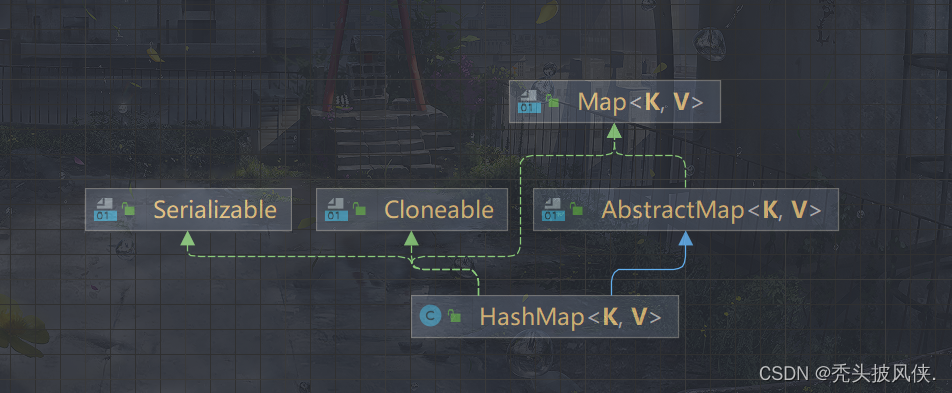
HashMap 继承于AbstractMap,实现了 Map、Cloneable、java.io.Serializable 接口。
下面是HashMap的类图
在HashMap里面,我们存储的每一个节点都是一个Node
    /**
     * Basic hash bin node, used for most entries.  (See below for
     * TreeNode subclass, and in LinkedHashMap for its Entry subclass.)
     */
    static class Node<K,V> implements Map.Entry<K,V> {


        final int hash;
        final K key;
        V value;
        Node<K,V> next;

        Node(int hash, K key, V value, Node<K,V> next) {


            this.hash = hash;
            this.key = key;
            this.value = value;
            this.next = next;
        }

        public final K getKey()        {

     return key; }
        public final V getValue()      {

     return value; }
        public final String toString() {

     return key + "=" + value; }

        public final int hashCode() {


            return Objects.hashCode(key) ^ Objects.hashCode(value);
        }

        public final V setValue(V newValue) {


            V oldValue = value;
            value = newValue;
            return oldValue;
        }

        public final boolean equals(Object o) {


            if (o == this)
                return true;
            if (o instanceof Map.Entry) {


                Map.Entry<?,?> e = (Map.Entry<?,?>)o;
                if (Objects.equals(key, e.getKey()) &&
                    Objects.equals(value, e.getValue()))
                    return true;
            }
            return false;
        }
    }
对于HashMap,这篇文章不会对hash算法还有红黑树的原理进行说明,这个是属于数据结构的知识!!!
在开始了解HashMap源码前,先对HashMap的几个重要成员属性进行说明

    /**
     * The table, initialized on first use, and resized as
     * necessary. When allocated, length is always a power of two.
     * (We also tolerate length zero in some operations to allow
     * bootstrapping mechanics that are currently not needed.)
     */
    transient Node<K,V>[] table;
table就是用来存储元素的
    /**
     * The number of key-value mappings contained in this map.
     */
    transient int size;
size表示元素个数
    /**
     * The default initial capacity - MUST be a power of two.
     */
    static final int DEFAULT_INITIAL_CAPACITY = 1 << 4; // aka 16

    /**
     * The maximum capacity, used if a higher value is implicitly specified
     * by either of the constructors with arguments.
     * MUST be a power of two <= 1<<30.
     */
    static final int MAXIMUM_CAPACITY = 1 << 30;

    /**
     * The load factor used when none specified in constructor.
     */
    static final float DEFAULT_LOAD_FACTOR = 0.75f;
上面几个是关于table容量的一些属性
    /**
     * The bin count threshold for using a tree rather than list for a
     * bin.  Bins are converted to trees when adding an element to a
     * bin with at least this many nodes. The value must be greater
     * than 2 and should be at least 8 to mesh with assumptions in
     * tree removal about conversion back to plain bins upon
     * shrinkage.
     */
    static final int TREEIFY_THRESHOLD = 8;

    /**
     * The bin count threshold for untreeifying a (split) bin during a
     * resize operation. Should be less than TREEIFY_THRESHOLD, and at
     * most 6 to mesh with shrinkage detection under removal.
     */
    static final int UNTREEIFY_THRESHOLD = 6;

    /**
     * The smallest table capacity for which bins may be treeified.
     * (Otherwise the table is resized if too many nodes in a bin.)
     * Should be at least 4 * TREEIFY_THRESHOLD to avoid conflicts
     * between resizing and treeification thresholds.
     */
    static final int MIN_TREEIFY_CAPACITY = 64;
上面这些是关于是否树形化的一些属性
构造器
在HashMap中有3个构造器,分别如下
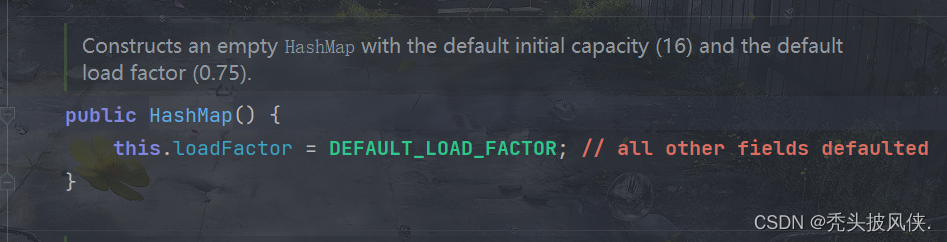
无参构造器
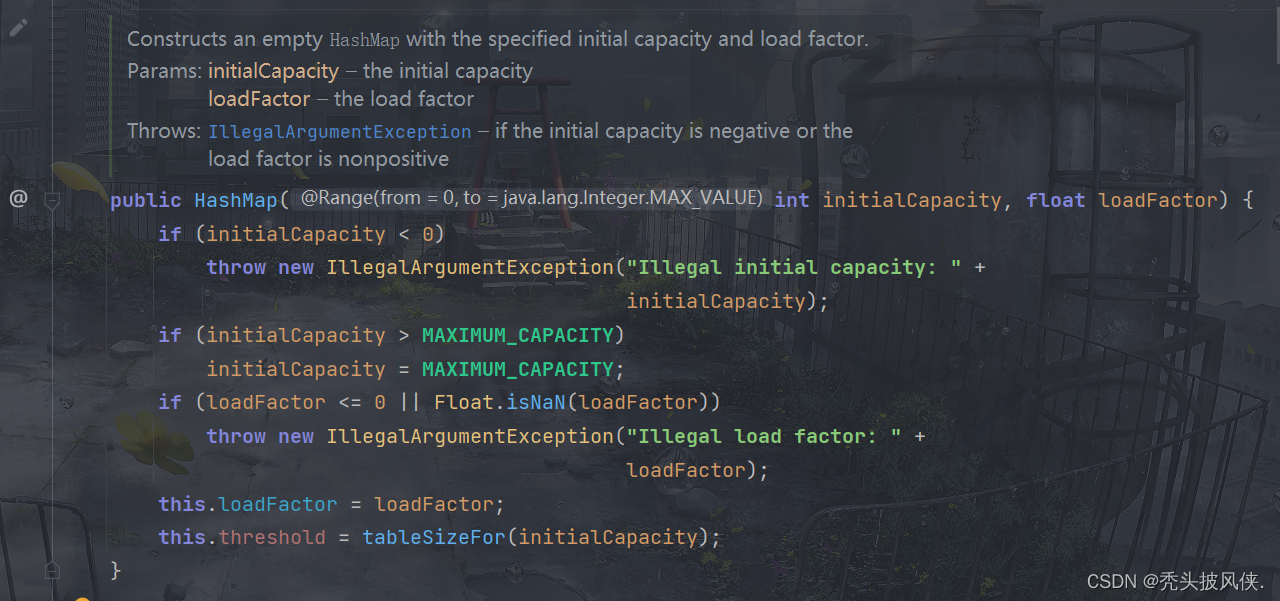
指定初始容量

指定初始容量和负载因子
通过Map创建

对于HashMap,一般都是使用无参构造器。对于初始容量,默认值就是16,对于负载因子,默认值就是0.75。
负载因子的作用就是判断table是否需要扩容了,如果table的容量达到了 当前容量*负载因子,那么就会进行扩容
put方法(无扩容,无冲突)
现在我们就来开始debug,下面就是要进行debug的代码
    public static void main(String[] args) {


        HashMap<Integer, String> hashMap = new HashMap<>();
        for (int i = 0; i < 20; i++) {


            hashMap.put(i, "100");
        }
    }
对于debug,我们主要是看过程,一定不要过分在意细节,不然就绕进去了。下面就开始debug了
首先看看创建HashMap后有什么
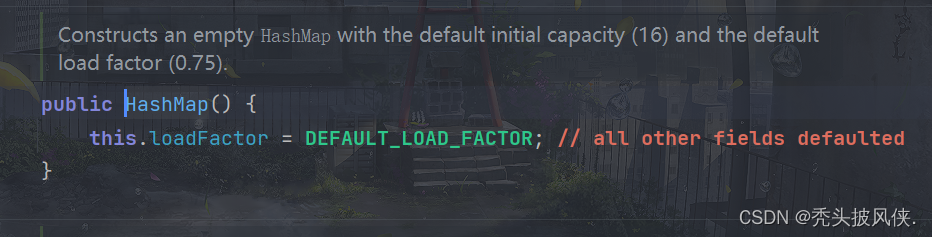
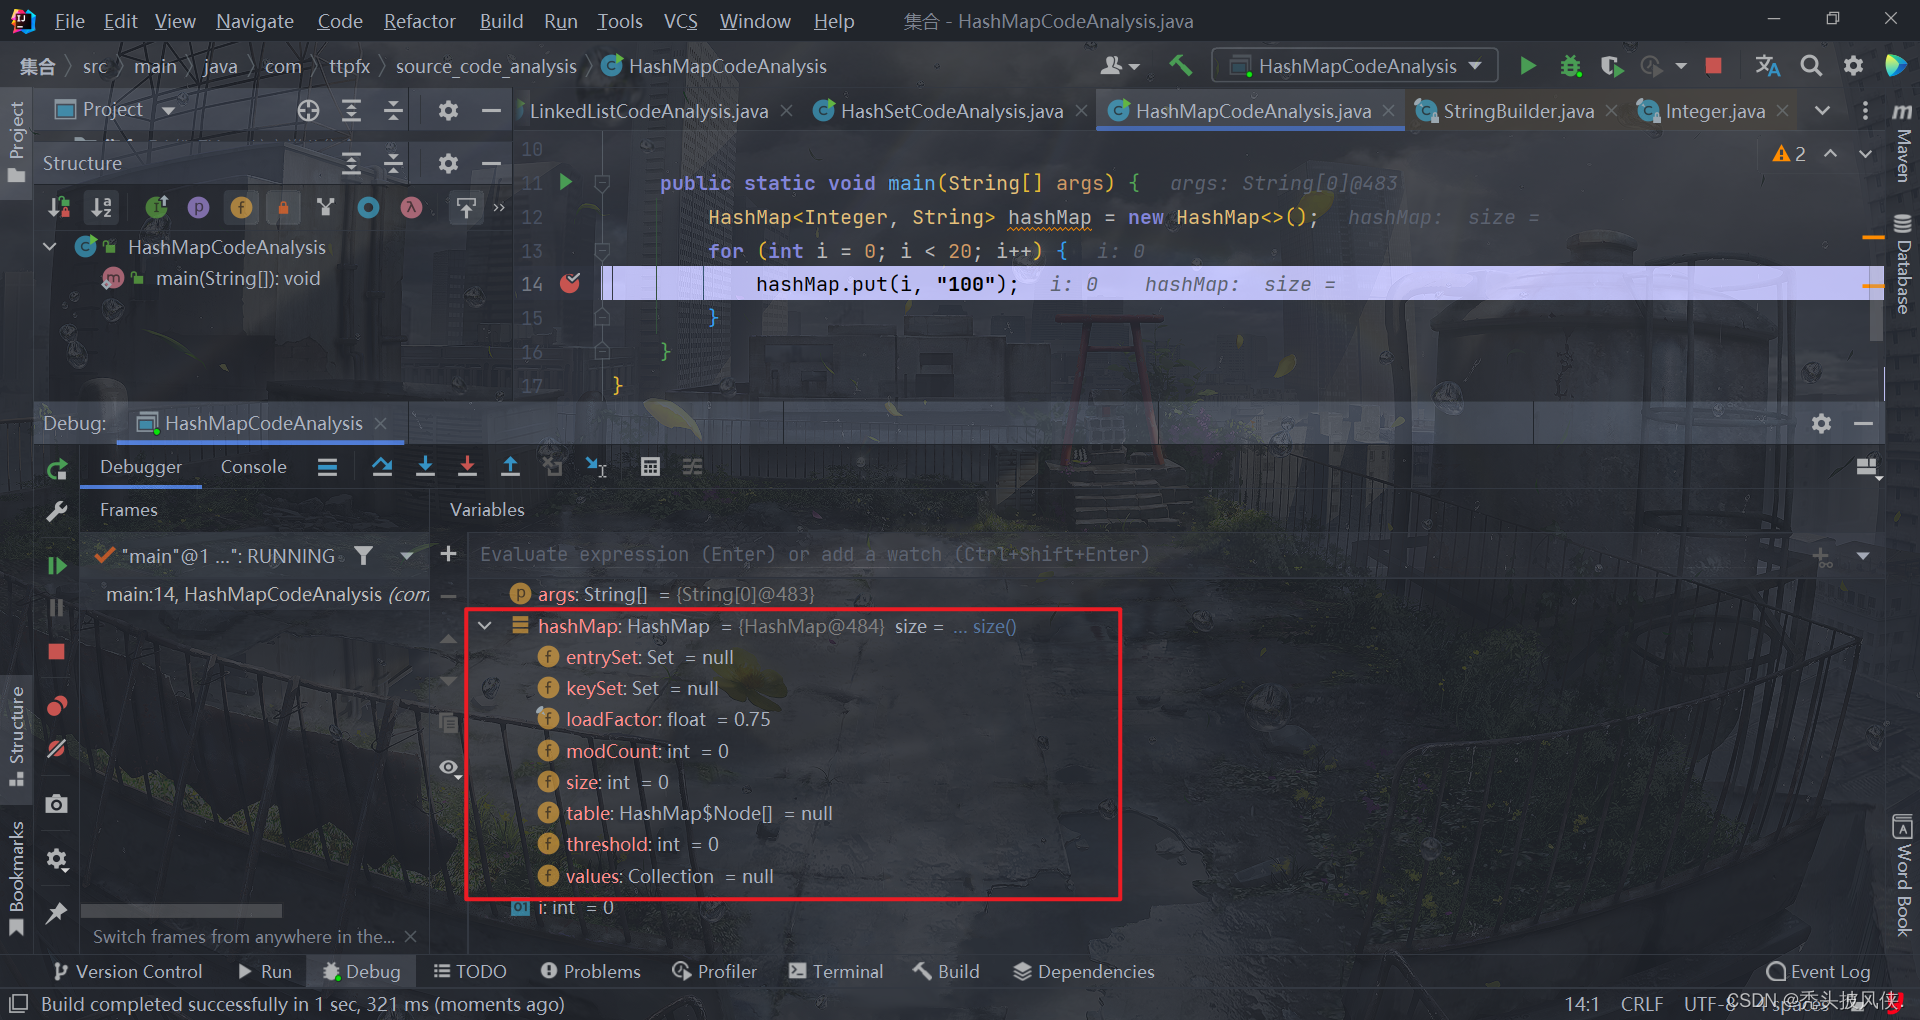
可以发现创建就是设置了一些负载因子
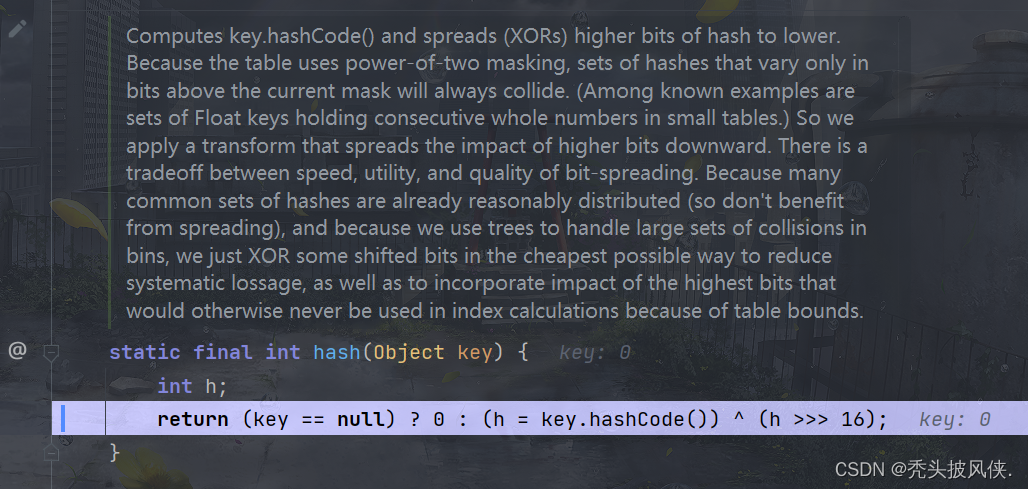
然后进入put方法

该方法首先会计算传入k的hash值,对于hash算法,这里不做说明,请参考数据结构,下面就是hash方法的内容
计算完hash后,进入putVal方法
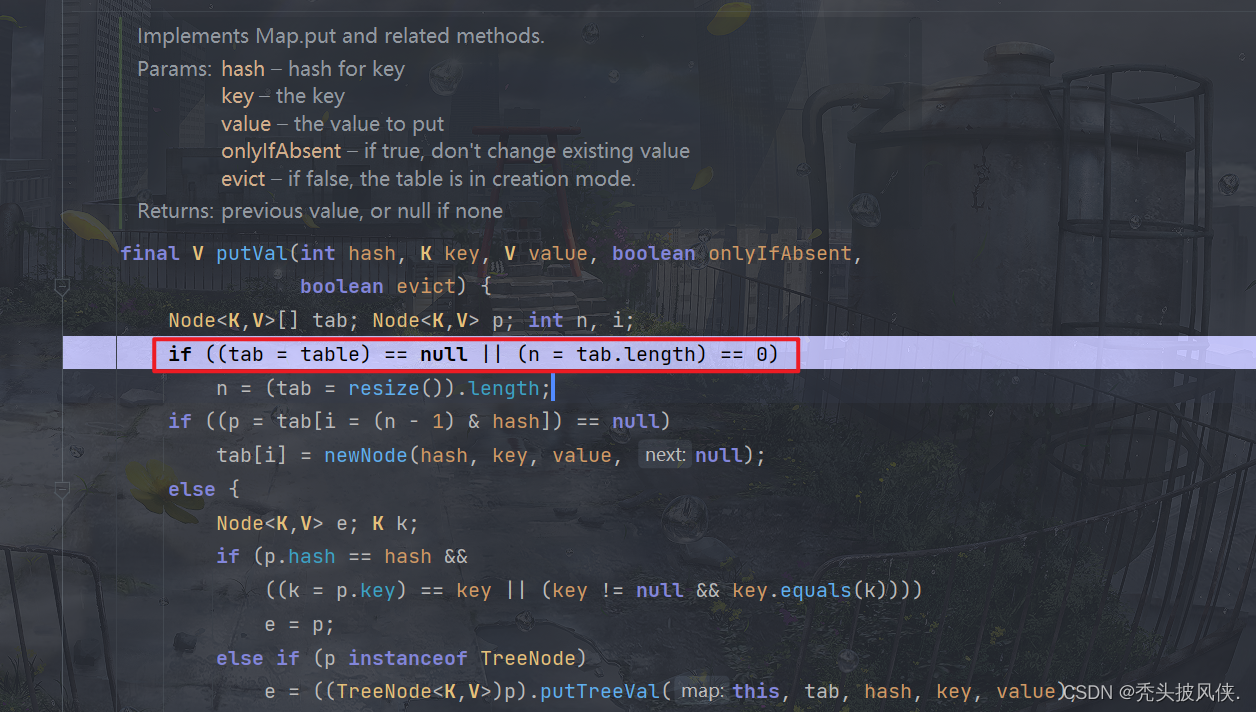
这个if就是判断当前table是否为null,显然是的,于是就进入到resize方法。resize方法内容很多,这里我不会说明每一条语句,挑重要的进行说明。在这之前,我们应当看一下该方法的注释
    /**
     * Initializes or doubles table size.  If null, allocates in
     * accord with initial capacity target held in field threshold.
     * Otherwise, because we are using power-of-two expansion, the
     * elements from each bin must either stay at same index, or move
     * with a power of two offset in the new table.
     *
     * @return the table
     */
开始debug
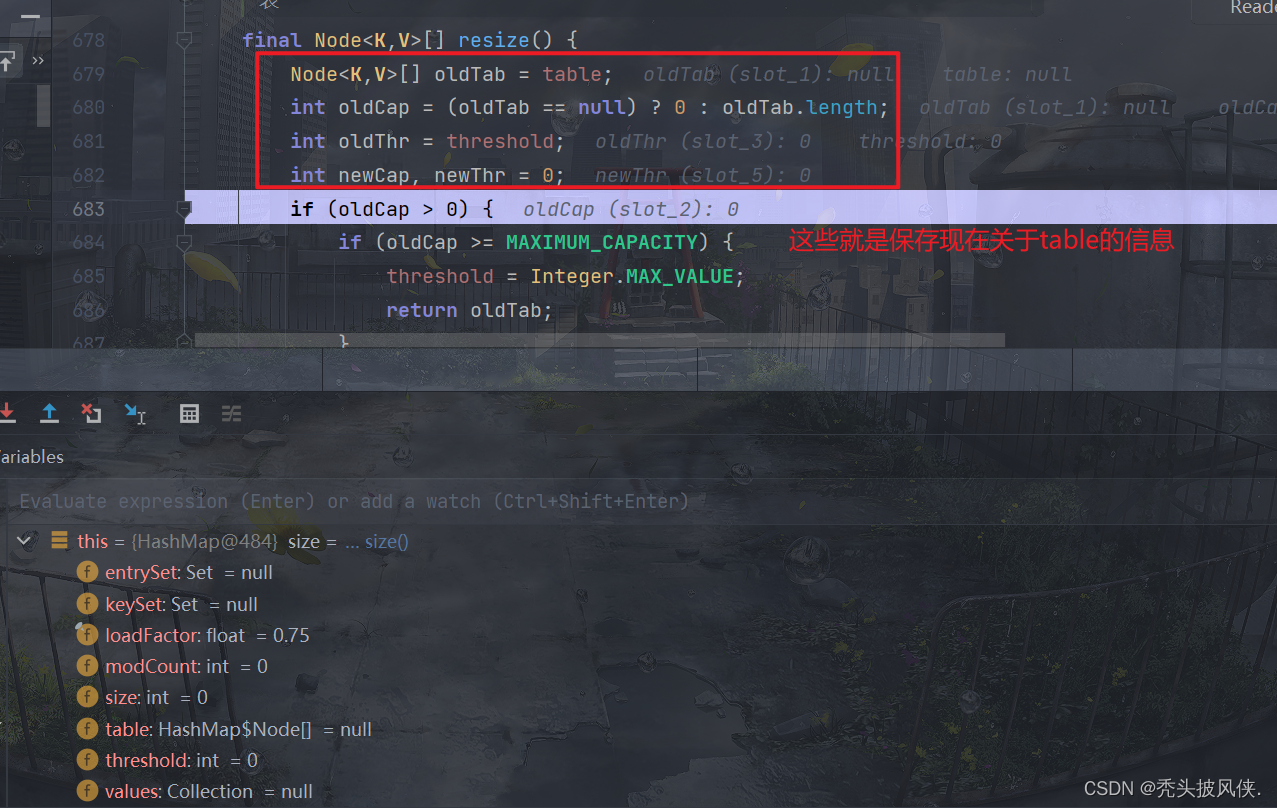
继续往下面走
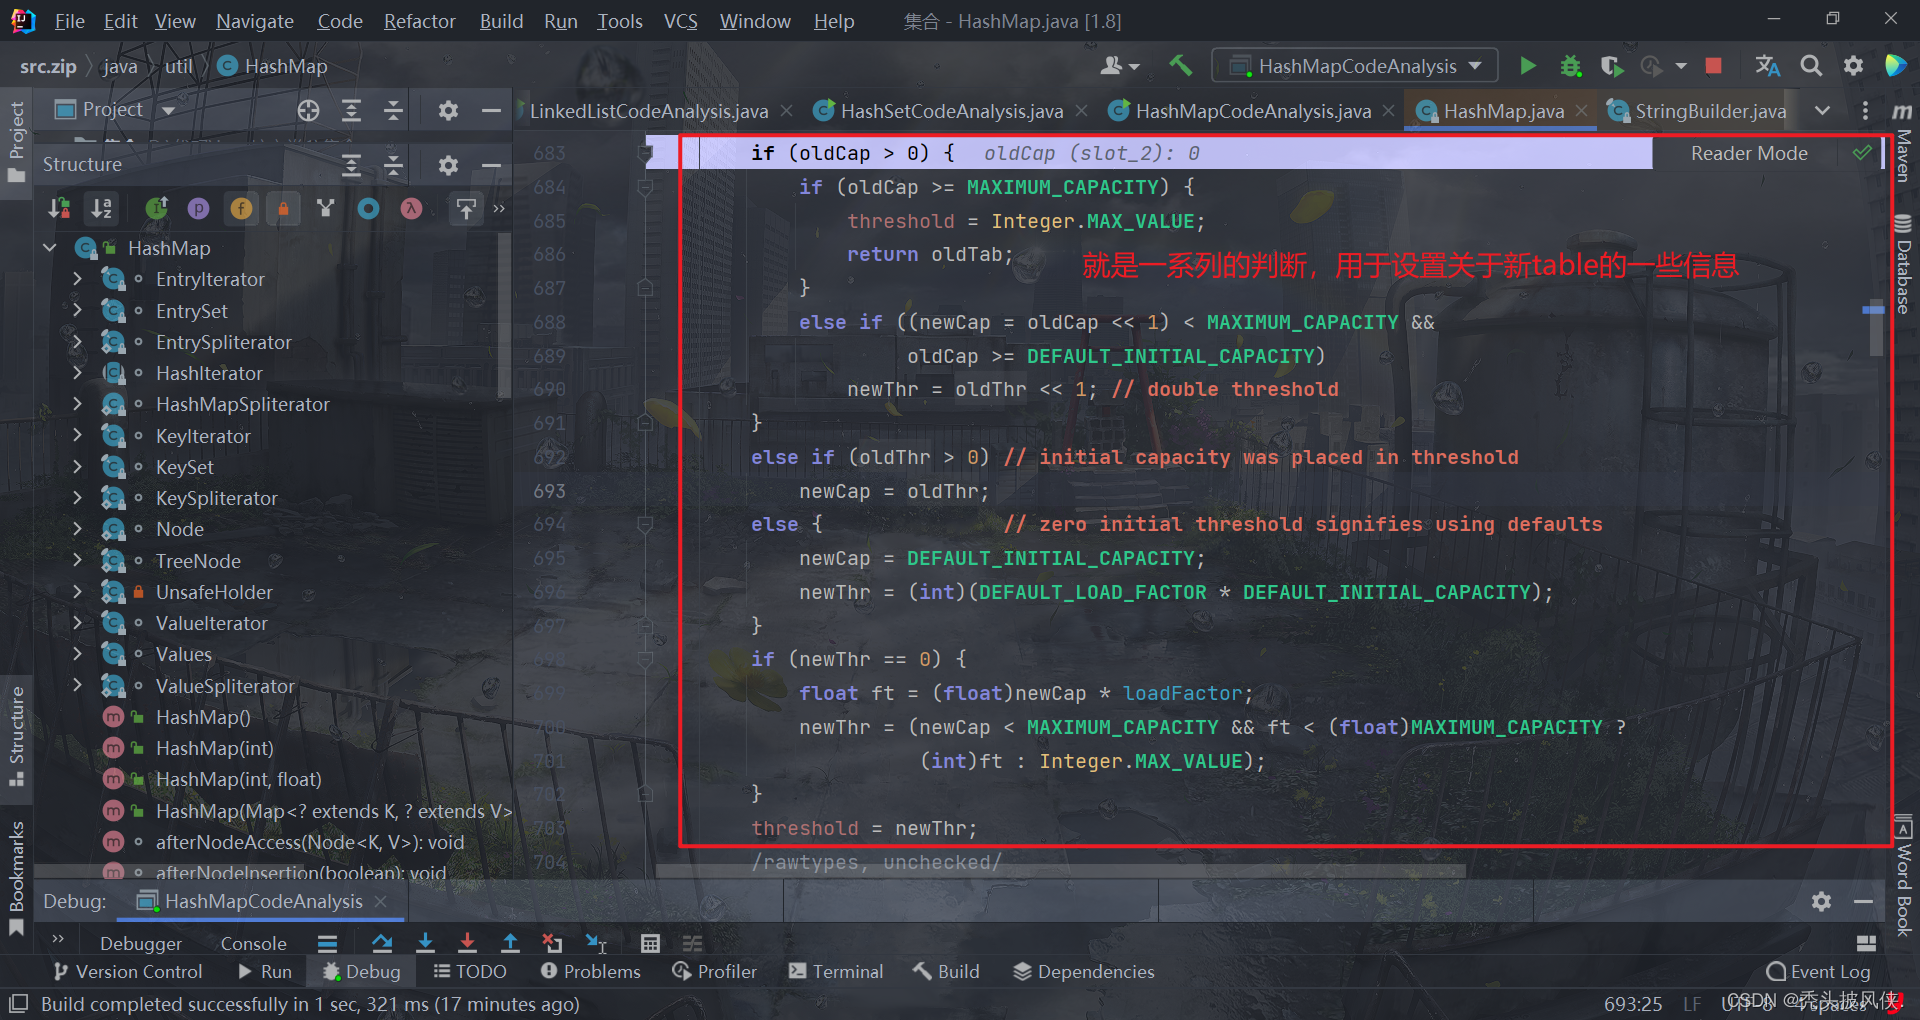
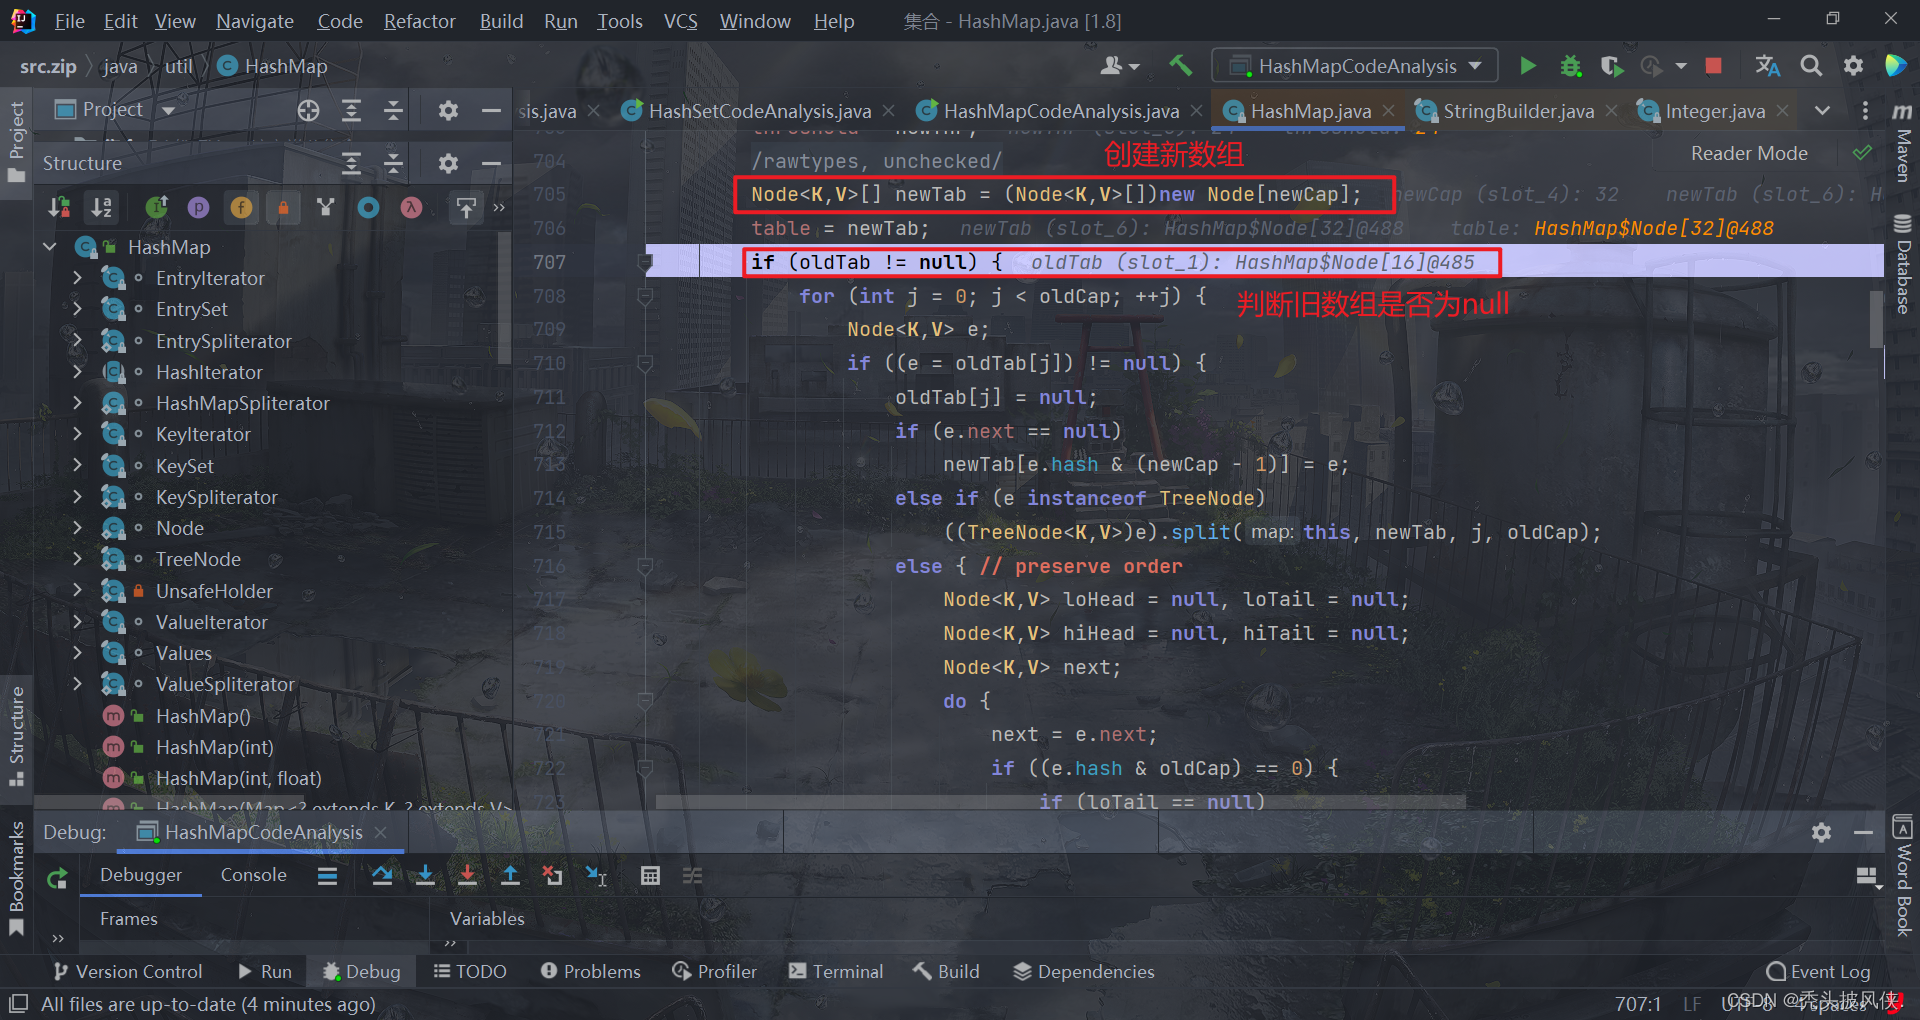
上面的判断完成后就开始真正创建数组了

然后赋值,对于下面的if判断,其实就是将oldTab的值复制过来,由于oldTab为null,所以这个方法就结束了,这个方法结束之后,table就已经初始化了,大小为16
继续debug
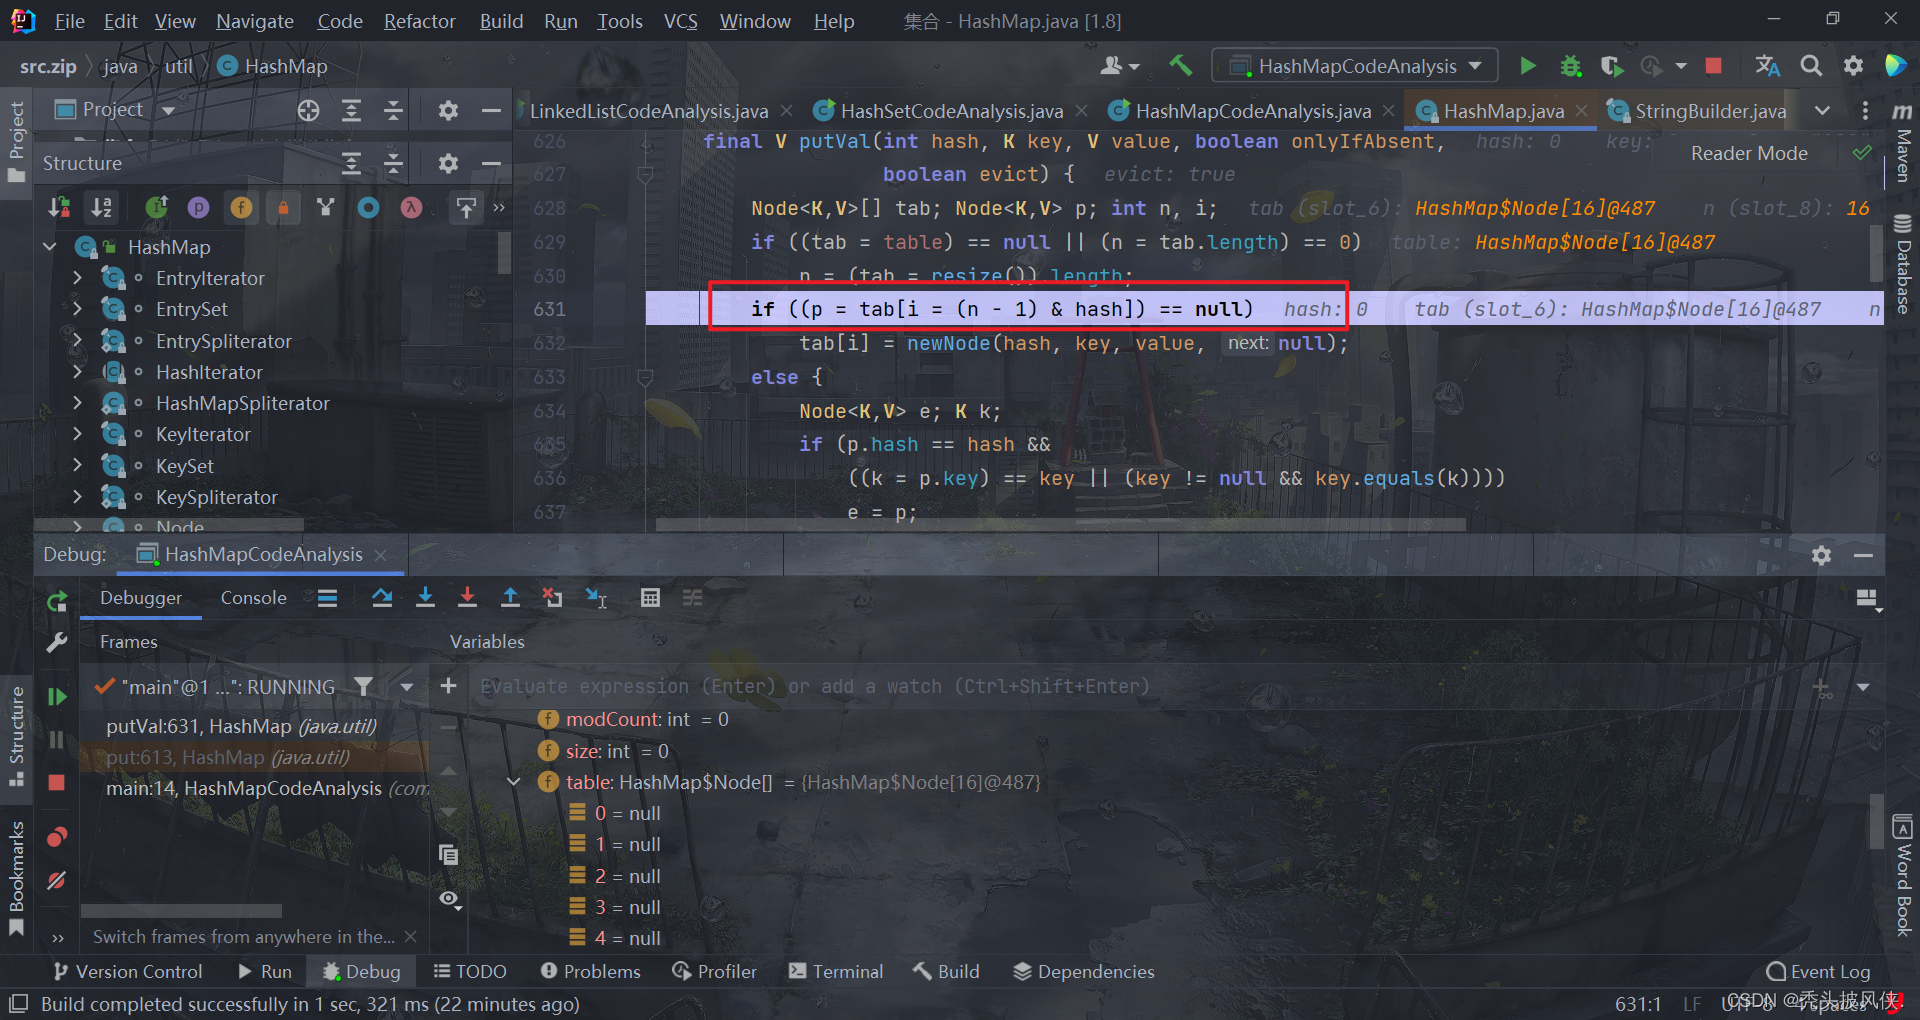
这条语句就是判断指定通过hash算出来的索引位置是否已经存放了值,显然没有,所以就会将其设置到指定位置
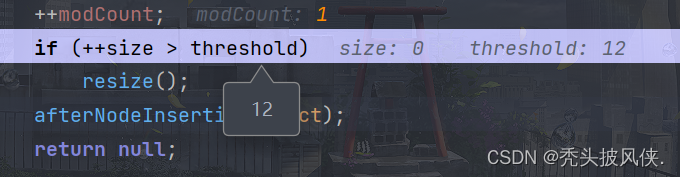
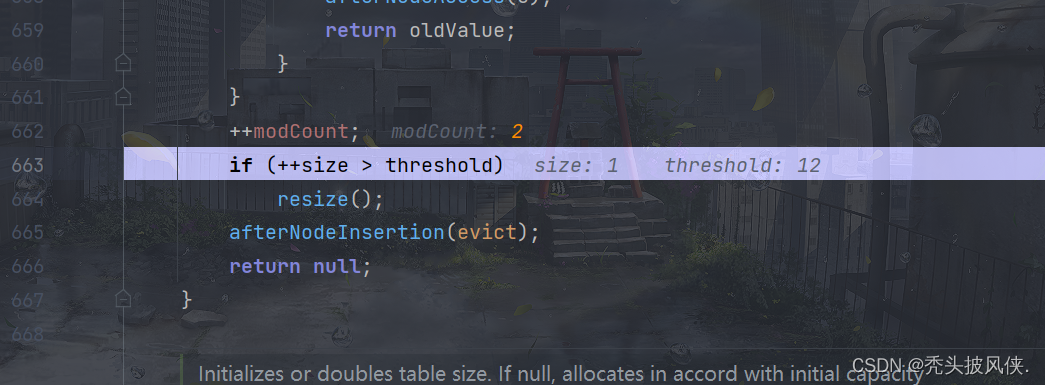
继续往下面走,可以看见一个if语句
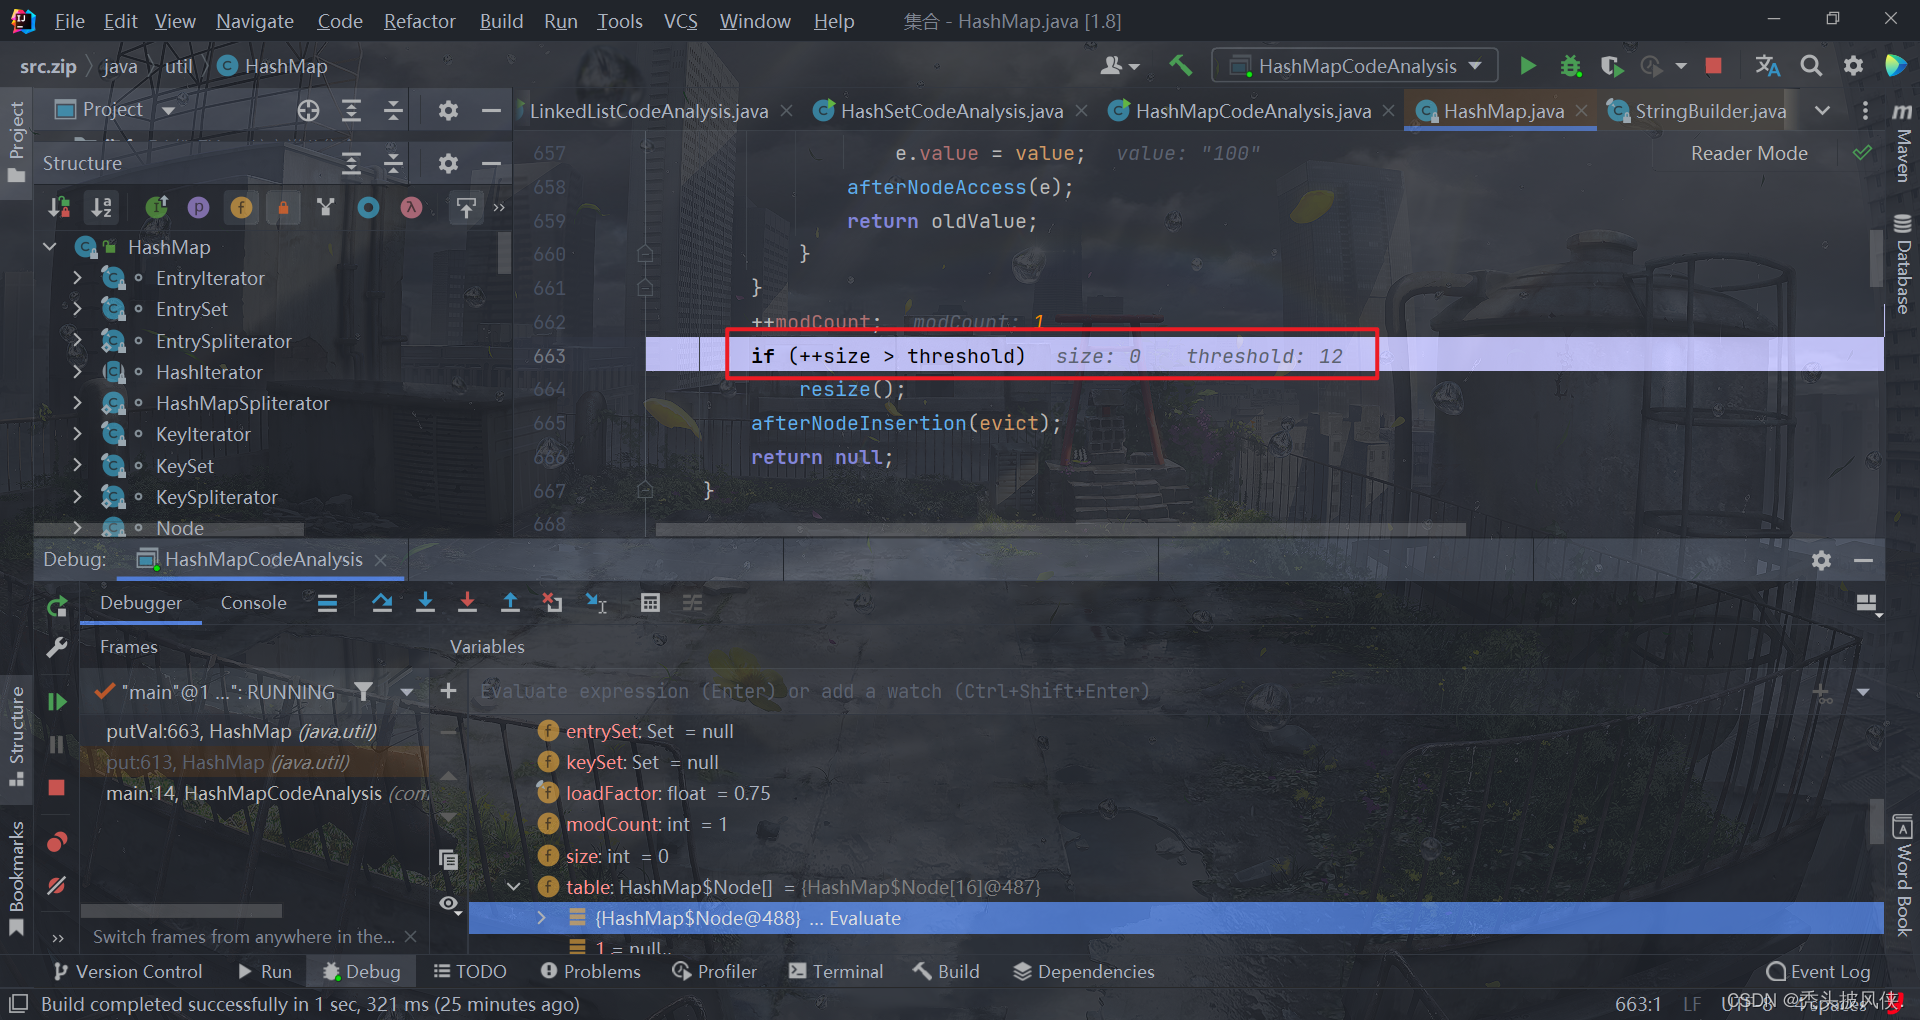
这个就是用来判断是否需要扩容的,threshold就是当前容量*负载因子,这里的threshold就是12
继续往下走,方法结束
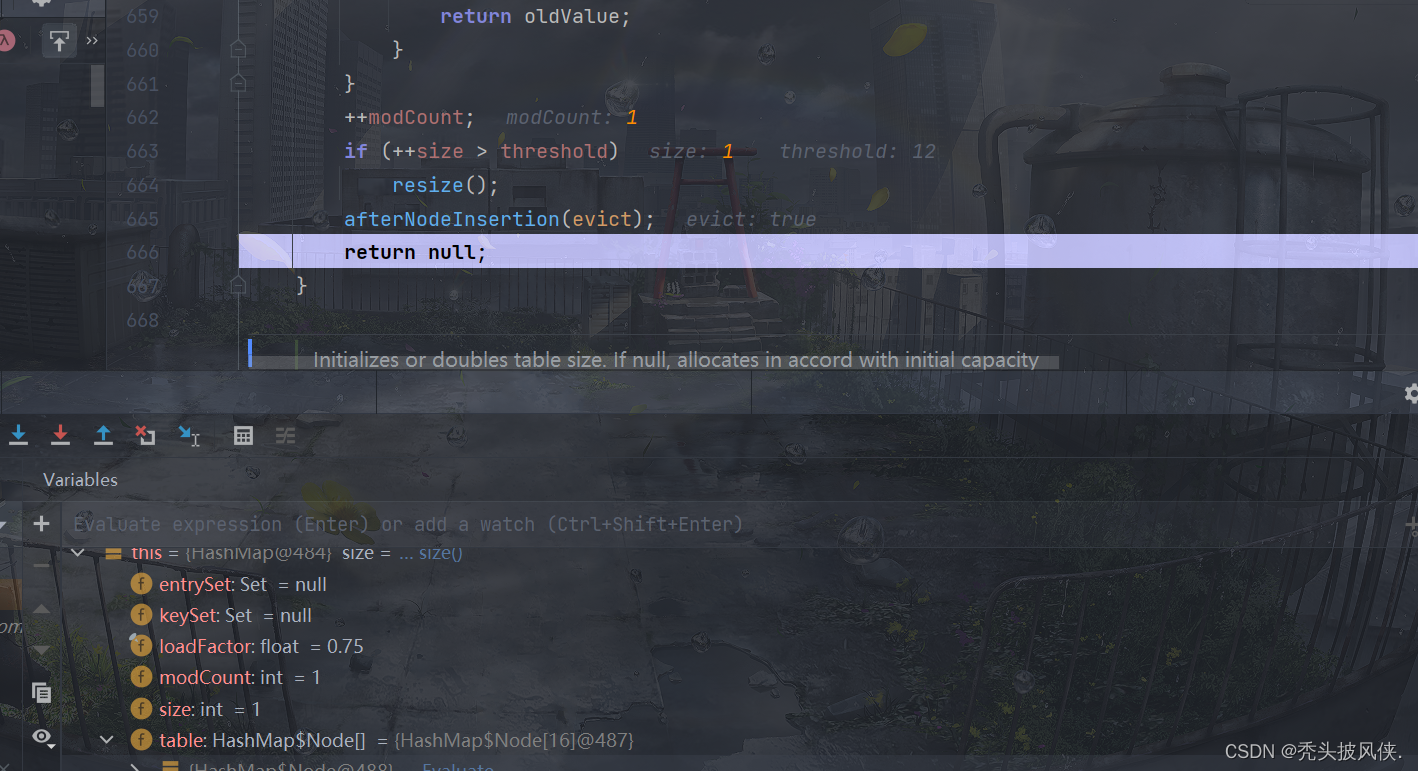
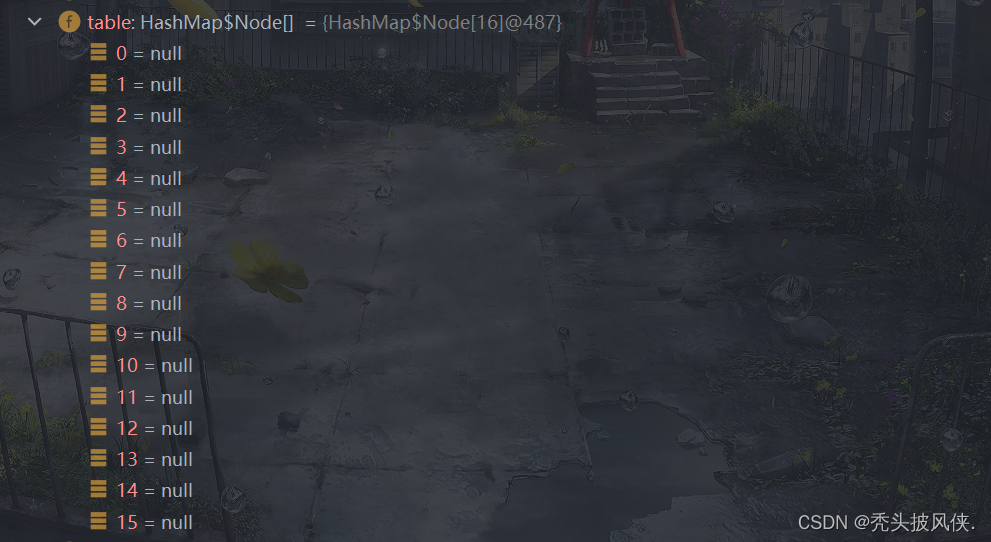
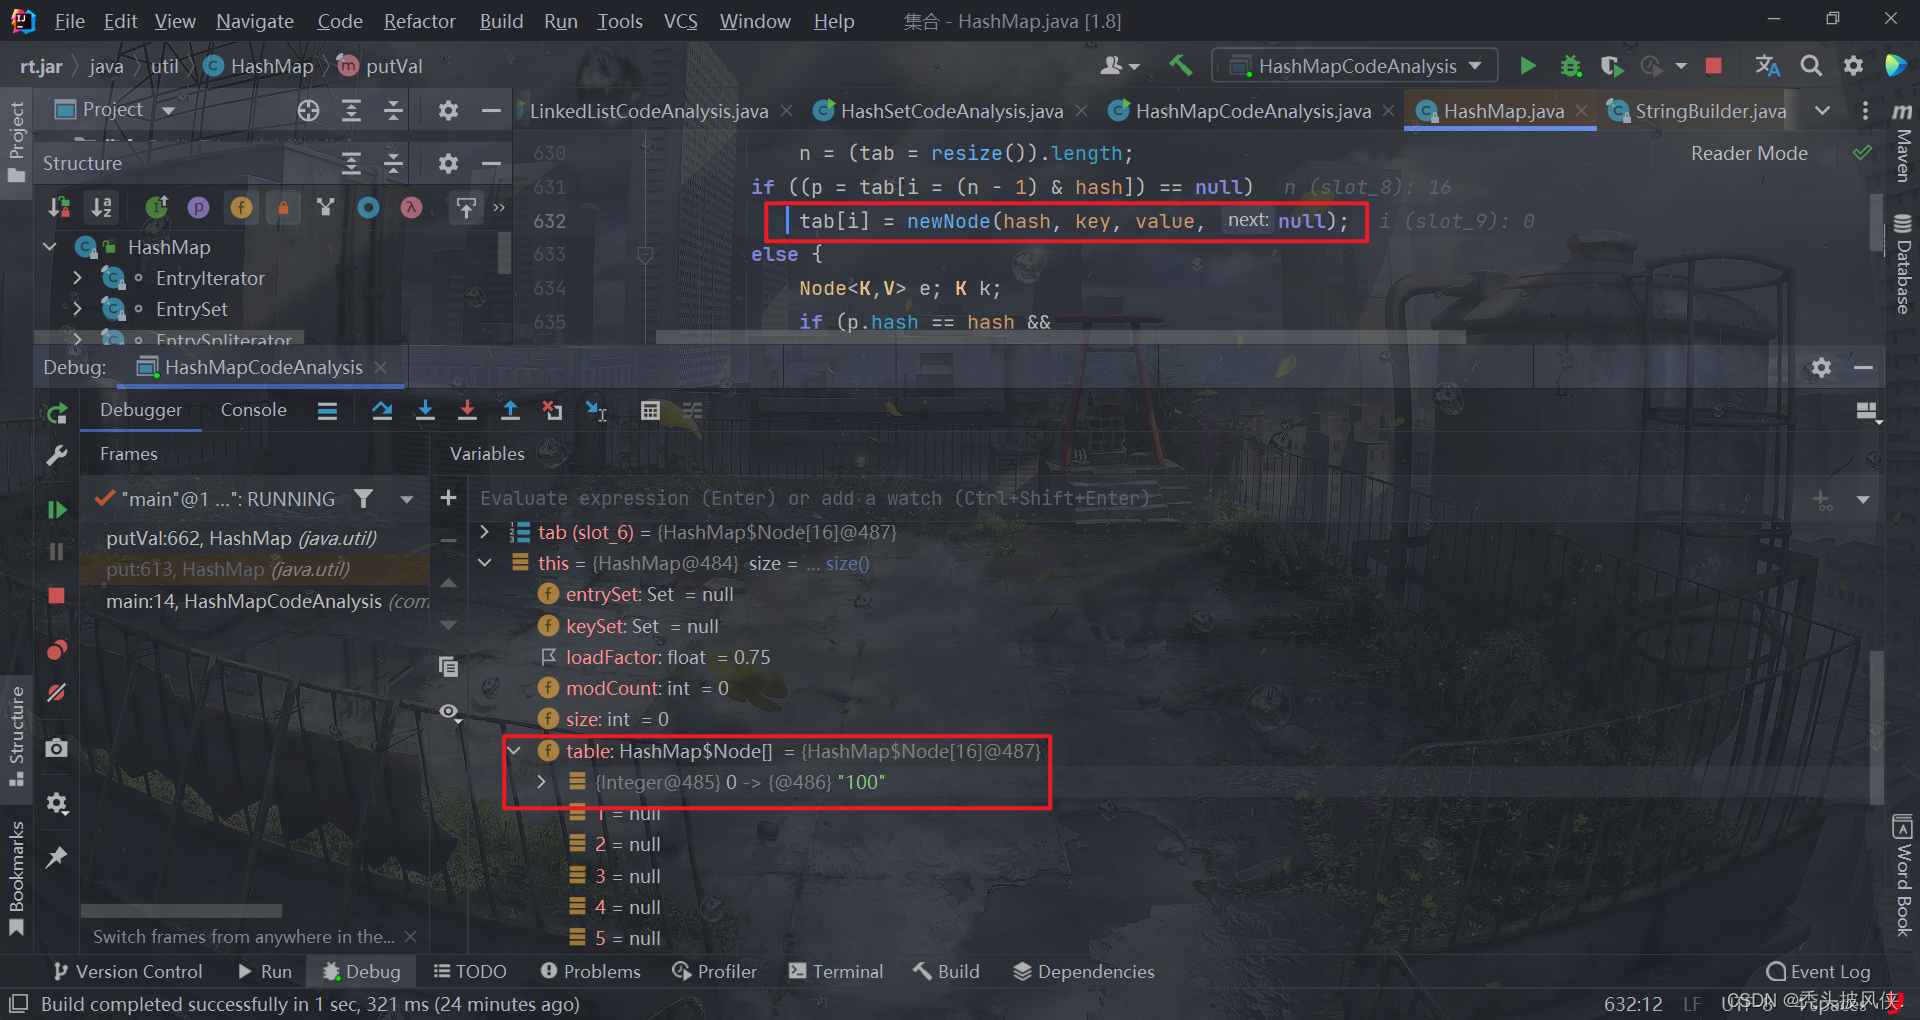
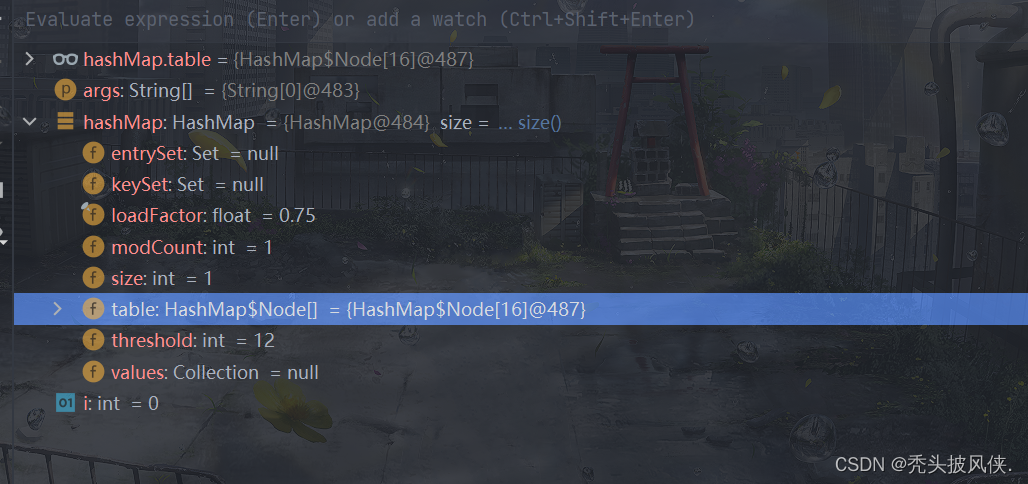
下面就是添加完一个元素后的HashMap信息
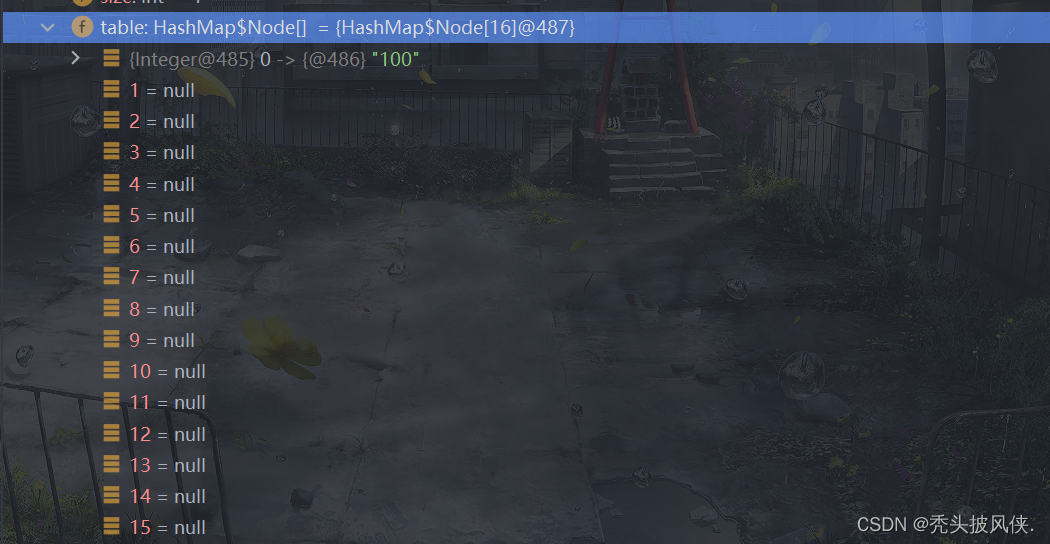
put方法(无冲突,有扩容)
我们通过上面的学习应该知道了当table数组使用3/4的时候就会扩容了,下面来具体看一下流程
    public static void main(String[] args) {


        HashMap<Integer, String> hashMap = new HashMap<>();
        for (int i = 0; i < 20; i++) {


            hashMap.put(i, "100");
        }
    }
还是这个代码,我们使用条件debug,看看i==12的时候是如何进行扩容的
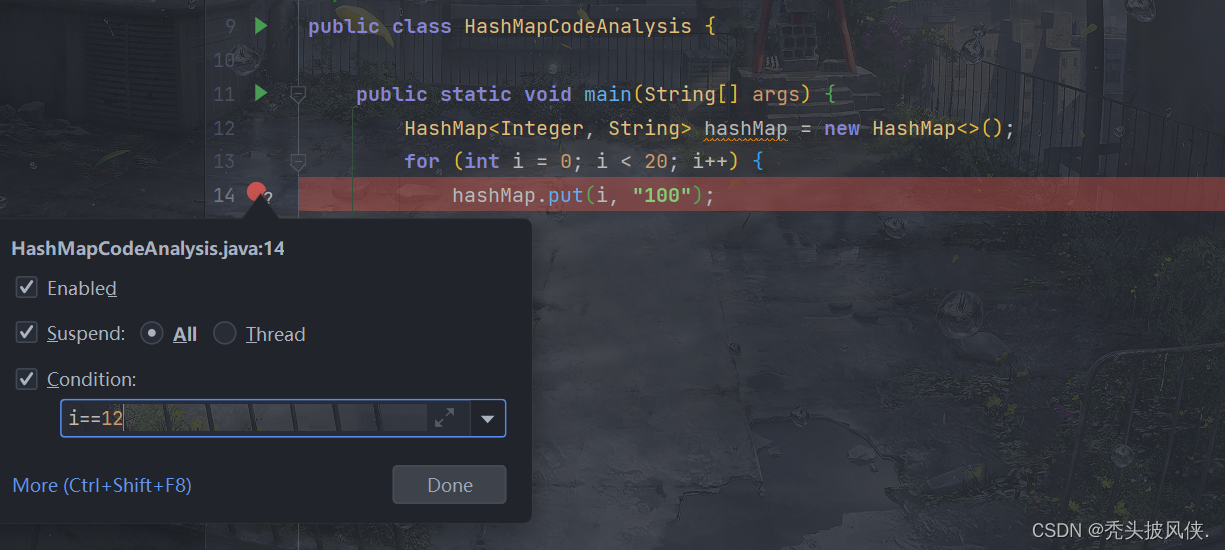
由于大部分内容都是和一般情况一样的,所以我就直接跳到关键部分
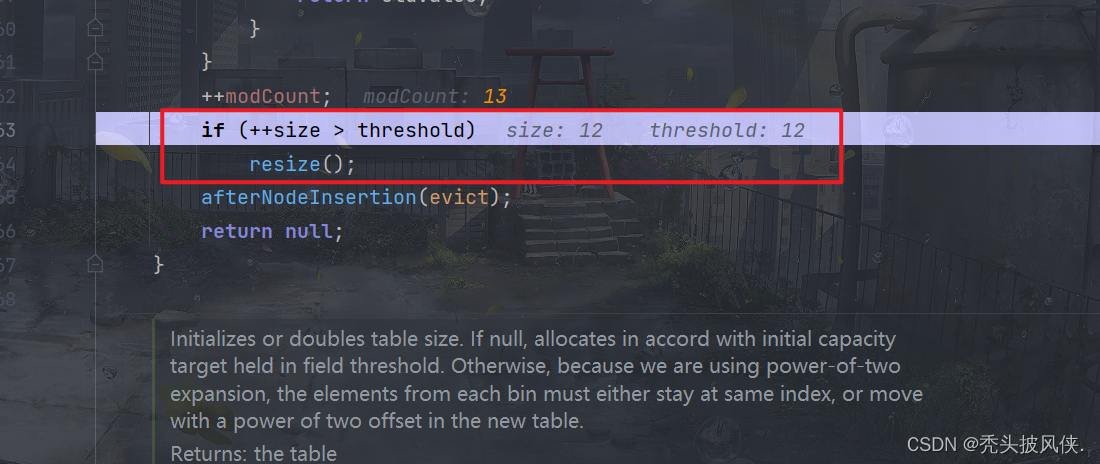
当i=12的时候,++size会>threshold,所以会执行resize方法。resize方法前面部分也是一样的,我也是直接跳到关键部分

由于我们的table没有发生冲突,在这个循环里面 e.next==null 永远成立

复制完成之后就会返回新table,大小为32,threshold会更新为24
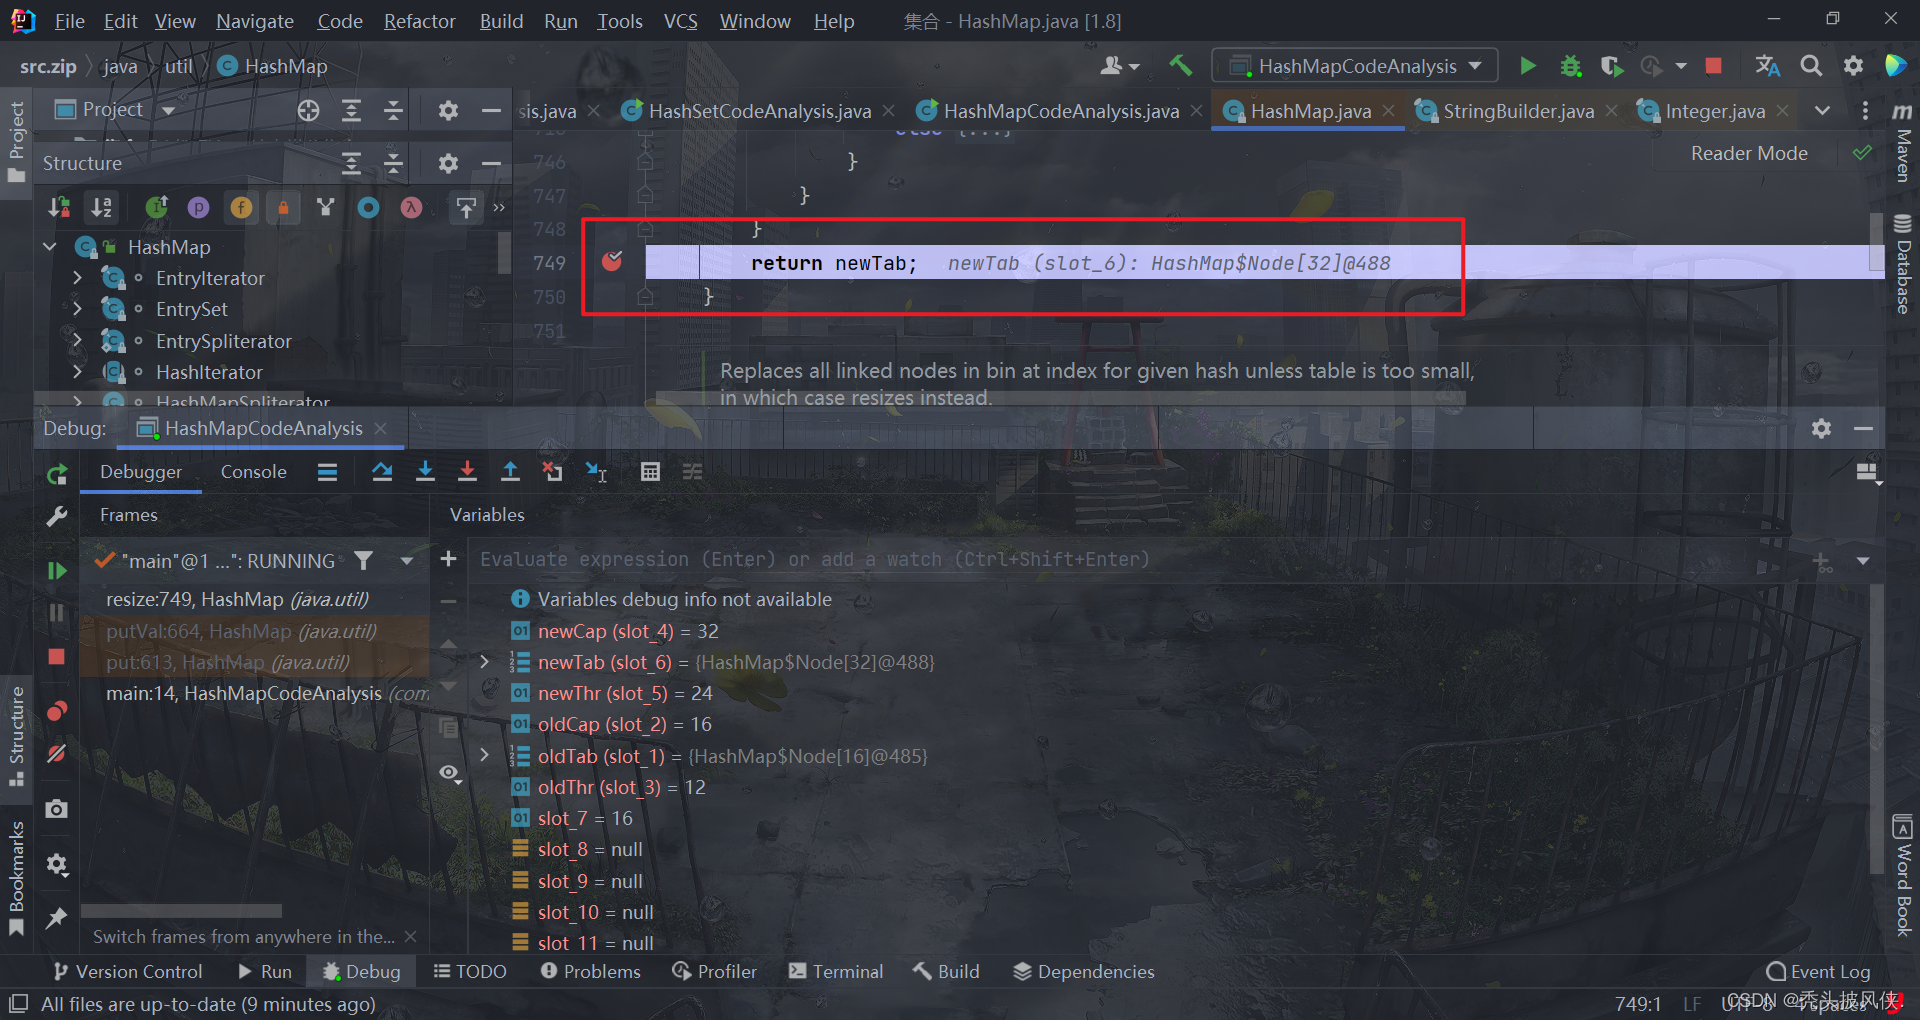
对于一般情况下的扩容,下面的条件基本都会成立,也就是threshold和容量都会翻倍

put方法(有冲突,无树化)
上面我们都是介绍的无hash冲突的情况,现在就来debug下出现hash冲突的情况
public class FixHashCat {


    @Override
    public int hashCode() {


        return 12345678;
    }
}
上面的FixHashCat重写了hashCode,使之成为固定值,这样方便debug
    public static void main(String[] args) {


        HashMap<FixHashCat, String> hashMap = new HashMap<>();

        hashMap.put(new FixHashCat(), "1");
        hashMap.put(new FixHashCat(), "2");
    }
上面的第二个put肯定就会产生hash冲突,下面就来看一下流程吧
对于重复的步骤我就跳过了,现在还是会进入putVal方法
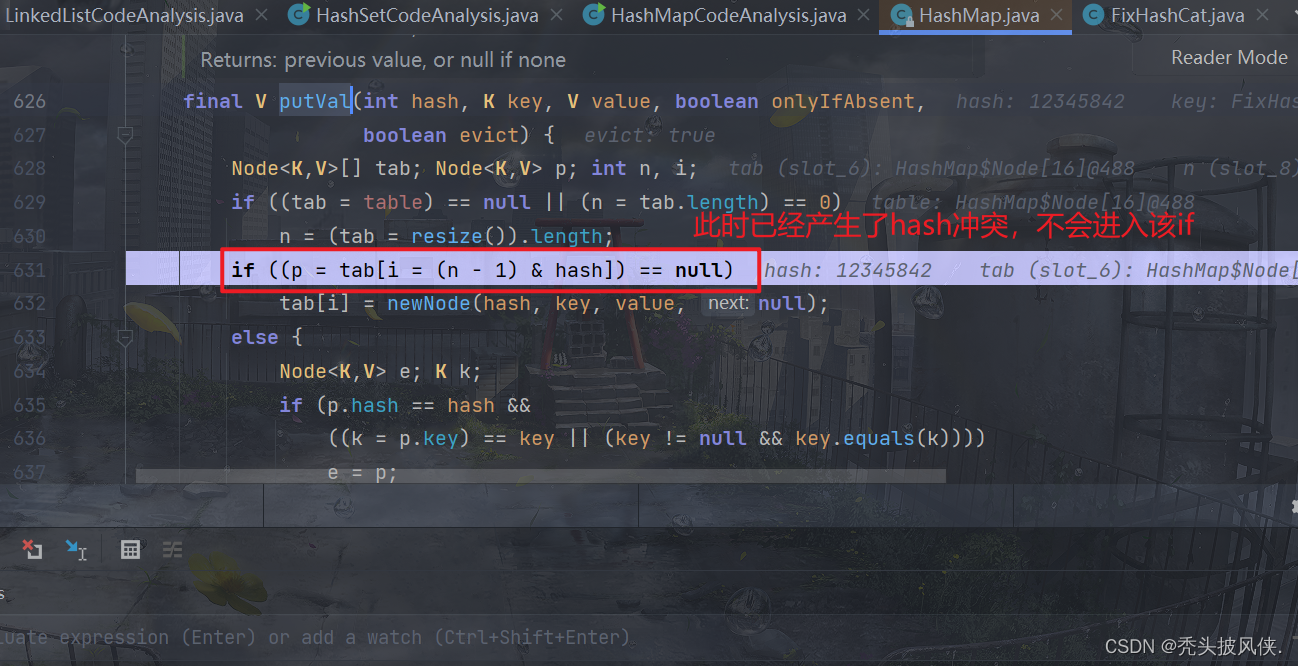
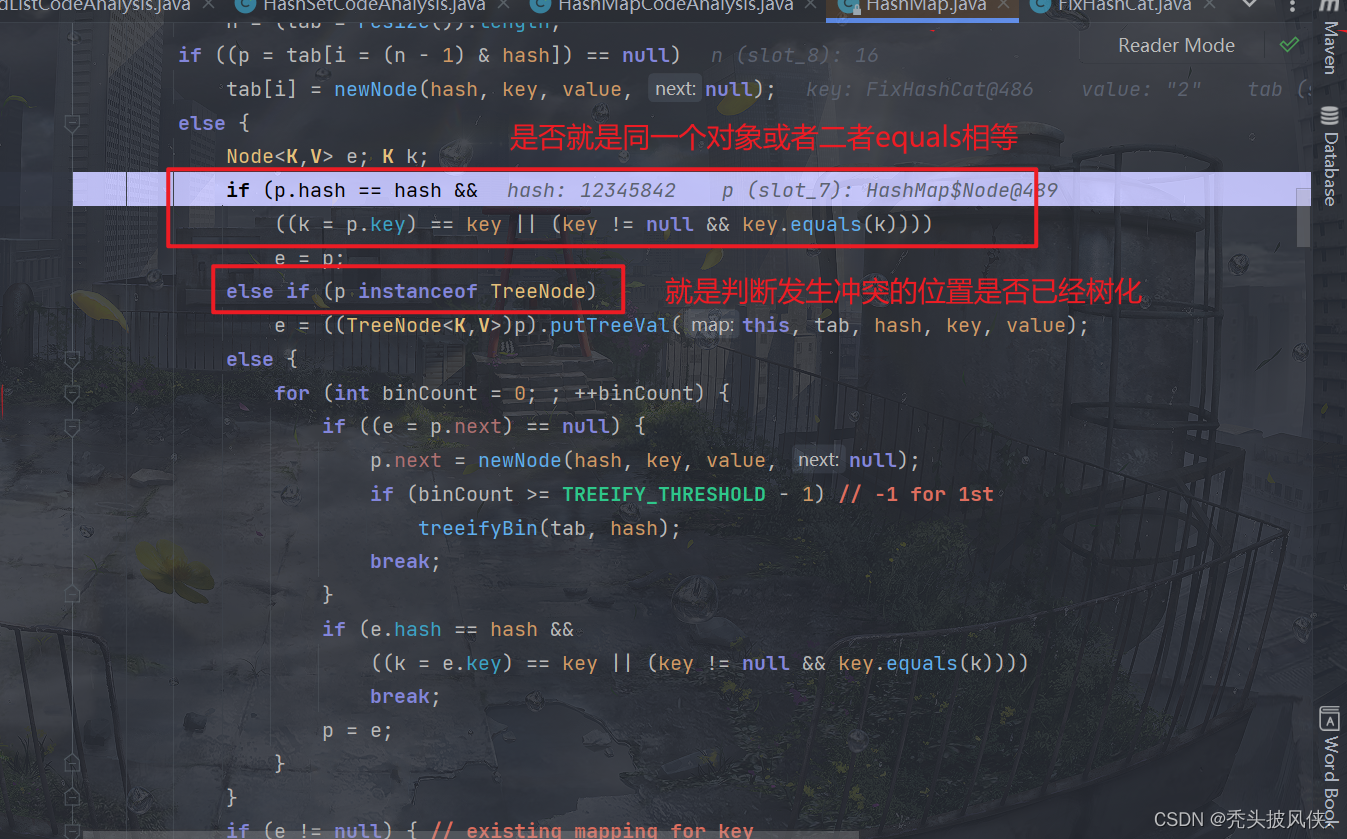
由于我们没有重写equals方法,当前也没有树化,所以会进行如else语句

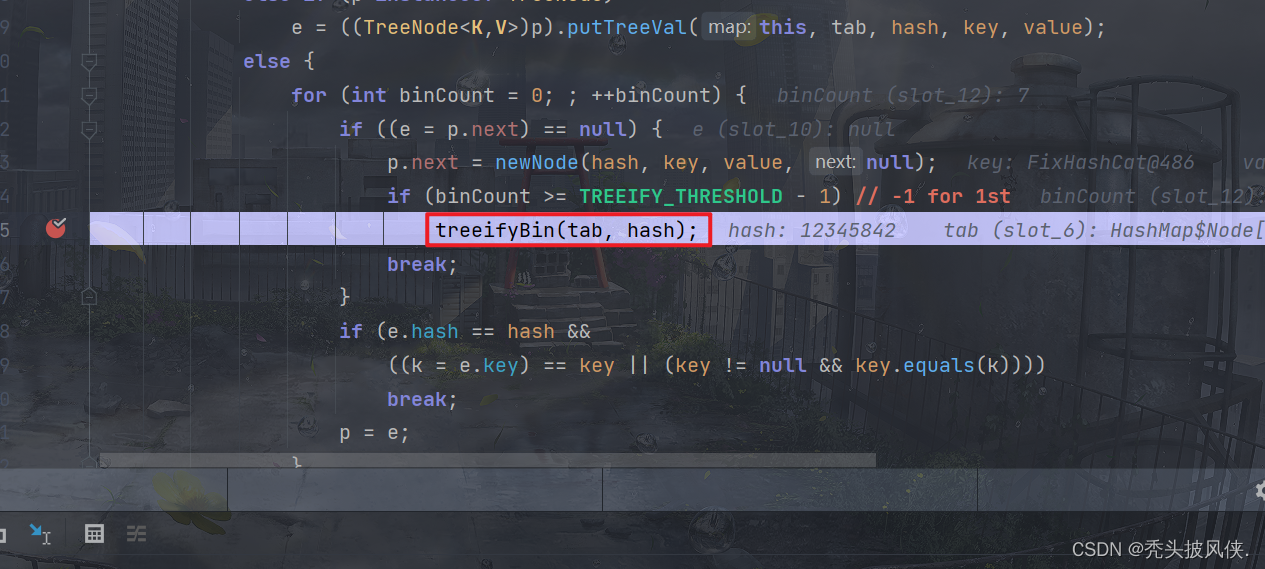
对于是否树化,链表的数量要大于等于7才行,加上新加入的那个,bitCount又是从0开始的,也就是当链表个数达到9个就会进行树化
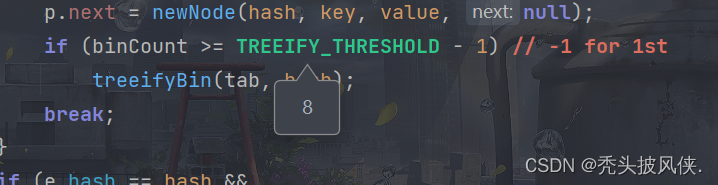
由于我们添加后链表长度都才为2,所以显然不会树化,继续执行,将当前元素添加到指定索引的链表末尾。继续往下执行,还可以发现一个if
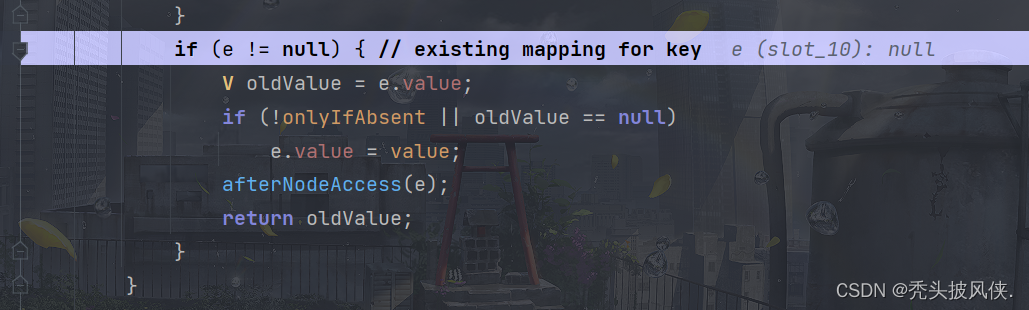
我们指定map里面key是唯一的,如果添加2个相同的key,那么前面个key的值就会被覆盖,这里的if就是用来完成这个事情的。继续debug
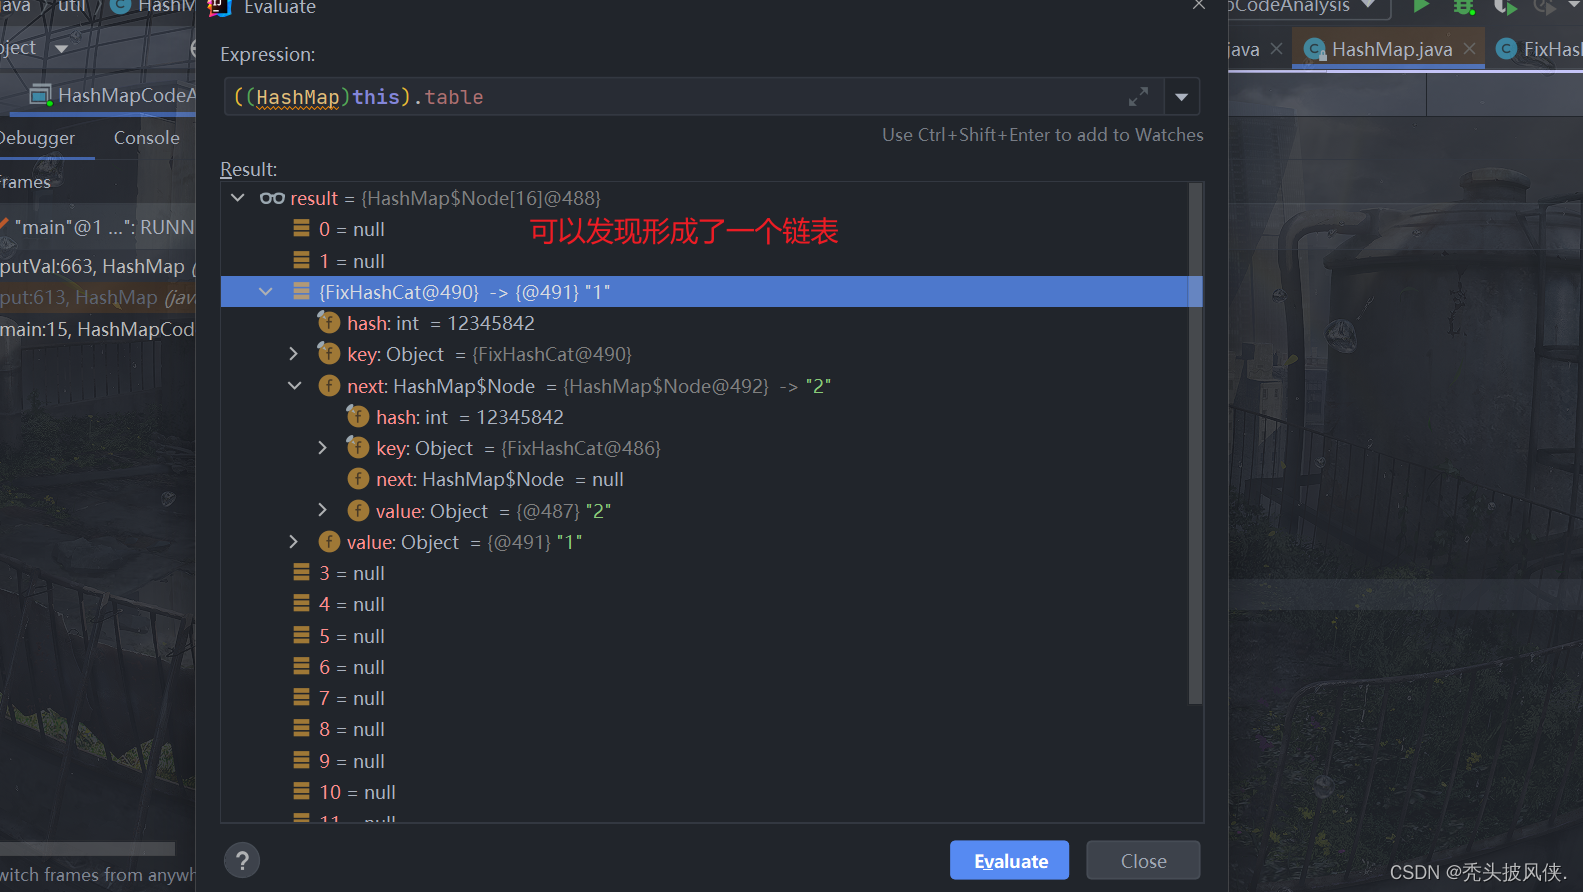
执行到这里,debug也就基本结束了,最后来看看table的结构
put方法(有冲突,树化)
上面看见了当链表个数达到9个的时候会进行树化,链表变换为红黑树,下面就来debug这个过程
    public static void main(String[] args) {


        HashMap<FixHashCat, String> hashMap = new HashMap<>();
        for (int i = 0; i < 8; i++) {


            hashMap.put(new FixHashCat(), i + "");
        }
        hashMap.put(new FixHashCat(), "8");
    }
我使用上面代码进行debug,查看hashMap.put(new FixHashCat(), “8”)这条语句添加时候的情况
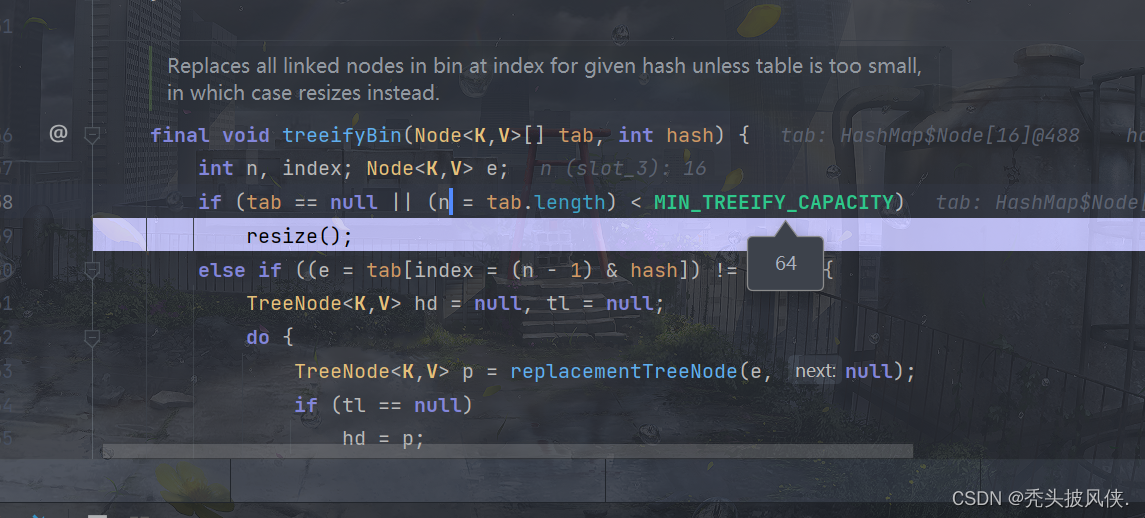
前面相同的部分我就跳过了,直接从树化部分开始
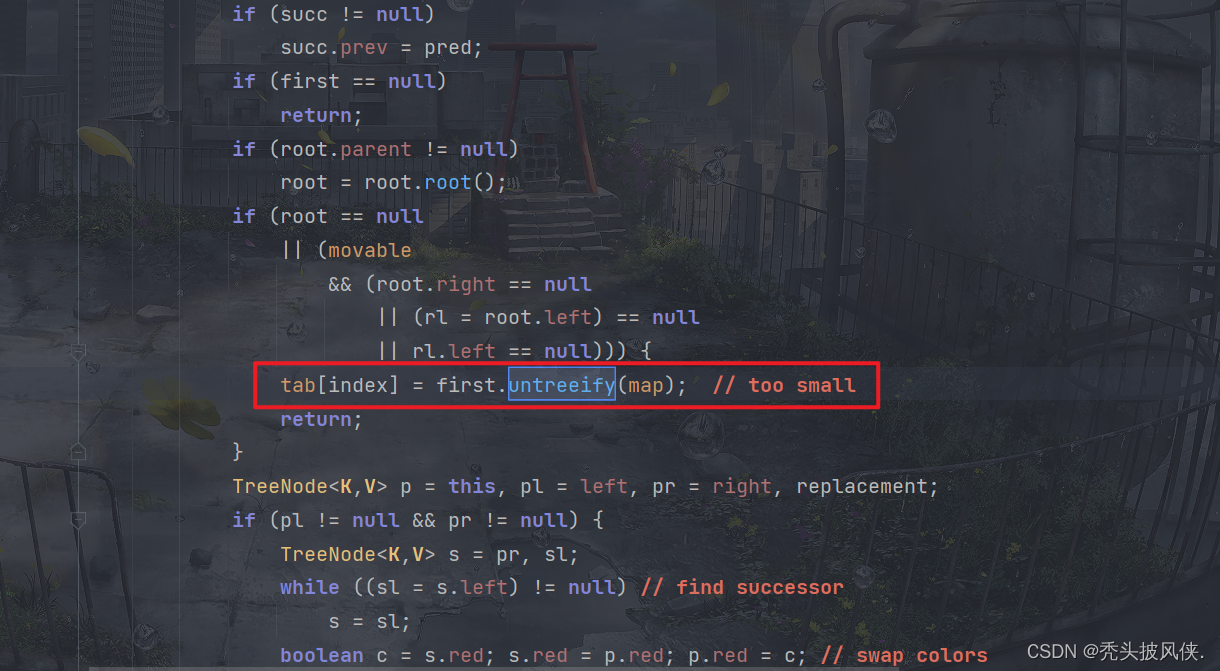
进入到treeifyBin,结果由于table容量太小(这里是16),于是会重设table大小,并不会树化。
为了看到树化的过程,我在创建HashMap的时候指定初始容量
    public static void main(String[] args) {


        HashMap<FixHashCat, String> hashMap = new HashMap<>(128);
        for (int i = 0; i < 8; i++) {


            hashMap.put(new FixHashCat(), i + "");
        }
        hashMap.put(new FixHashCat(), "9");
    }
还是debug到treeifyBin
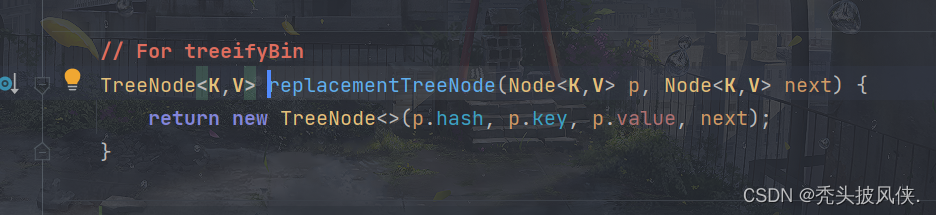
简单看一下replacementTreeNode,代码很简单,如下
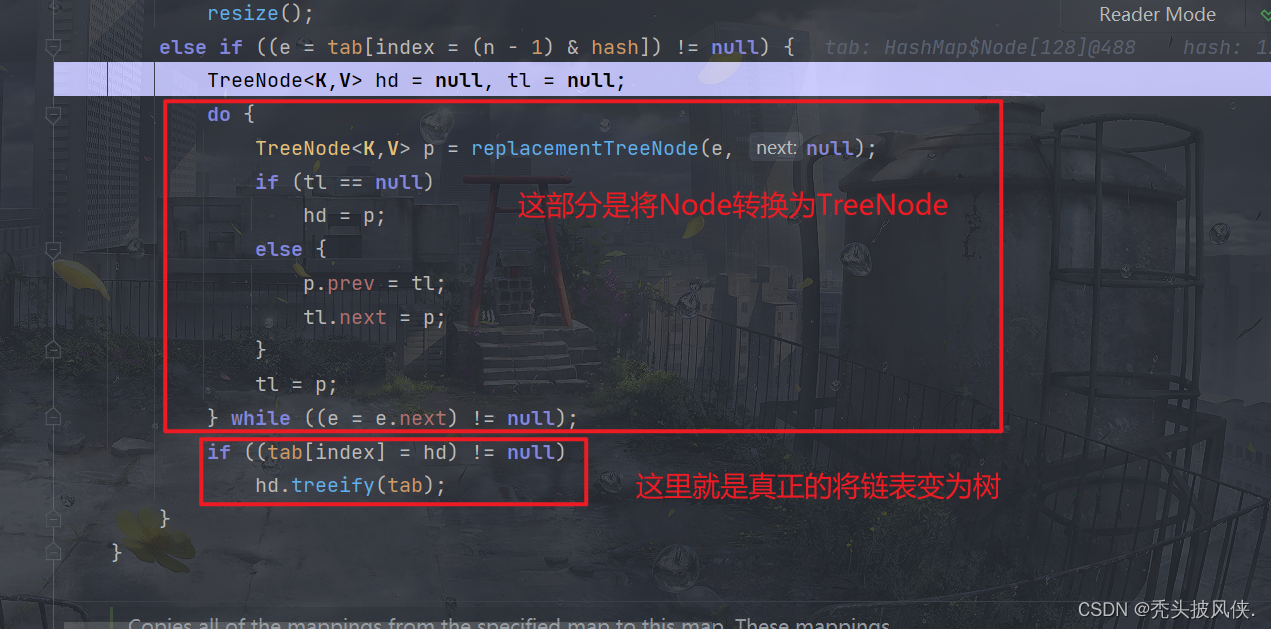
对于do-while里面的内容我并不关心,直接跳到if语句
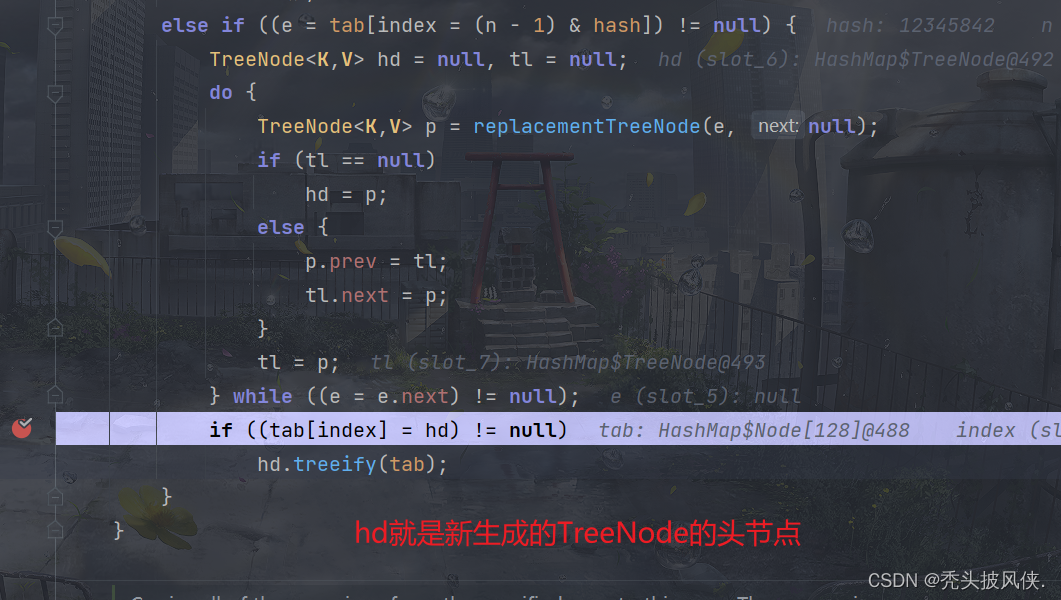
可以看一下hd的内容
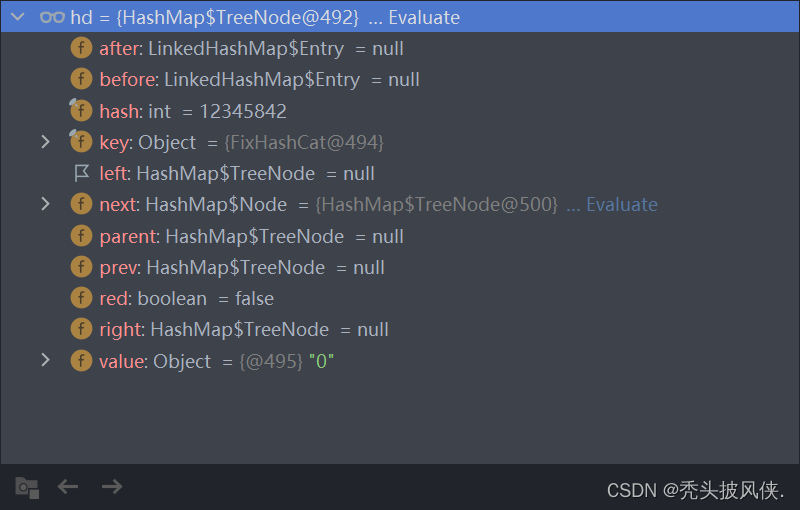
下面就是执行treeify方法
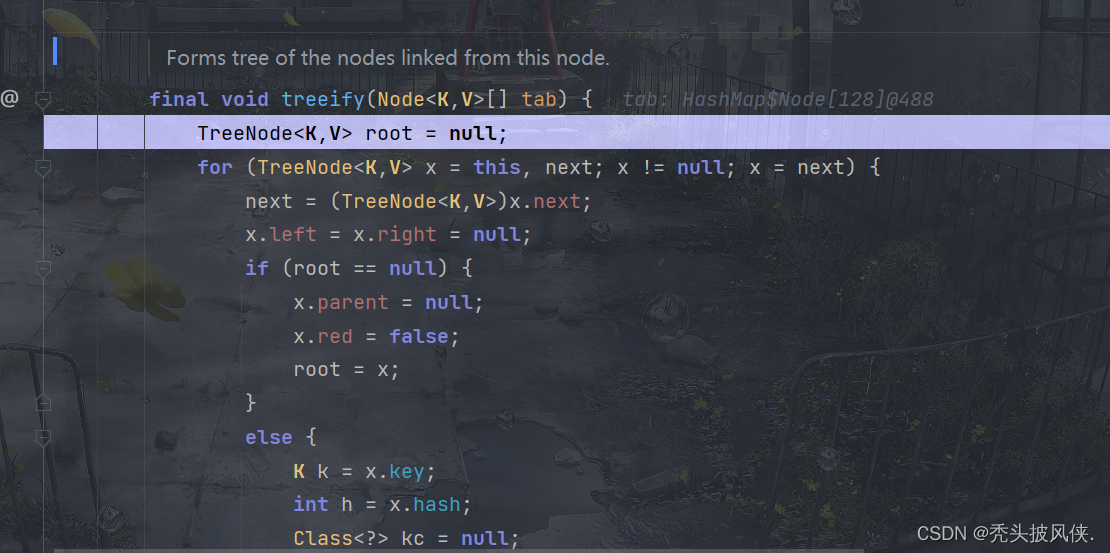
对于这个方法,完全就是属于数据结构了,这里不进行说明,大家可以自行查看源代码。现在我直接看看执行完该方法后产生的树
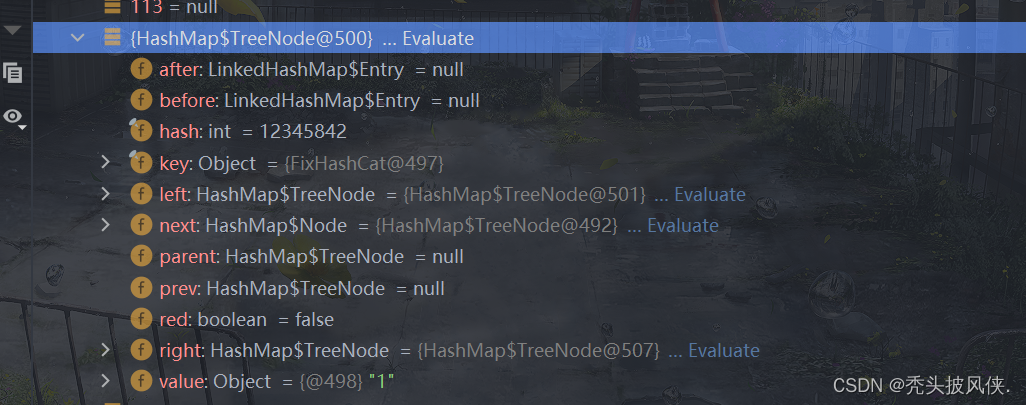
可以发现树节点就是通过TreeNode来存储的,用于快速查找。
现在关于树化的debug就结束了,现在我想对上面提到的TreeNode进行一下说明

就是p instanceof TreeNode,这个在上面提到过,现在大家应该可以看懂了,树化之后的节点就是TreeNode,如果是TreeNode,那么就要将其添加到树,而不是链表尾部。
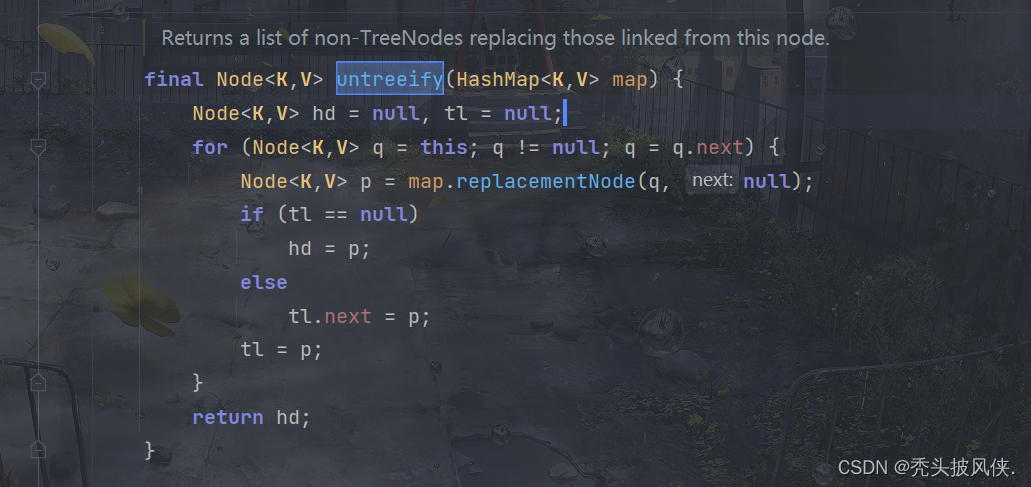
remove方法(树退化)
对于HashMap,不仅仅会将链表变化为树,当树的元素个数小于某个阈值时,树也会退化为链表
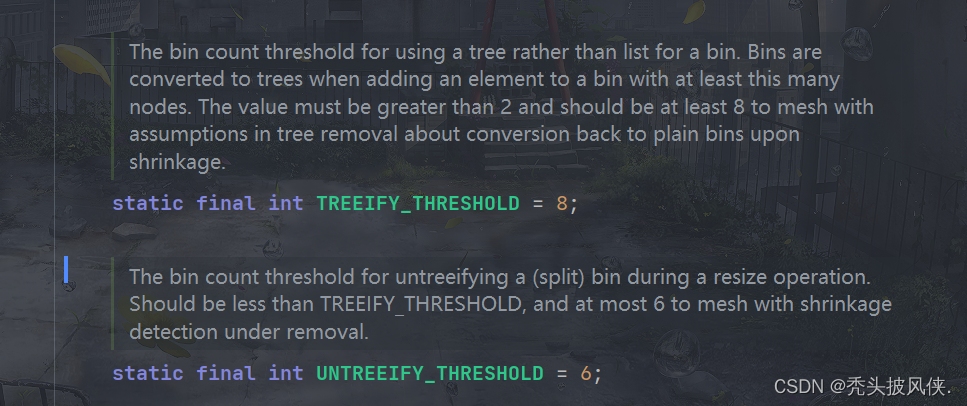
上面分别是树化和退化的阈值。
当我们删除元素的时候可能就会进行退化,树变成链表

常见方法
在这里介绍一些HashMap里面经常使用到的方法
| 方法名称 | 作用 |
|---|---|
| entrySet() | 返回所有元素的set集合(k-v形式) |
| getOrDefault(Object key, V defaultValue) | 返回指定key对于的value,如果不存在就返回defaultValue |
| keySet() | 返回所有的key |
| values() | 返回所有的value |
| forEach | 遍历集合元素 |
| containsKey(Object key) | 是否包含指定key |
| containsValue(Object value) | 是否包含指定value |
总结
HashMap使用K-V的形式存储数据,Map的扩容机制是按照2倍进行的,当达到阈值时就会扩容。当hash冲突严重时,链表会转换为红黑树,当树元素个数很少时,又会退化为链表。