0 效果与体验
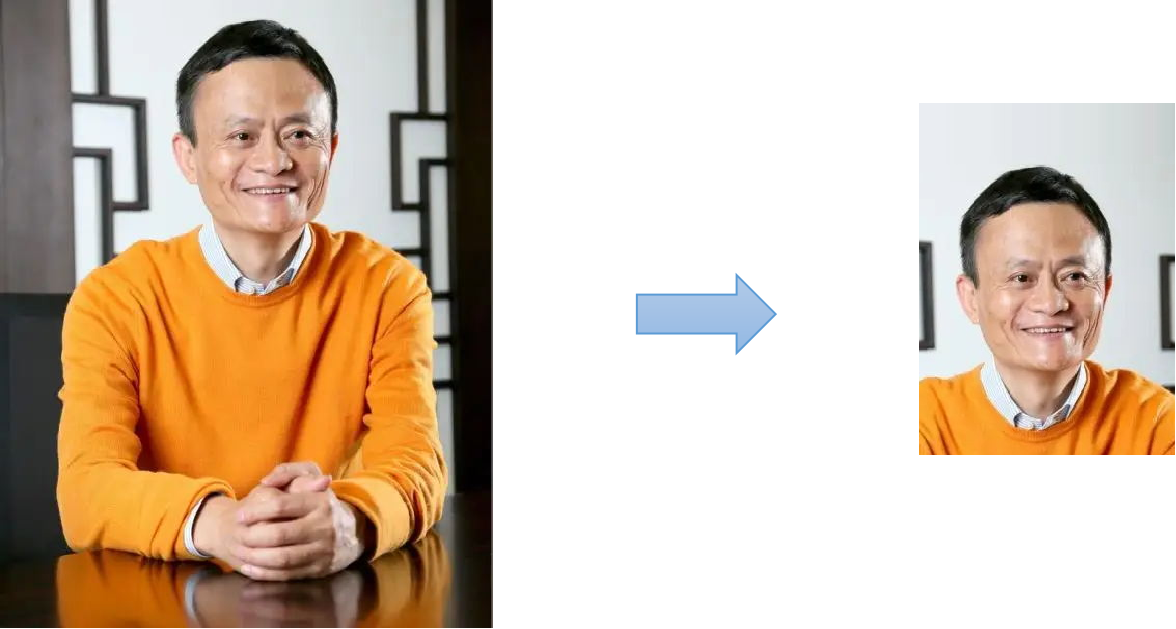
不想去照相馆?担心肖像隐私被第三方获取?不会抠图?本文实现基于人工智能的一键自动抠图生成证件照。在进入正文之前,先看最终效果:

为了让读者快速体验,我写了个小程序: 证照工具箱,可打开直接体验。

1 人脸检测
在制作证件照时,首选需要检测人脸。根据指定的输出大小将人脸区域等比裁剪。
1.1 人脸检测
这里使用了Retina人脸检测模型,因为篇幅原因,具体使用方法不再描述详细调用过程,如有需要请关注我的公众号:Python学习实战,后台回复:Retina。即可获取作者已封装好的人脸检测调用源码。
1.2 人脸裁剪
具体实现代码逻辑如下:
def crop(rgb, dh, dw):
    oh, ow, _ = rgb.shape
    bgr = cv2.cvtColor(rgb, cv2.COLOR_RGB2BGR)
    box = infer_face_detector(bgr)

    leye_x, leye_y, reye_x, reye_y = box[5:9]
    lzb_x, lzb_y, rzb_x, rzb_y = box[11:15]
    left = int(leye_x - (reye_x - leye_x) * 2)
    right = int(reye_x + (reye_x - leye_x) * 2)
    ceye_y = (leye_y + reye_y) / 2
    czb_y = (lzb_y + rzb_y) / 2
    top = int(ceye_y - (czb_y - ceye_y) * 2)
    bottom = int(czb_y + (czb_y - ceye_y) * 2)

    th = dh * (right - left) / dw
    tag = abs(th - (bottom - top)) / 2
    if th < bottom - top:
        top = int(top + tag)
        bottom = int(bottom - tag)
    else:
        top = int(top - tag)
        bottom = int(bottom + tag)

    if top < 0:
        rgb = np.pad(rgb, ((-top, 0), (0, 0), (0, 0)), "edge")
        top = 0
    if left < 0:
        rgb = np.pad(rgb, ((0, 0), (-left, 0), (0, 0)), "edge")
        left = 0
    if right > ow:
        rgb = np.pad(rgb, ((0, right - ow), (0, 0), (0, 0)), "edge")
    if bottom > oh:
        rgb = np.pad(rgb, ((0, 0), (0, bottom - oh), (0, 0)), "edge")
    rgb = rgb[top:bottom, left:right, :]

    return rgb
2 自动抠图
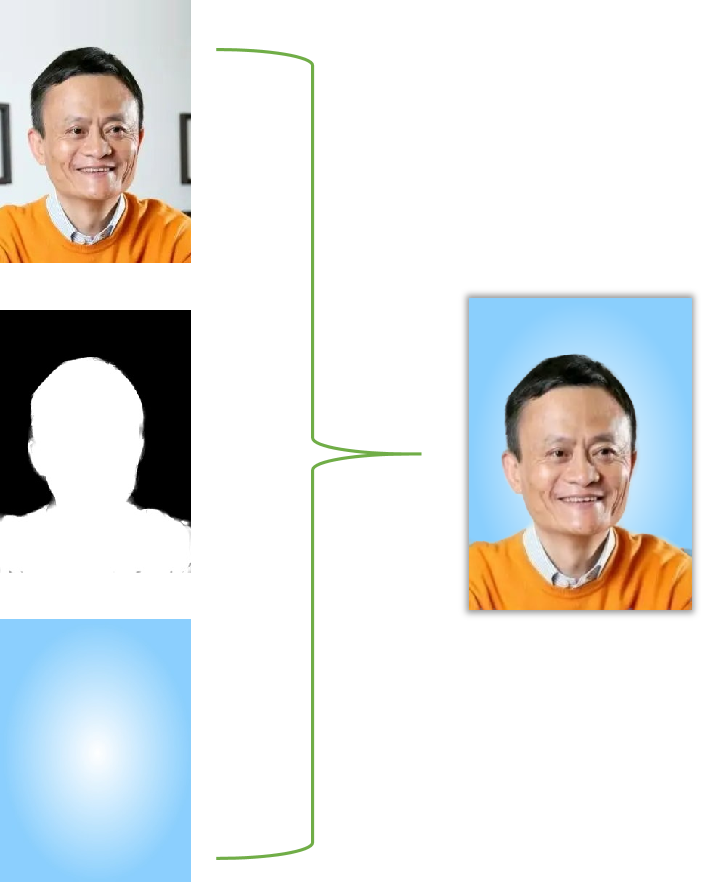
从github下载基于深度学习的自动抠图模型,得到一张alpha图。alpha图将前景和背景分离,同样,因为篇幅原因,这里不具体描述如何去调用。如有需要请关注我的公众号:Python学习实战,后台回复:抠图。即可获取作者已封装好的人像抠图调用源码。这里只展示抠图效果:

3 合成证件照
合成证件照公式:out = src * alpha + (1 - alpha) * bg,输出示意图如下:
4 在线体验
搜索小程序 :证照工具箱,即可直接体验。
相关源码获取:
- 关注我的公众号:Python学习实战
- 后台回复:
抠图。获取作者已封装好的人像抠图调用源码。 - 后台回复:
Retina。获取作者已封装好的人脸检测调用源码。
欢迎关注我的公众号:Python学习实战,专注于Python、Pytorch、Numpy等技术,第一时间获取最新更新。如果您觉得本文有帮助,帮忙点个赞,这是对我最大的鼓励!