参考PyTorch深度学习快速入门教程(绝对通俗易懂!)【小土堆】
安装anaconda
官网

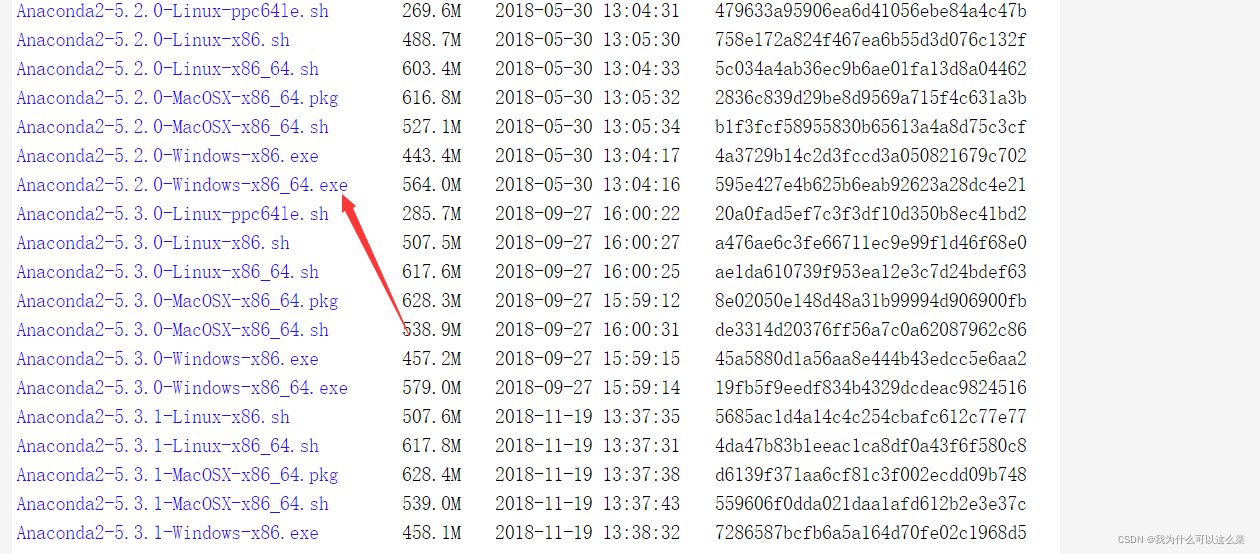
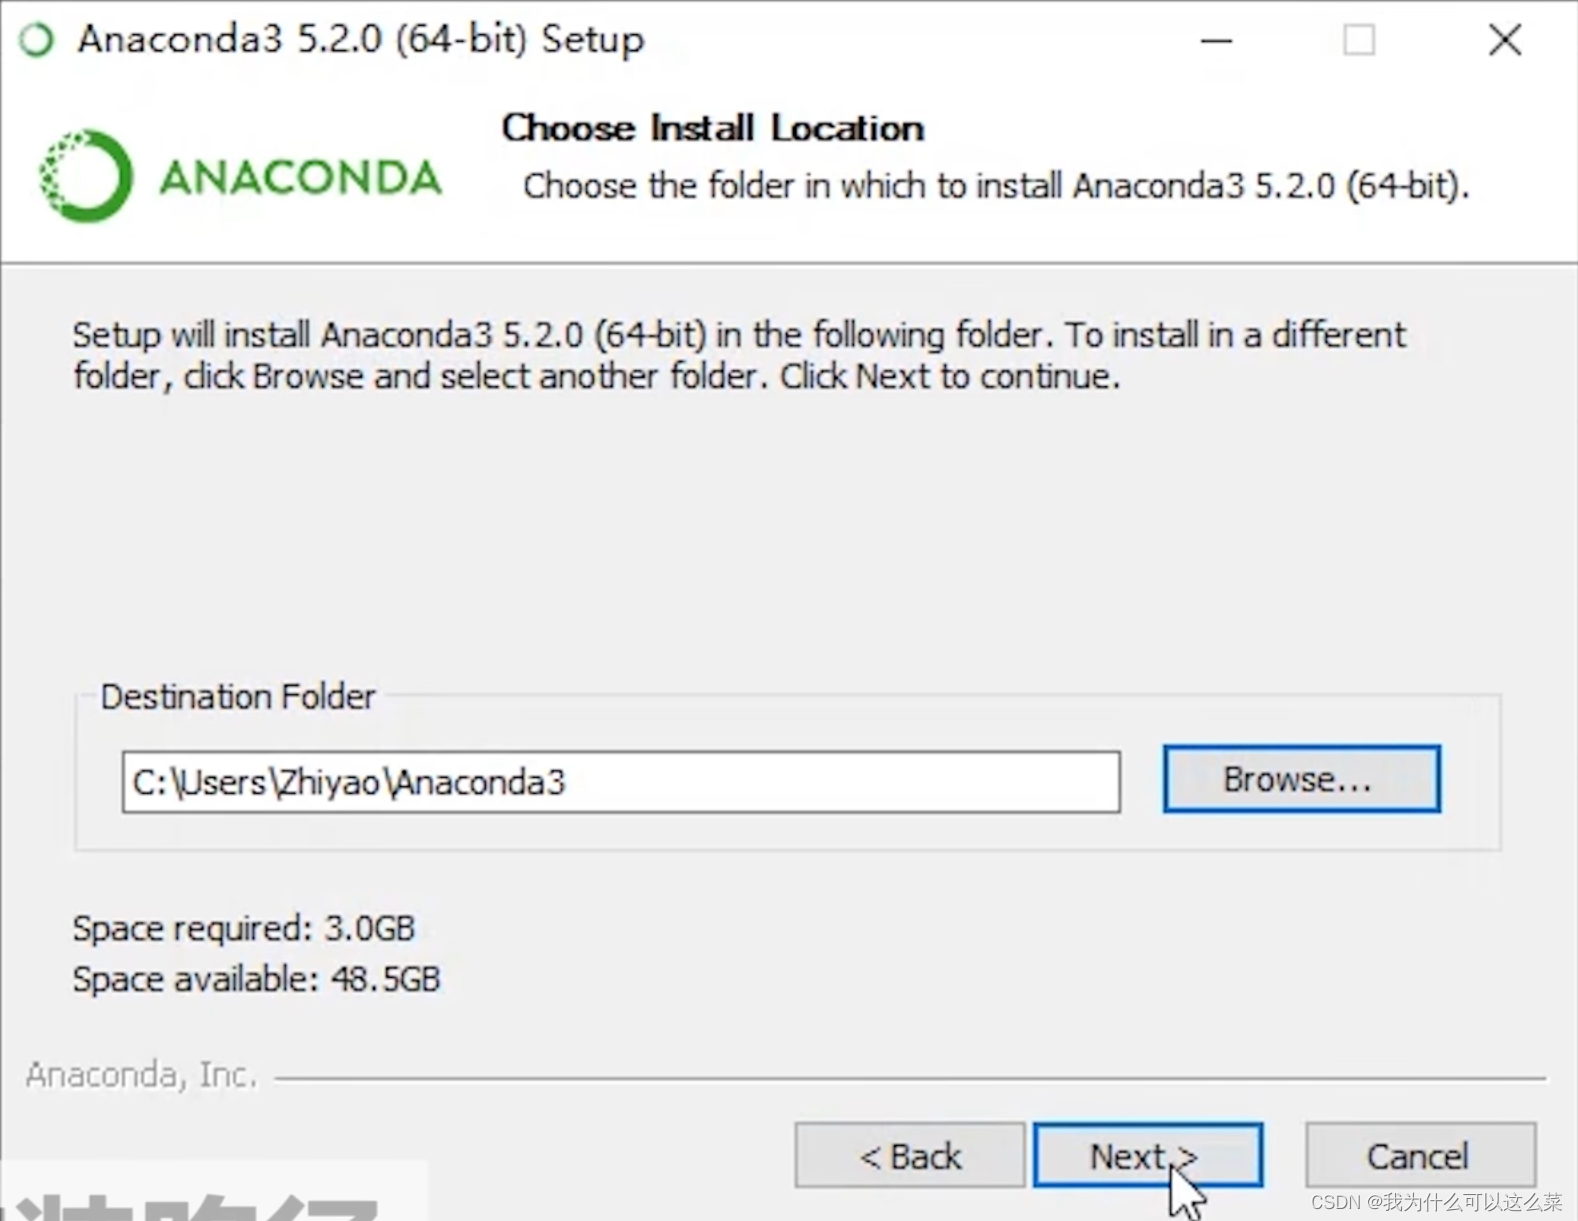
视频中所用python版本为3.6,因此需要到anaconda历史版本中找到适配相应版本的安装包

对应地址
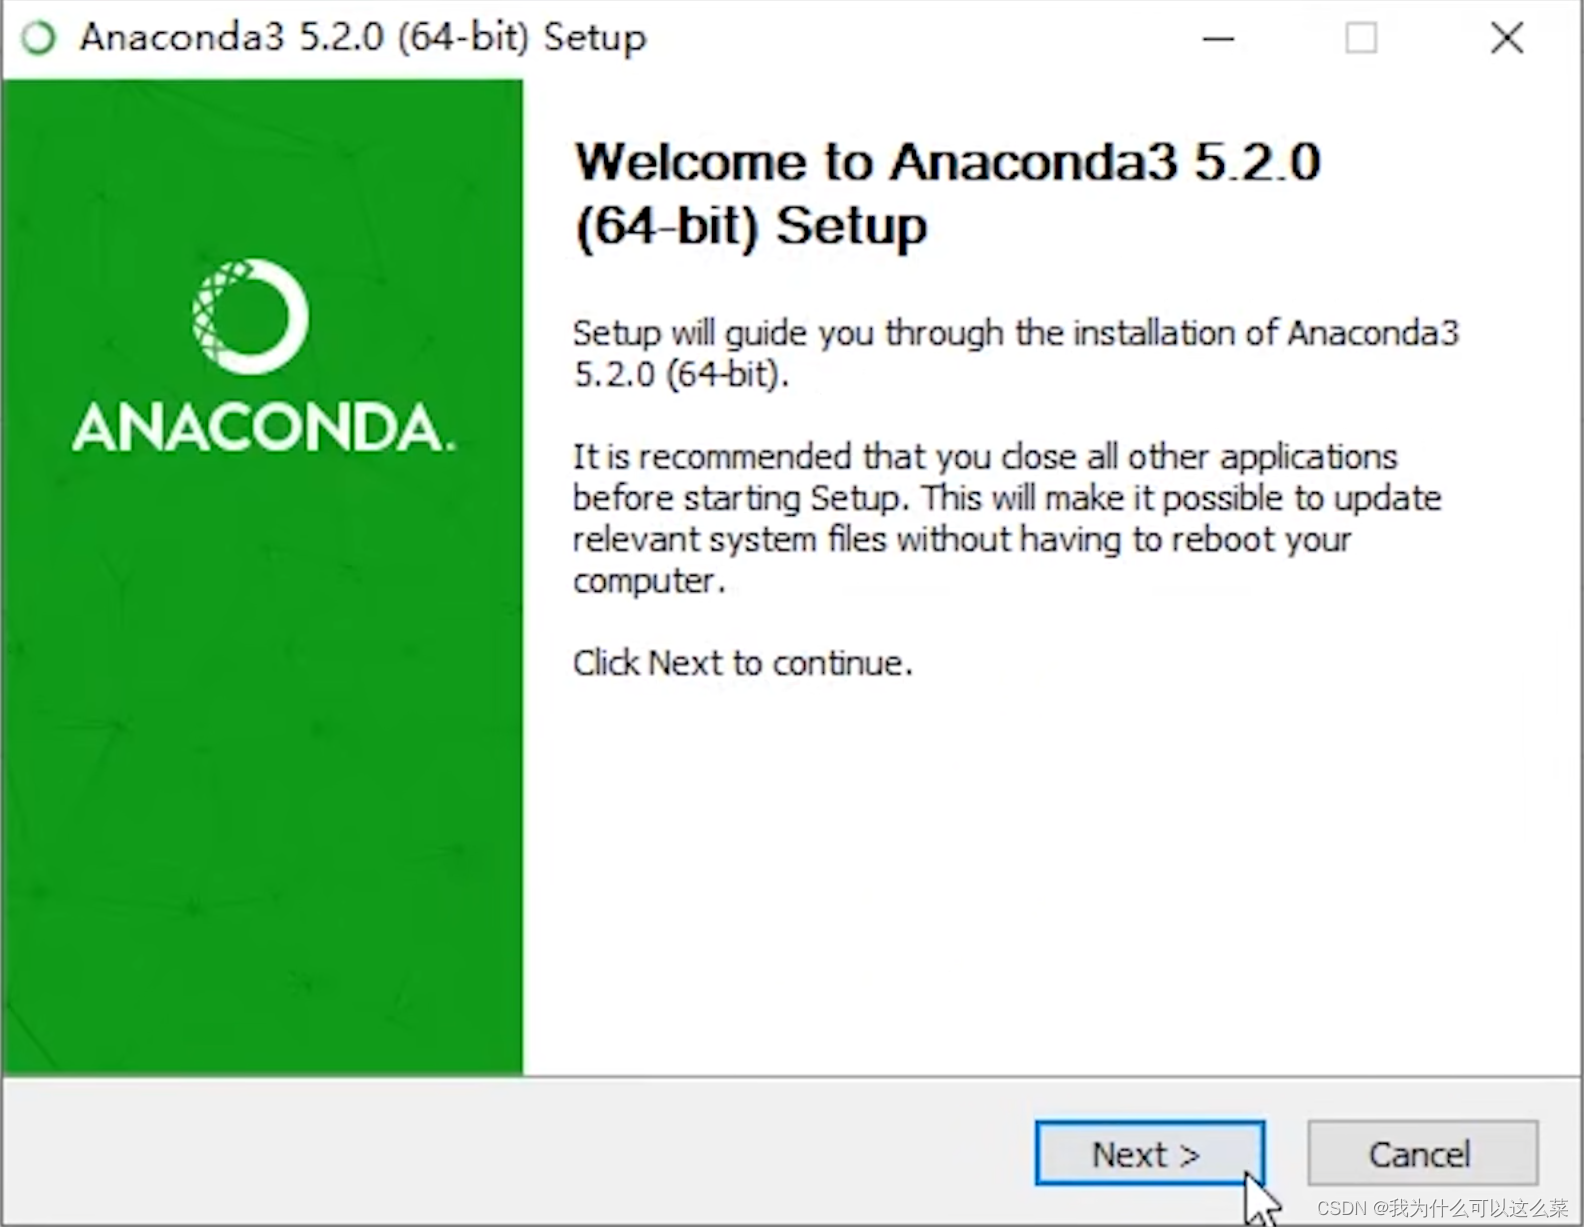
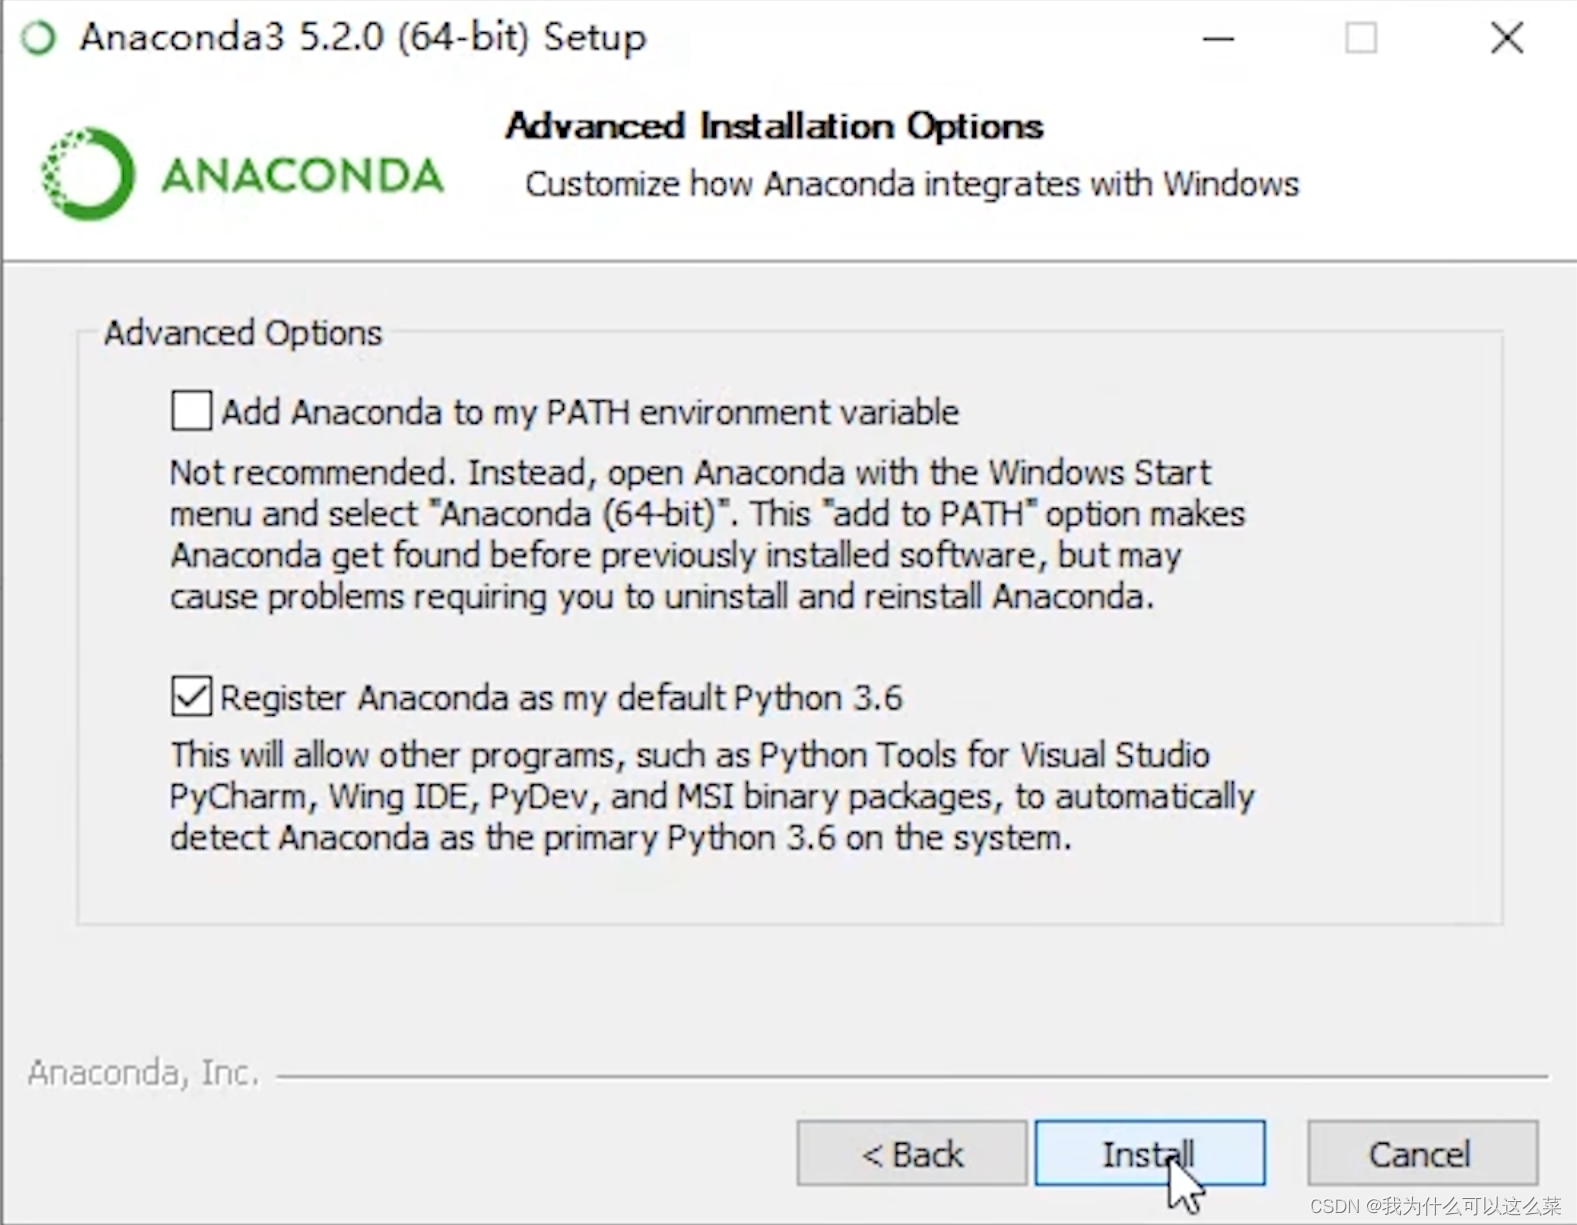
文件地址可以自己设置,其余选项默认即可
显卡准备
查看显卡驱动是否正确安装了
打开任务管理器
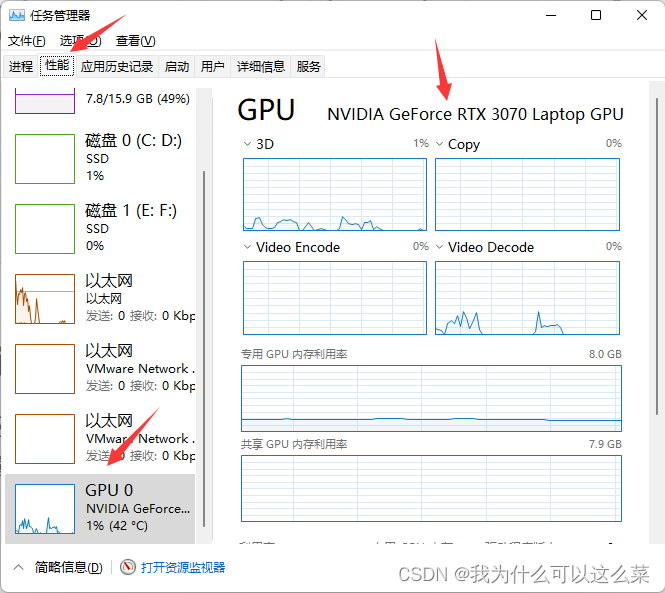
如果能显示显卡型号则说明显卡驱动已经正确安装了
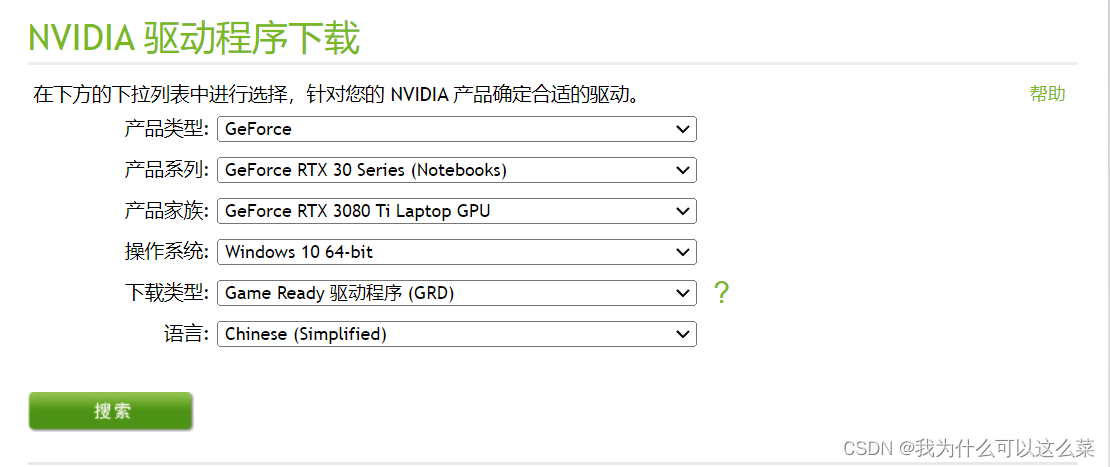
如果没有则需要去官网下载
管理环境
conda create -n pytorch python=3.6创建专门的虚拟环境
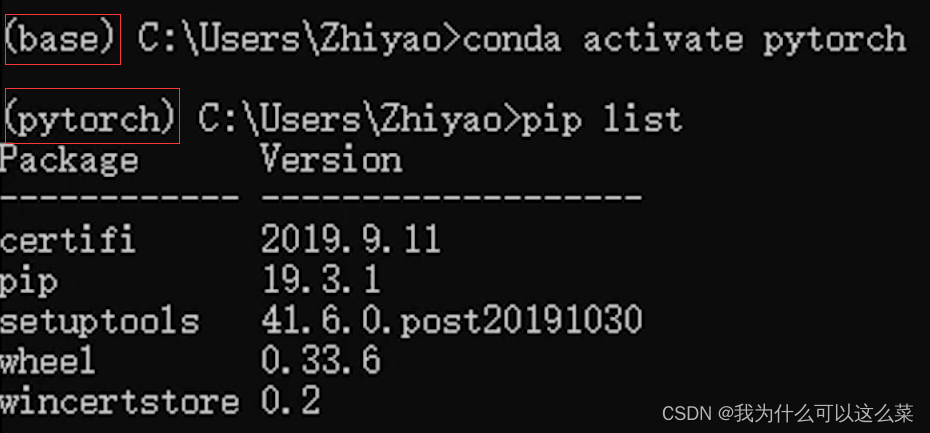
conda activate pytorch进入pytorch环境
pip list查看安装的库
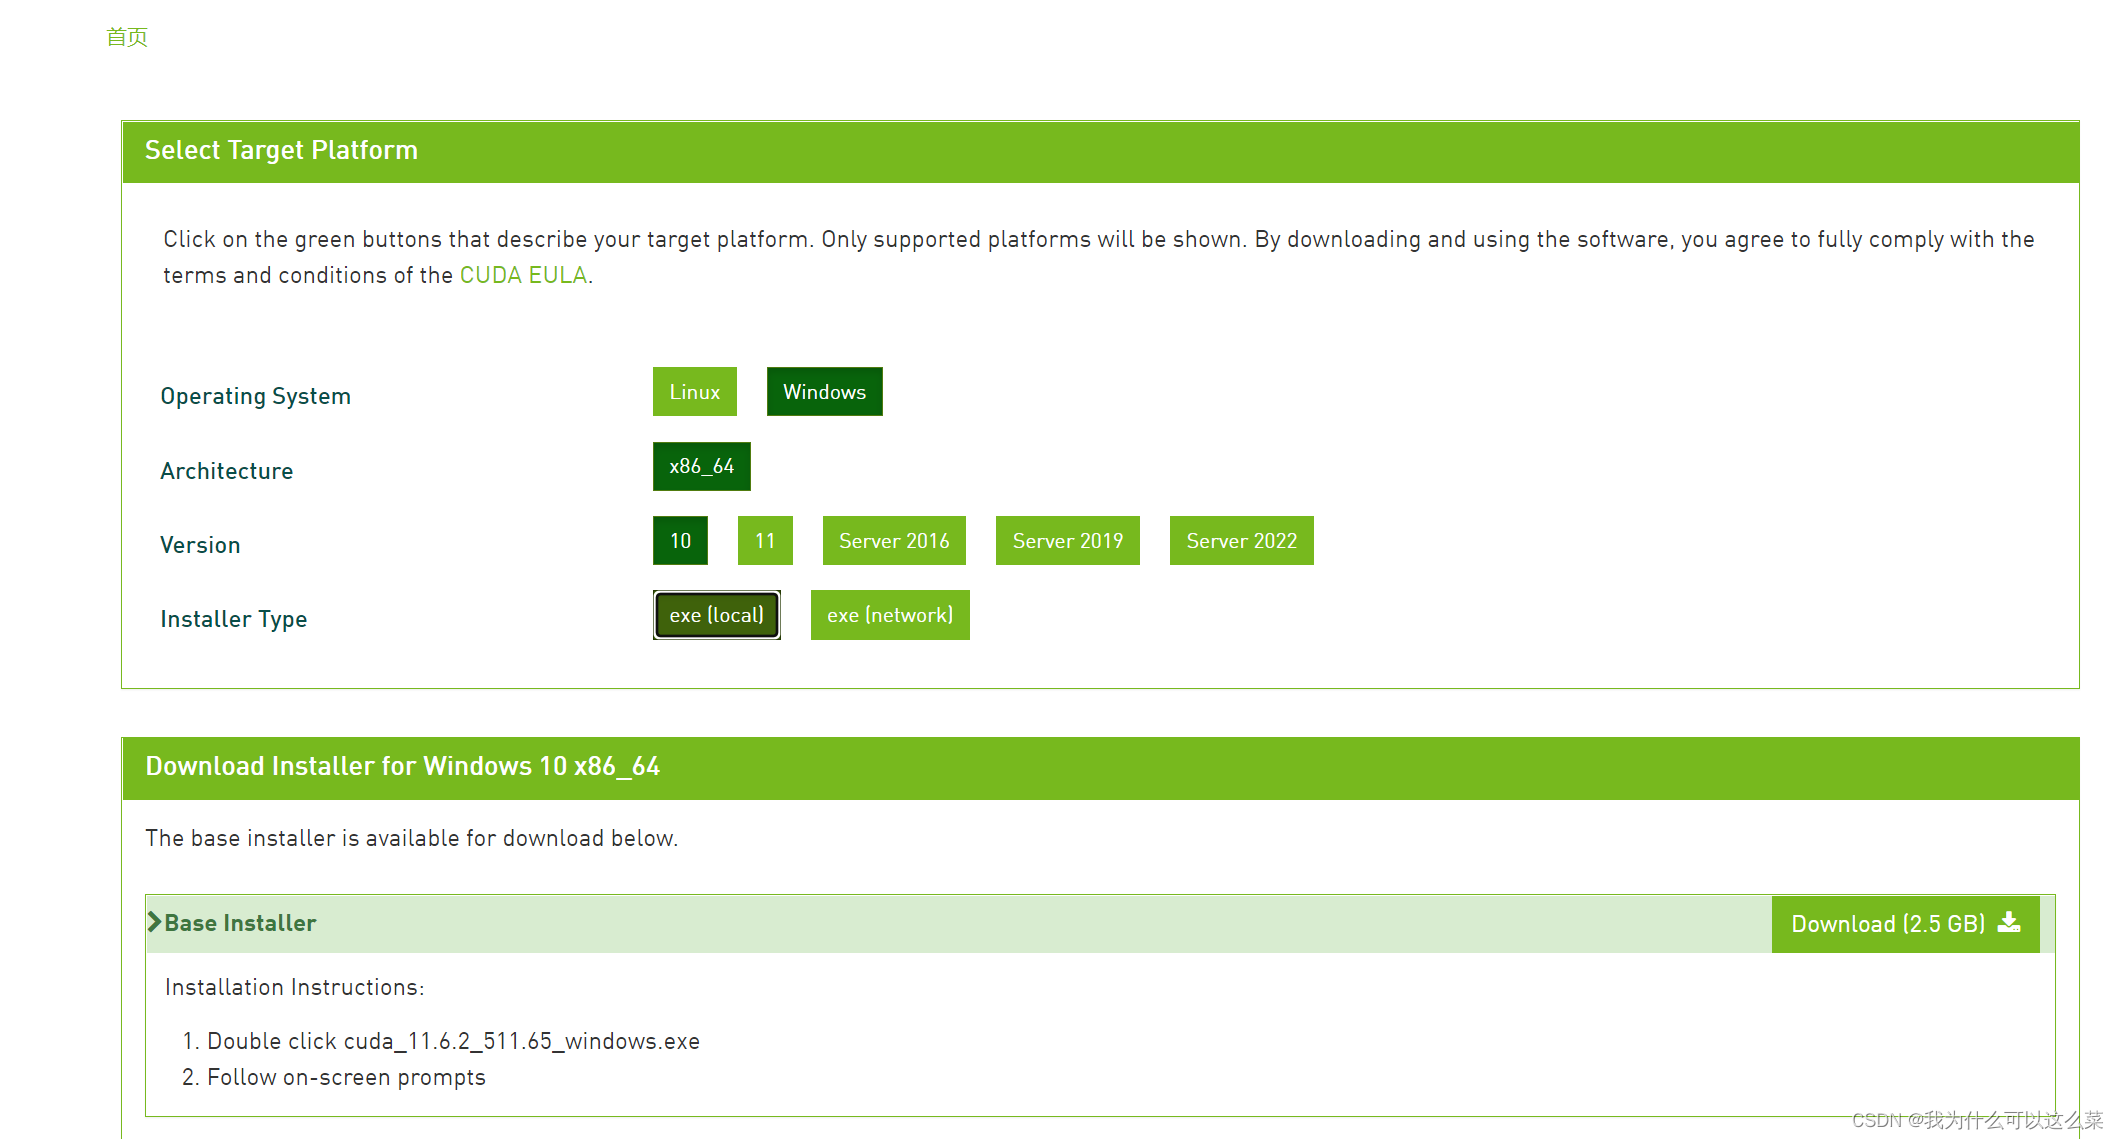
安装pytorch
nvidia-smi查看驱动版本
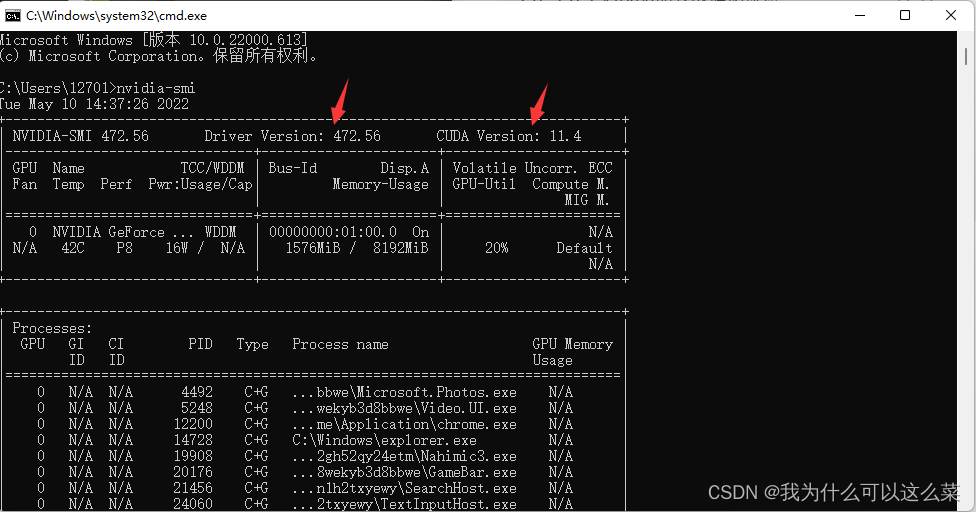
检查驱动版本Driver Version是否大于396.2
如果版本数小于要求,则可以进入英伟达驱动官网,选择适合自己电脑的驱动程序然后下载更新
在下载pytorch前先进行换源
anaconda 的清华镜像帮助
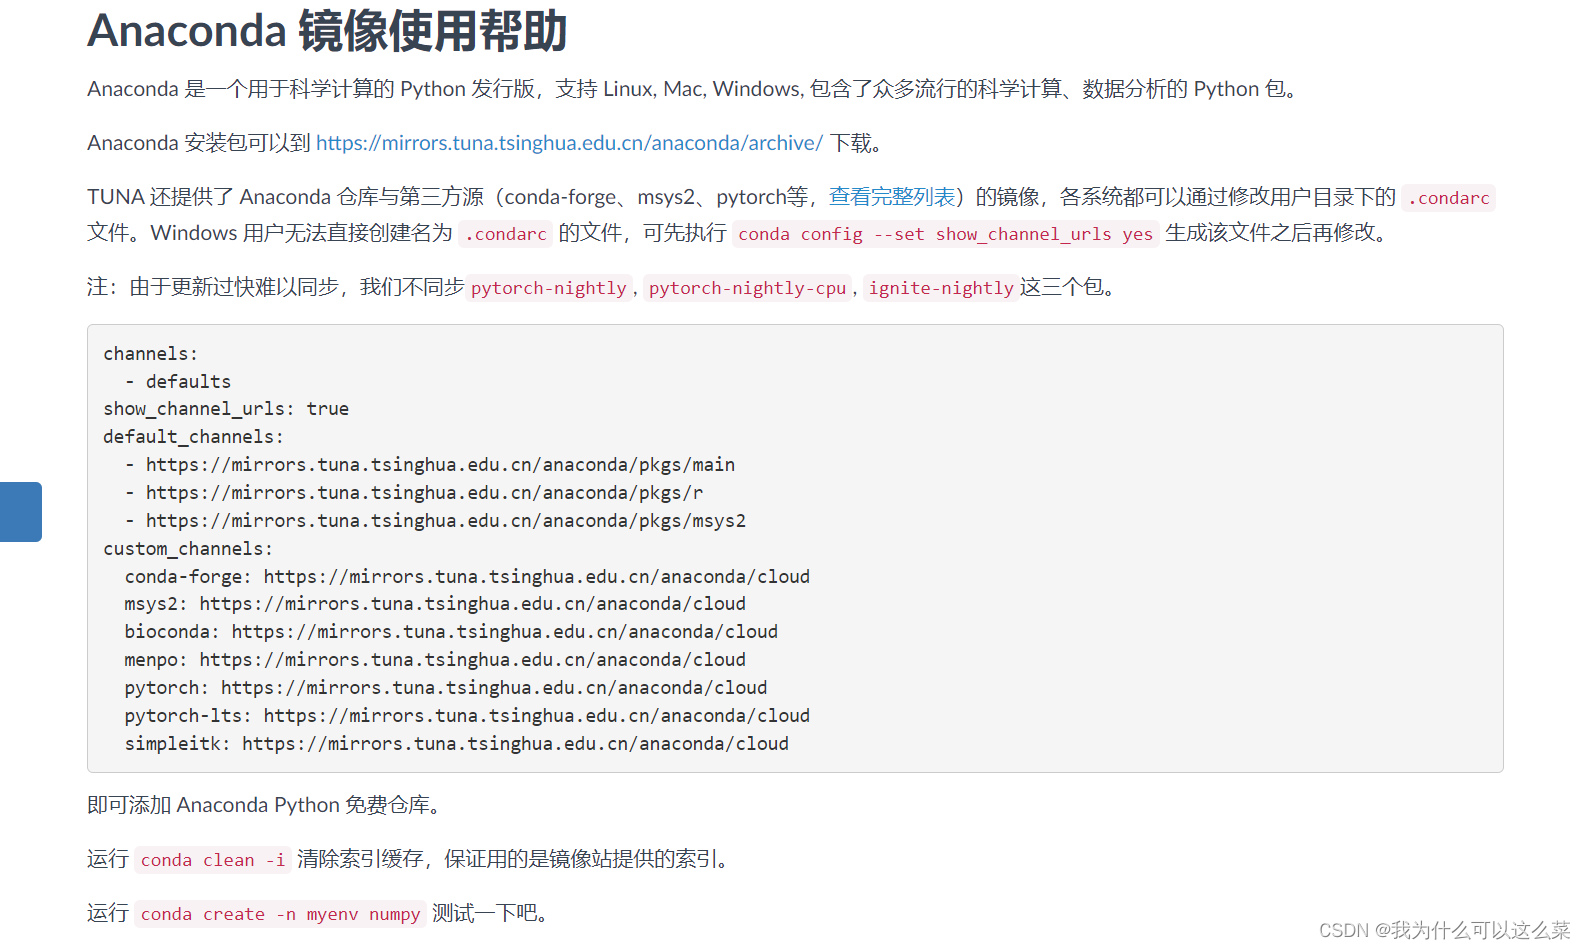
conda config --add channels https://mirrors.tuna.tsinghua.edu.cn/anaconda/pkgs/free/
conda config --add channels https://mirrors.tuna.tsinghua.edu.cn/anaconda/pkgs/main/
conda config --set show_channel_urls yes
conda config --add channels https://mirrors.tuna.tsinghua.edu.cn/anaconda/cloud/pytorch/
conda config --add channels https://mirrors.tuna.tsinghua.edu.cn/anaconda/cloud/pytorch/win-64
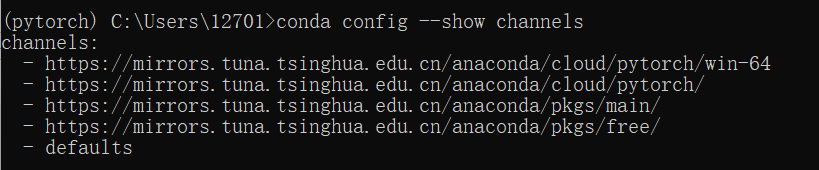
用conda config --show channels检查已经加入的channels
进入pytorch官网
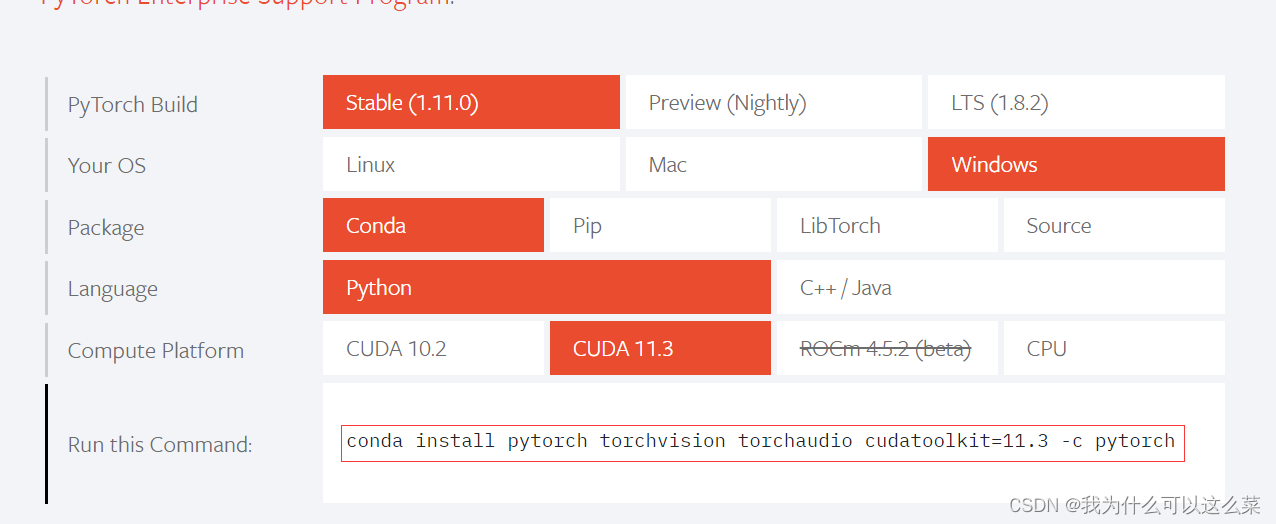
-c pytorch为强制使用pytorch官网安装,因此只需要执行conda install pytorch torchvision torchaudio cudatoolkit=11.3
如果还是很慢可以考虑用pip加清华源进行安装
pip install torch -i https://mirrors.tuna.tsinghua.edu.cn/anaconda/cloud/pytorch/
测试
输入python进入python环境
输入import torch导入torch库,同时下一行也出现>>>说明pytorch安装成功

输入torch.cuda.is_available()返回为True说明GPU可以使用
