Release date: 23 July, 2014
Contents
2. Hardware and Software Prerequisites
3. Installing Hercules Emulator
3.2 Installation Steps (MSVC Windows Installer Package)
4. Getting Application Development System(ADCD)
5. Configuring Hercules Emulator
5.1 Creating the Hercules Configuration File
6. Configuring 3270 Terminal Emulator
7.1 Power on Hercules Emulator
8.2 Stopping Hercules Emulator
1. Hercules Emulator Overview
Hercules is an open source software implementation of the mainframe System/370, ESA/390 and z/Architecture hardware. The Hercules emulator runs under Linux on several hardware platforms in-cluding the Intel Pentium PC, under Windows 98, Windows NT, Windows 2000, Windows XP, Windows Vista, Windows 7, Windows Server 2003, Windows Server 2008, Solaris, FreeBSD and under MAC OS X 10.3 and later.
2. Hardware and Software Prerequisites
2.1 Hareware Prerequisites
2.1.1 Processor
Hercules does not necessarily depend on the Intel Pentium architecture. It also has been built, installed and run successfully on an Alpha 21164, SPARC and on z/Architecture Linux/390 systems.
-
-
- Pentium with 500 MHz or equivalent processor (minimal)
- Pentium with 1 GHz or equivalent processor (moderate)
- Pentium with 2 GHz or equivalent processor (average)
- Pentium with 3 GHz (Dual or Quad Core) or equivalent processor (good)
- 2 or more Pentium Quad Core processors with 2.66 GHz or equivalent processors (optimal)
-
2.1.2 RAM
The more RAM installed in the system the better Hercules will perform.
-
-
- 128 MB RAM (minimal)
- 512 MB RAM (moderate)
- 1024 MB RAM (average)
- 2048 MB RAM (good)
- 4096 MB RAM (optimal)
-
2.1.3 Disk Storage
The disk storage requirements for Hercules depend entirely on your requirements. The runtime Hercules system requires only small amount of disk space.
The following table shows how much space is occupied for each virtual DASD volume on your PC hard disk(s) for some of the supported device types.
| Model | Cylinder | Bytes/Track | Bytes/Cylinder | Bytes/Volume |
| 3380-J | 885 | 47’476 | 712’140 | 630 MB |
| 3380-E | 1’770 | 47’476 | 712’140 | 1.26GB |
| 3380-K | 2’665 | 47’476 | 712’140 | 1.89 GB |
| 3390-1 | 1’113 | 56’664 | 849’960 | 946 MB |
| 3390-2 | 2’226 | 56’664 | 849’960 | 1.89GB |
| 3390-3 | 3’339 | 56’664 | 849’960 | 2.83 GB |
| 3390-9 | 10’017 | 56’664 | 849’960 | 8.51 GB |
| 3390-27 | 32’760 | 56’664 | 849’960 | 27.84 GB |
| 3390-54 | 65'520 | 56’664 | 849’960 | 55.68 GB |
| 9345-1 | 1’440 | 46’456 | 849’960 | 1.0 GB |
| 9345-2 | 2’156 | 46’456 | 849’960 | 1.5 GB |
Table 1: DASD Device Capacity
2.2 Software Prerequisites
2.2.1 Operating System
The Hercules Emulator runs under Windows 98, Windows NT, Windows 2000, Windows XP, Windows Vista, Windows Server 2000 and Windows Server 2003. Although Windows 98 and Windows NT are possible candidates for running Hercules, their use is not recommended because of limitations in stability (especially Windows 98), limited networking capabilities and lack of support.
2.2.2 Installed Software on a Hercules System
It is recommended to have the following software installed:
-
-
- Windows 2000, Windows XP, Windows Server 2003 with latest service packs and hot fixes
- Software firewall, especially if there is no hardware firewall in the LAN
- Antivirus software with on demand and on access checks active
-
Depending on your requirements other commonly used utilities include:
-
-
- Network sniffer
- Performance monitor / Task monitor
- FTP program
-
2.2.3 3270 Terminal Emulator
Pre-install 2370 terminal emulator, just like wc3270, pcom.
2.3 Required programs
2.3.1 Hercules Emulator
The Hercules executables are the heart of the emulator and a mandatory component. This is the software implementation of the System/370, ESA/390 and z/Architecture mainframe hardware and processor machine code instruction set.
3. Installing the Hercules Emulator
3.1 Downloading the Binaries
The "ready-to-run" binaries can be downloaded from http://www.hercules-390.org. For Windows users there are currently two varieties available:
-
- MSVC Windows installer package (filename "hercules-v.rr-w64.msi" or "hercules-v.rr-w64.msi")
- MSVC binaries only archive (filename "hercules-v.rr-w64.zip" or "hercules-v.rr-w32.zip")
We use MSVC Windows installer package.
3.2 Installation Steps (MSVC Windows Installer Package)
To start the installation dialog run the .MSI executable file. A welcome window is presented first.
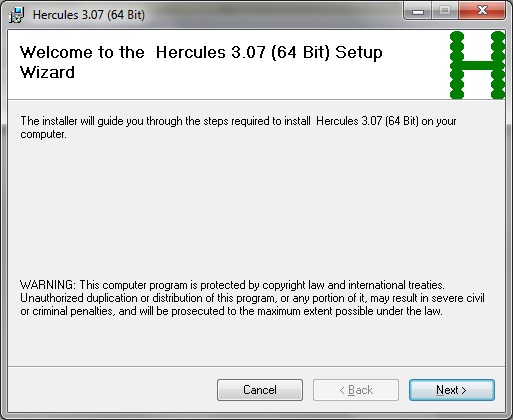
Figure 1: Welcome Window (MSVC Installer Package)
Clicking on "Next" continues the installation process.
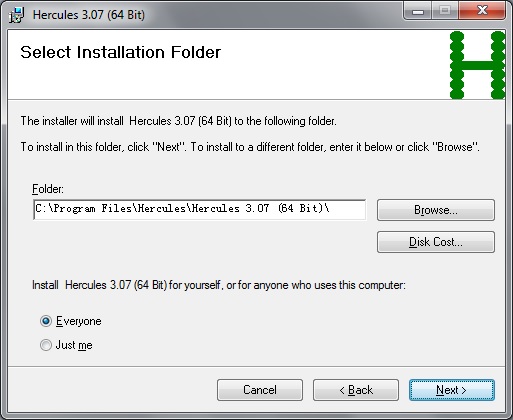
Figure 2: Installation Directory Selection (MSVC Installer Package)
If you do not want to change any of your choices, click on "Next >" to start the actual installation process.
The installer now begins to copy files to the destination directories.
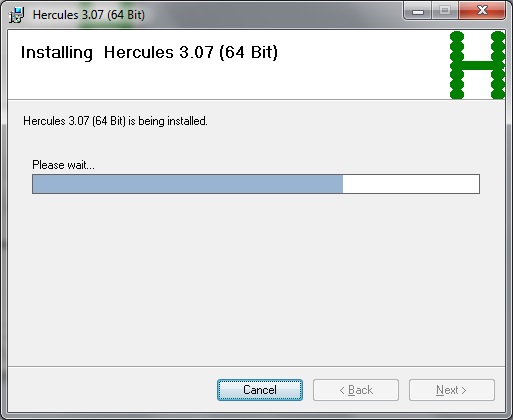
Figure 3: Installation Progress Bar (MSVC Installer Package)
If necessary the process of copying files can be stopped by clicking on "Cancel".
After a few seconds the installation process will finish and present the final window.
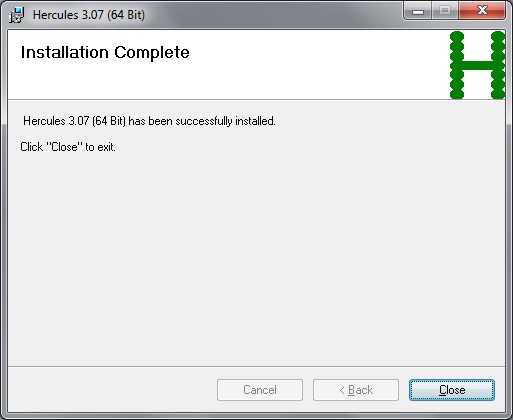
Figure 4: Installation Complete (MSVC Installer Package)
Click on "Close" to terminate the installation dialog and proceed to customise your installation as de-scribed in the following sections.
4. Getting Application Development System(ADCD)
The ADCD is built on a twice per year schedule typically coinciding with the release of new versions of z/OS. The ADCD is created to provide qualified Independent Software Vendors (ISVs) with the latest z/OS System along with associated middleware products at the latest available maintenance level. For quite some time now, we have been offering the z/OS System also via download option, in addition to the DVDs.
The currently supported ADCD environments are:
-
- z/OS 1.9 December 2007 under Red Hat and Flex
- z/OS 1.9s Summer 2008 under Red Hat and Flex
- z/OS 1.10 December 2008 under Red Hat and Flex
We use z/OS 1.10 to build virtual z/OS inver environment.
4.1 DVD Disk description
| DVD Disk | File | Description |
| DVD Disk 1 | zares1.gz | RES Volume 1 - Required for IPL |
| zares2.gz | RES Volume 2 - Required for IPL | |
| zasys1.gz | System volume 1 - Required for IPL | |
| zauss1.gz | UNIX Services Volume 1 - Required for IPL | |
| zaprd1.gz | Product target Libraries - Required to run selected products | |
| zaprd2.gz | Product target Libraries - Required to run selected products | |
| DVD Disk 2 | zadis1.gz | Distribution Volume 1 |
| zadis2.gz | Distribution Volume 2 | |
| zadis3.gz | Distribution Volume 3 | |
| zadis4.gz | Distribution Volume 4 | |
| zadis5.gz | Distribution Volume 5 | |
| zadis6.gz | Distribution Volume 5 | |
| DVD Disk 3 |
zaprd3.gz |
Java HFS datasets for both 31 and 64 bit for 1.4, 1,6, |
| zacic1.gz | Target and Dlibs for CICS 3.2 | |
| zaims1.gz | Target and Dlibs for IMS 10 | |
| sares1.gz | sares1.gz | |
| DVD Disk 4 | zadb81.gz | DB2 v8 Target and Required datasets |
| zadb82.gz | DB2 v8 Utilities Target and Required datasets | |
| zadb83.gz | DB2 v9 Performance Analyzer Utility Target datasets | |
| zadb84.gz | DB2 v9 Performance Analyzer Utility DLIB datasets | |
| DVD Disk 5 | zawas1.gz | WAS 6.1,ESB 6.0.1 and WPS 6.0.1 Target datasets |
| zawas2.gz | WAS 6.1,ESB 6.0.1 and WPS 6.0.1 DLIB datasets | |
| zawas3.gz | WAS 6.1 Large ZFS dataset |
Table 2: ADCD DVD Disk 1 description
5. Configuring Hercules Emulator
5.1 Creating the Hercules Configuration File
When starting the Hercules Emulator from either a DOS command line or via the Hercules Windows GUI, you may specify the name of a configuration file. The following figure is a sample of the configuration file, ensure that your configuration file references your DASD devices correctly. The paths from the configuration file may be relative.

#
# Hercules Emulator Control file...
#
# Description:
# MaxShutdownSecs:   15
# LoadUnit:          0A80
# RCFile:
# LogoFile:
# IgnoreParseErrors: 0
# HercGUI Version:   1.12.6.3219
#

#  System parameters

MAXCPU               4
ENGINES              CP,CP,CP,CP
NUMCPU               4

HERCPRIO             0
TODPRIO              -20
DEVPRIO              8
CPUPRIO              15

ALRF                 ENABLE
ARCHMODE             z\Arch
AUTO_SCSI_MOUNT      NO
CNSLPORT             3270
CONKPALV             (3,1,10)
CODEPAGE             default
CPUMODEL             2064
CPUSERIAL            011519
CPUVERID             00
DEVTMAX              8
DIAG8CMD             ENABLE NOECHO
ECPSVM               YES
MODPATH              .
LEGACYSENSEID        DISABLE
LOADPARM             0A829CM1
LPARNUM              01
LPARNAME             HERCULES
MAINSIZE             1024
MANUFACTURER         HRC
MODEL                EMULATOR
MOUNTED_TAPE_REINIT  DISALLOW
OSTAILOR             Z\OS
PANRATE              50
PGMPRDOS             RESTRICTED
PLANT                ZZ
SHCMDOPT             ENABLE DIAG8
SYSEPOCH             1900
TIMERINT             50
TRACEOPT             TRADITIONAL
TZOFFSET             +0900
XPNDSIZE             0
YROFFSET             0

PGMPRDOS LICENSED

#  Display Terminals

0700-0708    3270    *

#  DASD Devices

0A80    3390    D:\ADCD\ZAres1.cckd
0A81    3390    D:\ADCD\ZAres2.cckd
0A82    3390    D:\ADCD\ZAsys1.cckd
0A83    3390    D:\ADCD\ZAuss1.cckd
0A84    3390    D:\ADCD\ZAprd1.cckd
0A85    3390    D:\ADCD\ZAprd2.cckd
0A86    3390    D:\ADCD\ZAprd3.cckd
0A87    3390    D:\ADCD\ZAprd4.cckd
0A88    3350    D:\ADCD\ZAdis1.cckd
0A89    3350    D:\ADCD\ZAdis2.cckd
0A8A    3350    D:\ADCD\ZAdis3.cckd
0A8B    3350    D:\ADCD\ZAdis4.cckd
0A8C    3350    D:\ADCD\ZAdis5.cckd
0A8D    3350    D:\ADCD\ZAdis6.cckd
6. Configuring 3270 Terminal Emulator
6.1 Configuring 3270 terminal
Open a 3270 terminal emulator, set host to localhost or 127.0.0.1 and set TCP port to 3270.
The following figure is a sample of 3270 terminal emulator configration.
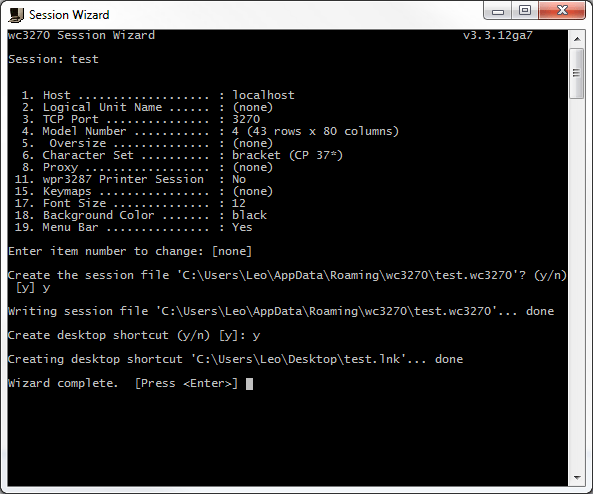
Figure 5: 3270 terminal configration
7. Starting Hercules Emulator
7.1 Power on Hercules Emulator
When starting the Hercules Emulator from either a DOS command line or via the Hercules Windows GUI, you may specify the name of a configuration file as a parameter:
HERCULES [ -f filename ] …
where filename is the name of the configuration file. The default filename if none is specified during the startup is ‘hercules.cnf’. The name of the default configuration file may be overridden via the environment variable HERCULES_CNF.
The following is a sample to power on the Herclues Emulator
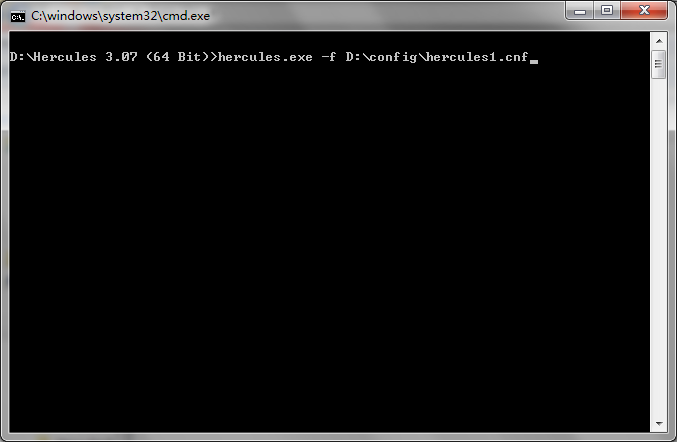
Figure 6: Power on Herclues Emulator command
Hercules should start and you should see something similar to:

Figure 7: Hercules Hardware Console - Console window
Press ‘ESC’ to switch to the graphic mode. Start two instances of the 3270 terminals that was configured in "6. Configuring 3270 Terminal Emulator". The first will be the console terminal, the second will be the TSO terminal.
You should see two terminals binded to Hercules(0700 and 0701 in the following figure, if you connect Hercules by local, the Assignment will be 127.0.0.1 or localhost):
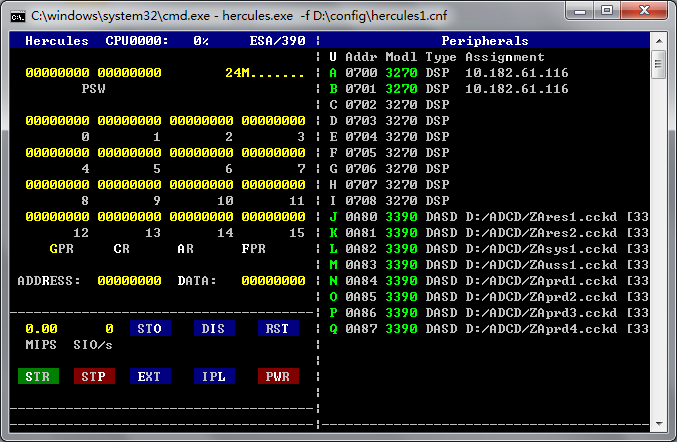
Figure 8: Hercules Hardware Console - Device and status display
Until you IPL the system, both of the 3270 terminals will show the following:
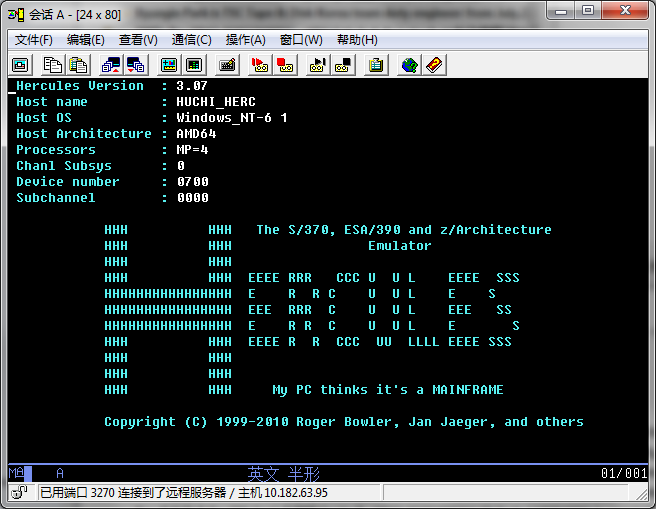
Figure 9: 3270 terminal - Hercules power on
7.2 IPL z/OS
To IPL z/OS, press ‘L’ for IPL:
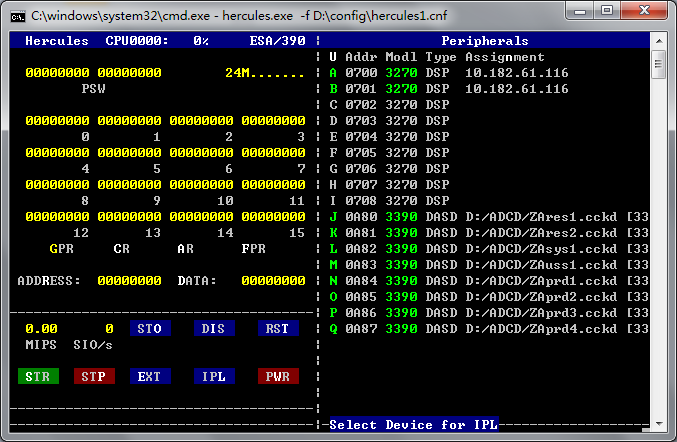
Figure 10: Hercules Hardware Console - Select Device for IPL
Then press the device number to IPL the z/OS.
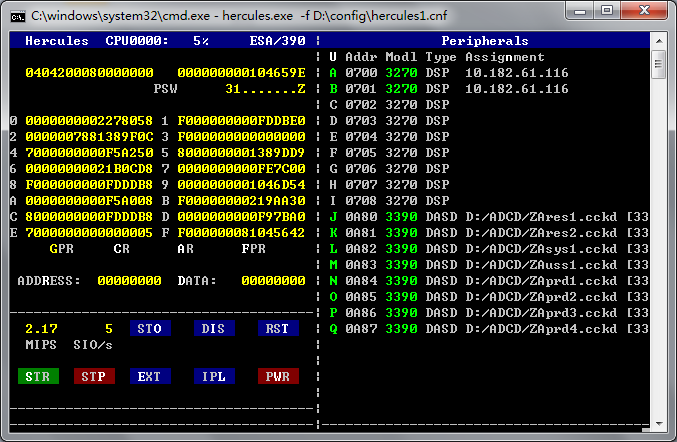
Figure 11: Hercules Hardware Console - IPL
During the IPL progress, console will stop at the following figure:
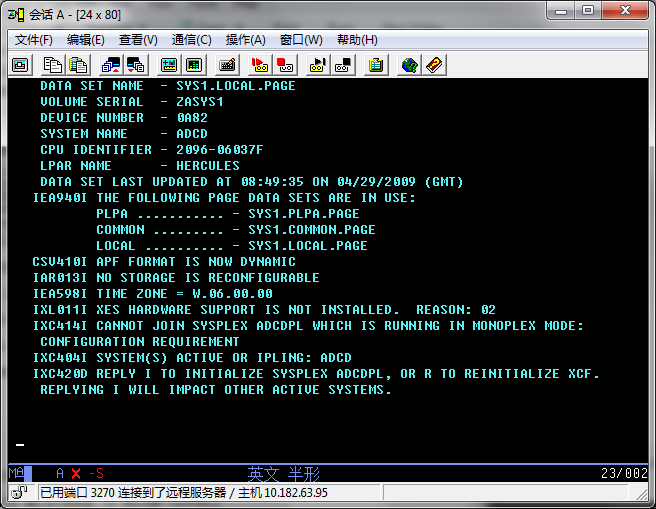
Figure 12: Console terminal - IPL 1
Use the following command to reply "I":
r 00, i
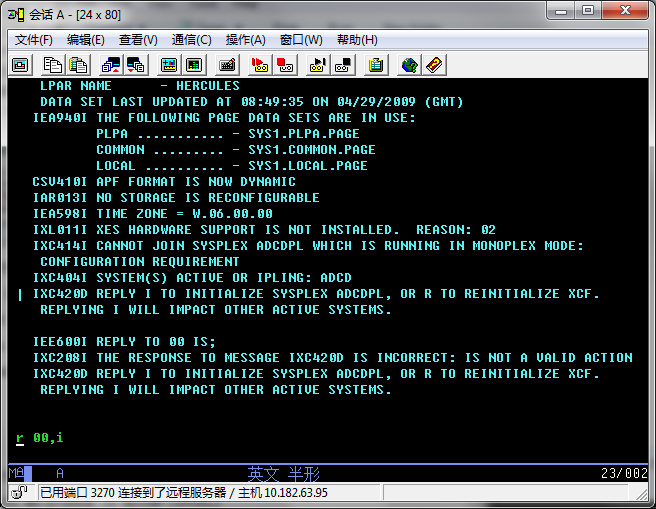
Figure 13: Console terminal - IPL 2
After IPL, you will see the follwoing firgure in TSO terminal:
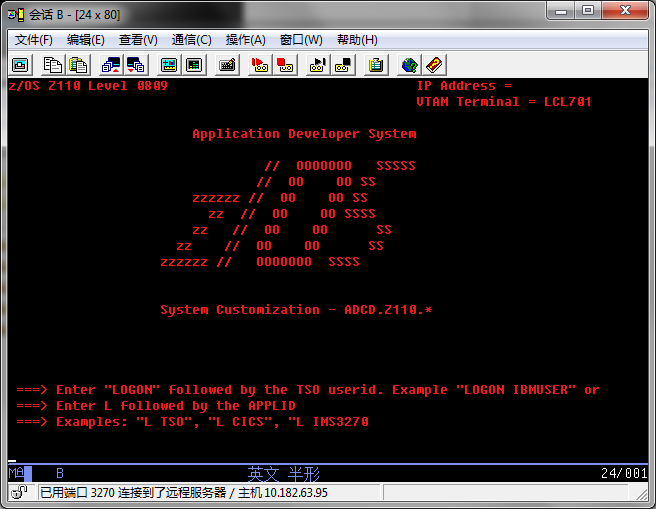
Figure 14: TSO terminal - Welcome
You may login as ‘IBMUSER’ with the password ‘SYS1′.
Have FUN!
8. Stopping Hercules Emulator
8.1 Stopping z/OS
To stop z/OS, you can type the following command in console:
s shudown
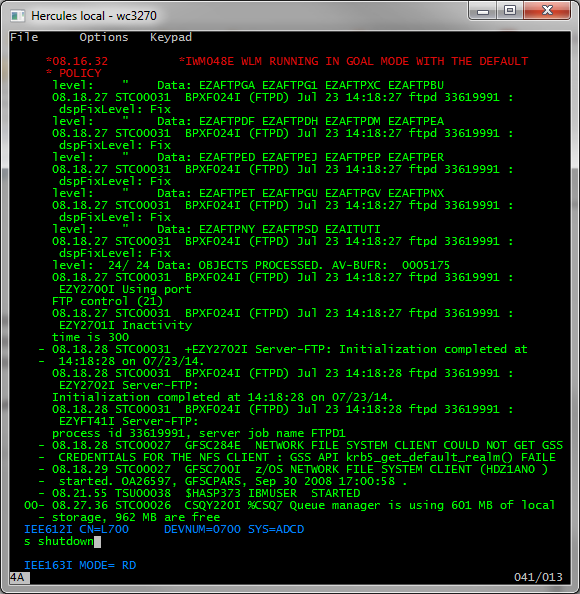
Figure 15: Stopping z/OS - input shutdown command
During the stopping progress, you can type the following command to check the active jobs:
d a,l

Figure 16: Stopping z/OS - check active jobs
When the s shutdown command complete, you will find there is only three jobs left:
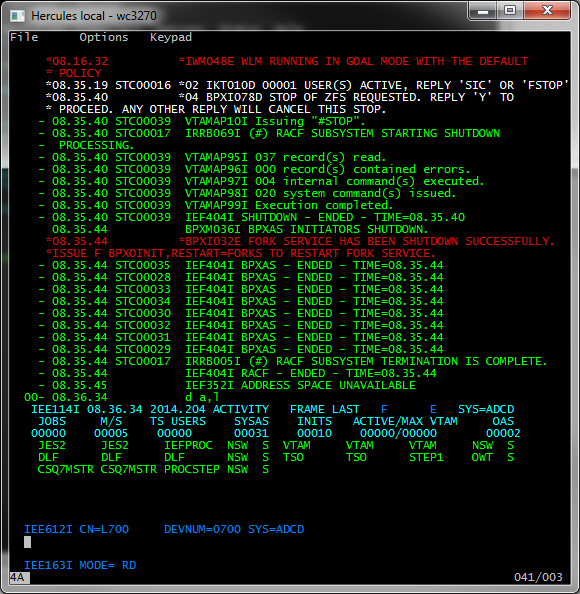
Figure 17: Stopping z/OS - check active jobs left
Then you will use the following command to stop JSE2:
$P JES2,term
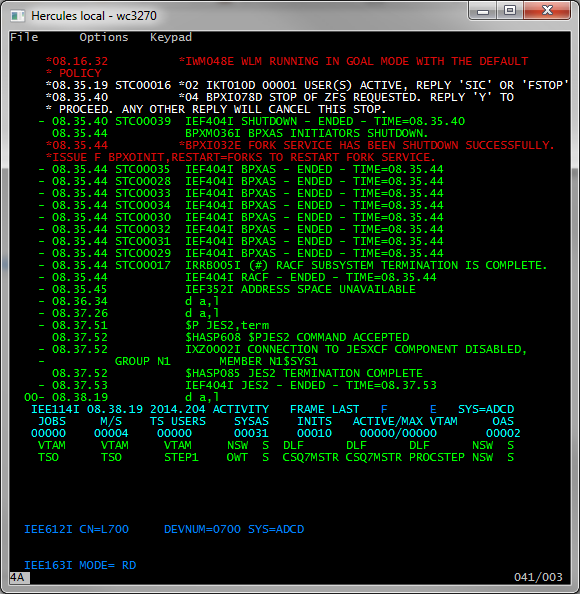
Figure 18: Stopping z/OS - stopping jes2
Until now, z/OS has been stopped.
8.2 Stopping Hercules Emulator
In the Hercules graphic mode, you should press 'E' to external interrupt the system.
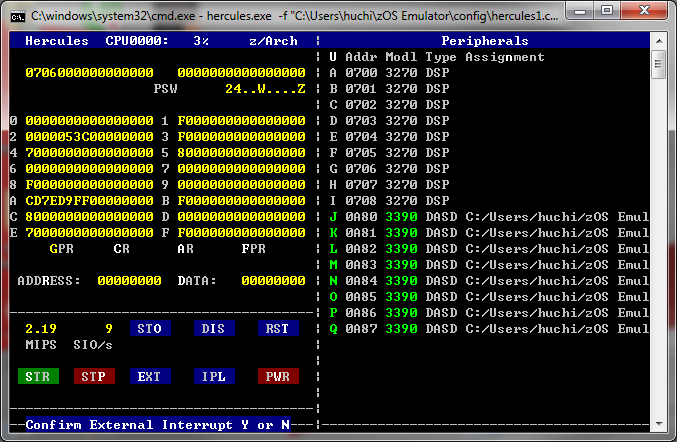
Figure 19: Stopping Hercules Emulator - external interrupt
After input 'Y', you should input 'S' to powerdown the Hercules Emulator:
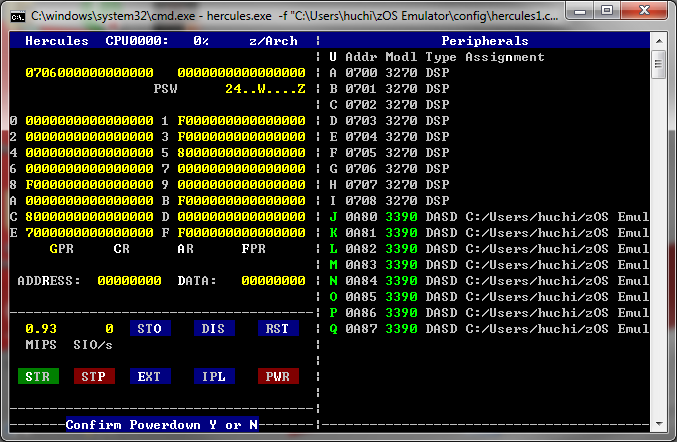
Figure 20: Stopping Hercules Emulator - powerdown
Input 'Y' to confirm, you will jump to the windows command line:
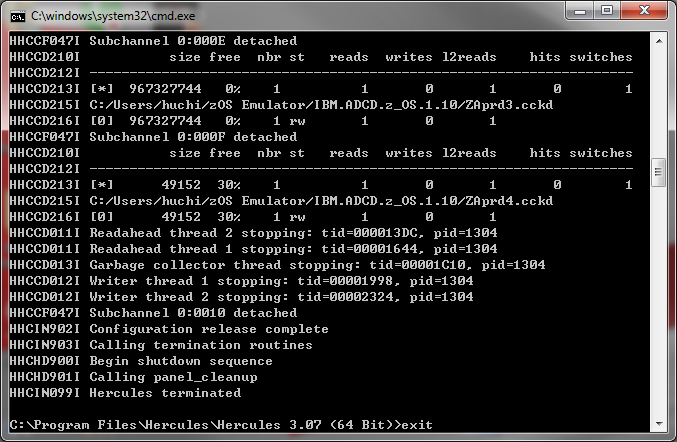
Figure 21: Stopping Hercules Emulator - windows cmd ui
Appendix 1. Reference
[001] The Hercules System/370, ESA/390, and z/Architecture Emulator
http://www.hercules-390.org
[002] Hercules – General Information Version 3 Release 07
http://www.hercules-390.org/HerculesGeneralInfo.pdf
[003] Hercules - Installation Guide Version 3 Release 07
http://www.hercules-390.org/HerculesInstallation.pdf
[003] Hercules – User Reference Guide Version 3 Release 10
http://hercdoc.glanzmann.org/V310/HerculesUserReference.pdf
[004] Hercules – Messages and Codes Version 3 Release 10
http://hercdoc.glanzmann.org/V310/HerculesMessagesandCodes.pdf
[005] Hercules Windows GUI Interface "Operating Instructions" Version 1.4.0
http://www.bsp-gmbh.com/turnkey/cookbook/hercgui/hercgui-readme.html
[006] IBM System z Personal Development Tool Volume 2 Installation and Basic Use
http://www.redbooks.ibm.com/redbooks/pdfs/sg247722.pdf
[007] Booting Z/OS Emulation Files with Hercules by Leo's Random Stuff
http://leo.steamr.com/2012/07/booting-zos-emulation-files-with-hercules/
[008] Hercules Version 3: System Messages: CF: Configuration Processing
http://www.hercules-390.eu/hercmscf.html
Appendix 2. Figure List
Table 2: ADCD DVD Disk 1 description
Appendix 3. Table List
Figure 1: Welcome Window (MSVC Installer Package)
Figure 2: Installation Directory Selection (MSVC Installer Package)
Figure 3: Installation Progress Bar (MSVC Installer Package)
Figure 4: Installation Complete (MSVC Installer Package)
Figure 5: 3270 terminal configration
Figure 6: Power on Herclues Emulator command
Figure 7: Hercules Hardware Console - Console window
Figure 8: Hercules Hardware Console - Device and status display
Figure 9: 3270 terminal - Hercules power on
Figure 10: Hercules Hardware Console - Select Device for IPL
Figure 11: Hercules Hardware Console - IPL
Figure 12: Console terminal - IPL 1
Figure 13: Console terminal - IPL 2
Figure 14: TSO terminal - Welcome
Figure 15: Stopping z/OS - input shutdown command
Figure 16: Stopping z/OS - check active jobs
Figure 17: Stopping z/OS - check active jobs left
Figure 18: Stopping z/OS - stopping jes2
Figure 19: Stopping Hercules Emulator - external interrupt
Figure 20: Stopping Hercules Emulator - powerdown