协程,即Coroutine,可以认为它是一个返回值是IEnumerator的函数,但是使用它需要配合StartCoroutine使用。
协程不是多线程,所有的任务还是在主线程上完成,是一种异步多任务处理的方式。
协程的好处在于,它可以在一个函数内实现像update那样按帧执行某个部分,或者按照过几秒后执行某个部分。
例如实现一个计时器:

普通的实现方式如下:
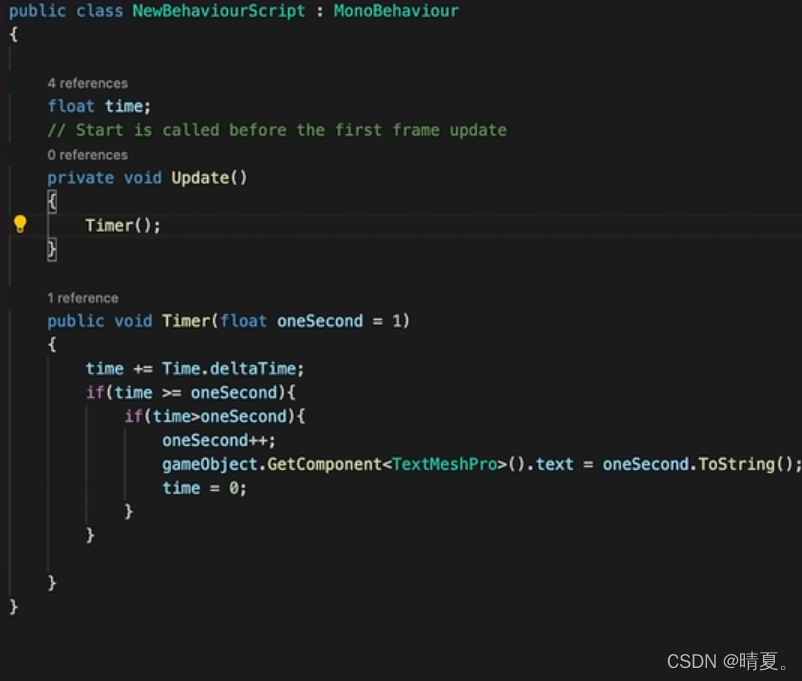
这种方法有两个弊端,在每一帧都需要判断执行一次,浪费资源。
创建很多变量,实际上只改变了一个数字。
对比使用协程的方法:
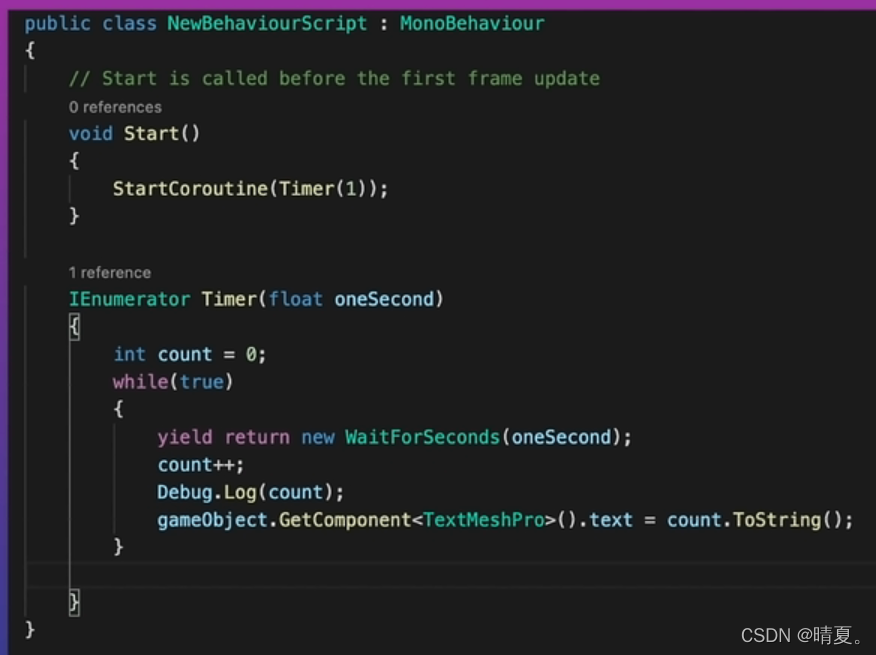
yield return new WaitForSeconds会在一秒后再次调用,执行剩下的部分。
终止协程两个函数,stopCoroutine和stopAllCoroutine。

yield return null就相当于是下一帧继续执行剩下的部分。
下面把官方教程中的例子引入:
public class CoroutinesExample : MonoBehaviour
{


    public float smoothing = 1f;
    public Transform target;


    void Start ()
    {


        StartCoroutine(MyCoroutine(target));
    }


    IEnumerator MyCoroutine (Transform target)
    {


        while(Vector3.Distance(transform.position, target.position) > 0.05f)
        {


            transform.position = Vector3.Lerp(transform.position, target.position, smoothing * Time.deltaTime);

            yield return null;
        }

        print("Reached the target.");

        yield return new WaitForSeconds(3f);

        print("MyCoroutine is now finished.");
    }
协程开始执行后,在循环中每次返回null后,将会继续执行循环里的操作,然后直到循环结束,在循环结束后,然后执行print"Reached the target.",然后执行 yield return new WaitForSeconds(3f);,直到3秒后,再次回到这个函数,然后执行 print(“MyCoroutine is now finished.”);。
解析啦实现一个使用协程的例子:
例如点击屏幕上某一位置,然后物体将会移动到该位置:
public class PropertiesAndCoroutines : MonoBehaviour
{


    public float smoothing = 7f;
    public Vector3 Target
    {


        get {

     return target; }
        set//当target被设置的时候将会执行这部分函数
        {


            target = value;

            StopCoroutine("Movement");
            StartCoroutine("Movement", target);
        }
    }


    private Vector3 target;


    IEnumerator Movement (Vector3 target)
    {


        while(Vector3.Distance(transform.position, target) > 0.05f)
        {


            transform.position = Vector3.Lerp(transform.position, target, smoothing * Time.deltaTime);

            yield return null;
        }
    }
使用协程的方法可以实现物体不必在update中每帧轮询,可以提高效率。
点击设定位置的函数:
ClickSetPosition
public class ClickSetPosition : MonoBehaviour
{


    public PropertiesAndCoroutines coroutineScript;


    void OnMouseDown ()
    {


        Ray ray = Camera.main.ScreenPointToRay(Input.mousePosition);
        RaycastHit hit;

        Physics.Raycast(ray, out hit);

        if(hit.collider.gameObject == gameObject)
        {


            Vector3 newTarget = hit.point + new Vector3(0, 0.5f, 0);
            coroutineScript.Target = newTarget;
        }
    }
}
补充一下ScreenPointToRay的函数作用:
Camera.ScreenPointToRay
描述
返回从摄像机通过屏幕点的光线。
产生的光线位于世界空间中,从摄像机的近平面开始,并通过屏幕上 位置的 (x,y) 像素坐标(忽略 position.z)。
屏幕空间以像素定义。屏幕的左下角为 (0,0),右上角为 (pixelWidth -1,pixelHeight -1)。
	Camera cam;

    void Start()
    {


        cam = GetComponent<Camera>();
    }

    void Update()
    {


        Ray ray = cam.ScreenPointToRay(new Vector3(200, 200, 0));
        Debug.DrawRay(ray.origin, ray.direction * 10, Color.yellow);
    }
Physics.Raycast的作用是释放射线,比如说可以提供发射起点和距离以及方向,然后发送射线
如果我们想要获取一些碰撞的相关信息,可以声明一个rayCastHit变量,这种变量是用来存放一些碰撞有关的信息的:
RaycastHit hit;
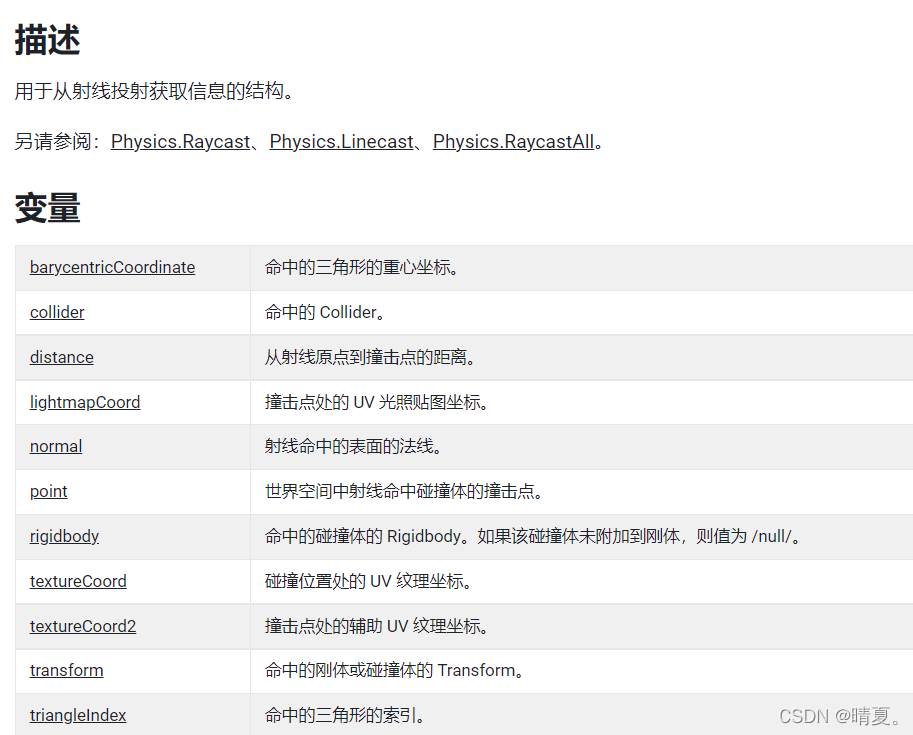
可以获取很多需要的信息,将射线的信息输出到射线信息变量用下面的这条语句:
      RaycastHit hit;
      Physics.Raycast(ray, out hit);