创建索引
定义一个日志,记录简单的header,ip,message,stype 通过本索引来介绍基本的查询语法。
PUT log
{


   "mappings": {


       "properties": {


           "request_body":{


               "properties": {


                   "header":{

    "type":"text","fields":{

    "keyword":{

    "type":"keyword"}}},
                   "ip":{

    "type":"keyword"}
               }
           },
          "message":{

    "type":"text"},
          "stype":{


               "type":"text",
               "fields": {


                   "keyword":{


                       "type":"keyword"
                   }
               }
           }
       }
   }
}
写入两条数据
PUT /log/_doc/a2020-07-22-1
{


   "request_body":{


       "header":"Sec-Fetch-Site: same-site User-Agent: Mozilla/5.0 (Windows NT 10.0; Win64; x64) AppleWebKit/537.36 (KHTML, like Gecko) Chrome/84.0.4147.89 Safari/537.36",
       "ip":"127.0.0.1"
   },
   "message":"[00000030] ./lualib/service/worldstatus_lib.lua:119 -- ./lualib/service/worldstatus_lib.lua:107: attempt to index a nil value (field '?')",
   "stype":"main"
}

PUT /log/_doc/a2020-07-22
{


   "request_body":{


       "header":"site-html token is ",
       "ip":"192.168.2.326"
   },
   "message":"[00000061] ./lualib/server.lua:688 -- leave_map -- rid:105415694458129, node:world_22993",
   "stype":"source"
}
match
普通查询,分词查询(被查询的字符串分词),具体使用哪种分词可以指定,也可以使用系统默认,指定分词见上一节。
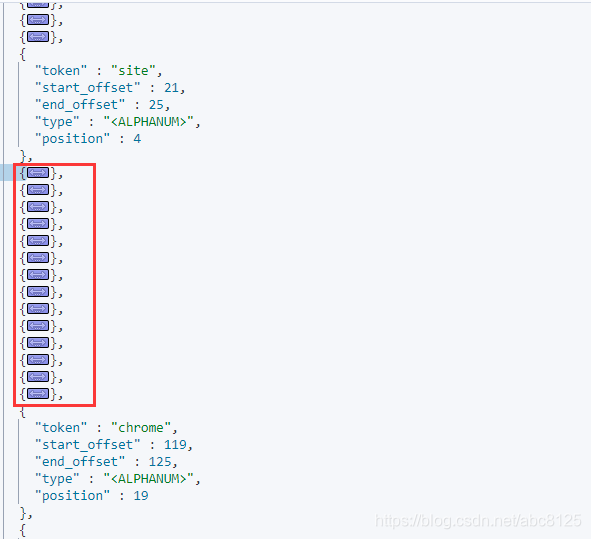
在使用match查询之前先看下,先看下header的默认分词:
# 查看默认分词
GET /log/_analyze
{


    "field": "request_body.header",
    "text": "Sec-Fetch-Site: same-site User-Agent: Mozilla/5.0 (Windows NT 10.0; Win64; x64) AppleWebKit/537.36 (KHTML, like Gecko) Chrome/84.0.4147.89 Safari/537.36"
}

# 结果
{


  "tokens" : [
    {


      "token" : "sec",
      "start_offset" : 0,
      "end_offset" : 3,
      "type" : "<ALPHANUM>",
      "position" : 0
    },
    {


      "token" : "fetch",
      "start_offset" : 4,
      "end_offset" : 9,
      "type" : "<ALPHANUM>",
      "position" : 1
    },
    {


      "token" : "site",
      "start_offset" : 10,
      "end_offset" : 14,
      "type" : "<ALPHANUM>",
      "position" : 2
    },
    {


      "token" : "same",
      "start_offset" : 16,
      "end_offset" : 20,
      "type" : "<ALPHANUM>",
      "position" : 3
    },
    {


      "token" : "site",
      "start_offset" : 21,
      "end_offset" : 25,
      "type" : "<ALPHANUM>",
      "position" : 4
    },
    {


      "token" : "user",
      "start_offset" : 26,
      "end_offset" : 30,
      "type" : "<ALPHANUM>",
      "position" : 5
    },
    {


      "token" : "agent",
      "start_offset" : 31,
      "end_offset" : 36,
      "type" : "<ALPHANUM>",
      "position" : 6
    },
    {


      "token" : "mozilla",
      "start_offset" : 38,
      "end_offset" : 45,
      "type" : "<ALPHANUM>",
      "position" : 7
    },
    {


      "token" : "5.0",
      "start_offset" : 46,
      "end_offset" : 49,
      "type" : "<NUM>",
      "position" : 8
    },
    {


      "token" : "windows",
      "start_offset" : 51,
      "end_offset" : 58,
      "type" : "<ALPHANUM>",
      "position" : 9
    },
    {


      "token" : "nt",
      "start_offset" : 59,
      "end_offset" : 61,
      "type" : "<ALPHANUM>",
      "position" : 10
    },
    {


      "token" : "10.0",
      "start_offset" : 62,
      "end_offset" : 66,
      "type" : "<NUM>",
      "position" : 11
    },
    {


      "token" : "win64",
      "start_offset" : 68,
      "end_offset" : 73,
      "type" : "<ALPHANUM>",
      "position" : 12
    },
    {


      "token" : "x64",
      "start_offset" : 75,
      "end_offset" : 78,
      "type" : "<ALPHANUM>",
      "position" : 13
    },
    {


      "token" : "applewebkit",
      "start_offset" : 80,
      "end_offset" : 91,
      "type" : "<ALPHANUM>",
      "position" : 14
    },
    {


      "token" : "537.36",
      "start_offset" : 92,
      "end_offset" : 98,
      "type" : "<NUM>",
      "position" : 15
    },
    {


      "token" : "khtml",
      "start_offset" : 100,
      "end_offset" : 105,
      "type" : "<ALPHANUM>",
      "position" : 16
    },
    {


      "token" : "like",
      "start_offset" : 107,
      "end_offset" : 111,
      "type" : "<ALPHANUM>",
      "position" : 17
    },
    {


      "token" : "gecko",
      "start_offset" : 112,
      "end_offset" : 117,
      "type" : "<ALPHANUM>",
      "position" : 18
    },
    {


      "token" : "chrome",
      "start_offset" : 119,
      "end_offset" : 125,
      "type" : "<ALPHANUM>",
      "position" : 19
    },
    {


      "token" : "84.0.4147.89",
      "start_offset" : 126,
      "end_offset" : 138,
      "type" : "<NUM>",
      "position" : 20
    },
    {


      "token" : "safari",
      "start_offset" : 139,
      "end_offset" : 145,
      "type" : "<ALPHANUM>",
      "position" : 21
    },
    {


      "token" : "537.36",
      "start_offset" : 146,
      "end_offset" : 152,
      "type" : "<NUM>",
      "position" : 22
    }
  ]
}
使用分词索引查询
GET /log/_search
{


    "query": {


        "match":{


            "request_body.header": "site Chrome"
        }
    }
}
结果很显然被查询的字符串经过分词后,site 和Chrome都在分词的结果中,两个结果都匹配。
term
查询时不分词,同理测试上面的查询
GET /log/_search
{


   "query": {


      "term": {


        "request_body.header": "site"
      }
   }
}
因为被查询的是site,他在header对应的字段分词后能查询到。
GET /log/_search
{


   "query": {


      "term": {


        "request_body.header": "same-site"
      }
   }
}
这个就查询不到
match_pharse 短语匹配
先来介绍下短语匹配的定义:
# 对于匹配了短语"a b c"的文档,下面的条件必须为true:
# 1.a b c 必须全部出现在某个字段中。
# 2.b的位置必须比a的位置大1。
# 3.c的位置必须比a的位置大2。
# match_phrase查询首先解析查询字符串来产生一个词条列表。然后会搜索所有的词条,但只保留包含了所有搜索词条的文档,并且词条的位置要邻接

GET /log/_search
{


   "query": {


       "match_phrase": {


         "request_body.header": "site Chrome"
       }
   }
}
直接使用这个我们是查询不到的,因为我们写入的两条header中并没有完整的site Chrome
match_pharse 非严格模式
# 非严格匹配, site 和Chrome隔多远可以匹配,这里的隔多远指的是header经过分词后,两个指定词语之间的举例, 默认是1 通过sloop
GET /log/_search
{


   "query": {


       "match_phrase": {


            "request_body.header": {


                "query": "site Chrome",
                "slop":14
            }
       }
   }
}
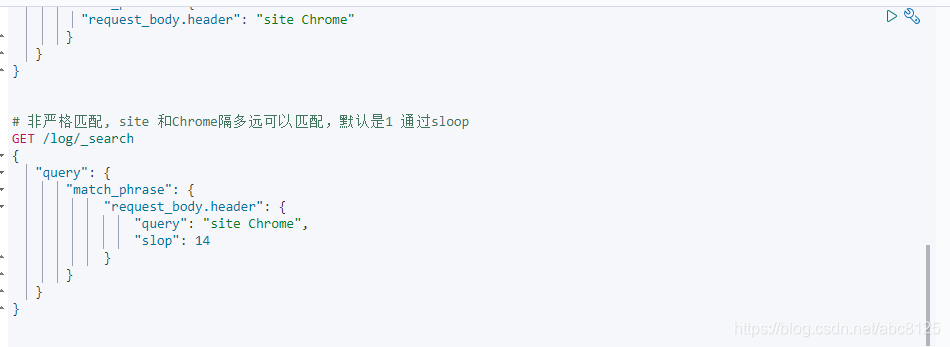
这里的14是原始header中分词之间的间隔,最小值为14 可以大于14。
多字段匹配
GET /log/_search
{


   "query": {


      "multi_match": {


        "query": "lua:119",
        "fields": ["request_body.header","message"]
      }
   }
}
这句类似于 select * from table where request_body.header like '%lua:119%' or message like '%lua:119%'
评分最高
GET /log/_search
{


    "query": {


      "multi_match": {


        "query": "lua:119",
        "type": "best_fields",
        "fields": ["request_body.header","message"]
      }
    }
}
bool查询
这种查询将多查询组合在一起,成为用户自己想要的布尔查询。
组合查询(过滤) 提供的查询参数:must,should,must_not 过滤参数: filter
两者区别
查询:会先比较查询条件,然后计算分值,最后返回文档结果,
过滤:先判断是否满足查询条件,如果不满足,会缓存查询过程(记录该文档不满足结果);满足的话,就直接缓存结果。优点就是缓存+不计算得分
参数小解:
must:文档必须匹配这些条件才能被包含进来。
must_not文档必须不匹配这些条件才能被包含进来
should当文档满足此条件时,会增加其_score值,类似于or语句
filter 必须匹配,但它以不评分、过滤模式来进行。这些语句对评分没有贡献,只是根据过滤标准来排除或包含文档
代码示例:
GET /log/_search
{


  "query": {


      "bool": {


          "must": [
            {


                "match": {


                  "message": "service"
                }
            }
          ],

        "should": [
          {


                 "match": {


                   "stype": "main"
                 }


          }
        ]
      }
  }
}
看到以上的语句很容的理解为
select * from log where message like '%service%' or stype like '%main%';
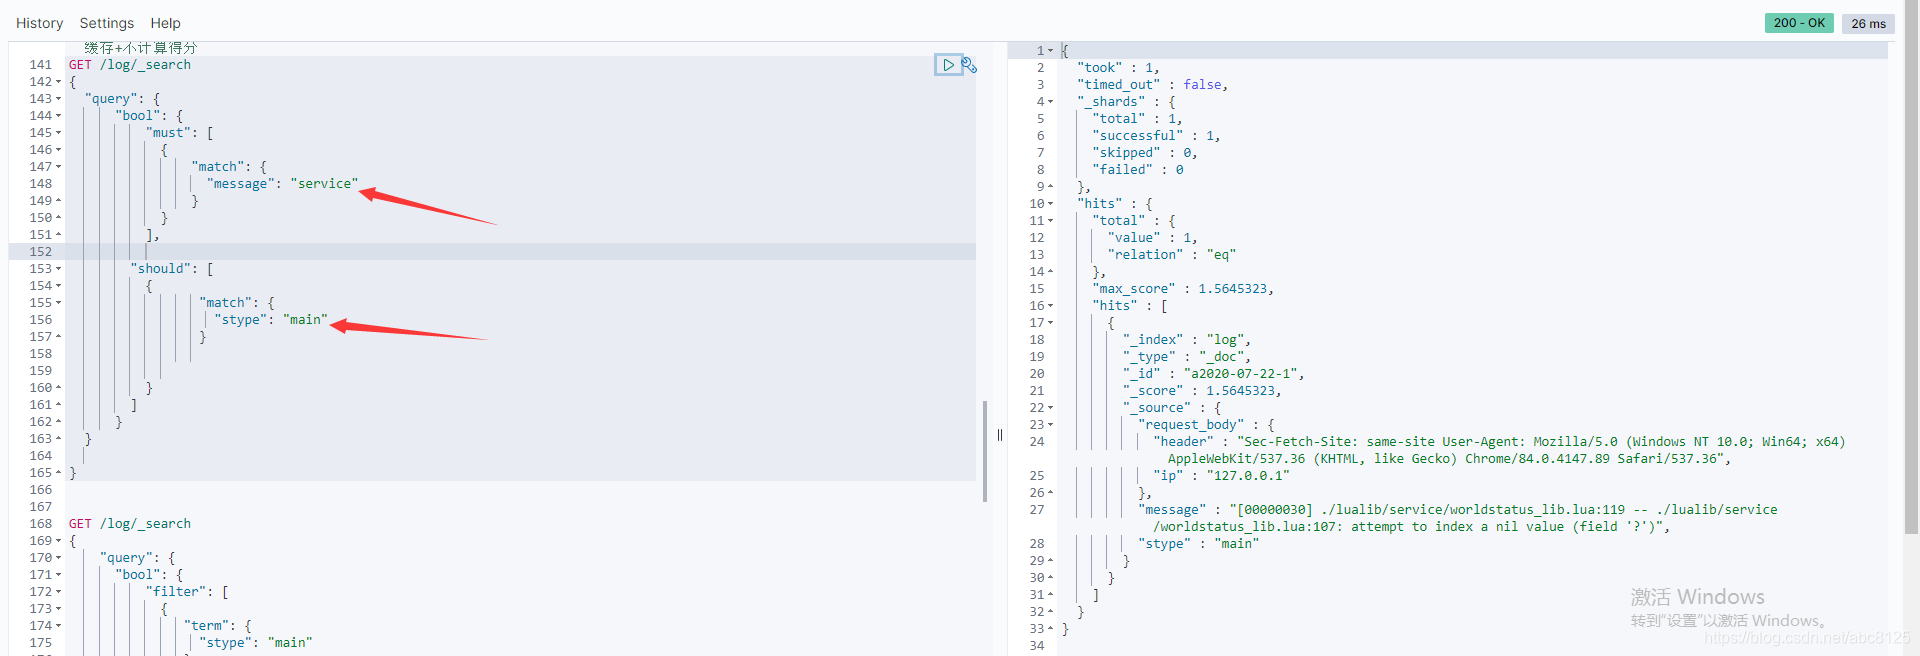
must中满足了,可以查询出结果来。
must不满足should满足依旧没有数据,这里并不是很简单的传统数据库中的or and 的关系,
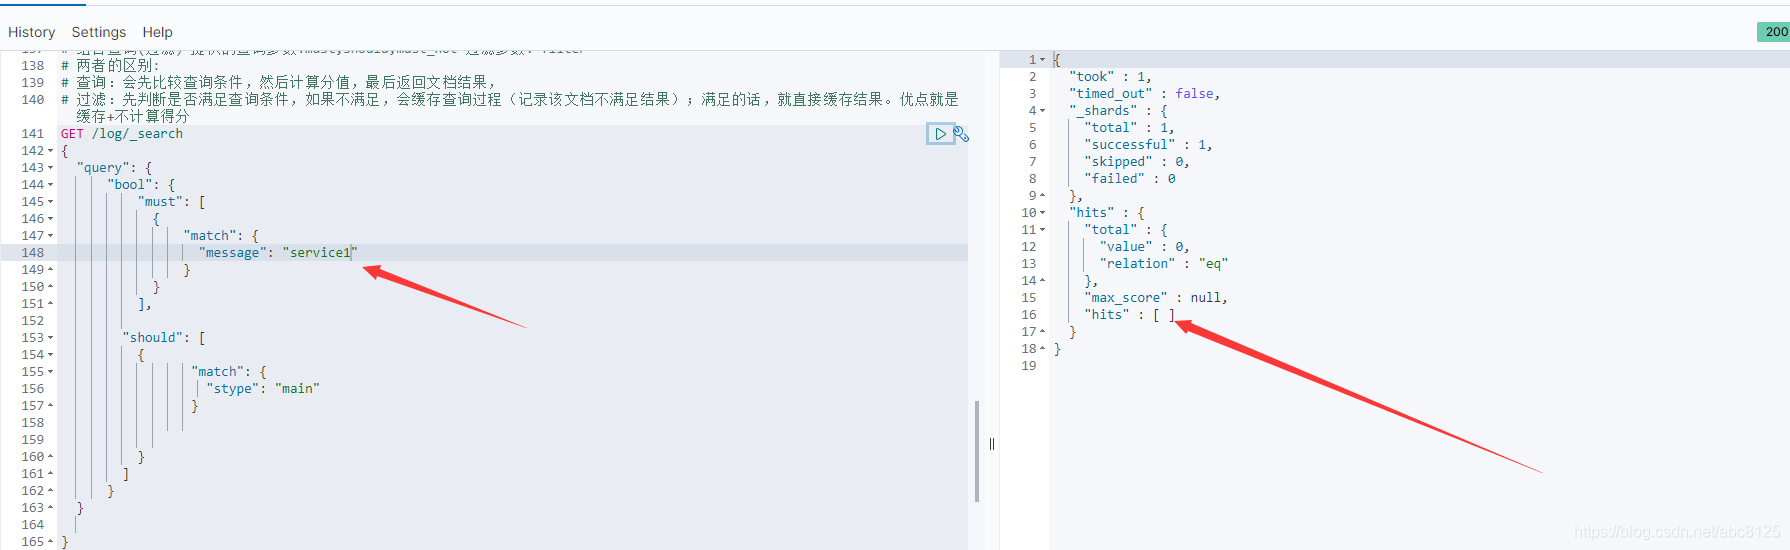
总结:
如果没有 must 语句,那么至少需要能够匹配其中的一条 should 语句。但,如果存在至少一条 must 语句,则对 should 语句的匹配没有要求。如果想实现and or , 通过bool的嵌套即可。
嵌套文档
传统数据库中经常会用到join这种关联查询,或者带有某种层级的查询。在elasticsearch中被称为父子文档。那么对于这种带有关系的查询我们改如何去查询呢
parent-child 实现(es6之前)
借助一个索引下可以有多个type来实现,
这里以传统的 学生-课程 关系来演示, 暂定一个学生存在多个课程,一个课程只能对应一个学生,传统的一对多的关系。
Join (es6.x之后)
每个索引下只允许有一个type,es6新推出join类型,mapping语法格式如下:
PUT join_demo
{


  "mappings": {


      "properties": {


        "my_join_field": {


          "type": "join",
          "relations": {


            "animal": "bird"
          }
        }
      }
  }
}
其中animal为bird的父类,my_join_field为查询关联字段。
因为父类和子类必须在同一个切片,因此路由需要强制,routimng=1,这里的1不是固定死,只需要保证父子保持在同一个切片上即可。
# 写入父类
PUT join_demo/_doc/1?refresh
{


   "text":"this is animal",
    "my_join_field":"animal"
}
#写入子类
PUT join_demo/_doc/2?routing=1&refresh
{


    "text":"this is bird",
    "my_join_field":{


        "name":"bird",
        "parent":"1"
    }
}
# 根据父类查子类
GET join_demo/_search
{


   "query": {


      "has_parent": {


        "parent_type": "animal",
        "query": {


          "match": {


            "text": "this"
          }
        }
      }
   }
}

#根据子类找父类
GET join_demo/_search
{


   "query": {


      "has_child": {


        "type": "bird",
        "query": {


           "match": {


             "text": "this"
           }
        }
      }
   }
}