1、导入web前端框架或者静态资源
spring boot帮我们做好了前端的maven依赖,直接导入依赖就可以用了
这种操作叫做webjars,所有的webjars都可以在这里查询 webjars.org
比如要导入jQuery的包,导入依赖
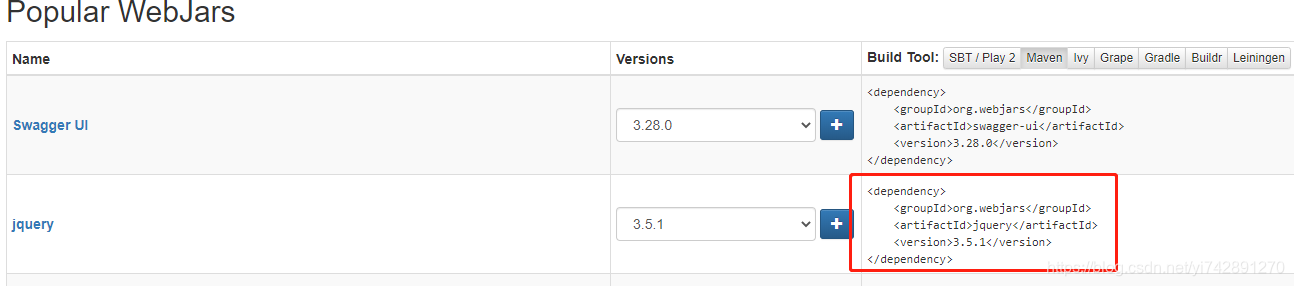
<dependency>
    <groupId>org.webjars</groupId>
    <artifactId>jquery</artifactId>
    <version>3.5.1</version>
</dependency>
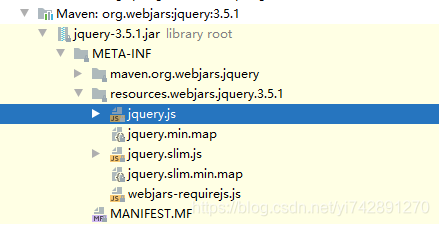
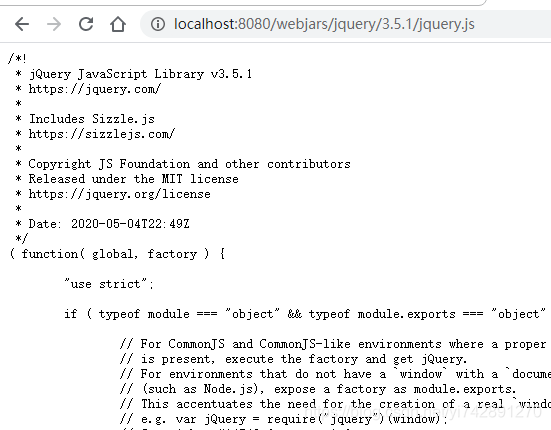
但是,访问这些加载的静态资源的时候,都是在localhost:xxxx/webjars/资源名/版本/资源
2、静态网页或者资源放哪里
“classpath:/META-INF/resources/”,
“classpath:/resources/”,
“classpath:/static/”,
“classpath:/public/”
“/”:当前项目的根路径
放在这几个地方都可以,就是这几个地方
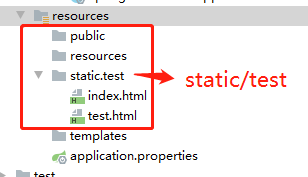
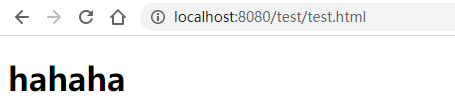
然后比如resources/static/test/test.html,这样打开
3、模板引擎:thymeleaf(这个没有前后分离)
用了thymeleaf后,可以达到以下步骤
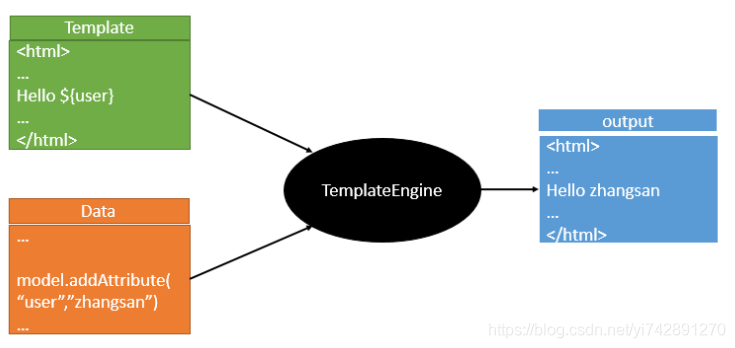
和php有点类似,不过是Java的,比JSP方便
首先导入依赖
<dependency>
            <groupId>org.springframework.boot</groupId>
            <artifactId>spring-boot-starter-thymeleaf</artifactId>
        </dependency>
1)使用方法
把静态资源写在resources的templates中,thymeleaf会自动识别的
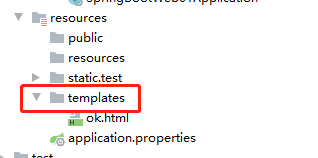
先简单地创建一个界面
ok.html:
<!DOCTYPE html>
<html lang="en">
<head>
    <meta charset="UTF-8">
    <title>Title</title>
</head>
<body>
<h1>输出了OK </h1>
</body>
</html>
这和之前地在浏览器输出是一样的,要用到控制类进行配合输出
@Controller
public class HelloController {


    @RequestMapping("/ok")
    public String ok(){


    	//返回ok.html
        return "ok";
    }
}
只要用到了Thymeleaf,在控制类的这里返回return,不再 是在页面上输出字符串了,而是返回ok.html,然后再到templates文件夹下去寻找ok.html文件,找到后就输出该网页的内容
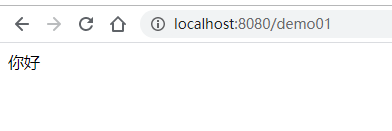
2)数据在页面展示
首先在控制类写数据,数据类型为Map<type,type>
在HTML页面中,我们可以使用<html lang="en" xmlns:th="http://www.thymeleaf.org">,让IDEA有提示输出
先在Java中写数据
@Controller
public class HelloController {


    @RequestMapping("/demo01")
    public String ok(Map<String,Object> map){


    	//"hello" ==> "你好"
         map.put("hello","你好");
         //返回demo01.html
        return "demo01";
    }
}
"hello" ==> "你好",在网页网页端用下标来进行输出
demo01.html
<!DOCTYPE html>
<html lang="en" xmlns:th="http://www.thymeleaf.org">
<head>
<meta charset="UTF-8">
<title>Title</title>
</head>
<body>
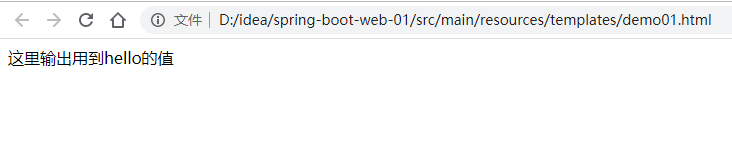
<div th:text="${hello}">这里输出用到hello的值</div>
</body>
</html>
如果你没有用到tomcat的方式打开,而是双击html打开的话,会这样
3)语法规则
比如th:text=${xxx}修改了该元素的text属性,同理,th:id=${xx}和th:class=${xx}也是一样道理

4)表达式
1、${…}:获取变量值
- 获取对象的属性、调用方法,如
${person.father.name}、${person['father']['name']}、 - 使用内置的基本对象:
#ctx : the context object.
#vars: the context variables.
#locale : the context locale.
#request : (only in Web Contexts) the HttpServletRequest object.
#response : (only in Web Contexts) the HttpServletResponse object.
#session : (only in Web Contexts) the HttpSession object.
#servletContext : (only in Web Contexts) the ServletContext object. - 内置的一些工具对象:
#execInfo : information about the template being processed.
#messages : methods for obtaining externalized messages inside variables expressions, in the same way as they would be obtained using #{…} syntax.
#uris : methods for escaping parts of URLs/URIs
#conversions : methods for executing the configured conversion service (if any).
#dates : methods for java.util.Date objects: formatting, component extraction, etc.
#calendars : analogous to #dates , but for java.util.Calendar objects.
#numbers : methods for formatting numeric objects.
#strings : methods for String objects: contains, startsWith, prepending/appending, etc.
#objects : methods for objects in general.
#bools : methods for boolean evaluation.
#arrays : methods for arrays.
#lists : methods for lists.
#sets : methods for sets.
#maps : methods for maps.
#aggregates : methods for creating aggregates on arrays or collections.
#ids : methods for dealing with id attributes that might be repeated (for example, as a result of an iteration). - 还有一些自带参数也是可以用的,如 ${session.size()}
- 有一个很重要的功能,就比如想要输出一些字然后这个字不在任何标签里面,就用
[[${xxx}]],来输出
2、*{…}:选择表达式:和${}在功能上是一样;
- 有一个不一样,配合
th:object="${session.user}:,比如下面的代码,直接取上面的对象 -
  <div th:object="${session.user}">
      <p>Name: <span th:text="*{firstName}">Sebastian</span>.</p>
      <p>Surname: <span th:text="*{lastName}">Pepper</span>.</p>
      <p>Nationality: <span th:text="*{nationality}">Saturn</span>.</p>
  </div>
3、#{…}:获取国际化内容
4、@{…}:定义URL;
比如原本要这样传值 'http://localhost:8080/gtvg/order/details?orderId=3'
下面就是新格式了
<a href="details.html" th:href="@{http://localhost:8080/gtvg/order/details(orderId=${o.id})}">view</a>
单个用(参数名=${..}),多个就(参数名=${..},参数名=${...})
又或者,直接跳转当前网页的,用
<a href="details.html" th:href="@{/order/details(orderId=${o.id})}">view</a>
5、~{…}:片段引用表达式
6、字面量
文本文字: 'one text' , 'Another one!' ,…
数字: 0 , 34 , 3.0 , 12.3 ,…
布尔值: true , false
空值: null
文字标识: one , sometext , main ,…
7、数学运算
+ , - , * , / , %,-
8、布尔运算
and、or、!、not
9、比较运算
有 > , < , >=等等
10、三目运算符
(if) ? (then)
(if) ? (then) : (else)
(value) ?: (defaultvalue)
5)做点高级点的事情
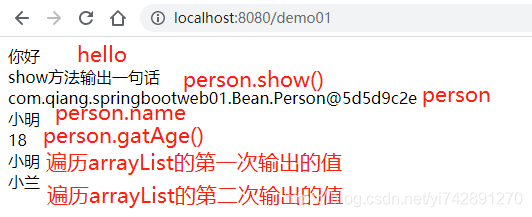
我们直接在网页端输出一个对象的属性,或者对象的方法,又或者是遍历ArrayList并且输出对应值
package com.qiang.springbootweb01.Bean;

public class Person {


    String name;
    int age;

    public Person(String name, int age) {


        this.name = name;
        this.age = age;
    }

    public String show(){


        return "show方法输出一句话";
    }

    public String getName() {


        return name;
    }

    public void setName(String name) {


        this.name = name;
    }

    public int getAge() {


        return age;
    }

    public void setAge(int age) {


        this.age = age;
    }
}
控制类:
@Controller
public class HelloController {


    @RequestMapping("/demo01")
    public String ok(Map<String,Object> map){


        map.put("hello","你好");

        Person person = new Person("小明",18);
        map.put("person",person);

        ArrayList<String> arrayList = new ArrayList<>();
        arrayList.add("小明");
        arrayList.add("小兰");
        map.put("users",arrayList);
        //返回demo01.html,默认补上.html
        //规定放在templates下
        return "demo01";
    }
demo01.html:
<!DOCTYPE html>
<html lang="en" xmlns:th="http://www.thymeleaf.org">
<head>
    <meta charset="UTF-8">
    <title>Title</title>
</head>
<body>
<!--"hello ==> "你好"-->
<div th:text="${hello}" > asdasd </div>
<!-- "person" ==> new Person("小明",18) -->
<!--调用Person下的show()方法-->
<div th:text="${person.show()}">使用person.show()</div>
<!--直接打印地址-->
<div th:text="${person}">打印地址</div>
<div th:text="${person.name}"></div>
<div th:text="${person.getAge()}"></div>
<!-- ${users}  ==> ArrayList<String> arrayList
   arrayList添加了两个String:小明、小兰
   th:each相当于foreach,遍历arrayList,然后每一个的值都是user
   然后th:text="${user},输出对应的arrayList遍历值
-->
<div th:each="user:${users}" th:text="${user}"></div>
</body>
</html>
4、输入localhost:8080进入首页
因为上面用到了thymeleaf,return返回就是templates/下的路径
//多个映射
@RequestMapping({

    "","/","/index.html"})
    public String index(){


        return "index";
    }
输入http://localhost:8080/index.html,或者是http://localhost:8080,都可以访问到首页了
5、WebMvcConfigurer配置类取代控制类,进行请求输出
这个是默认我们已经用到了thymeleaf的了,没有配合thymeleaf的,我不会。。。
之前的我们,比如这个代码,我们是在控制类写的,但是我们也可以在配置类里面写,而且更方便,但是怎么把值输出到浏览器中,我还在学习,就是那个/demo01还不会
@Controller
public class HelloController {


//    @RequestMapping("/demo01")
//    public String ok(Map<String,Object> map){


//        map.put("hello","你好");
//        Person person = new Person("小明",18);
//        map.put("person",person);
//        ArrayList<String> arrayList = new ArrayList<>();
//        arrayList.add("小明");
//        arrayList.add("小兰");
//        map.put("users",arrayList);
//        //返回demo01.html,默认补上.html
//        //规定放在templates下
//        return "demo01";
//    }

    @RequestMapping("/test")
    public String test(){


        //返回templates/ok.html
        return "ok";
    }

    @RequestMapping({

    "","/","/index.html"})
    public String index(){


        return "index";
    }
}
写成配置类,要用到接口WebMvcConfigurer,里面又很多方法,但是我们还在学习,只用到registry.addViewController("访问名称").setViewName("控制类的return值");
比如这一行registry.addViewController("").setViewName("index");,相当于
@RequestMapping("")
    public String index(){


        return "index";
    }
简单了很多
配置类
//这是替代了控制器,配合thymeleaf使用的
@Configuration
public class MyMvcConfig implements WebMvcConfigurer {


    @Override
    public void addViewControllers(ViewControllerRegistry registry) {


        //浏览器发送  请求来到 success
        registry.addViewController("").setViewName("index");
        registry.addViewController("/").setViewName("index");
        registry.addViewController("/index.html").setViewName("index");
        registry.addViewController("/ok").setViewName("ok");
    }
}
这个结果也是可以访问到的,和控制类的效果完全一样
6、thyme leaf与WebMvcConfigurer后,静态资源与html的关系
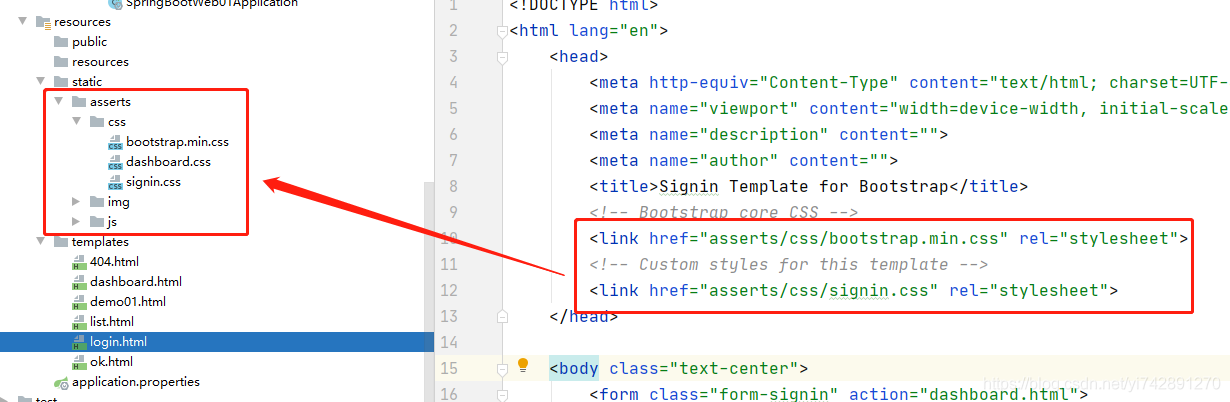
在templates中,存放html文件,但是对应的css/js文件,存放的位置和我们的认知有点奇怪
比如login.html , link一个css文件 <link href="asserts/css/signin.css" rel="stylesheet">
那么理所应当,这个asserts/css/signin.css就是放在templates下,但是!!!我不知道是因为thyme leaf的原因还是什么自动配置的原因,这些js,css,img文件,放在上一级的static或者public或者resources下,要这样用,如果是我们平常认知的话,就会错误
7、简单的登陆
1)代码
我们数据库先不做,先假设登陆账号是任何的都可以,然后密码固定是123456
首先,需要禁用模板引擎的缓冲,就比如之前做的PHP,改了一下CSS或者HTML样式,要换个浏览器才能显示成功,在application.properties改
spring.thymeleaf.cache=false
springMVC配置类
//这是替代了控制器,配合thymeleaf使用的
@Configuration
public class MyMvcConfig implements WebMvcConfigurer {


    @Override
    public void addViewControllers(ViewControllerRegistry registry) {


        //浏览器发送  请求来到 success
        registry.addViewController("").setViewName("login");
        registry.addViewController("/").setViewName("login");
        registry.addViewController("/login.html").setViewName("login");
    }
}
这个登陆注册的模板全都是偷的,spring boot官网有的下
login.html:
<!DOCTYPE html>
<html lang="en" xmlns:th="http://www.thymeleaf.org">
<head>
<meta http-equiv="Content-Type" content="text/html; charset=UTF-8">
<meta name="viewport" content="width=device-width, initial-scale=1, shrink-to-fit=no">
<meta name="description" content="">
<meta name="author" content="">
<title>Signin Template for Bootstrap</title>
<!-- Bootstrap core CSS -->
<link href="/asserts/css/bootstrap.min.css" rel="stylesheet">
<!-- Custom styles for this template -->
<link href="/asserts/css/signin.css" rel="stylesheet">
</head>
<body class="text-center">
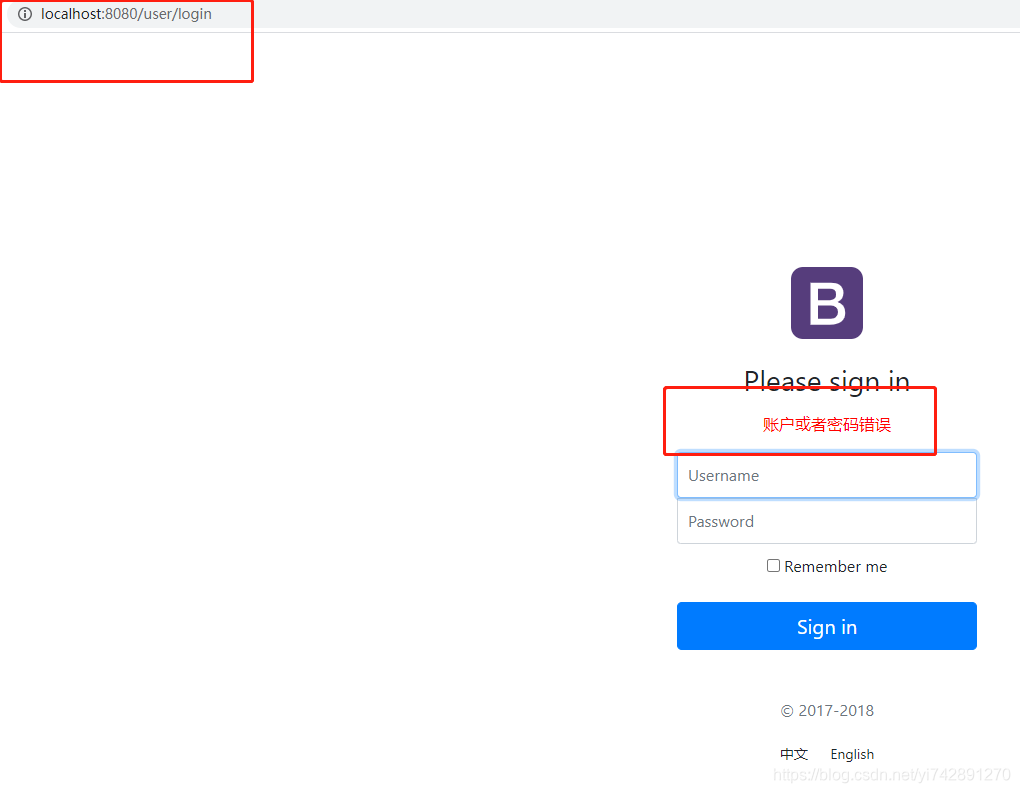
<!-- th:action="@{/user/login}" action请求为/user/login,这样的话,在控制类就可以拿到这个请求去做事情了-->
<form class="form-signin" action="dashboard.html" th:action="@{/user/login}" method="post">
<img class="mb-4" src="/asserts/img/bootstrap-solid.svg" alt="" width="72" height="72">
<h1 class="h3 mb-3 font-weight-normal">Please sign in</h1>
<p style="color: red" th:if="${msg}!=null" th:text="${msg}"></p>
<label class="sr-only">Username</label>
<input type="text" name="username" class="form-control" placeholder="Username" required="" autofocus="">
<label class="sr-only">Password</label>
<input type="password" name="password" class="form-control" placeholder="Password" required="">
<div class="checkbox mb-3">
<label>
<input type="checkbox" value="remember-me"> Remember me
</label>
</div>
<button class="btn btn-lg btn-primary btn-block" type="submit">Sign in</button>
<p class="mt-5 mb-3 text-muted">© 2017-2018</p>
<a class="btn btn-sm">中文</a>
<a class="btn btn-sm">English</a>
</form>
</body>
</html>
讲解:
- 17行:
th:action="@{/user/login}",这个的action返回值就不再是返回一个html文件了,而是返回一个请求,请求名字就是/user/login,这样的话,我们就可以在控制类或者配置类里面,使用@RequestMapping或者registry.addViewController("/user/login").setViewName("xxx");来处理请求,并且进行相对应的操作 - 20行:
th:if="${msg}!=null",类似PHP的<?php if $msg!=null?>,这个msg是当输入账户或者密码错误的情况下,Java控制类获得/user/login请求,然后判断密码是不是为123456。如果不是123456的话,就map.put("msg","密码账号错误")。所以,当没有错误的话,这个p标签就不会显示,当错误(msg!=null),就会显示p标签并且输出错误信息
登陆控制类LoginController:
@Controller
public class LoginController {


    //    下面是这个的简化版 @RequestMapping(value = "/user/login",method = RequestMethod.POST)
    @PostMapping(value = "/user/login")
    public String login(@RequestParam("username") String username,
                        @RequestParam("password") String password,
                        Map<String,Object> map){


        if (username!=null && "123456".equals(password)){


            //登陆成功
            return "dashboard";
        }else{


            map.put("msg","账户或者密码错误");
            return "login";
        }
    }
}
讲解:
@PostMapping:相当于简化的@RequestMapping(value = "/user/login",method = RequestMethod.POST),专门用来处理POST请求的,value就是写请求的东西。在HTML文件我们有th:action="@{/user/login},这里要对应上@RequestParam("xxx"):将请求参数绑定到你控制器的方法参数上,这里的绑定就是HTML文件中标签的name属性,如果没有对应上的话,就会报错了- 剩下的就没什么了,就是用了
@PostMapping来获取/user/login请求,然后里面写业务操作,参数就是HTML传过来的name和准备输出的Map。当用户名不是空或者密码为123456的时候,返回dashboard.html。当密码错误的时候,map添加msg ⇒ 账号或者密码错误,并且返回login.html
2)展示与修改BUG
当我们输入错误的密码的时候
当输入正确的密码,跳转到dashboard.html的时候么久会惊讶地发现
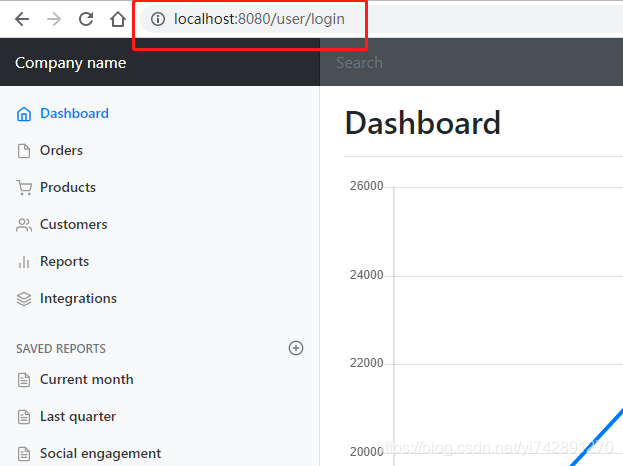
为什么地址不是localhost:8080dashboard.html而是http://localhost:8080/user/login这个就和PHP很像了,在PHP搞不懂地问题在这里解决.这个很像PHP的require,只是把页面给你,但是地址并没有跳转
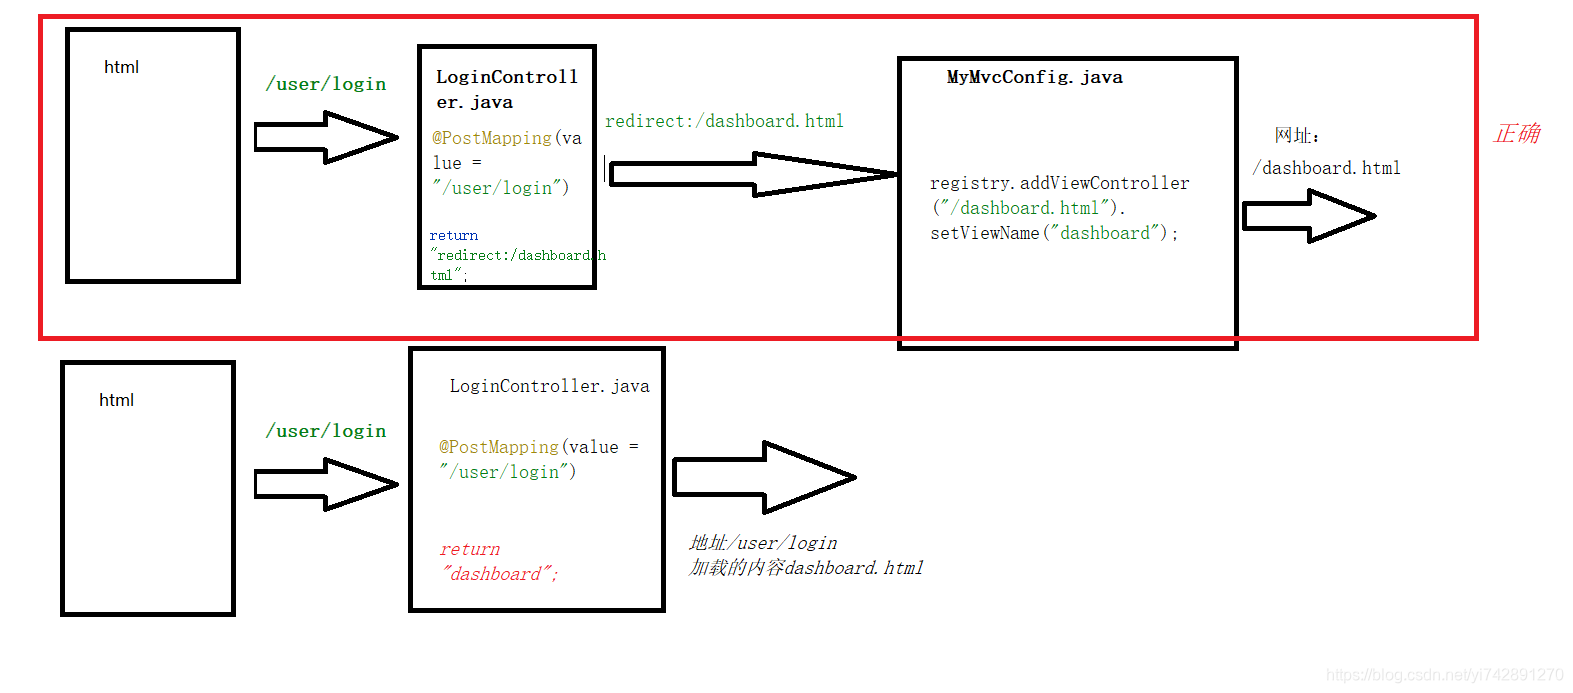
解决办法:
登陆控制类
@Controller
public class LoginController {


    //    下面是这个的简化版 @RequestMapping(value = "/user/login",method = RequestMethod.POST)
    @PostMapping(value = "/user/login")
    public String login(@RequestParam("username") String username,
                        @RequestParam("password") String password,
                        Map<String,Object> map){


        if (username!=null && "123456".equals(password)){


            //登陆成功
            //改成重定向
            return "redirect:/dashboard.html";
//            return "dashboard";
        }else{


            map.put("msg","账户或者密码错误");
            return "login";
        }
    }
}
或者,你不写redirect也行,forward也行
redirect:重定向到一个网址forward:转发到一个网址
还有,用了redirect:后是不会自动补全.html的
在MVC配置类添加registry.addViewController("/dashboard.html").setViewName("dashboard");
这样,登陆控制类return/dashboard.html,然后MVC配置类拿到地址,把/dashboard.html映射为dashboard.html
3)拦截器
但是,如果直接这样做完了,就会有致命的不安全性,你在谷歌输入了http://localhost:8080/并且登陆成功了,跳转到http://localhost:8080/dashboard.html,那么你回到火狐浏览器也输入http://localhost:8080/dashboard.html,不用登陆一遍就可以直接到达用户界面,然后返回一下,你的账号密码全部都知道了,这是非常不安全的行为
那么就要用到一个叫拦截器的东西来进行安全检查
思路:
- 在登陆控制类中,当登陆成功的时候添加一个session,方便后面检查
- 创建一个类继承拦截器接口,然后重写
preHandle方法,是用来做登陆之前要做的事情 preHandle里写拿到session,当有session时,返回true。当无session时,保存错误信息,并且返回到登陆页面- 在MVC配置类中使用
addInterceptors进行拦截器的注册
登陆控制类中
if (username!=null && "123456".equals(password)){


     //登陆成功
     session.setAttribute("loginuser",username);//session赋值
     return "redirect:/dashboard.html";
}
最好在component中创建容器
LoginHandlerInterceptor.java:
@Component
public class LoginHandlerInterceptor implements HandlerInterceptor {


    //登陆之前要做的事,controller方法之前
    @Override
    public boolean preHandle(HttpServletRequest request, HttpServletResponse response, Object handler) throws Exception {


        Object loginuser = request.getSession().getAttribute("loginuser");
        if (loginuser == null) {


            //未登陆,返回登陆页面
            request.setAttribute("msg","没有登陆权限");
            request.getRequestDispatcher("/index.html").forward(request,response);
            return false;
        }else{


            //登陆成功
            return true;
        }

    }

    //Controller方法处理完之后
    @Override
    public void postHandle(HttpServletRequest request, HttpServletResponse response, Object handler, ModelAndView modelAndView) throws Exception {


    }

    //
    @Override
    public void afterCompletion(HttpServletRequest request, HttpServletResponse response, Object handler, Exception ex) throws Exception {


    }
}
讲解:
preHandle:登陆之前要做的事情request.getSession().getAttribute("loginuser");:相当于PHP的$_SESSION[loginuser]request.setAttribute("msg","没有登陆权限");:相当于控制类中写的map.put("msg",“没有权限登陆”);request.getRequestDispatcher("/index.html").forward(request,response);:请求返回到某个页面,后面的.forward(request,response)照抄就对了
在MVC配置类中使用addInterceptors进行拦截器的注册:
//这是替代了控制器,配合thymeleaf使用的
@Configuration
public class MyMvcConfig implements WebMvcConfigurer {


    @Override
    public void addViewControllers(ViewControllerRegistry registry) {


        //xxxxx
    }

    //添加拦截器/注册拦截器
    //spring还要排除css,js等静态资源的,但是spring boot默认帮我们排除了
    @Override
    public void addInterceptors(InterceptorRegistry registry) {


        registry.addInterceptor(new LoginHandlerInterceptor()).addPathPatterns("/**")
                .excludePathPatterns("/index.html","/login.html","","/","/user/login");
    }
}
registry.addInterceptor(new LoginHandlerInterceptor())注册器注册一个拦截器,对象是接口拦截器的类.addPathPatterns("/**"):所有路径都进行拦截器检查.excludePathPatterns("/index.html","/login.html","","/","/user/login");:但排除这些请求不进行拦截器检查,因为你登陆页面和数据发送页面,session是肯定没有的。还要排除css,js等静态资源,但spring boot帮我们自动排除了
我们最后还可以在http://localhost:8080/dashboard.html中,添加[[${session.loginuser}]],这样,就可以在登陆成功后显示你的账户
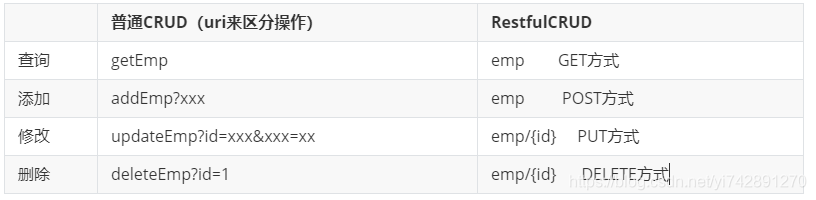
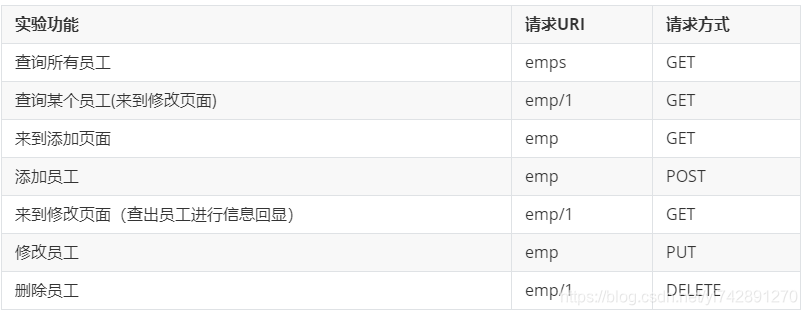
8、RestfulCRUD
RestfulCRUD是一个CRUD的风格,对于增删改查,都是通过不同的请求来完成的
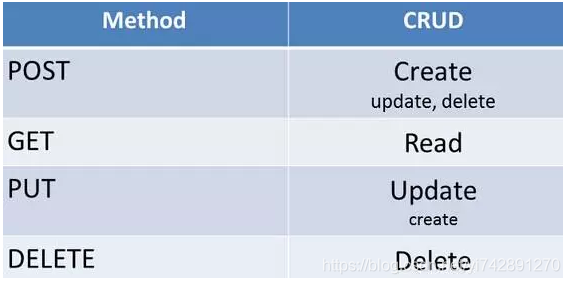
就是上图,POST请求就是用来添加,GET请求就是查询的
9、(伪)CRUD-员工管理
1)MVC
首先要大概知道MVC是什么,分为model view control,三段分离,各自实现自己的功能。先写entities实体类/文件。然后写对应的DAO文件,DAO就封装好,就让里面有各种方法可以return数据。control就是进行业务操作,操作DAO文件,获取类,然后把数据传给WEB端(VIEW)。
2)实体类
先弄好entities实体类
public class Department {


	private Integer id;
	private String departmentName;

	//各种ser,get,tostring
}
public class Employee {


	private Integer id;
    private String lastName;

    private String email;
    //1 male, 0 female
    private Integer gender;
    private Department department;
    private Date birth;

	//各种ser,get,tostring
3)DAO层
@Repository
public class DepartmentDao {


	private static Map<Integer, Department> departments = null;

	static{


		departments = new HashMap<Integer, Department>();

		departments.put(101, new Department(101, "D-AA"));
		departments.put(102, new Department(102, "D-BB"));
		departments.put(103, new Department(103, "D-CC"));
		departments.put(104, new Department(104, "D-DD"));
		departments.put(105, new Department(105, "D-EE"));
	}

	public Collection<Department> getDepartments(){


		return departments.values();
	}

	public Department getDepartment(Integer id){


		return departments.get(id);
	}

}
@Repository
public class EmployeeDao {


	private static Map<Integer, Employee> employees = null;

	@Autowired
	private DepartmentDao departmentDao;

	static{


		employees = new HashMap<Integer, Employee>();

		employees.put(1001, new Employee(1001, "E-AA", "[email protected]", 1, new Department(101, "D-AA")));
		employees.put(1002, new Employee(1002, "E-BB", "[email protected]", 1, new Department(102, "D-BB")));
		employees.put(1003, new Employee(1003, "E-CC", "[email protected]", 0, new Department(103, "D-CC")));
		employees.put(1004, new Employee(1004, "E-DD", "[email protected]", 0, new Department(104, "D-DD")));
		employees.put(1005, new Employee(1005, "E-EE", "[email protected]", 1, new Department(105, "D-EE")));
	}

	private static Integer initId = 1006;

	public void save(Employee employee){


		if(employee.getId() == null){


			employee.setId(initId++);
		}
		employee.setDepartment(departmentDao.getDepartment(employee.getDepartment().getId()));
		employees.put(employee.getId(), employee);
	}

	public Collection<Employee> getAll(){


		return employees.values();
	}

	public Employee get(Integer id){


		return employees.get(id);
	}

	public void delete(Integer id){


		employees.remove(id);
	}
}
@Repository:用于将数据访问层 (DAO 层 ) 的类标识为 Spring Bean。具体只需将该注解标注在 DAO类上即可。
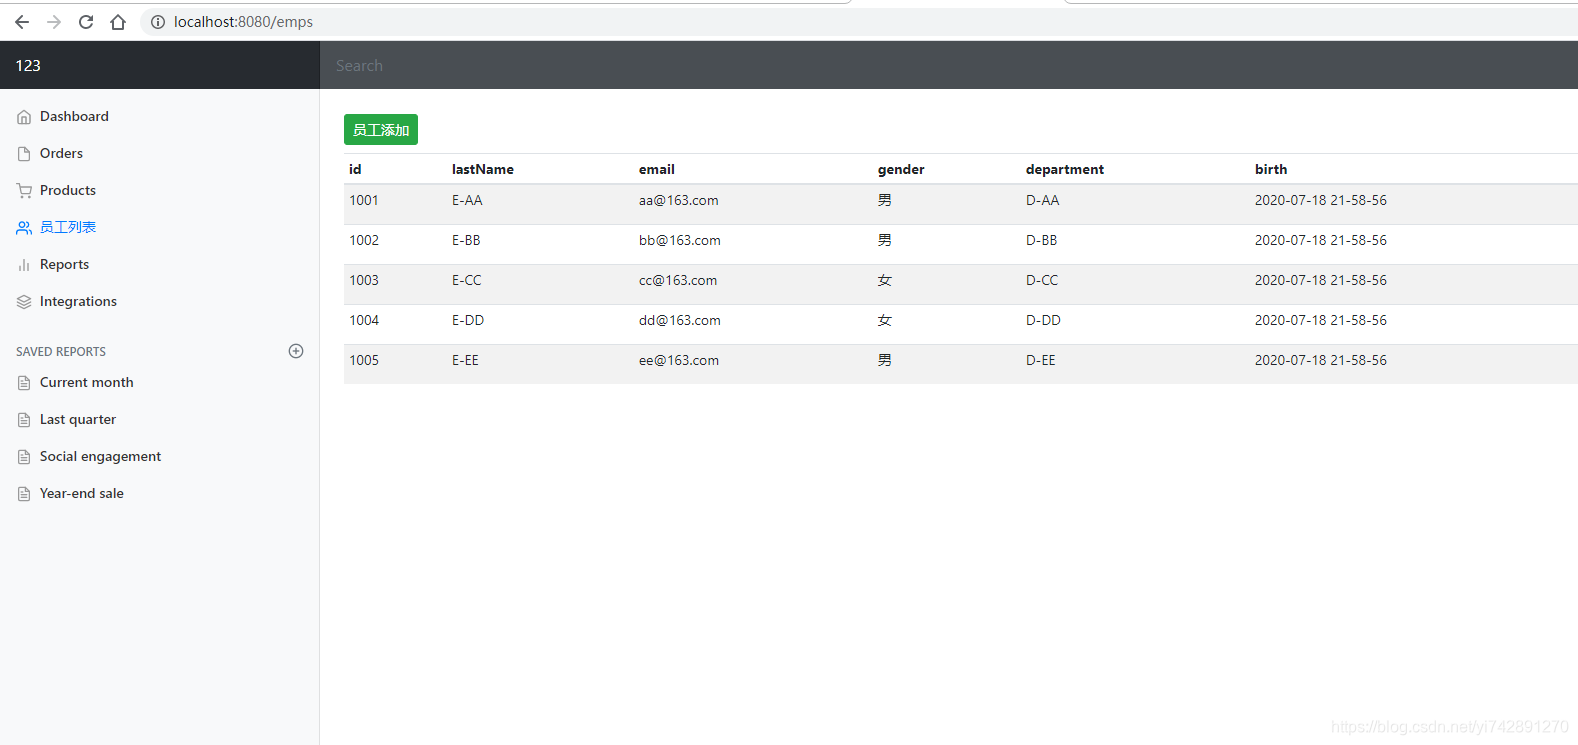
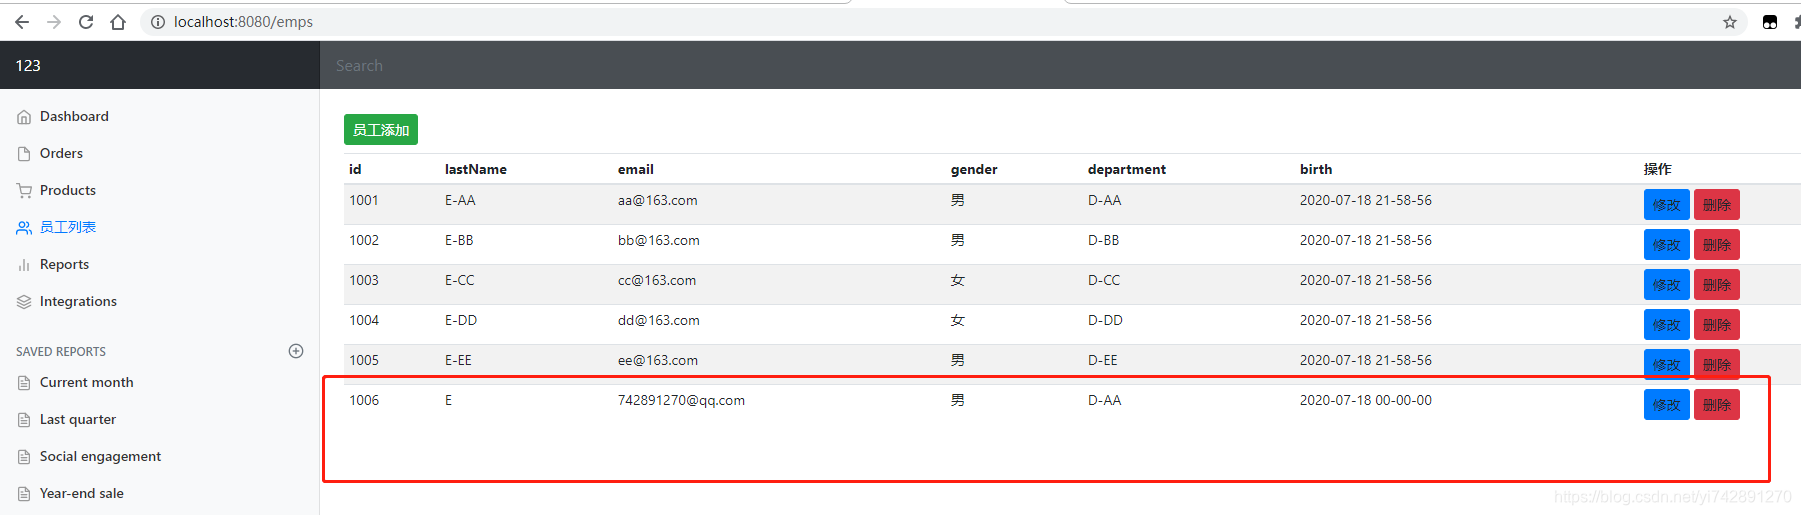
4)VIEW
就是HTML页面啦,前面我们有了login.html和dashboard.html,接下来我们要做的是list.html,是用于查看员工信息的页面
番外篇1:thymeleaf公共页面元素抽取
其实就是在A.html的某个div,想在B.html中用,在B中不用再打一遍的操作而已
公共片段声明:
声明公共元素的html
<div th:fragment="标签名"></div>
使用公共元素的html
<div th:replace="~{声明公共元素的html名(不用写.html)::标签名}"></div>
<div th:replace="声明公共元素的html名(不用写.html)::标签名"></div>
又或者是
<div id="id名"></div>
<div th:replace="~{声明公共元素的html名(不用写.html)::#id名}"></div>

番外篇2:thymeleaf在DIV中赋值,让各种文件连通起来
比如我们用了公共元素页面抽取,但是比如A页面想让这个DIV亮,但B不想让这个页面亮,但是A和B导入的是同一个DIV公共元素,那怎么办?
可以在class中用判断该元素是什么,比如用三目运算符来运算,是A的值就亮,不是就不亮。然后在A页面调用DIV的时候,赋值就OK
赋值,直接在${}或者~{}中添加(参数名='值')
公共代码块
 <a class="nav-link" href="#" th:href="@{/emps}"
	th:class="${activeUri=='emps'?'nav-link active':'nav-link'}">
或者
 <a class="nav-link" href="#" th:href="@{/emps}"
	th:class="${activeUri}=='emps'?'nav-link active':'nav-link'">**加粗样式**
- 判断这个
activeUri是不是为emps,是就添加active表示高亮,不是就没有高亮
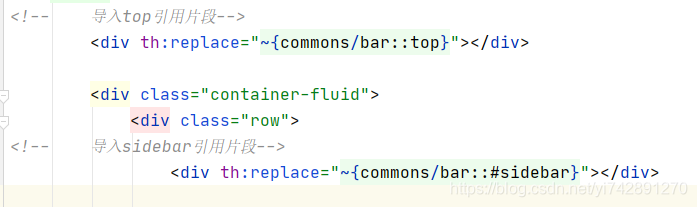
使用代码块
<!--	导入sidebar引用片段-->
<div th:replace="~{commons/bar::#sidebar(activeUri='emps')}"></div>
- 赋值
activeUri='emps',然后这个是用到了那个代码块的(a标签在dvi为sidebar的里边,所以能读取到)
到目前位置,代码都在GitHub了传送门,下载spring-boot-web-01
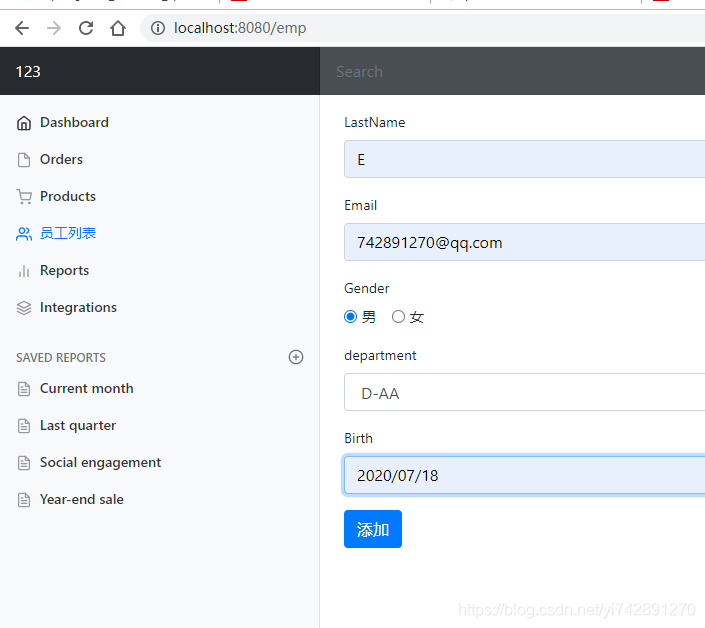
5)跳转到添加页面
list.html中添加
<h2><a class="btn btn-sm btn-success" href="/emp" th:href="@{/emp}">员工添加</a></h2>
请求为/emp
add.html主要代码
<form>
	<div class="form-group">
		<label>LastName</label>
		<input type="text" class="form-control" placeholder="张三">
	</div>
	<div class="form-group">
		<label>Email</label>
		<input type="email" class="form-control" placeholder="[email protected]">
	</div>
	<div class="form-group">
		<label>Gender</label><br/>
		<div class="form-check form-check-inline">
			<input class="form-check-input" type="radio" name="gender"  value="1">
			<label class="form-check-label">男</label>
		</div>
		<div class="form-check form-check-inline">
			<input class="form-check-input" type="radio" name="gender"  value="0">
			<label class="form-check-label">女</label>
		</div>
	</div>
	<div class="form-group">
		<label>department</label>
		<select class="form-control">
<!--	一般的value都是用id的,这里记得要加value,否则传不到值-->
			<option th:value="${dept.id}" th:each="dept:${depts}" th:text="${dept.departmentName}"></option>
		</select>
	</div>
	<div class="form-group">
		<label>Birth</label>
		<input type="text" class="form-control" placeholder="2020/07/18">
	</div>
	<button type="submit" class="btn btn-primary">添加</button>
</form>
员工控制类中添加请求映射
    @Autowired
    DepartmentDao departmentDao;

	@GetMapping(value = "/emp")
	public String toAddPage(Model model){


	     Collection<Department> departments = departmentDao.getDepartments();
	     model.addAttribute("depts",departments);
	     return "add";
	 }
6)员工添加
那么到了添加了,怎么个添加法?
我的思路:
- 每一个
input或者要传值的东西,都加上name,然后使用@RequestParam("xxx"),让接受/emp的请求的方法中,参数写@RequestParam("xxx") xxx类型 xxx参数名 - new一个对象,每一个对象都与name传过来的值一一对应
- 然后返回
list.html
但是,这样写太麻烦了,提交的表单里面有太多的东西,每一个都要@RequestParam("xxx")的话,那个方法里面的参数写得也太多了,但是,springMVC帮我们简化了步骤
springMVC思路:
- 第一步,在接受请求的方法里面,写一个对象,类就是上面第二步准备要new的一个对象
- 第二步,每一个
input或者要传值的东西,都加上name。但是,这个name,SpringMVC自动将请求参数和入参对象的属性进行一一绑定;要求请求参数的名字和javaBean入参的对象里面的属性名是一样的。就是说,在方法的参数为一个对象,那么input的name属性名规定是对象的属性名
add.html:
<!DOCTYPE html>
<!-- saved from url=(0052)http://getbootstrap.com/docs/4.0/examples/dashboard/ -->
<html lang="en" xmlns:th="http://www.thymeleaf.org">
<head>
	<meta http-equiv="Content-Type" content="text/html; charset=UTF-8">
	<meta name="viewport" content="width=device-width, initial-scale=1, shrink-to-fit=no">
	<meta name="description" content="">
	<meta name="author" content="">

	<title>Dashboard Template for Bootstrap</title>
	<!-- Bootstrap core CSS -->
	<link href="/asserts/css/bootstrap.min.css" rel="stylesheet">

	<!-- Custom styles for this template -->
	<link href="/asserts/css/dashboard.css" rel="stylesheet">
	<style type="text/css">
		/* Chart.js */

			@-webkit-keyframes chartjs-render-animation {


				from {


					opacity: 0.99
				}
				to {


					opacity: 1
				}
			}

			@keyframes chartjs-render-animation {


				from {


					opacity: 0.99
				}
				to {


					opacity: 1
				}
			}

			.chartjs-render-monitor {


				-webkit-animation: chartjs-render-animation 0.001s;
				animation: chartjs-render-animation 0.001s;
			}
		</style>
	</head>

	<body>
		<!--引入抽取的topbar-->
		<!--模板名:会使用thymeleaf的前后缀配置规则进行解析-->
		<div th:replace="commons/bar::top"></div>

		<div class="container-fluid">
			<div class="row">
				<!--引入侧边栏-->
				<div th:replace="commons/bar::#sidebar(activeUri='emps')"></div>

				<main role="main" class="col-md-9 ml-sm-auto col-lg-10 pt-3 px-4">
					<!--需要区分是员工修改还是添加;-->
					<form method="post" th:action="@{/emp}">
						<div class="form-group">
							<label>LastName</label>
							<input name="lastName" type="text" class="form-control" placeholder="张三">
						</div>
						<div class="form-group">
							<label>Email</label>
							<input name="email" type="email" class="form-control" placeholder="[email protected]">
						</div>
						<div class="form-group">
							<label>Gender</label><br/>
							<div class="form-check form-check-inline">
								<input class="form-check-input" type="radio" name="gender"  value="1">
								<label class="form-check-label">男</label>
							</div>
							<div class="form-check form-check-inline">
								<input class="form-check-input" type="radio" name="gender"  value="0">
								<label class="form-check-label">女</label>
							</div>
						</div>
						<div class="form-group">
							<label>department</label>
							<select class="form-control" name="department.id">
<!--								一般的value都是用id的,这里记得要加value,否则传不到值-->
								<option th:value="${dept.id}" th:each="dept:${depts}" th:text="${dept.departmentName}"></option>
							</select>
						</div>
						<div class="form-group">
							<label>Birth</label>
							<input name="birth" type="text" class="form-control" placeholder="2020/07/18">
						</div>
						<button type="submit" class="btn btn-primary">添加</button>
					</form>
				</main>
			</div>
		</div>

		<!-- Bootstrap core JavaScript
    ================================================== -->
		<!-- Placed at the end of the document so the pages load faster -->
		<script type="text/javascript" src="/asserts/js/jquery-3.2.1.slim.min.js" ></script>
		<script type="text/javascript" src="/asserts/js/popper.min.js" ></script>
		<script type="text/javascript" src="/asserts/js/bootstrap.min.js" ></script>

		<!-- Icons -->
		<script type="text/javascript" src="/asserts/js/feather.min.js" ></script>
		<script>
			feather.replace()
		</script>

	</body>

</html>
- 56行:请求方法是POST,请求是
/emp - 59行一下的name:这些name都是
employee的属性,甚至包括department.id
员工控制类
@Controller
public class EmployeeController {


    @Autowired
    EmployeeDao employeeDao;

    @Autowired
    DepartmentDao departmentDao;

    @GetMapping("/emps")
    public String list(Model model){


        Collection<Employee> employees = employeeDao.getAll();
        model.addAttribute("emps",employees);
        return "list";
    }

    @GetMapping(value = "/emp")
    public String toAddPage(Model model){


        Collection<Department> departments = departmentDao.getDepartments();
        model.addAttribute("depts",departments);
        return "add";
    }

    @PostMapping(value = "/emp")
    public String addEmp(Employee employee){


        employeeDao.save(employee);
        System.out.println(employee);
        //重定向,请求为/emp,这样就能到list.html了
        return "redirect:/emps";
    }

}
- 28行:
return "redirect:/emps";重定向,这样不用补全.html,这样返回这个的@GetMapping(value = "/emp")

7)员工修改
番外篇1:
在控制中的各种请求,还可以从请求中获得数据丢给方法中使用,比如
请求为/emp/1001,而我们在方法中想拿到这个1001,请求的Mapping参数就应该使用"/emp/{id}",让id == > 1001
请求:http://localhost:8080/emp/1001,控制类中:
@GetMapping("/emp/{id}")
    public String toEditPage(@PathVariable("id") Integer id,Model model){
- 接受请求使用注解
@GetMapping("/emp/{id}"), - 再在方法参数中使用注解
@PathVariable,可以将URL中占位符参数{id}绑定到处理器类的方法形参中@PathVariable("id"),使得Integer id=1001
番外篇2:
原生HTML只有POST和GET请求,那么DELETE和PUT请求要我们用springboot来写,但是,得先把spring boot中hidden的过滤器给开启,不如读取不到
application.properties中添加配置
spring.mvc.hiddenmethod.filter.enabled=true
<input type="hidden" name="_method" value="请求的方式">
<input type="hidden" name="_method" value="put">
1、思路
在list(员工列表)页面,点击修改按钮,利用占位符获得id号,再在控制类中查找该id员工对应的信息。通过编辑修改员工信息,保存数据,并且返回到员工列表。需要写两个控制类,一个是跳转到编辑页面,一个是保存修改数据后的功能
edit.html:
<!DOCTYPE html>
<!-- saved from url=(0052)http://getbootstrap.com/docs/4.0/examples/dashboard/ -->
<html lang="en" xmlns:th="http://www.thymeleaf.org">
<head>
	<meta http-equiv="Content-Type" content="text/html; charset=UTF-8">
	<meta name="viewport" content="width=device-width, initial-scale=1, shrink-to-fit=no">
	<meta name="description" content="">
	<meta name="author" content="">

	<title>Dashboard Template for Bootstrap</title>
	<!-- Bootstrap core CSS -->
	<link href="/asserts/css/bootstrap.min.css" rel="stylesheet">

	<!-- Custom styles for this template -->
	<link href="/asserts/css/dashboard.css" rel="stylesheet">
	<style type="text/css">
		/* Chart.js */

			@-webkit-keyframes chartjs-render-animation {


				from {


					opacity: 0.99
				}
				to {


					opacity: 1
				}
			}

			@keyframes chartjs-render-animation {


				from {


					opacity: 0.99
				}
				to {


					opacity: 1
				}
			}

			.chartjs-render-monitor {


				-webkit-animation: chartjs-render-animation 0.001s;
				animation: chartjs-render-animation 0.001s;
			}
		</style>
	</head>

	<body>
		<!--引入抽取的topbar-->
		<!--模板名:会使用thymeleaf的前后缀配置规则进行解析-->
		<div th:replace="commons/bar::top"></div>

		<div class="container-fluid">
			<div class="row">
				<!--引入侧边栏-->
				<div th:replace="commons/bar::#sidebar(activeUri='emps')"></div>

				<main role="main" class="col-md-9 ml-sm-auto col-lg-10 pt-3 px-4">

					<form method="post" th:action="@{/emp}">
<!--						不能再form写method="put",因为原生的就没有put请求方式的,是spring boot特有的
							那么我们就要用到下面的东西-->
						<input type="hidden" name="_method" value="put">
						<input type="hidden" name="id" th:value="${emp.id}">
						<div class="form-group">
							<label>LastName</label>
							<input name="lastName" type="text" class="form-control" placeholder="张三" th:value="${emp.lastName}">
						</div>
						<div class="form-group">
							<label>Email</label>
							<input name="email" type="email" class="form-control" placeholder="[email protected]" th:value="${emp.email}">
						</div>
						<div class="form-group">
							<label>Gender</label><br/>
							<div class="form-check form-check-inline">
								<input class="form-check-input" type="radio" name="gender"  value="1" th:checked="${emp.gender==1}">
								<label class="form-check-label">男</label>
							</div>
							<div class="form-check form-check-inline">
								<input class="form-check-input" type="radio" name="gender"  value="0" th:checked="${emp.gender==0}">
								<label class="form-check-label">女</label>
							</div>
						</div>
						<div class="form-group">
							<label>department</label>
							<select class="form-control" name="department.id">
<!--								一般的value都是用id的,这里记得要加value,否则传不到值-->
								<option th:selected="${emp.department.id==dept.id}" th:value="${dept.id}" th:each="dept:${depts}" th:text="${dept.departmentName}"></option>
							</select>
						</div>
						<div class="form-group">
							<label>Birth</label>
							<input name="birth" type="text" class="form-control" placeholder="2020/07/18" th:value="${#dates.format(emp.birth,'yyyy/MM/dd')}">
						</div>
						<button type="submit" class="btn btn-primary">添加</button>
					</form>
				</main>
			</div>
		</div>

		<!-- Bootstrap core JavaScript
    ================================================== -->
		<!-- Placed at the end of the document so the pages load faster -->
		<script type="text/javascript" src="/asserts/js/jquery-3.2.1.slim.min.js" ></script>
		<script type="text/javascript" src="/asserts/js/popper.min.js" ></script>
		<script type="text/javascript" src="/asserts/js/bootstrap.min.js" ></script>

		<!-- Icons -->
		<script type="text/javascript" src="/asserts/js/feather.min.js" ></script>
		<script>
			feather.replace()
		</script>

	</body>

</html>
EmployeeController.java添加两个方法
@Controller
public class EmployeeController {


    @Autowired
    EmployeeDao employeeDao;

    @Autowired
    DepartmentDao departmentDao;

    //跳转到编辑页面
    @GetMapping("/emp/{id}")
    public String toEditPage(@PathVariable("id") Integer id,Model model){


        Employee employee=employeeDao.get(id);
        model.addAttribute("emp",employee);
        //用于显示有什么部门可选
        Collection<Department> departments = departmentDao.getDepartments();
        model.addAttribute("depts",departments);
        System.out.println(employee);
        return "edit";
    }

    @PutMapping("/emp")
    public String edit(Employee employee){


        System.out.println(employee);
        employeeDao.save(employee);
        return "redirect:/emps";
    }

}
@GetMapping("/emp/{id}")在上面已经说明过了,占位符,然后@PathVariable("id")绑定ID获得值
8)员工删除
这个就比较简单了
<form th:action="@{/emp/}+${emp.id}" method="post">
	<input type="hidden" name="_method" value="delete">
	<button type="submit" class="btn btn-sm btn-danger">删除</button>
</form>
	//员工删除
    @DeleteMapping("/emp/{id}")
    public String deleteEmployee(@PathVariable("id") Integer id){


        System.out.println(id);
        employeeDao.delete(id);
        return "redirect:/emps";
    }
10、错误处理机制
1)定制错误页面
之前我们做了拦截器,如果没有登陆的话,就返回登陆页面,并且显示错误。
但是很多情况不允许这样的,要显示什么错误给别人看才好
先把拦截器给关掉,让错误有得显示
错误的文件放在哪里?
a.当有模板引擎
就是有thyme leaf的情况下,直接把error文件放在templates/error/xx.html。但是错误有很多种,spring boot帮我们写好了,只要写4xx.html和5xx.html文件就可(名字真的叫4xx.html)
其中,可以存放错误的信息
页面能获取的信息;
- timestamp:时间戳
- status:状态码
- error:错误提示
- exception:异常对象
- message:异常消息
- errors:JSR303数据校验的错误都在这里
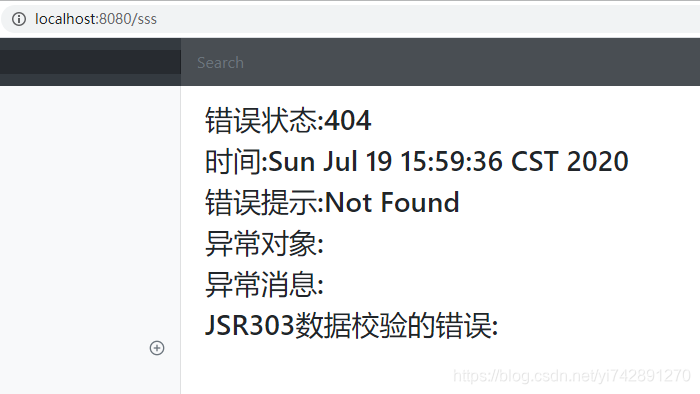
b.没有模板引擎,从静态资源下找4xx,5xx文件
c.没有写4xx,5xx文件,跳转到spring boot默认提示
<h3>错误状态:[[${status}]]</h3>
<h3>时间:[[${timestamp}]]</h3>
<h3>错误提示:[[${error}]]</h3>
<h3>异常对象:[[${exception}]]</h3>
<h3>异常消息:[[${message}]]</h3>
<h3>JSR303数据校验的错误:[[${errors}]]</h3>
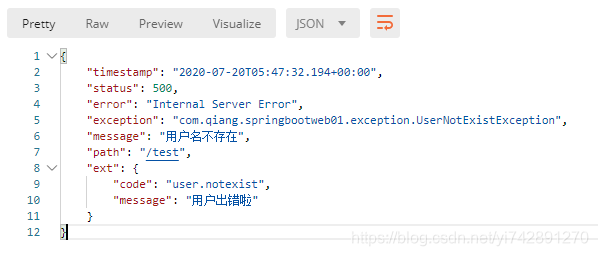
2)定制错误的json数据
由于spring boot的特性,当客户端访问的时候,如果产生错误,就会产生json数据给客户端。但是这个返回的json数据是默认的,spring boot可以额外地添加一些错误地json。
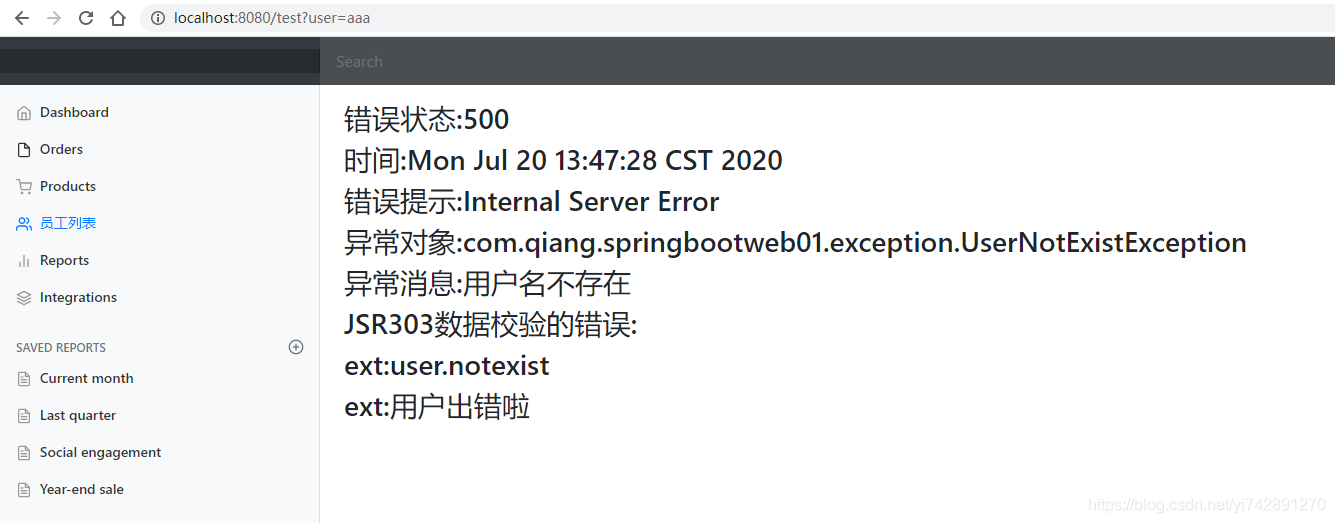
就比如一个例子,GET方式,访问user=aaa的时候产生自定义错误消息找不到该用户,如果user!=aaa则输入到正确的画面
application.properties进行配置
#在浏览器中可以异常
server.error.include-exception=true
#有异常后,异常信息(message)可以在浏览器中看到
server.error.include-message=always
这个因为新旧版本问题。。。会有很多地方不一样,现在用的是spring boot2020.01.x版本
这个新版本问题处理了我4个小时。。。
首先,我们自定义一个异常
public class UserNotExistException extends RuntimeException{


    public UserNotExistException(){


        super("用户名不存在");
    }
}
然后,比如我们在访问http://localhost:8080/test?user=aaa的时候,抛出异常。当user!=aaa,跳转到ok.html
@Controller
public class HelloController {


    @RequestMapping("/test")
    public String test(@RequestParam("user") String user){


        if (user.equals("aaa")){


            throw new UserNotExistException();
        }
        //返回templates/ok.html
        return "ok";
    }
}
接下来,我们要做两个类,分别是控制类和容器类,控制类就写错处跳转到哪个页面,然后还写客户端返回的数据。这里有个地方要知道的,比如访问http://localhost:8080/test?user=aaa,网页端显示的是错误的网页比如5xx.html,然后客户端返回的是一堆JSON数据。那么我们显示的错误不止是系统给我们的默认错误,我们还要显示我们设定的错误数据,那么就把想要自定义的错误数据写在控制类里面
控制类
@ControllerAdvice
public class MyExceptionHandler {


    @ExceptionHandler(UserNotExistException.class)
    public String handleException(Exception e, HttpServletRequest request){


        Map<String,Object> map = new HashMap<>();
        //传入我们自己的错误状态码  4xx 5xx
        /**
         * Integer statusCode = (Integer) request
         .getAttribute("javax.servlet.error.status_code");
         */
        request.setAttribute("javax.servlet.error.status_code",500);
        map.put("code","user.notexist");
        map.put("message","用户出错啦");

        request.setAttribute("ext",map);
        //转发到/error
        return "forward:/error";
    }
}
request.setAttribute("javax.servlet.error.status_code",500);,返回我们指定的错误页面,否则就会有其他的200,300错误,但spring只提供4xx,5xx错误设置给我们。这里返回500错误request.setAttribute("ext",map);:把想要自定义的错误添加到map中return "forward:/error";:spring boot会自动识别,寻找error文件夹下对应的文件
容器类:
@Component
public  class MyErrorArrtributes extends DefaultErrorAttributes {


    @Override
    public Map<String, Object> getErrorAttributes(WebRequest webRequest, ErrorAttributeOptions options) {


        Map<String, Object> map = super.getErrorAttributes(webRequest, options);
        Map<String,Object> ext = (Map<String, Object>) webRequest.getAttribute("ext", 0);
        map.put("ext",ext);
        return map;
    }

}
super.getErrorAttributes(webRequest, options);这里的map是获得系统的MAP,准备传过去JSON和在网页端显示的数据。Map<String,Object> ext = (Map<String, Object>) webRequest.getAttribute("ext", 0);和map.put("ext",ext);这两个我也不是很清楚。前者是获取上面的控制类的map,就是我们自定义的那些错误信息。后者是把这些错误信息传过去,让JSON和网页端都能看到
5xx.html主要内容:
<main role="main" class="col-md-9 ml-sm-auto col-lg-10 pt-3 px-4">
	<h3>错误状态:[[${status}]]</h3>
	<h3>时间:[[${timestamp}]]</h3>
	<h3>错误提示:[[${error}]]</h3>
	<h3>异常对象:[[${exception}]]</h3>
	<h3>异常消息:[[${message}]]</h3>
	<h3>JSR303数据校验的错误:[[${errors}]]</h3>
	<h3>ext:[[${ext.code}]]</h3>
	<h3>ext:[[${ext.message}]]</h3>
</main>
JSON数据:
11、配置嵌入式Servlet容器
1)定制Servlet相关的配置
之前我们做的修改端口号,可以在application.properties里面修改server.port=8083
也可以在配置类里面写,但配置类要继承了WebMvcConfigurer
@Configuration
public class MyMvcConfig implements WebMvcConfigurer {


    @Bean
    //和application.properties的配置操作一样
    public WebServerFactoryCustomizer webServerFactoryCustomizer(){


        return new WebServerFactoryCustomizer<ConfigurableWebServerFactory>() {


            @Override
            public void customize(ConfigurableWebServerFactory factory) {


                factory.setPort(8083);
            }
        };
    }
虽然这两个效果一样,但是在配置类里面能配置更多的东西
2)Servlet三大组件
三大组件分别是Servlet、Filter、Listener。
- Servlet:接受请求,处理请求,根据处理结果响应。
- Filter:在客户端到服务器的过程中,当发送请求时,如果有不符合的信息将会被filter进行拦截,如果符合则会进行放行,在服务器给客户端响应时也会进行判断 如果有不符合的信息将会被filter进行拦截,如果符合则会进行放行。
- Listener:监听器,就当有什么事情发生时,会产生对应的效果
三大组件大家约定都是各创建一个文件,业务先写操作。然后再创建一个关于Servlet的配置类,把各个组件都注册起来(使用@Bean注解),各个注册函数返回类型都是xxxxRegistrationBean
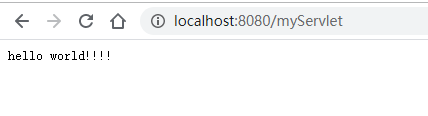
MyServlet :
public class MyServlet extends HttpServlet {


    @Override
    protected void doPost(HttpServletRequest req, HttpServletResponse resp) throws ServletException, IOException {


        resp.getWriter().write("hello world!!!!");
    }

    @Override
    protected void doGet(HttpServletRequest req, HttpServletResponse resp) throws ServletException, IOException {


        doPost(req,resp);
    }
}
MyFilter :
import javax.servlet.*;
import java.io.IOException;
//注意是javax.servlet.*;
public class MyFilter implements Filter {
@Override
public void init(FilterConfig filterConfig) throws ServletException {
}
@Override
public void destroy() {
}
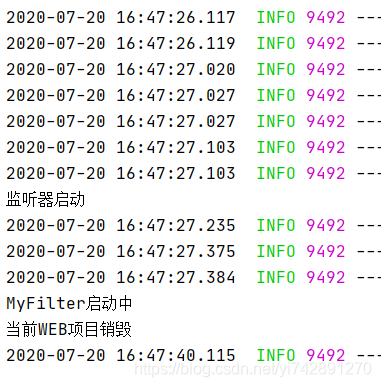
@Override
public void doFilter(ServletRequest servletRequest, ServletResponse servletResponse, FilterChain filterChain) throws IOException, ServletException {
System.out.println("MyFilter启动中");
filterChain.doFilter(servletRequest, servletResponse);
}
}
MyListener
package com.qiang.springbootweb01.listener;

import javax.servlet.ServletContextEvent;
import javax.servlet.ServletContextListener;

public class MyListener implements ServletContextListener {


    @Override
    public void contextInitialized(ServletContextEvent sce) {


        System.out.println("监听器启动");
    }

    @Override
    public void contextDestroyed(ServletContextEvent sce) {


        System.out.println("当前WEB项目销毁");
    }
}
MyServletConfig:配置类,注册三大组件
@Configuration
public class MyServletConfig {


    //注册Servlet
    @Bean
    public ServletRegistrationBean myServlet(){


//        当访问/myServlet的时候
        ServletRegistrationBean registrationBean = new ServletRegistrationBean(new MyServlet(),"/myServlet");
        return registrationBean;
    }

    //注册Filter
    @Bean
    public FilterRegistrationBean myFilter(){


        FilterRegistrationBean filterRegistrationBean = new FilterRegistrationBean();
        filterRegistrationBean.setFilter(new MyFilter());
//        过滤这两个请求
        filterRegistrationBean.setUrlPatterns(Arrays.asList("/hello","/myServlet"));
        return filterRegistrationBean;
    }
//
    //注册Linster
    @Bean
    public ServletListenerRegistrationBean myListener(){


        ServletListenerRegistrationBean<MyListener> registrationBean = new ServletListenerRegistrationBean<>(new MyListener());
        return registrationBean;
    }

//修改端口号
//    @Bean
//    //和application.properties的配置操作一样
//    public WebServerFactoryCustomizer webServerFactoryCustomizer(){


//        return new WebServerFactoryCustomizer<ConfigurableWebServerFactory>() {


//            @Override
//            public void customize(ConfigurableWebServerFactory factory) {


//                factory.setPort(8083);
//            }
//        };
//    }
}
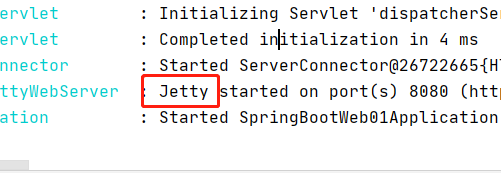
3)替换为其他嵌入式Servlet容器
默认使用tomcat的Servlet容器,但主流还有Jetty和Undertow的Servlet。
切换教程:
- 先把tomcat禁用,pom.xml里面设置
<dependency>
  <groupId>org.springframework.boot</groupId>
    <artifactId>spring-boot-starter-web</artifactId>
    <exclusions>
<!--                排除了tomcat-->
        <exclusion>
            <artifactId>spring-boot-starter-tomcat</artifactId>
            <groupId>org.springframework.boot</groupId>
        </exclusion>
    </exclusions>
</dependency>
- 引入其他Servlet
<!--引入其他的Servlet容器-->
<dependency>
    <artifactId>spring-boot-starter-jetty</artifactId>
    <groupId>org.springframework.boot</groupId>
</dependency>
或者
<!--引入其他的Servlet容器-->
<dependency>
   <artifactId>spring-boot-starter-undertow</artifactId>
   <groupId>org.springframework.boot</groupId>
</dependency>
默认:

修改后
目前为止的代码 下载02