这里介绍一种使用spring-boot开发web-模板引擎JSP的方式。这种方式不符合前后端分离的设计方式,权做记录。
开发环境 Intellij IDEA ,java spring-boot
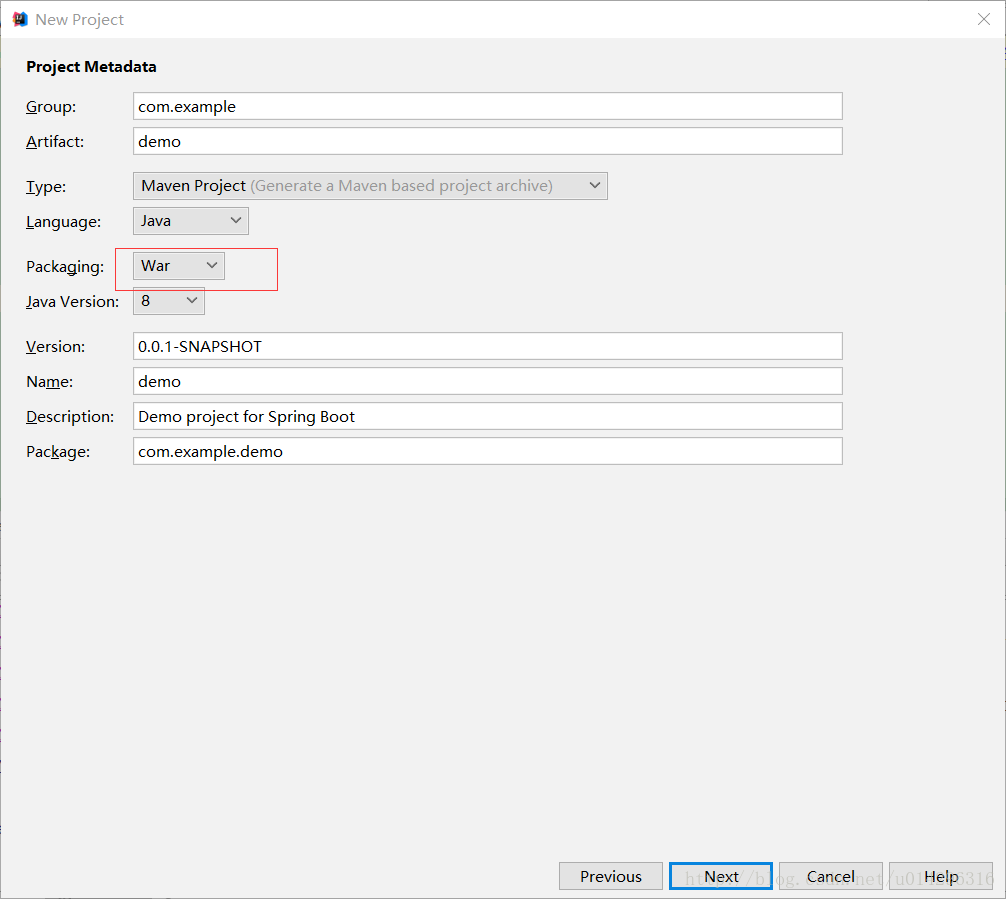
1.首先创建一个spring-boot项目,packaging要选为War包格式
2.依赖包要选择web应用

3.创建好项目后在pom.xml中添加如下依赖(jquery,jsp,jstl)
<dependency>
<groupId>org.webjars</groupId>
<artifactId>jquery</artifactId>
<version>2.1.4</version>
</dependency>
<dependency>
<groupId>org.apache.tomcat.embed</groupId>
<artifactId>tomcat-embed-jasper</artifactId>
</dependency>
<dependency>
<groupId>javax.servlet</groupId>
<artifactId>jstl</artifactId>
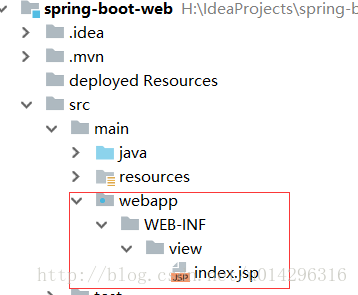
</dependency>4.在main包下创建webapp/WEB-INF/view目录,并在view目录下创建jsp文件
5.在配置文件中添加配置参数
spring.mvc.view.prefix= /WEB-INF/view/
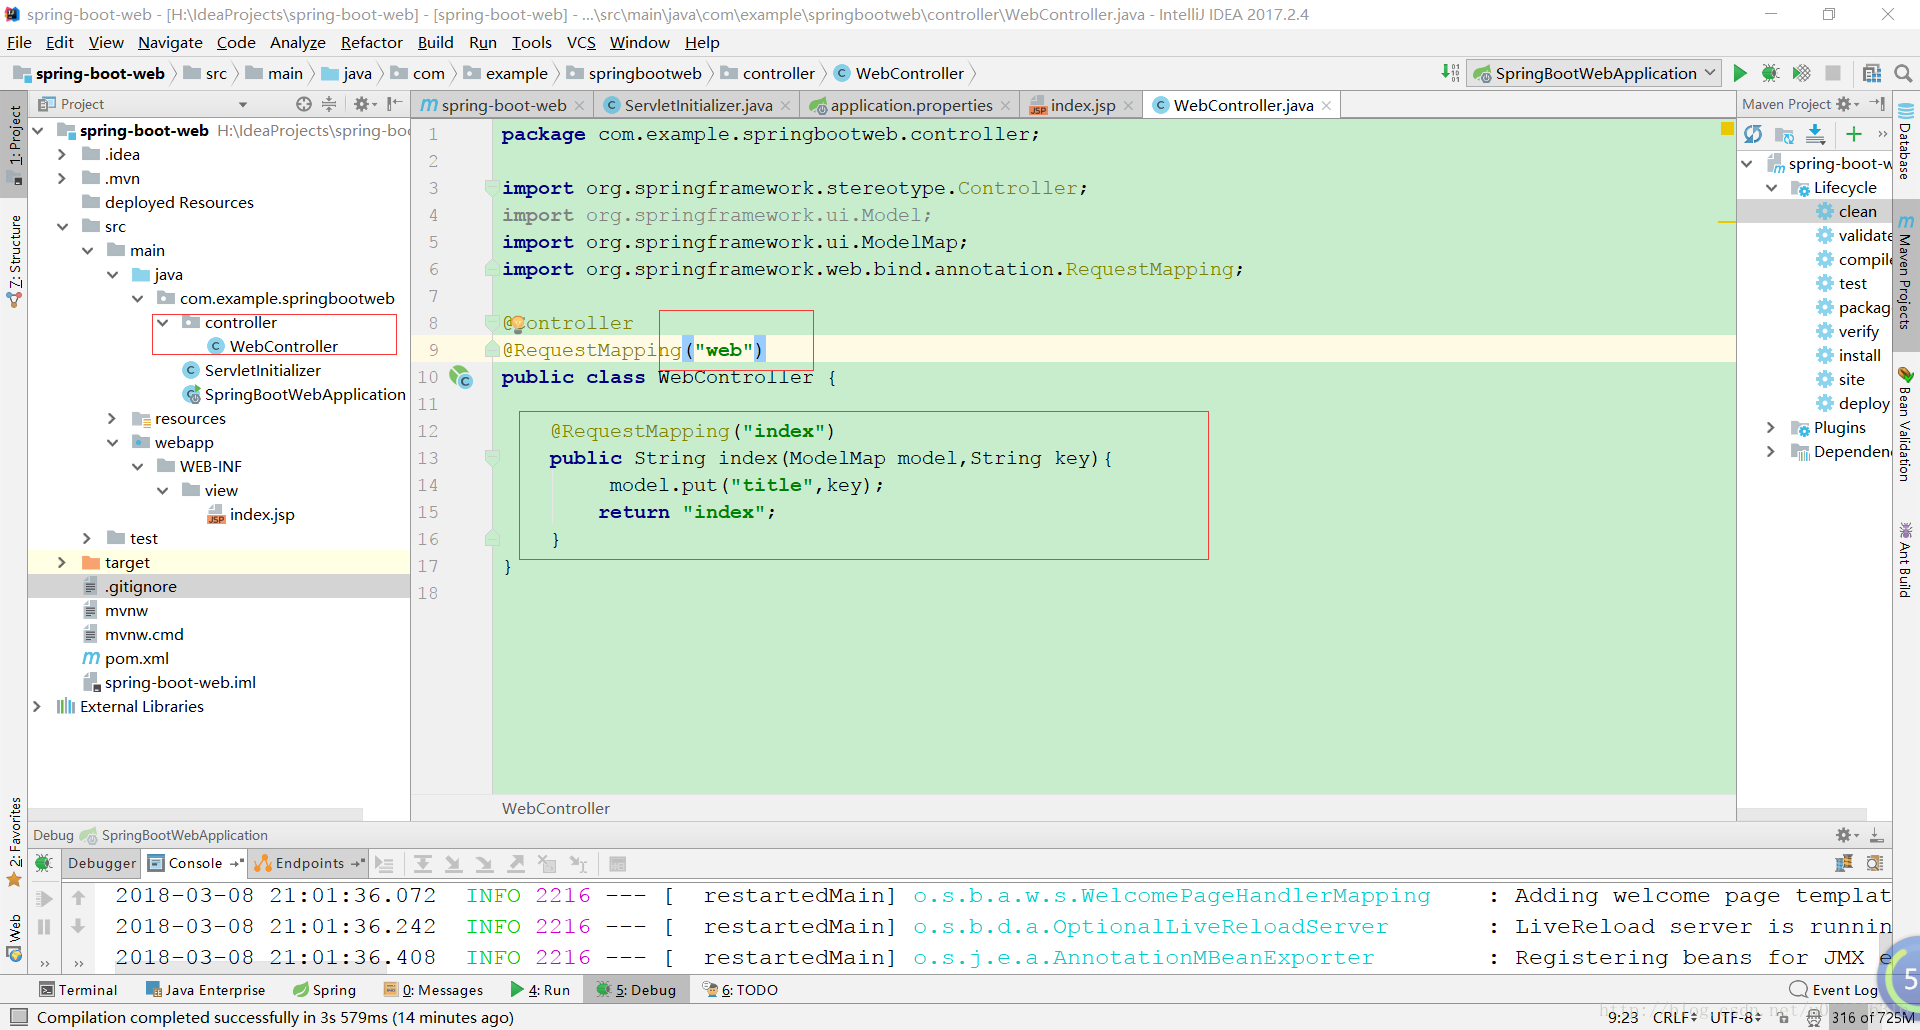
spring.mvc.view.suffix= .jsp6.创建Contoller
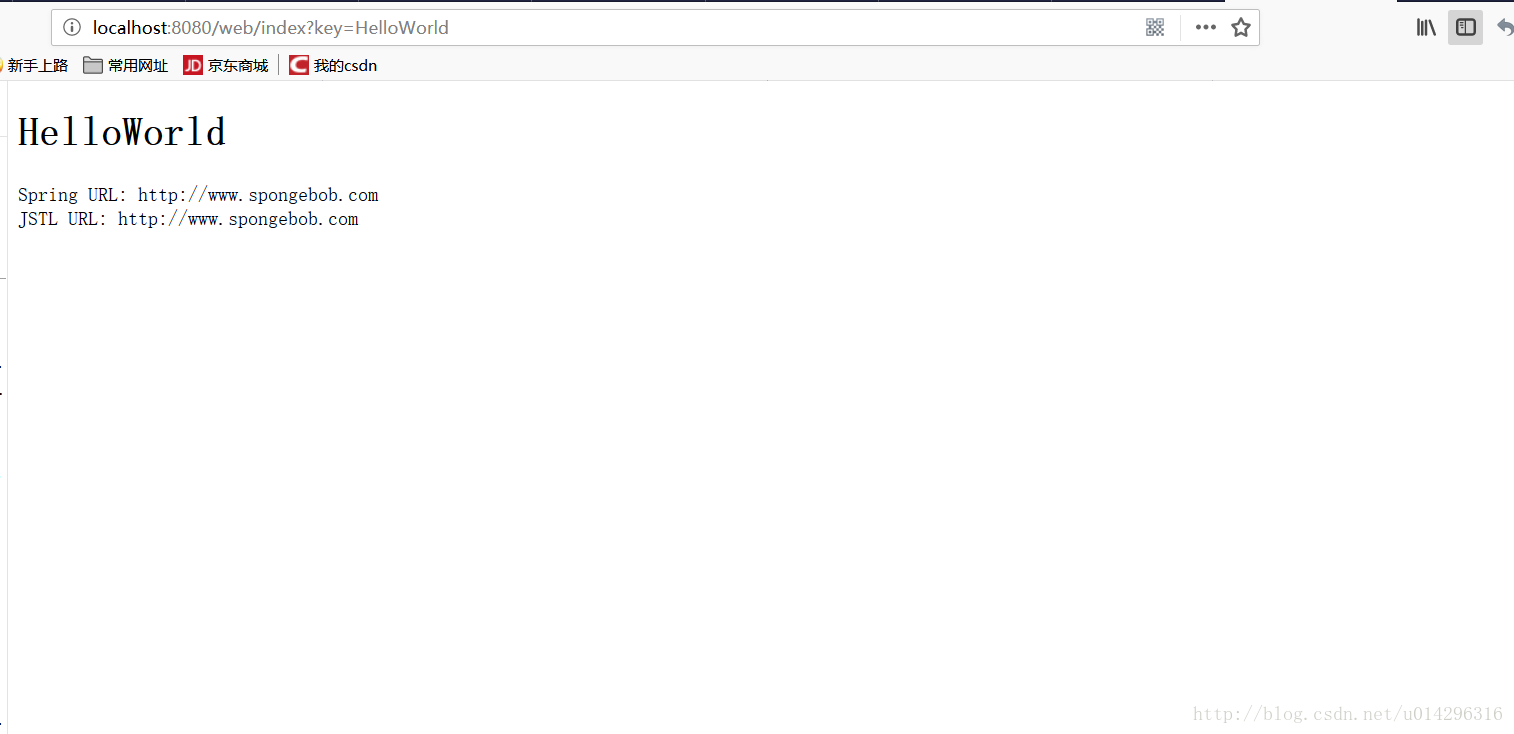
7.启动项目,便可以通过路径localhost:8080/web/index?key=HelloWord访问页面。
原index.jsp代码
<%@ taglib prefix="spring" uri="http://www.springframework.org/tags"%>
<%@ taglib prefix="c" uri="http://java.sun.com/jsp/jstl/core"%>

<!DOCTYPE html>
<html>
<head lang="en">
    <title>Spring Boot Demo - FreeMarker</title>
</head>
<body>
    <h1 id="title">${title}</h1>
    <c:url value="http://www.spongebob.com" var="url"/>
    <spring:url value="http://www.spongebob.com" htmlEscape="true" var="springUrl" />
    Spring URL: ${springUrl}
    <br>
    JSTL URL: ${url}
</body>
</html>
success!!!
springboot中已经无需添加web.xml文件了,在于servlet3.0中支持用注解的方式替代web.xml,但还是要转载一下web.xml的配置详情以供参考
http://www.cnblogs.com/hafiz/p/5715523.html