系列文章
SpringBoot 01 —— HelloSpringBoot、yaml配置、数据校验、多环境切换
SpringBoot 02 —— Web简单探究、员工管理系统
SpringBoot 03 —— Spring Security
SpringBoot 04 —— Shiro
十一、Spring Security
简介
Spring Security是一个功能强大且可高度定制的关于身份验证和访问控制的框架。 它是用于保护基于Spring的应用程序的标准。
SpringSecurity是来解决Web开发的安全性问题,就像之前我们写过的过滤器和拦截器,而SpringSecurity就相当于过滤器的一个框架,能帮我们省略很多代码。
比如之前我们用拦截器或者过滤器来进行访问控制,要求用户必须登录才能进入主页面,或者对于权限不同的用户进入的页面也不同等,但之前写的代码都较为复杂、冗余,而用框架就能简单实现。
需要记住几个关键类:
- WebSecurityConfigurerAdapter:自定义安全策略
- AuthenticationManagerBuilder:自定义认证策略
- @EnableWebSecurity:打开WebSecurity功能(看见@EnableXXX 就是开启某个功能)
Spring Security的两个主要目标就是"认证"和“授权”(也就是访问控制)。后面学习的Shiro也是一样的。
官方文档:https://spring.io/guides/gs/securing-web/
下面我们搭建一个常规的SpringBoot Web项目。
11.1、实验环境搭建
1、创建SpringBoot项目,添加Web模块,并导入Thymeleaf包。
<!--thymeleaf—— 命名空间xmlns:th="http://www.thymeleaf.org“ -->
<dependency>
  <groupId>org.springframework.boot</groupId>
  <artifactId>spring-boot-starter-thymeleaf</artifactId>
</dependency>

<dependency>
  <groupId>org.springframework.boot</groupId>
  <artifactId>spring-boot-starter-security</artifactId>
</dependency>
2、导入静态资源文件(从网上找的,可以不用这一步,只是为了让界面好看点,现在的操作都没涉及到security)
资源下载链接
链接: https://pan.baidu.com/s/1UoUJg6CsHm5bQbouYt609A 提取码: nv8p
CSDN:https://download.csdn.net/download/qq_39763246/15982736
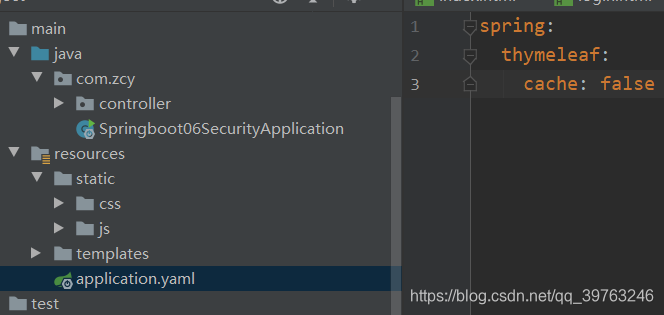
需要将Thymeleaf的缓存关闭

3、编写一个路由转发的Controller,将各个页面转发。
package com.zcy.controller;

import org.springframework.stereotype.Controller;
import org.springframework.web.bind.annotation.PathVariable;
import org.springframework.web.bind.annotation.RequestMapping;

@Controller
//用户路由转发的Controller
public class RouterController {


  	//输入 localhost:8080或者localhost:8080/index都会跳转到首页
    @RequestMapping({

    "/index", "/"})
    public String index(){


        return "index";
    }

    @RequestMapping("/toLogin")
    public String toLogin(){


        return "views/login";
    }

    //通过Restful风格,在URL输入 level1/1就会跳转到1.html,输入level2/2就跳转到2.html
    @RequestMapping("/level1/{id}")
    public String level1(@PathVariable("id") int id){


        return "views/level1/"+id;
    }
    @RequestMapping("/level2/{id}")
    public String level2(@PathVariable("id") int id){


        return "views/level2/"+id;
    }
    @RequestMapping("/level3/{id}")
    public String level3(@PathVariable("id") int id){


        return "views/level3/"+id;
    }
}
4、效果


11.2、认证和授权
新建一个SecurityConfig.java
package com.zcy.config;

import org.springframework.security.config.annotation.authentication.builders.AuthenticationManagerBuilder;
import org.springframework.security.config.annotation.web.builders.HttpSecurity;
import org.springframework.security.config.annotation.web.configuration.EnableWebSecurity;
import org.springframework.security.config.annotation.web.configuration.WebSecurityConfigurerAdapter;
import org.springframework.security.crypto.bcrypt.BCryptPasswordEncoder;

//这里用到了AOP,横切的思想,不会去改变我们Controller的代码。类似于拦截器,但更强大!
@EnableWebSecurity
public class SecurityConfig extends WebSecurityConfigurerAdapter {


    //授权
    @Override
    protected void configure(HttpSecurity http) throws Exception {


        //链式编程

        //实现的功能:首页index 所有人都能访问,具体的功能也level 只能被有相应权限的人访问

        //给请求添加规则,使的访问level1下的所有请求都要有vip1权限
        http.authorizeRequests()
                .antMatchers("/").permitAll()
                .antMatchers("/level1/**").hasRole("vip1")
                .antMatchers("/level2/**").hasRole("vip2")
                .antMatchers("/level3/**").hasRole("vip3");

        //如果没有权限,默认跳转至登录页面。这是Spring Security里内置的
        http.formLogin();

    }
    //认证(Spring Security 5.0+ 要求对密码加密才能正常使用)
    @Override
    protected void configure(AuthenticationManagerBuilder auth) throws Exception {


        //从内存中读取用户(提前设定好的用户,真实开发还是从数据库中读取,后面Shiro再讲)
        auth.inMemoryAuthentication().passwordEncoder(new BCryptPasswordEncoder())
                .withUser("zcy1").password(new BCryptPasswordEncoder().encode("123456")).roles("vip1")
                .and()
                .withUser("zcy2").password(new BCryptPasswordEncoder().encode("123456")).roles("vip1", "vip2")
                .and()
                .withUser("zcy3").password(new BCryptPasswordEncoder().encode("123456")).roles("vip1", "vip2", "vip3");

        //从数据库读用户
    }
}
效果:
1、未登录时访问各个页面都会跳转到登录页面。可以发现URL栏的请求是 /login,但我们并没有写这个页面,我们的login是views/login。这个页面是Spring Security的http.formLogin();中提供的。

http.formLogin();的源码注解:


2、登录用户zcy1,只有vip1的权限,只能访问level1下的页面,访问其他页面会被拦截。


3、登录用户zcy3,拥有vip1、vip2、vip3,可以访问所有页面。

11.3、注销和权限控制
效果图:
- 未登录时

- 登录zcy1(注意,此时我们没有定制登录页面,用的是security内置的,所以点击登录按钮无效,只能URL输入/login)


-
注销zcy1,就返回到主页
-
登录zcy2


实现方法:
1、在index.html中添加注销
 <!--登录注销-->
<div class="right menu">
  <!--未登录-->
  <a class="item" th:href="@{/toLogin}">
    <i class="address card icon"></i> 登录
  </a>

  <!-- 注销 -->
  <a class="item" th:href="@{/logout}">
    <i class="sign-out card icon"></i> 注销
  </a>
</div>
2、在SecurityConfig.java中添加注销
//授权
@Override
protected void configure(HttpSecurity http) throws Exception {


  //链式编程

  //实现的功能:首页index 所有人都能访问,具体的功能也level 只能被有相应权限的人访问

  //给请求添加规则,使的访问level1下的所有请求都要有vip1权限
  http.authorizeRequests()
    .antMatchers("/").permitAll()
    .antMatchers("/views/level1/**").hasRole("vip1")
    .antMatchers("/views/level2/**").hasRole("vip2")
    .antMatchers("/views/level3/**").hasRole("vip3");

  //如果没有权限,默认跳转至一个内置登录页面/login。这是Spring Security里内置的。
  http.formLogin(); //.loginPage("可以在这里指定自己的登录页面);

 	//关闭网站防攻击,默认会开启,因为我们前端用的<a>,是用get方式提交,不安全。
 	http.csrf().disable();//如果没有这句,注销会404

  //开启注销功能,logoutSuccessUrl作用是注销成功跳转到新url,点击注销跳转到首页
  http.logout().logoutSuccessUrl("/");
}
http.logout()源码注释:


3、Thymeleaf整合Spring Security
我们原来定制化主页是利用后端传值给前端,前端进行判断,然后显示,例如
<div th:if="${session.user.name}">
  ...显示专属内容
</div>
现在我们在Thymeleaf中直接整合Spring Security
- 先导包
<!-- https://mvnrepository.com/artifact/org.thymeleaf.extras/thymeleaf-extras-springsecurity4 -->
<dependency>
    <groupId>org.thymeleaf.extras</groupId>
    <artifactId>thymeleaf-extras-springsecurity4</artifactId>
    <version>3.0.4.RELEASE</version>
</dependency>
-
降低Spring Boot版本至2.0.7(Thymeleaf不支持高版本去整合Security,现在一般不会去整合Security)
降低后,会下载新版本,2.0.7的版本,我们还需要改变junit的包,详情看下面图片。


-
修改index.html


11.4、记住我和定制登录页
1、记住我:不注销,重新进入该页面会自动登录
SecurityConfig.java的configure方法添加代码:
//记住我,原理:添加Cookie到浏览器,关闭浏览器重新进入页面后保持登录状态
http.rememberMe();//默认保存两周
效果:


2、定制登录页
修改SecurityConfig.java的configure方法:
//如果没有权限,默认跳转至一个内置登录页面/login。这是Spring Security里内置的。
//usernameParameter和passwordParameter指定前端传递过来的参数名称
//loginPage指定自己的登录页面
http.formLogin()
  .loginPage("/toLogin")
  .usernameParameter("user")
  .passwordParameter("pwd");
//.loginProcessingUrl("/login")可指定真正的URL,即在浏览器输入/toLogin,但请求是/login

//记住我,原理:添加Cookie到浏览器,关闭浏览器重新进入页面后保持登录状态
//默认保存两周.rememberMeParameter指定前端传递的参数名称
http.rememberMe()
  .rememberMeParameter("remember");
修改index.html,原来参数名是username和password,现在修改了。并新增一个单选框,记住我。

效果:主页点击登录按钮可以正常登录了,且具备记住我功能。
