教程:使用tensorflow-slim训练自己数据的图像分类器
本教程提供了使用深度学习框架tensorflow/models中的slim实现图像的分类问题,包括数据处理、网络训练、测试以及实时显示等。
运行环境:
Ubuntu18.04
cuda:10.0
cudnn: 7.6.5
Tensorflow:1.14
models: 1.13.0
1. 环境配置
环境的配置可参考我的另一篇博客:使用Tensorflow object detection API训练自己的数据教程中的环境配置教程。
2. 数据集处理
在slim文件夹下建立一个classification_test的文件夹,用来放置本教程中需要用到的文件。
2.1 获取数据
这里以官网提供的Flowers为例,对数据集进行下载。
在classification_test文件夹下建立data文件夹,用来存放数据。
cd slim/classification_test/data
wget http://download.tensorflow.org/example_images/flower_photos.tgz
tar zxf flower_photos.tgz
数据结构如下:
flower_photos
├── daisy
│ ├── 100080576_f52e8ee070_n.jpg
│ └── …
├── dandelion
├── LICENSE.txt
├── roses
├── sunflowers
└── tulips
 数据集中共包含5种不同的花,每种文件夹都包含相应花的图片,如daisy文件夹下的图像如下:

2.2 生成list列表文件
由于实际情况中我们自己的数据集并不一定把图片按类别放在不同的文件夹里,故我们生成list.txt来表示图片路径与标签的关系。
编写create_list.py文件如下:
import os
class_names_to_ids = {

    'daisy': 0, 'dandelion': 1, 'roses': 2, 'sunflowers': 3, 'tulips': 4}
data_dir = 'flower_photos/'
output_path = 'list.txt'
fd = open(output_path, 'w')
for class_name in class_names_to_ids.keys():
    images_list = os.listdir(data_dir + class_name)
    for image_name in images_list:
        fd.write('{}/{} {}\n'.format(class_name, image_name, class_names_to_ids[class_name]))
fd.close()
data_dir = 'flower_photos/'对应实际的数据集文件夹路径。
运行生成 list.txt 文件。
2.3 生成labels标签文件
为了方便后期查看label标签,也可以定义labels.txt:
daisy
dandelion
roses
sunflowers
tulips
2.4 生成训练集与验证集
编写 create_train_val_list.py 文件,随机生成训练集与验证集:
import random
_NUM_VALIDATION = 350
_RANDOM_SEED = 0
list_path = 'list.txt'
train_list_path = 'list_train.txt'
val_list_path = 'list_val.txt'
fd = open(list_path)
lines = fd.readlines()
fd.close()
random.seed(_RANDOM_SEED)
random.shuffle(lines)
fd = open(train_list_path, 'w')
for line in lines[_NUM_VALIDATION:]:
    fd.write(line)
fd.close()
fd = open(val_list_path, 'w')
for line in lines[:_NUM_VALIDATION]:
    fd.write(line)
fd.close()
_NUM_VALIDATION = 350为随机生成的验证数据集的数量。
运行生成list_train.txt和list_val.txt两个文件。
2.5 生成TFRecord数据
编写文件 create_TFRecord.py 如下:
import sys
sys.path.insert(0, '../models/slim/')
from datasets import dataset_utils
import math
import os
import tensorflow as tf
def convert_dataset(list_path, data_dir, output_dir, _NUM_SHARDS=5):
    fd = open(list_path)
    lines = [line.split() for line in fd]
    fd.close()
    num_per_shard = int(math.ceil(len(lines) / float(_NUM_SHARDS)))
    with tf.Graph().as_default():
        decode_jpeg_data = tf.placeholder(dtype=tf.string)
        decode_jpeg = tf.image.decode_jpeg(decode_jpeg_data, channels=3)
        with tf.Session('') as sess:
            for shard_id in range(_NUM_SHARDS):
                output_path = os.path.join(output_dir,
                    'data_{:05}-of-{:05}.tfrecord'.format(shard_id, _NUM_SHARDS))
                tfrecord_writer = tf.python_io.TFRecordWriter(output_path)
                start_ndx = shard_id * num_per_shard
                end_ndx = min((shard_id + 1) * num_per_shard, len(lines))
                for i in range(start_ndx, end_ndx):
                    sys.stdout.write('\r>> Converting image {}/{} shard {}'.format(
                        i + 1, len(lines), shard_id))
                    sys.stdout.flush()
                    image_data = tf.gfile.FastGFile(os.path.join(data_dir, lines[i][0]), 'rb').read()
                    image = sess.run(decode_jpeg, feed_dict={

    decode_jpeg_data: image_data})
                    height, width = image.shape[0], image.shape[1]
                    example = dataset_utils.image_to_tfexample(
                        image_data, b'jpg', height, width, int(lines[i][1]))
                    tfrecord_writer.write(example.SerializeToString())
                tfrecord_writer.close()
    sys.stdout.write('\n')
    sys.stdout.flush()
os.system('mkdir -p train')
convert_dataset('list_train.txt', 'flower_photos', 'train/')
os.system('mkdir -p val')
convert_dataset('list_val.txt', 'flower_photos', 'val/')
- sys.path.insert(0, ‘…/models/slim/’)为slim路径;
- convert_dataset(‘list_train.txt’, ‘flower_photos’,
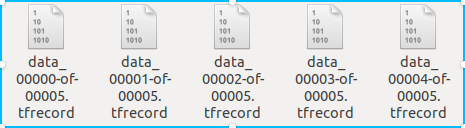
‘train/’)中list_train.txt为需要的训练数据列表文件,flower_photos为数据集所在文件,train/为生成的train文件夹; - 运行生成train和al两个文件夹,如下:
3. 下载预训练模型
所有slim图像分类模型下载网址
 在classification_test文件夹下建立checkpoints文件夹,存放预训练文件,下载并解压模型。
wget http://download.tensorflow.org/models/inception_resnet_v2_2016_08_30.tar.gz
tar zxf inception_resnet_v2_2016_08_30.tar.gz
4. 训练模型
4.1 读入数据
官方提供了读入Flowers数据集的代码models/slim/datasets/flowers.py,将其修改成能读入上面定义的通用数据集。
在classification_test文件夹下建立并编写dataset_classification.py文件:
import os
import tensorflow as tf
slim = tf.contrib.slim
def get_dataset(dataset_dir, num_samples, num_classes, labels_to_names_path=None, file_pattern='*.tfrecord'):
    file_pattern = os.path.join(dataset_dir, file_pattern)
    keys_to_features = {


        'image/encoded': tf.FixedLenFeature((), tf.string, default_value=''),
        'image/format': tf.FixedLenFeature((), tf.string, default_value='jpg'),
        'image/class/label': tf.FixedLenFeature(
            [], tf.int64, default_value=tf.zeros([], dtype=tf.int64)),
    }
    items_to_handlers = {


        'image': slim.tfexample_decoder.Image(),
        'label': slim.tfexample_decoder.Tensor('image/class/label'),
    }
    decoder = slim.tfexample_decoder.TFExampleDecoder(keys_to_features, items_to_handlers)
    items_to_descriptions = {


        'image': 'A color image of varying size.',
        'label': 'A single integer between 0 and ' + str(num_classes - 1),
    }
    labels_to_names = None
    if labels_to_names_path is not None:
        fd = open(labels_to_names_path)
        labels_to_names = {

    i : line.strip() for i, line in enumerate(fd)}
        fd.close()
    return slim.dataset.Dataset(
            data_sources=file_pattern,
            reader=tf.TFRecordReader,
            decoder=decoder,
            num_samples=num_samples,
            items_to_descriptions=items_to_descriptions,
            num_classes=num_classes,
            labels_to_names=labels_to_names)
4.2 构建模型
- 官方提供了许多模型在models/slim/nets/。
- 如需要自定义模型,则参考官方提供的模型并放在对应的文件夹即可。
- 我们将nets文件夹下的inception_resnet_v2.py文件复制到classification_test文件夹。
4.3 训练
官方提供了训练脚本:train_image_classifier.py
将其修改以适应自己的数据集,修改内容如下:
- 把
from datasets import dataset_factory
修改成
import dataset_classification
- 把
dataset = dataset_factory.get_dataset(
    FLAGS.dataset_name, FLAGS.dataset_split_name, FLAGS.dataset_dir)
修改成
dataset = dataset_classification.get_dataset(
    FLAGS.dataset_dir, FLAGS.num_samples, FLAGS.num_classes, FLAGS.labels_to_names_path)
- 在
tf.app.flags.DEFINE_string(
    'dataset_dir', None, 'The directory where the dataset files are stored.')
后面加入:
tf.app.flags.DEFINE_integer(
    'num_samples', 3320, 'Number of samples.')
tf.app.flags.DEFINE_integer(
    'num_classes', 5, 'Number of classes.')
tf.app.flags.DEFINE_string(
    'labels_to_names_path', None, 'Label names file path.')
- 可修改训练参数:
tf.app.flags.DEFINE_float('learning_rate', 0.01, 'Initial learning rate.')

tf.app.flags.DEFINE_float(
    'end_learning_rate', 0.0001,
    'The minimal end learning rate used by a polynomial decay learning rate.')

tf.app.flags.DEFINE_float(
    'label_smoothing', 0.0, 'The amount of label smoothing.')

tf.app.flags.DEFINE_float(
    'learning_rate_decay_factor', 0.94, 'Learning rate decay factor.')

 tf.app.flags.DEFINE_integer(                                          # batch_size
    'batch_size', 32, 'The number of samples in each batch.')

tf.app.flags.DEFINE_integer(
    'train_image_size', None, 'Train image size')

tf.app.flags.DEFINE_integer('max_number_of_steps', 300000,                # max_steps
                            'The maximum number of training steps.')
- 将上述train_image_classifier.py文件修改好后,建立train.sh文件:
python train_image_classifier.py \
    --train_dir=train_logs \
    --dataset_dir=./data/train \
    --num_samples=3320 \
    --num_classes=5 \
    --labels_to_names_path=./data/labels.txt \
    --model_name=inception_resnet_v2 \
    --checkpoint_path=./checkpoints/inception_resnet_v2_2016_08_30.ckpt \
    --checkpoint_exclude_scopes=InceptionResnetV2/Logits,InceptionResnetV2/AuxLogits \
    --trainable_scopes=InceptionResnetV2/Logits,InceptionResnetV2/AuxLogits
- 运行
bash train.sh
开始训练!!!
5. 验证模型
官方提供了验证脚本:eval_image_classifier.py
将其修改以适应自己的数据集,修改内容如下:
- 把
from datasets import dataset_factory
修改为:
from datasets import dataset_classification
- 把
dataset = dataset_factory.get_dataset(
    FLAGS.dataset_name, FLAGS.dataset_split_name, FLAGS.dataset_dir)
修改为:
dataset = dataset_classification.get_dataset(
    FLAGS.dataset_dir, FLAGS.num_samples, FLAGS.num_classes, FLAGS.labels_to_names_path)
- 在
tf.app.flags.DEFINE_string(
    'dataset_dir', None, 'The directory where the dataset files are stored.')
后面加入:
tf.app.flags.DEFINE_integer(
    'num_samples', 350, 'Number of samples.')
tf.app.flags.DEFINE_integer(
    'num_classes', 5, 'Number of classes.')
tf.app.flags.DEFINE_string(
    'labels_to_names_path', None, 'Label names file path.')
- 修改好后,建立eval.sh文件
python eval_image_classifier.py \
    --checkpoint_path=train_logs \
    --eval_dir=eval_logs \
    --dataset_dir=./data/val \
    --num_samples=350 \
    --num_classes=5 \
    --model_name=inception_resnet_v2
- 运行
bash eval.sh
开始验证!!!
6. 可视化
运行
tensorboard --logdir train_logs/ --port 6007
tensorboard --logdir eval_logs/ --port 6007
分别可视化训练和验证的结果。
7. 模型导出
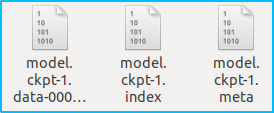
在训练完成后,在train_log文件夹内会生成 .data .index 和 .meta三个文件,需要将其导出转化成 .pb文件,方便后续的调用。
7.1 导出包含模型体系的GraphDef
建立export_inference_graph.sh文件,调用export_inference_graph.py文件对网络模型体系进行导出到output_model_pb文件夹内。
python export_inference_graph.py \
  --alsologtostderr \
  --model_name=inception_resnet_v2 \
  --output_file=./output_model_pb/inception_resnet_v2_inf_graph.pb \
  --dataset_name flowers
7.2 冻结网络模型
tensorflow在训练过程中,通常不会将权重数据保存的格式文件里,反而是分开保存在一个叫checkpoint的检查点文件里,当初始化时,再通过模型文件里的变量Op节点来从checkoupoint文件读取数据并初始化变量。这种模型和权重数据分开保存的情况,使得发布产品时不是那么方便,所以便有了freeze_graph.py脚本文件用来将这两文件整合合并成一个文件。
- 建立frozen_graph.sh文件,调用freeze_graph.py文件对冻结的网络模型导出到output_model_pb文件夹内。
python3 -m tensorflow.python.tools.freeze_graph \
  --input_graph output_model_pb/inception_resnet_v2_inf_graph.pb \
  --input_checkpoint ./train_logs/model.ckpt-306187 \
  --input_binary true \
  --output_node_names InceptionResnetV2/Logits/Predictions \
  --output_graph ./output_model_pb/frozen_graph.pb
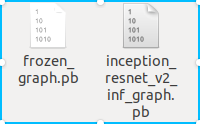
- 此时,在output_model_pb文件夹内生成frozen_graph.pb(冻结pb文件)和inception_resnet_v2_inf_graph.pb(GraphDef的pb文件)2个文件。
8.调用pb文件进行图片预测
- 进行图片预测参考博客:
在tensorflow/slim下调用pb文件进行图像识别的预测 - 使用摄像头对图像进行实时的分类,参考博文:
使用camera在tensorflow/slim下调用pb文件进行图像识别的预测