0. 前提
本文针对场景识别,其中采用的模型是mobilenet_v2,如有需要,可替换成其他tf-slim支持模型;
1. 准备工作
(1)tf-slim源码
git clone 官方代码仓:https://github.com/tensorflow/models
(2)准备完成自己的场景数据集
我的数据集结构如下:

2. 将数据集转成tfrecord格式
操作均在slim文件夹下
(1)在datasets文件夹下,将download_and_convert_flowers.py文件,复制一份重新命名为:download_and_convert_place6.py,打开该文件进行修改,一共修改4处代码如下:
from __future__ import absolute_import
from __future__ import division
from __future__ import print_function

import math
import os
import random
import sys

import tensorflow as tf

from datasets import dataset_utils

# The URL where the Flowers data can be downloaded.
_DATA_URL = 'http://download.tensorflow.org/example_images/flower_photos.tgz'

# The number of images in the validation set.
_NUM_VALIDATION = 350

# Seed for repeatability.
_RANDOM_SEED = 0

# The number of shards per dataset split.
_NUM_SHARDS = 5


class ImageReader(object):
  """Helper class that provides TensorFlow image coding utilities."""

  def __init__(self):
    # Initializes function that decodes RGB JPEG data.
    self._decode_jpeg_data = tf.placeholder(dtype=tf.string)
    self._decode_jpeg = tf.image.decode_jpeg(self._decode_jpeg_data, channels=3)

  def read_image_dims(self, sess, image_data):
    image = self.decode_jpeg(sess, image_data)
    return image.shape[0], image.shape[1]

  def decode_jpeg(self, sess, image_data):
    image = sess.run(self._decode_jpeg,
                     feed_dict={self._decode_jpeg_data: image_data})
    assert len(image.shape) == 3
    assert image.shape[2] == 3
    return image


def _get_filenames_and_classes(dataset_dir):
  """Returns a list of filenames and inferred class names.

  Args:
    dataset_dir: A directory containing a set of subdirectories representing
      class names. Each subdirectory should contain PNG or JPG encoded images.

  Returns:
    A list of image file paths, relative to `dataset_dir` and the list of
    subdirectories, representing class names.
  """
#改为自己的数据集
  flower_root = os.path.join(dataset_dir, 'place_photos')
  directories = []
  class_names = []
  for filename in os.listdir(flower_root):
    path = os.path.join(flower_root, filename)
    if os.path.isdir(path):
      directories.append(path)
      class_names.append(filename)

  photo_filenames = []
  for directory in directories:
    for filename in os.listdir(directory):
      path = os.path.join(directory, filename)
      photo_filenames.append(path)

  return photo_filenames, sorted(class_names)


def _get_dataset_filename(dataset_dir, split_name, shard_id):
#修改为place6
  output_filename = 'place6_%s_%05d-of-%05d.tfrecord' % (
      split_name, shard_id, _NUM_SHARDS)
  return os.path.join(dataset_dir, output_filename)


def _convert_dataset(split_name, filenames, class_names_to_ids, dataset_dir):
  """Converts the given filenames to a TFRecord dataset.

  Args:
    split_name: The name of the dataset, either 'train' or 'validation'.
    filenames: A list of absolute paths to png or jpg images.
    class_names_to_ids: A dictionary from class names (strings) to ids
      (integers).
    dataset_dir: The directory where the converted datasets are stored.
  """
  assert split_name in ['train', 'validation']

  num_per_shard = int(math.ceil(len(filenames) / float(_NUM_SHARDS)))

  with tf.Graph().as_default():
    image_reader = ImageReader()

    with tf.Session('') as sess:

      for shard_id in range(_NUM_SHARDS):
        output_filename = _get_dataset_filename(
            dataset_dir, split_name, shard_id)

        with tf.python_io.TFRecordWriter(output_filename) as tfrecord_writer:
          start_ndx = shard_id * num_per_shard
          end_ndx = min((shard_id+1) * num_per_shard, len(filenames))
          for i in range(start_ndx, end_ndx):
            sys.stdout.write('\r>> Converting image %d/%d shard %d' % (
                i+1, len(filenames), shard_id))
            sys.stdout.flush()

            # Read the filename:
            image_data = tf.gfile.GFile(filenames[i], 'rb').read()
            height, width = image_reader.read_image_dims(sess, image_data)

            class_name = os.path.basename(os.path.dirname(filenames[i]))
            class_id = class_names_to_ids[class_name]

            example = dataset_utils.image_to_tfexample(
                image_data, b'jpg', height, width, class_id)
            tfrecord_writer.write(example.SerializeToString())

  sys.stdout.write('\n')
  sys.stdout.flush()


def _clean_up_temporary_files(dataset_dir):
  """Removes temporary files used to create the dataset.

  Args:
    dataset_dir: The directory where the temporary files are stored.
  """
  filename = _DATA_URL.split('/')[-1]
  filepath = os.path.join(dataset_dir, filename)
  tf.gfile.Remove(filepath)

  tmp_dir = os.path.join(dataset_dir, 'flower_photos')
  tf.gfile.DeleteRecursively(tmp_dir)


def _dataset_exists(dataset_dir):
  for split_name in ['train', 'validation']:
    for shard_id in range(_NUM_SHARDS):
      output_filename = _get_dataset_filename(
          dataset_dir, split_name, shard_id)
      if not tf.gfile.Exists(output_filename):
        return False
  return True


def run(dataset_dir):
  """Runs the download and conversion operation.

  Args:
    dataset_dir: The dataset directory where the dataset is stored.
  """
  if not tf.gfile.Exists(dataset_dir):
    tf.gfile.MakeDirs(dataset_dir)

  if _dataset_exists(dataset_dir):
    print('Dataset files already exist. Exiting without re-creating them.')
    return

#无需下载,此行注释
  #dataset_utils.download_and_uncompress_tarball(_DATA_URL, dataset_dir)
  photo_filenames, class_names = _get_filenames_and_classes(dataset_dir)
  class_names_to_ids = dict(zip(class_names, range(len(class_names))))

  # Divide into train and test:
  random.seed(_RANDOM_SEED)
  random.shuffle(photo_filenames)
  training_filenames = photo_filenames[_NUM_VALIDATION:]
  validation_filenames = photo_filenames[:_NUM_VALIDATION]

  # First, convert the training and validation sets.
  _convert_dataset('train', training_filenames, class_names_to_ids,
                   dataset_dir)
  _convert_dataset('validation', validation_filenames, class_names_to_ids,
                   dataset_dir)

  # Finally, write the labels file:
  labels_to_class_names = dict(zip(range(len(class_names)), class_names))
  dataset_utils.write_label_file(labels_to_class_names, dataset_dir)

#此行注释,避免删除原来照片
  #_clean_up_temporary_files(dataset_dir)
  print('\nFinished converting the Flowers dataset!')
(2)在slim文件夹下打开download_and_convert_data.py文件,添加如下两处代码:
from datasets import download_and_convert_place6
  elif FLAGS.dataset_name == 'place6':
    download_and_convert_place6.run(FLAGS.dataset_dir)
(3)最后运行如下命令:
python download_and_convert_data.py \
--dataset_name=place6 \
--dataset_dir=dataset的位置
完成后可以看到如下终端输出:
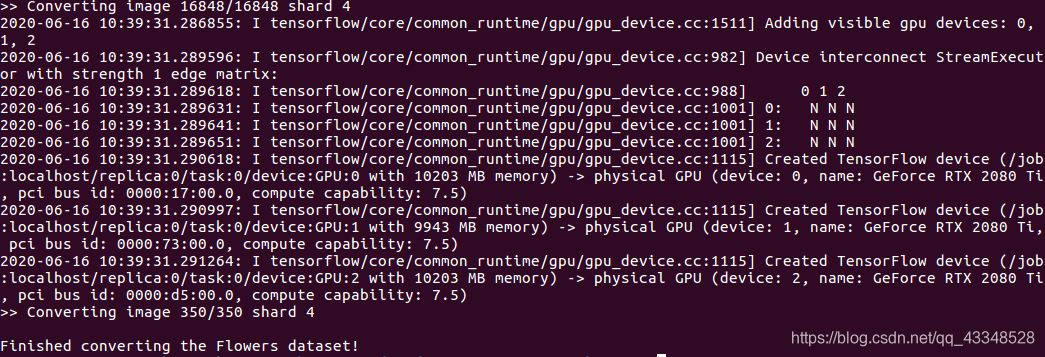 数据集被分为 16848 (训练集)和 350(验证集);
3. 模型训练过程
(1)将slim/datasets/flowers.py复制一份,并且命名为place6.py,将其中的3处内容修改如下:
可以知道,实际训练时的训练集设置为16198张图像,验证集设置为1000张图像;
_FILE_PATTERN = 'place6_%s_*.tfrecord'

SPLITS_TO_SIZES = {'train': 16198, 'validation': 1000}

_NUM_CLASSES = 7

_ITEMS_TO_DESCRIPTIONS = {
    'image': 'A color image of varying size.',
    'label': 'A single integer between 0 and 6',
}
(2)修改slim/datasets/dataset_factory.py内容,一共修改2处:
from datasets import place6
datasets_map = {
    'cifar10': cifar10,
    'flowers': flowers,
    'imagenet': imagenet,
    'mnist': mnist,
    'visualwakewords': visualwakewords,
    'place6':place6,
}
通过以下命令训练:
python3 train_image_classifier.py \
 --train_dir=/*/research/slim/mobilenet_v2_place6/training \
 --dataset_dir=/*/slim/intel_placedata/place6 \
 --dataset_name=place6 \
 --dataset_split_name=train \
 --model_name=mobilenet_v2 \
 --max_number_of_steps=40000 \
 --learning_rate=0.001 \
 --save_interval_secs=60 \
 --save_summaries_secs=60 \
 --log_every_n_steps=10 \
 --optimizer=adam \
训练时的终端输出如下:

通过tensorboard查看训练情况:
~/*/slim/mobilenet_v2_place6$ tensorboard --logdir=training

4. 评价(evaluation)训练结果
同样是在slim目录下,输入以下命令:
python3 eval_image_classifier.py \
  --checkpoint_path=/*/slim/mobilenet_v2_place6/training \
  --eval_dir=/*/slim/mobilenet_v2_place6/eval \
  --dataset_name=place6 \
  --dataset_split_name=validation \
  --dataset_dir=/*/slim/intel_placedata/place6 \
  --model_name=mobilenet_v2
5. 最终冻成pb文件(使用tensorflow模块功能导出)
两种方式:
(1)只用如下这个单步骤,会有问题,对于冻好的.pb文件会缺少第一个输入层,导致使用该.pb文件时报错说shape问题;
报错信息为:
(1,224,224,3)的shape和(32,224,224,3)的shape不一致;
python3 -m tensorflow.python.tools.freeze_graph \
  --input_graph /*/slim/mobilenet_v2_place6/training1/graph.pbtxt \
  --input_checkpoint /*/slim/mobilenet_v2_place6/training1/model.ckpt-50000 \
  --input_binary false \
  --output_graph /*/slim/mobilenet_v2_place6/model/mobilenet_v2place6_frozen.pb \
  --output_node_names MobilenetV2/Predictions/Reshape_1
(2)使用如下两个步骤可以正常使用,第一步先导出前向传播图,第二步再利用前向传播图+cpkt文件的参数导入到前向传播图中得到最终的.pb模型,这个就可以使用:
python export_inference_graph.py \
  --alsologtostderr \
  --dataset_dir=/*/slim/intel_placedata/place6 \
  --dataset_name=place6 \
  --model_name=mobilenet_v2 \
  --image_size=224 \
  --output_file=/*/slim/mobilenet_v2_place6/model/mobilenet_v2_inf.pb
python3 -m tensorflow.python.tools.freeze_graph \
  --input_graph /*/slim/mobilenet_v2_place6/model/mobilenet_v2_inf.pb \
  --input_checkpoint /*/slim/mobilenet_v2_place6/training1/model.ckpt-50000 \
  --input_binary True \
  --output_graph /*/slim/mobilenet_v2_place6/model/mobilenet_v2place61_frozen.pb \
  --output_node_names MobilenetV2/Predictions/Reshape_1
6. 利用pb文件随机预测一张图

预测代码(自己写的,较为简单):
- (1) 使用IPython,只能做到终端输出字符串,不能实现在图上写出结果
import tensorflow as tf
import numpy as np
import cv2
from datasets import dataset_utils
from IPython import display
import pylab
import PIL

image_dir='/*/slim/seg_pred/52.jpg'
dataset_dir='/*/slim/intel_placedata/place6'
model_dir ='/*/slim/mobilenet_v2_place6/model/mobilenet_v2place61_frozen.pb'


display.display(display.Image(image_dir))

img = np.array(PIL.Image.open(image_dir).resize((224, 224))).astype(np.float) / 128 - 1
gd = tf.GraphDef.FromString(open(model_dir, 'rb').read())
inp, predictions = tf.import_graph_def(gd,  return_elements = ['input:0','MobilenetV2/Predictions/Reshape_1:0'])

with tf.Session(graph=inp.graph):
  x = predictions.eval(feed_dict={inp: img.reshape(1, 224,224, 3)})

label_map = dataset_utils.read_label_file(dataset_dir)
print("Top 1 Prediction: ", x.argmax(),label_map[x.argmax()], x.max())
终端输出:

预测正确right!
- (2) 采用opencv+PIL (个人写的代码,可以直接在图片上显示出来分类)
import tensorflow as tf
import numpy as np
import cv2
from datasets import dataset_utils
from IPython import display
import pylab
import PIL
from PIL import Image
from PIL import ImageDraw
from PIL import ImageFont
import matplotlib.font_manager as fm

image_dir='/*/slim/seg_pred/52.jpg'
dataset_dir='/*/slim/intel_placedata/place6'
model_dir ='/*/slim/mobilenet_v2_place6/model/mobilenet_v2place61_frozen.pb'


#opencv
class TOD(object):
  def __init__(self):
    self.PATH_TO_CKPT = '/*/slim/mobilenet_v2_place6/model/mobilenet_v2place61_frozen.pb'
    self.NUM_CLASSES = 7
    self.detection_graph = self._load_model()
    self.label_map = dataset_utils.read_label_file(dataset_dir)

  def _load_model(self):
    detection_graph = tf.Graph()
    with detection_graph.as_default():
      od_graph_def = tf.GraphDef()
      with tf.gfile.GFile(self.PATH_TO_CKPT, 'rb') as fid:
        serialized_graph = fid.read()
        od_graph_def.ParseFromString(serialized_graph)
        tf.import_graph_def(od_graph_def, name='')
    return detection_graph

  def visualization(self,image,str):
    image_pil = Image.fromarray(np.uint8(image)).convert('RGB')
    draw = ImageDraw.Draw(image_pil)
    font = ImageFont.truetype(fm.findfont(fm.FontProperties(family='DejaVu Sans')), 15)  # 设置字体DejaVu Sans
    draw.text((10, 10), str, 'red', font)  # 'fuchsia'
    np.copyto(image, np.array(image_pil))
    return image

  def detect(self,image,resized):
    with self.detection_graph.as_default():
      with tf.Session(graph=self.detection_graph) as sess:
        # Expand dimensions since the model expects images to have shape: [1, None, None, 3]
        image_np_expanded = np.expand_dims(resized, axis=0)
        inp = self.detection_graph.get_tensor_by_name('input:0')
        predictions = self.detection_graph.get_tensor_by_name('MobilenetV2/Predictions/Reshape_1:0')
        x = predictions.eval(feed_dict={inp: image_np_expanded})
        font1 = str(self.label_map[x.argmax()])
        font2 = str(x.max())
        font3 = font1 + ":" + font2
        image = self.visualization(image,font3)
        #print("Top 1 Prediction: ", x.argmax(), self.label_map[x.argmax()], x.max())

    cv2.namedWindow("detection", cv2.WINDOW_NORMAL)
    cv2.imshow("detection", image)
    cv2.waitKey(0)


if __name__ == '__main__':
  image = cv2.imread(image_dir)
  # dst=cv2.cvtColor(src,cv2.COLOR_BGR2GRAY)
  width = 224
  height = 224
  dim = (width, height)

  # resize image to [-1,1] Maps pixel values to the range [-1, 1]
  resized = (cv2.resize(image, dim)).astype(np.float) / 128 - 1
  detecotr = TOD()
  detecotr.detect(image,resized)
