文章目录
- 一、Glance概述及配置
-
- 1.简单了解Glance镜像服务
- 2.配置流程
-
- 2.1 创建数据库实例和数据库用户
- 2.2 创建用户、修改配置文件
-
- 2.2.1 创建用户前,需要首先执行管理员环境变量脚本(此处已经在~/.bashrc 中定义过了)
- 2.2.2 创建镜像服务 API 端点,OpenStack使用三种API端点代表三种服务:admin、internal、public
- 2.2.3 安装 openstack-glance 软件包
- 2.2.4 修改glance配置文件,glance有两个配置文件:/etc/glance/glance-api.conf
- 2.2.5 添加glance-api.conf配置
- 2.2.6 通过cat命令来查看配置文件,查看传入的参数是否有错
- 2.2.7 修改glance-registry.conf 配置文件
- 2.2.8 通过cat命令来查看参数传入的情况
- 3. 数据库及服务的配置
- 3.2 开启glance服务(此处开启之后会生成存放镜像的目录/var/lib/glance/image)
- 3.4 赋予openstack-glance-api.service服务对存储设备的可写权限(-h:值对符号连接/软链接的文件修改)
- 4. 镜像的导入及查看
- 总结
一、Glance概述及配置
1.简单了解Glance镜像服务
1.1 什么是镜像
镜像的英文为Image,又译为映像,通常是指一系列或一个磁盘驱动器的精确副本(资源集合,可以作为模板使用)。镜像文件其实和ZIP压缩包类似,它将特定的一系列文件按照一定的格式制作成单一的文件,以方便用户下载和使用。
1.2 Glance镜像在OpenStack中是什么?
-
1.它在OpenStack中的项目名称为Glance。在早期的OpenStack版本中,Glance只有管理镜像的功能,并不具备镜像存储功能。现在,Glance已发展成为集镜像上传,检索,管理和存储等多种功能的OpenStack核心服务
-
2.即Glance随着OpenStack的版本迭代管理镜像,Glance服务功能越来越全面,精细化。
1.3 镜像服务
镜像服务就是用来管理镜像的,让用户能够发现(搜索扫描),获取(上传到服务器和识别)和保存镜像。在OpenStack中提供镜像服务的是Glance,其主要功能如下:
- 查询和获取镜像的元数据(镜像本身的属性,详细描述)和镜像本身
- 注册和上传虚拟机镜像,包括镜像的创建,上传,下载和管理
- 维护镜像信息(保持镜像为可用状态),包括元数据和镜像本身
- 支持多种方式存储镜像,包括普通的文件系统,Swift,Amazon S3等
- 对虚拟机实例执行创建快照命令来创建新的的镜像,或者备份虚拟机的状态
(目的:保证某一时刻的状态)
1.4 一个镜像从上传到可以使用的几个状态/过程
- 1、初始化过程 queued
- 2、导入数据库过程(镜像数据) saving
- 3、提交给服务识别过程(让服务可调用) uploading
- 4、准使用(服务已识别、可调用) importing
注意:镜像还没完全准备好给VM提供服务(预处理,可见,但未可使用)
1.5 以下标识的是镜像上载完成后的状态类型
- 1、active 表示可使用
- 2、deactivated: 表示只对管理员开放的权限
- 3、killed 表示镜像上传中发生错误
- 4、deletd . 镜像将在不久后自动删除,镜像不可用(保留数据)
- 5、pending_delete 与deleted类似, 但是删除后无法恢复
1.6 访问权限
- Public(公共的):可以被所有的项目使用
- Private(私有的):只有被镜像所有者所在的项目使用
- Shared(共享的):一个非共有的镜像可以共享给其他项目,这是通过项目成员(member-*)操作来实现的
- Protected(受保护的):这种镜像不能被删除
1.7 glance的工作流程
client的任务分发后,先向keystone认证,然后发给调度器,调度器根据需求分发给后端的子功能模块,子功能模块从数据库里拉取详细信息,把结果返回给api,最后返回给客户端
2.配置流程
2.1 创建数据库实例和数据库用户
[root@ct ~]# mysql -u root -p
MariaDB [(none)]> CREATE DATABASE glance;
MariaDB [(none)]> GRANT ALL PRIVILEGES ON glance.* TO 'glance'@'localhost' IDENTIFIED BY 'GLANCE_DBPASS';
MariaDB [(none)]> GRANT ALL PRIVILEGES ON glance.* TO 'glance'@'%' IDENTIFIED BY 'GLANCE_DBPASS';
MariaDB [(none)]> flush privileges;
MariaDB [(none)]> exit
2.2 创建用户、修改配置文件
创建OpenStack的Glance用户
2.2.1 创建用户前,需要首先执行管理员环境变量脚本(此处已经在~/.bashrc 中定义过了)
[root@ct ~]# openstack user create --domain default --password GLANCE_PASS glance
+---------------------+----------------------------------+
| Field               | Value                            |
+---------------------+----------------------------------+
| domain_id           | default                          |
| enabled             | True                             |
| id                  | 6608dfee2b914ce3861a949546fa67ea |
| name                | glance                           |
| options             | {

    }                               |
| password_expires_at | None                             |
+---------------------+----------------------------------+
[root@ct ~]# openstack role add --project service --user glance admin
[root@ct ~]# openstack service create --name glance --description "OpenStack Image" image
+-------------+----------------------------------+
| Field       | Value                            |
+-------------+----------------------------------+
| description | OpenStack Image                  |
| enabled     | True                             |
| id          | 8febba7c6b6340deb9c55f133d3513fc |
| name        | glance                           |
| type        | image                            |
+-------------+----------------------------------+
2.2.2 创建镜像服务 API 端点,OpenStack使用三种API端点代表三种服务:admin、internal、public
[root@ct ~]# openstack endpoint create --region RegionOne image public http://ct:9292
[root@ct ~]# openstack endpoint create --region RegionOne image internal http://ct:9292
[root@ct ~]# openstack endpoint create --region RegionOne image admin http://ct:9292
2.2.3 安装 openstack-glance 软件包
[root@ct ~]# yum -y install openstack-glance
2.2.4 修改glance配置文件,glance有两个配置文件:/etc/glance/glance-api.conf
/etc/glance/glance-registry.conf
[root@ct ~]# cp -a /etc/glance/glance-api.conf{

    ,.bak}

[root@ct ~]# grep -Ev '^$|#' /etc/glance/glance-api.conf.bak > /etc/glance/glance-api.conf
2.2.5 添加glance-api.conf配置
#传入修改的参数 # 可以通过shell脚本来一起传入参数,减小出错的可能性
openstack-config --set /etc/glance/glance-api.conf database connection mysql+pymysql://glance:GLANCE_DBPASS@ct/glance
openstack-config --set /etc/glance/glance-api.conf keystone_authtoken www_authenticate_uri http://ct:5000
openstack-config --set /etc/glance/glance-api.conf keystone_authtoken auth_url http://ct:5000
openstack-config --set /etc/glance/glance-api.conf keystone_authtoken memcached_servers ct:11211
openstack-config --set /etc/glance/glance-api.conf keystone_authtoken auth_type password
openstack-config --set /etc/glance/glance-api.conf keystone_authtoken project_domain_name Default
openstack-config --set /etc/glance/glance-api.conf keystone_authtoken user_domain_name Default
openstack-config --set /etc/glance/glance-api.conf keystone_authtoken project_name service
openstack-config --set /etc/glance/glance-api.conf keystone_authtoken username glance
openstack-config --set /etc/glance/glance-api.conf keystone_authtoken password GLANCE_PASS
openstack-config --set /etc/glance/glance-api.conf paste_deploy flavor keystone
openstack-config --set /etc/glance/glance-api.conf glance_store stores file,http
openstack-config --set /etc/glance/glance-api.conf glance_store default_store file
openstack-config --set /etc/glance/glance-api.conf glance_store filesystem_store_datadir /var/lib/glance/images/
2.2.6 通过cat命令来查看配置文件,查看传入的参数是否有错
[root@ct ~] cd /etc/glance
[root@ct glance]# cat glance-api.conf
[DEFAULT]
[cinder]
[cors]
[database]
connection = mysql+pymysql://glance:GLANCE_DBPASS@ct/glance
[file]
[glance.store.http.store]
[glance.store.rbd.store]
[glance.store.sheepdog.store]
[glance.store.swift.store]
[glance.store.vmware_datastore.store]

[glance_store]
stores = file,http					#存储类型,file:文件,http:基于api调用的方式,把镜像放到其他存储上
default_store = file					#默认存储方式
filesystem_store_datadir = /var/lib/glance/images/	##指定镜像存放的本地目录

[image_format]
[keystone_authtoken]
www_authenticate_uri = http://ct:5000			##指定认证的keystone的URI
auth_url = http://ct:5000
memcached_servers = ct:11211
auth_type = password
project_domain_name = Default
user_domain_name = Default
project_name = service				#glance用户针对service项目拥有admin权限
username = glance
password = GLANCE_PASS

[oslo_concurrency]
[oslo_messaging_amqp]
[oslo_messaging_kafka]
[oslo_messaging_notifications]
[oslo_messaging_rabbit]
[oslo_middleware]
[oslo_policy]

[paste_deploy]
flavor = keystone					#指定提供认证的服务器为keystone

[profiler]
[store_type_location_strategy]
[task]
[taskflow_executor]
2.2.7 修改glance-registry.conf 配置文件
#备份、过滤注释信息
cp -a /etc/glance/glance-registry.conf{

    ,.bak}
grep -Ev '^$|#' /etc/glance/glance-registry.conf.bak > /etc/glance/glance-registry.conf

#修改配置文件参数,同样可以用shell脚本来传参
openstack-config --set /etc/glance/glance-api.conf database connection mysql+pymysql://glance:GLANCE_DBPASS@ct/glance
openstack-config --set /etc/glance/glance-api.conf keystone_authtoken www_authenticate_uri http://ct:5000
openstack-config --set /etc/glance/glance-api.conf keystone_authtoken auth_url http://ct:5000
openstack-config --set /etc/glance/glance-api.conf keystone_authtoken memcached_servers ct:11211
openstack-config --set /etc/glance/glance-api.conf keystone_authtoken auth_type password
openstack-config --set /etc/glance/glance-api.conf keystone_authtoken project_domain_name Default
openstack-config --set /etc/glance/glance-api.conf keystone_authtoken user_domain_name Default
openstack-config --set /etc/glance/glance-api.conf keystone_authtoken project_name service
openstack-config --set /etc/glance/glance-api.conf keystone_authtoken username glance
openstack-config --set /etc/glance/glance-api.conf keystone_authtoken password GLANCE_PASS
openstack-config --set /etc/glance/glance-api.conf paste_deploy flavor keystone
openstack-config --set /etc/glance/glance-api.conf glance_store stores file,http
openstack-config --set /etc/glance/glance-api.conf glance_store default_store file
openstack-config --set /etc/glance/glance-api.conf glance_store filesystem_store_datadir /var/lib/glance/images/
#修改参数(配置与glance-api.conf相同)
openstack-config --set /etc/glance/glance-registry.conf database connection  mysql+pymysql://glance:GLANCE_DBPASS@t/glance
openstack-config --set /etc/glance/glance-registry.conf keystone_authtoken www_authenticate_uri   http://ct:5000
openstack-config --set /etc/glance/glance-registry.conf keystone_authtoken auth_url  http://ct:5000
openstack-config --set /etc/glance/glance-registry.conf keystone_authtoken memcached_servers  ct:11211
openstack-config --set /etc/glance/glance-registry.conf keystone_authtoken auth_type  password
openstack-config --set /etc/glance/glance-registry.conf keystone_authtoken project_domain_name  Default
openstack-config --set /etc/glance/glance-registry.conf keystone_authtoken user_domain_name  Default
openstack-config --set /etc/glance/glance-registry.conf keystone_authtoken project_name  service
openstack-config --set /etc/glance/glance-registry.conf keystone_authtoken username  glance
openstack-config --set /etc/glance/glance-registry.conf keystone_authtoken password  GLANCE_PASS
openstack-config --set /etc/glance/glance-registry.conf paste_deploy flavor  keystone
2.2.8 通过cat命令来查看参数传入的情况
[root@ct ~]# cd /etc/glance/
[root@ct glance]# cat glance-registry.conf
[DEFAULT]
[database]
connection = mysql+pymysql://glance:GLANCE_DBPASS@ct/glance
[keystone_authtoken]
www_authenticate_uri = http://ct:5000
auth_url = http://ct:5000
memcached_servers = ct:11211
auth_type = password
project_domain_name = Default
user_domain_name = Default
project_name = service
username = glance
password = GLANCE_PASS
[oslo_messaging_amqp]
[oslo_messaging_kafka]
[oslo_messaging_notifications]
[oslo_messaging_rabbit]
[oslo_policy]
[paste_deploy]
flavor = keystone
[profiler]
3. 数据库及服务的配置
3.1 初始化glance数据库,生成相关表结构;(不管有多少个controler,只需要初始化一次即可)
su -s /bin/sh -c "glance-manage db_sync" glance
3.2 开启glance服务(此处开启之后会生成存放镜像的目录/var/lib/glance/image)
[root@ct ~]# systemctl enable openstack-glance-api.service
[root@ct ~]# systemctl start openstack-glance-api.service
3.3 查看端口(也可以使用lsof -i:9292 )
[root@ct glance]# netstat -natp | grep 9292
tcp        0      0 0.0.0.0:9292            0.0.0.0:*               LISTEN      95169/python2
3.4 赋予openstack-glance-api.service服务对存储设备的可写权限(-h:值对符号连接/软链接的文件修改)
[root@ct ~]# chown -hR glance:glance /var/lib/glance/
4. 镜像的导入及查看
4.1 导入镜像
先上传cirros镜像到控制节点的/root,然后导入glance,最后查看是否创建成功
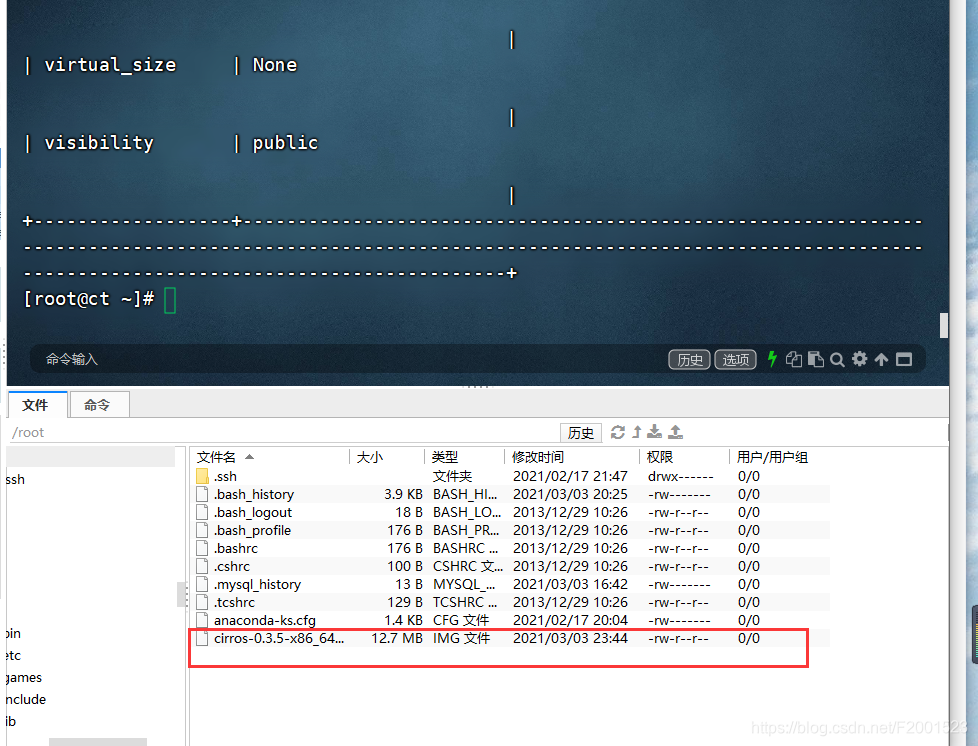
[root@ct ~]# openstack image create --file cirros-0.3.5-x86_64-disk.img --disk-format qcow2 --container-format bare --public cirros
4.2 查看镜像
方式一:
[root@ct ~]# openstack image list
+--------------------------------------+--------+--------+
| ID                                   | Name   | Status |
+--------------------------------------+--------+--------+
| 16bb5f76-4c7d-42b1-b16c-ce005b408bdd | cirros | active |
+--------------------------------------+--------+--------+
方式二:
[root@ct ~]# glance image-list
+--------------------------------------+--------+
| ID                                   | Name   |
+--------------------------------------+--------+
| 16bb5f76-4c7d-42b1-b16c-ce005b408bdd | cirros |
+--------------------------------------+--------+
总结
因为OpenStack上创建虚拟机需要镜像支持,所以先行进行部署
部署思路:
- 1、创建数据库、授权
- 2、创建openstack用户、授权、管理
- 3、修改配置文件(glance-api.conf、glance-registry.conf)
- 4、初始化数据库、上传实例镜像