Spring Boot MyBatis学习(一)
本文仅为记录自己的学习过程,其中很多问题还需要进一步的理解
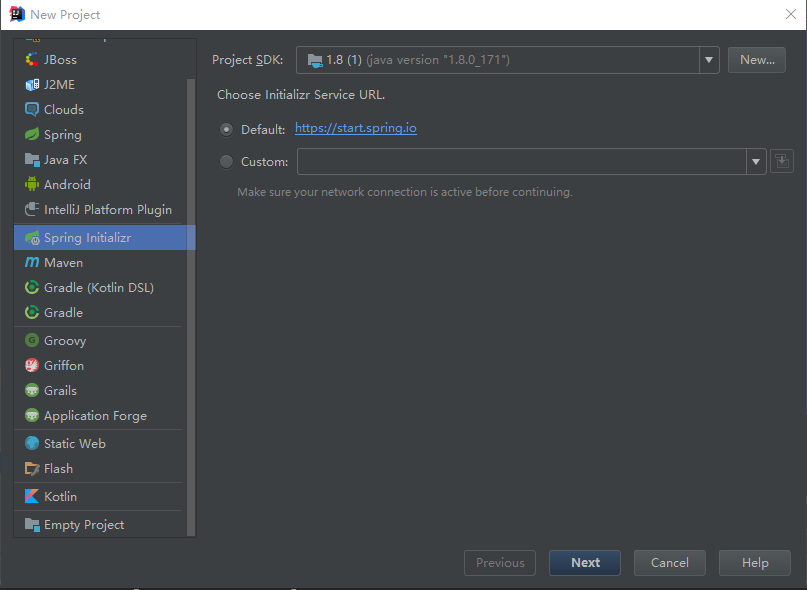
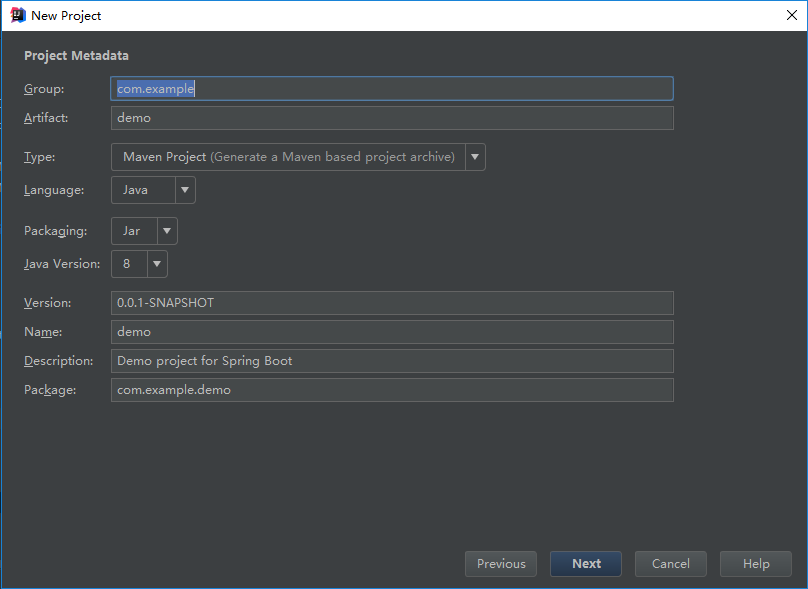
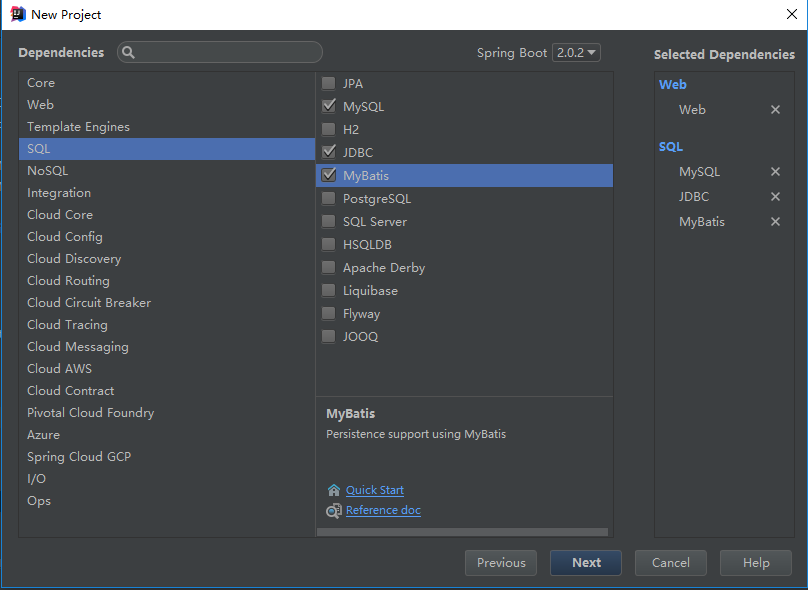
1.创建Spring Initializr项目
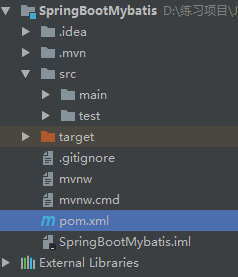
然后点Next、最后点Finsh即可。项目结构如下
二、创建、配置相应的配置文件
1、配置application.properties中的数据库信息
spring.datasource.driver-class-name=com.mysql.jdbc.Driver
spring.datasource.url=jdbc:mysql://localhost:3306/db_student
spring.datasource.username=root
spring.datasource.password=123456
2.在src/main/resources下创建mybatis.cfg.xml文件,内容如下:
<?xml version="1.0" encoding="UTF-8" ?>
<!DOCTYPE configuration PUBLIC "-/mybatis.org//DTD Config 3.0//EN"
        "http://mybatis.org/dtd/mybatis-3-config.dtd">
<configuration>
    <!--引入外部配置文件-->
    <properties resource="mysql.properties"></properties>

    <!--为Java Bean起类别名-->
    <typeAliases>
        <package name="com.example.beans"></package>
    </typeAliases>

    <!--配置myBatis运行环境-->
    <environments default="cybatis">
        <environment id="cybatis">
            <transactionManager type="JDBC"></transactionManager>
            <dataSource type="POOLED">
                <property name="driver" value="${jdbc.driver}"/>
                <property name="url" value="${jdbc.url}" />
                <property name="username" value="${jdbc.username}" />
                <property name="password" value="${jdbc.password}" />
            </dataSource>
        </environment>
    </environments>

    <mappers>
        <package name="com/example/mapper"></package>
    </mappers>
</configuration>
3.配置pom.xml,修改内容如下
<build>
		<resources>
			<resource>
				<directory>src/main/java</directory>
                <includes>
					<include>**/*.properties</include>
					<include>**/*.xml</include>
				</includes>
				<filtering>false</filtering>
			</resource>
		</resources>
		<plugins>
			<plugin>
				<groupId>org.springframework.boot</groupId>
				<artifactId>spring-boot-maven-plugin</artifactId>
			</plugin>
		</plugins>
	</build>
三、在java/com/example下创建beans包,在下面创建Student类,内容如下
该类主要对应着数据库中的tb_studentinfo数据表
package com.example.beans;

public class Student {
    private int id;
    private String name;
    private int age;
    private String address;

    //省略get和set方法
}
四、在java/com/example下创建mapper包
1.在包中创建StudentInfoMapper接口,内容如下:
package com.example.mapper;

import com.example.beans.Student;

import java.util.List;

public interface StudentInfoMapper {
    public List<Student> selectAllStudent() throws Exception;
}
2.在包中创建StudentInfoMapper.xml文件,内容如下:
<?xml version="1.0" encoding="UTF-8" ?>
<!DOCTYPE mapper
        PUBLIC "-//mybatis.org//DTD Mapper 3.0//EN"
        "http://mybatis.org/dtd/mybatis-3-mapper.dtd">
<mapper namespace="com.example.mapper.StudentInfoMapper">
    <!--自定义返回结果集-->
    <resultMap id="studentMap" type="Student">
        <id property="id" column="id" javaType="java.lang.Integer"></id>
        <result property="name" column="name" javaType="java.lang.String"></result>
        <result property="age" column="age" javaType="java.lang.Integer"/>
        <result property="address" column="address" javaType="java.lang.String"/>
    </resultMap>

    <select id="selectAllStudent" resultMap="studentMap">
        select * from tb_studentinfo
    </select>

</mapper>
五、在java/com/example下创建tools包,
创建DBTools类,该类主要用于获得SqlSession对象
package com.example.tools;

import org.apache.ibatis.io.Resources;
import org.apache.ibatis.session.SqlSession;
import org.apache.ibatis.session.SqlSessionFactory;
import org.apache.ibatis.session.SqlSessionFactoryBuilder;

import java.io.IOException;
import java.io.Reader;

public class DBTools {
    public static SqlSessionFactory sessionFactory;
    static{
        try {
            Reader reader= Resources.getResourceAsReader("mybatis.cfg.xml");
            sessionFactory=new SqlSessionFactoryBuilder().build(reader);
        } catch (IOException e) {
            e.printStackTrace();
        }
    }

    public static SqlSession getSession(){
        return sessionFactory.openSession();
    }
}
六、在java/com/example下创建service包,在包内创建StudentService类,内容如下:
package com.example.service;

import com.example.beans.Student;
import com.example.mapper.StudentInfoMapper;
import com.example.tools.DBTools;
import org.apache.ibatis.session.SqlSession;
import org.springframework.stereotype.Service;

import java.util.List;

public class StudentService {

    public List<Student> showAllStudents(){
        SqlSession session= DBTools.getSession();
        StudentInfoMapper mapper=session.getMapper(StudentInfoMapper.class);
        List<Student> students=null;
        try {
            students=mapper.selectAllStudent();
            session.commit();
        } catch (Exception e) {
            e.printStackTrace();
            session.rollback();
        }finally{
            session.close();
        }
        return students;
    }
}
七、在java/com/example/demo下创建controller包,在包内创建StudentController类,内容如下:
package com.example.demo.controller;

import com.example.beans.Student;
import com.example.service.StudentService;
import org.springframework.web.bind.annotation.RequestMapping;
import org.springframework.web.bind.annotation.RestController;

@RestController
public class StudentController {

    private StudentService studentService=new StudentService();

    @RequestMapping("/studentinfo")
    public String showStudentInfo(){
        String name=null;
        for(Student s:studentService.showAllStudents()){
            name=name+s.getName()+"  ";
        }
        return name;
    }

    @RequestMapping("/")
    public String Index(){
        return "Hello Spring-Boot";
    }
}
八、启动程序,打开浏览器进行测试