Springcloud
十三、SpringCloud Config分布式配置中心
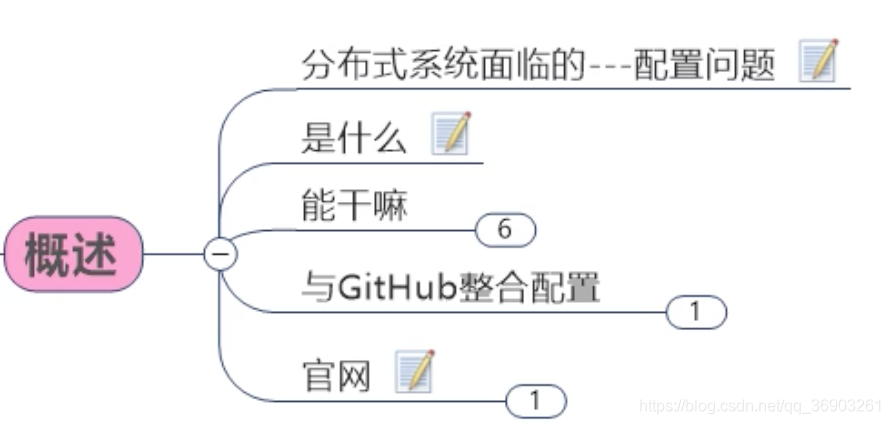


Config【服务端】配置与测试
-
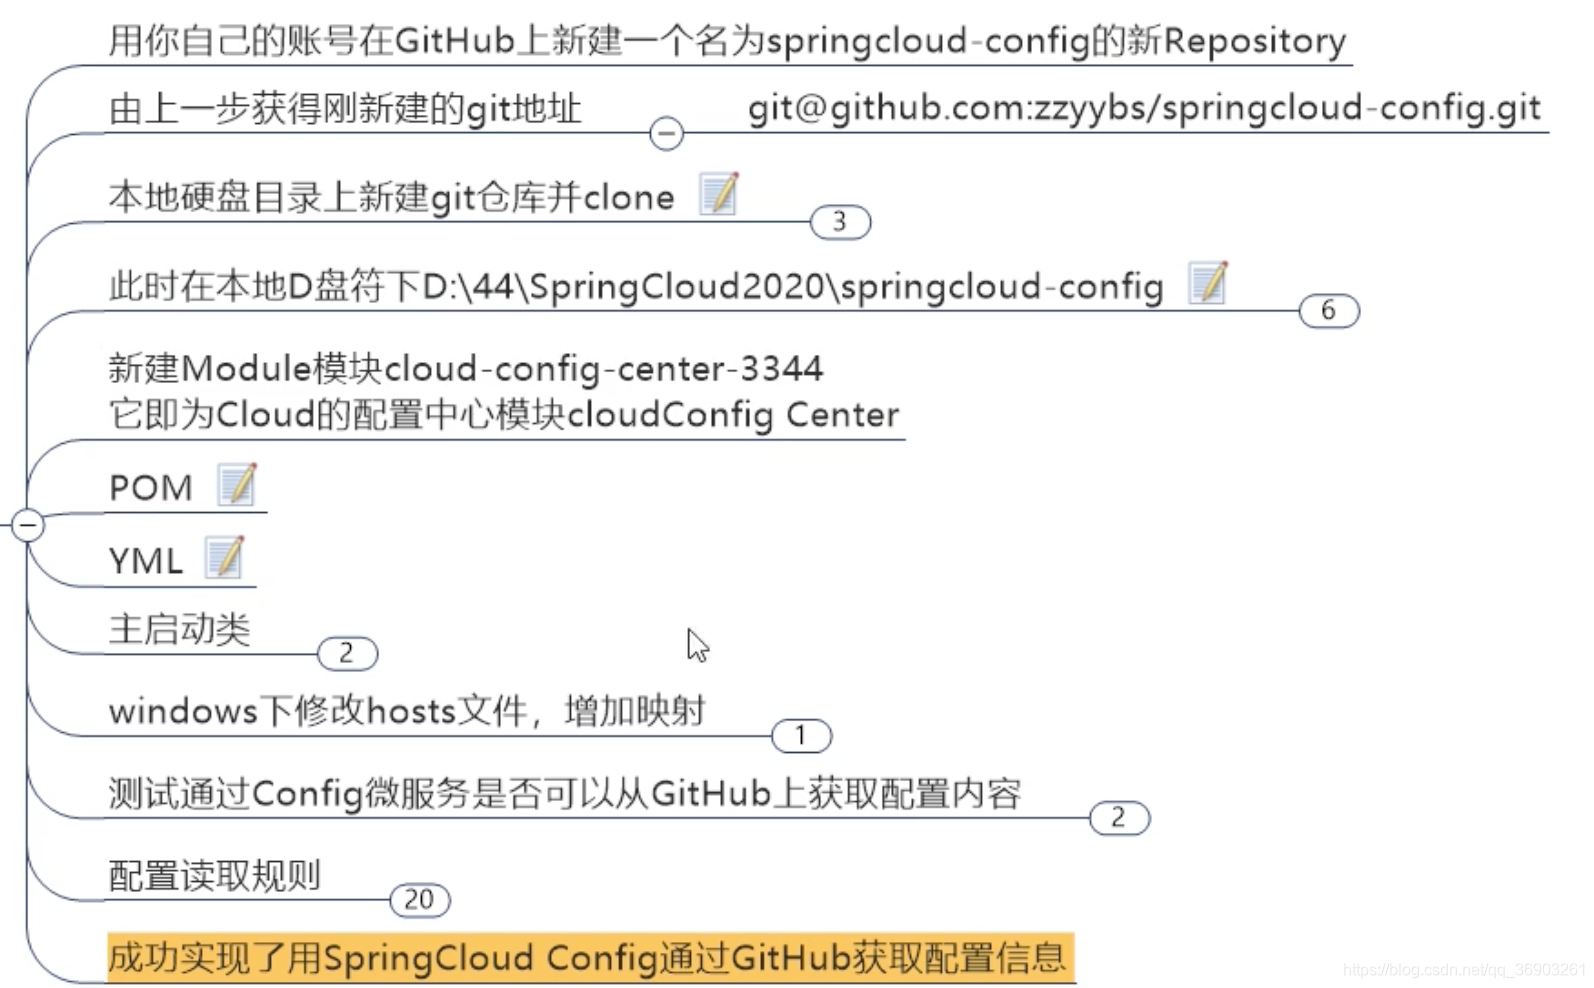
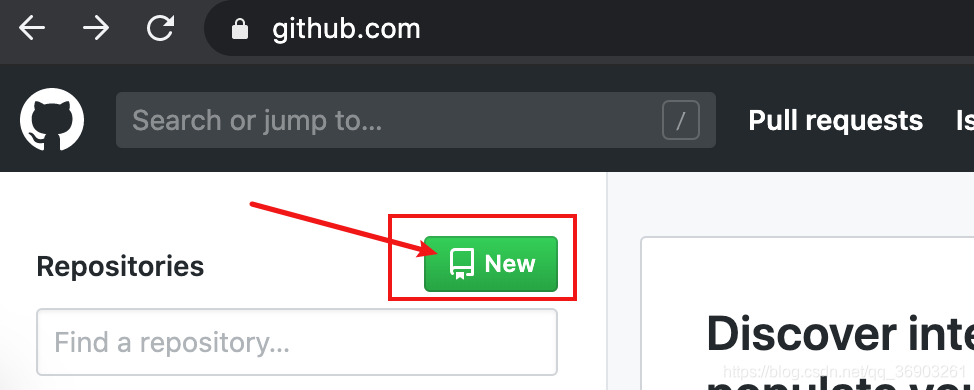
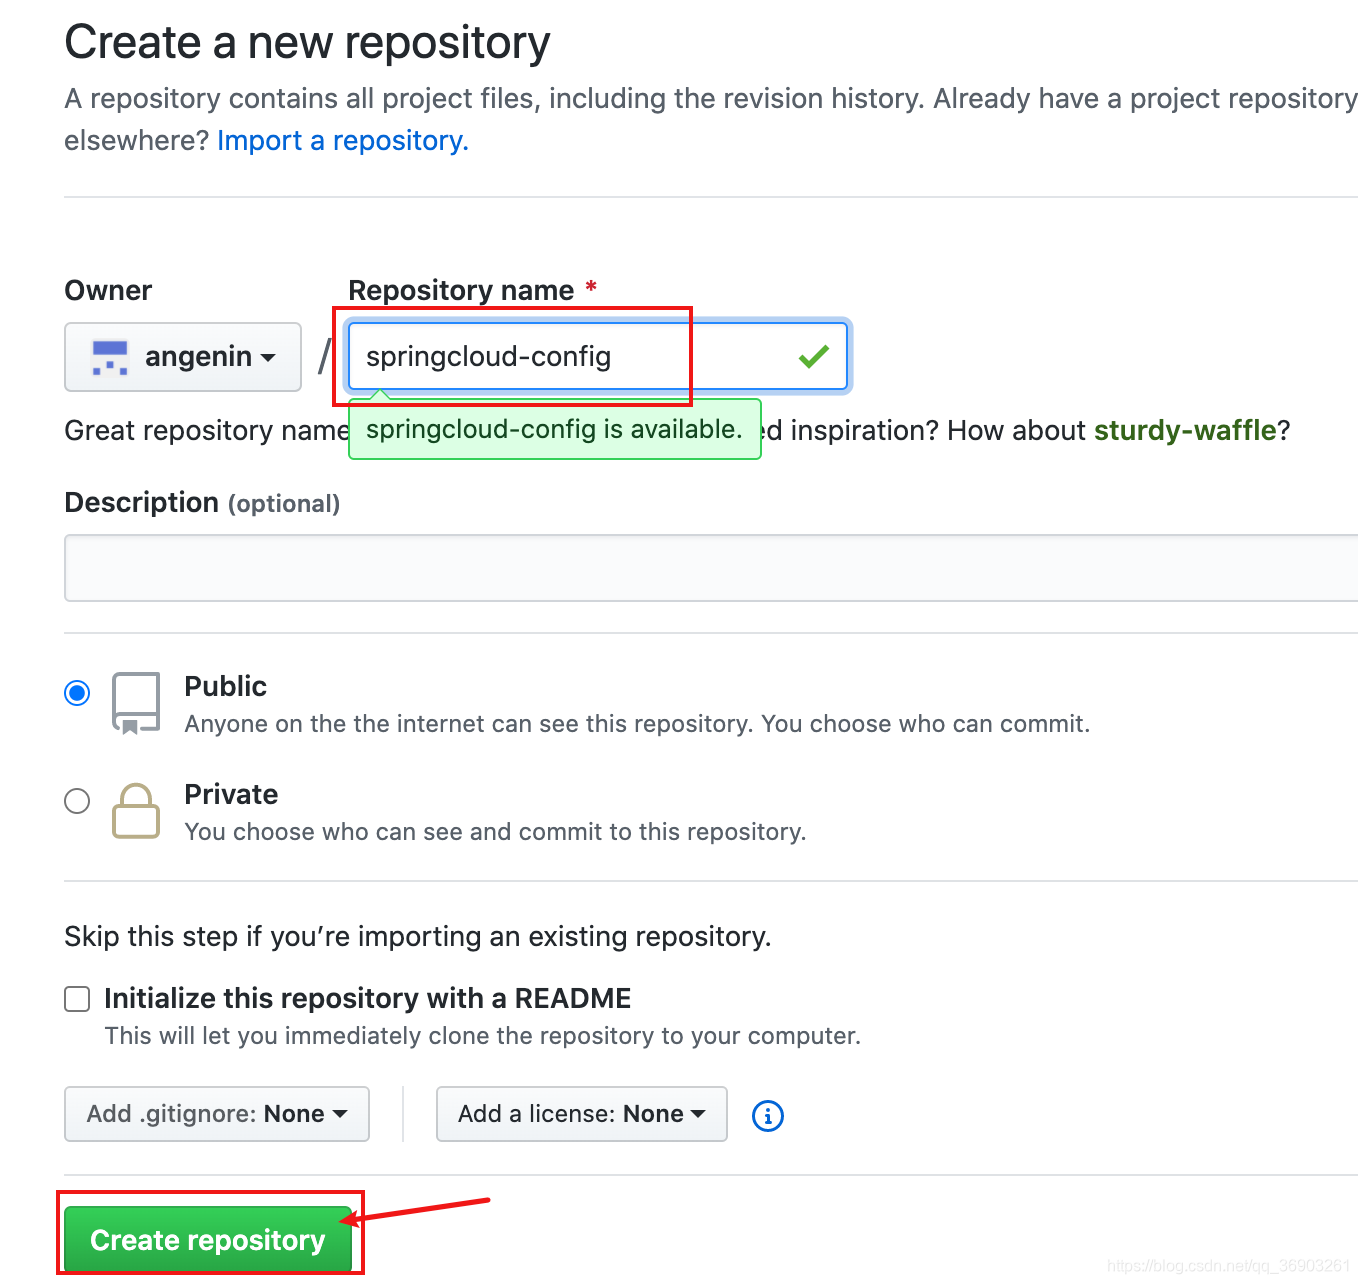
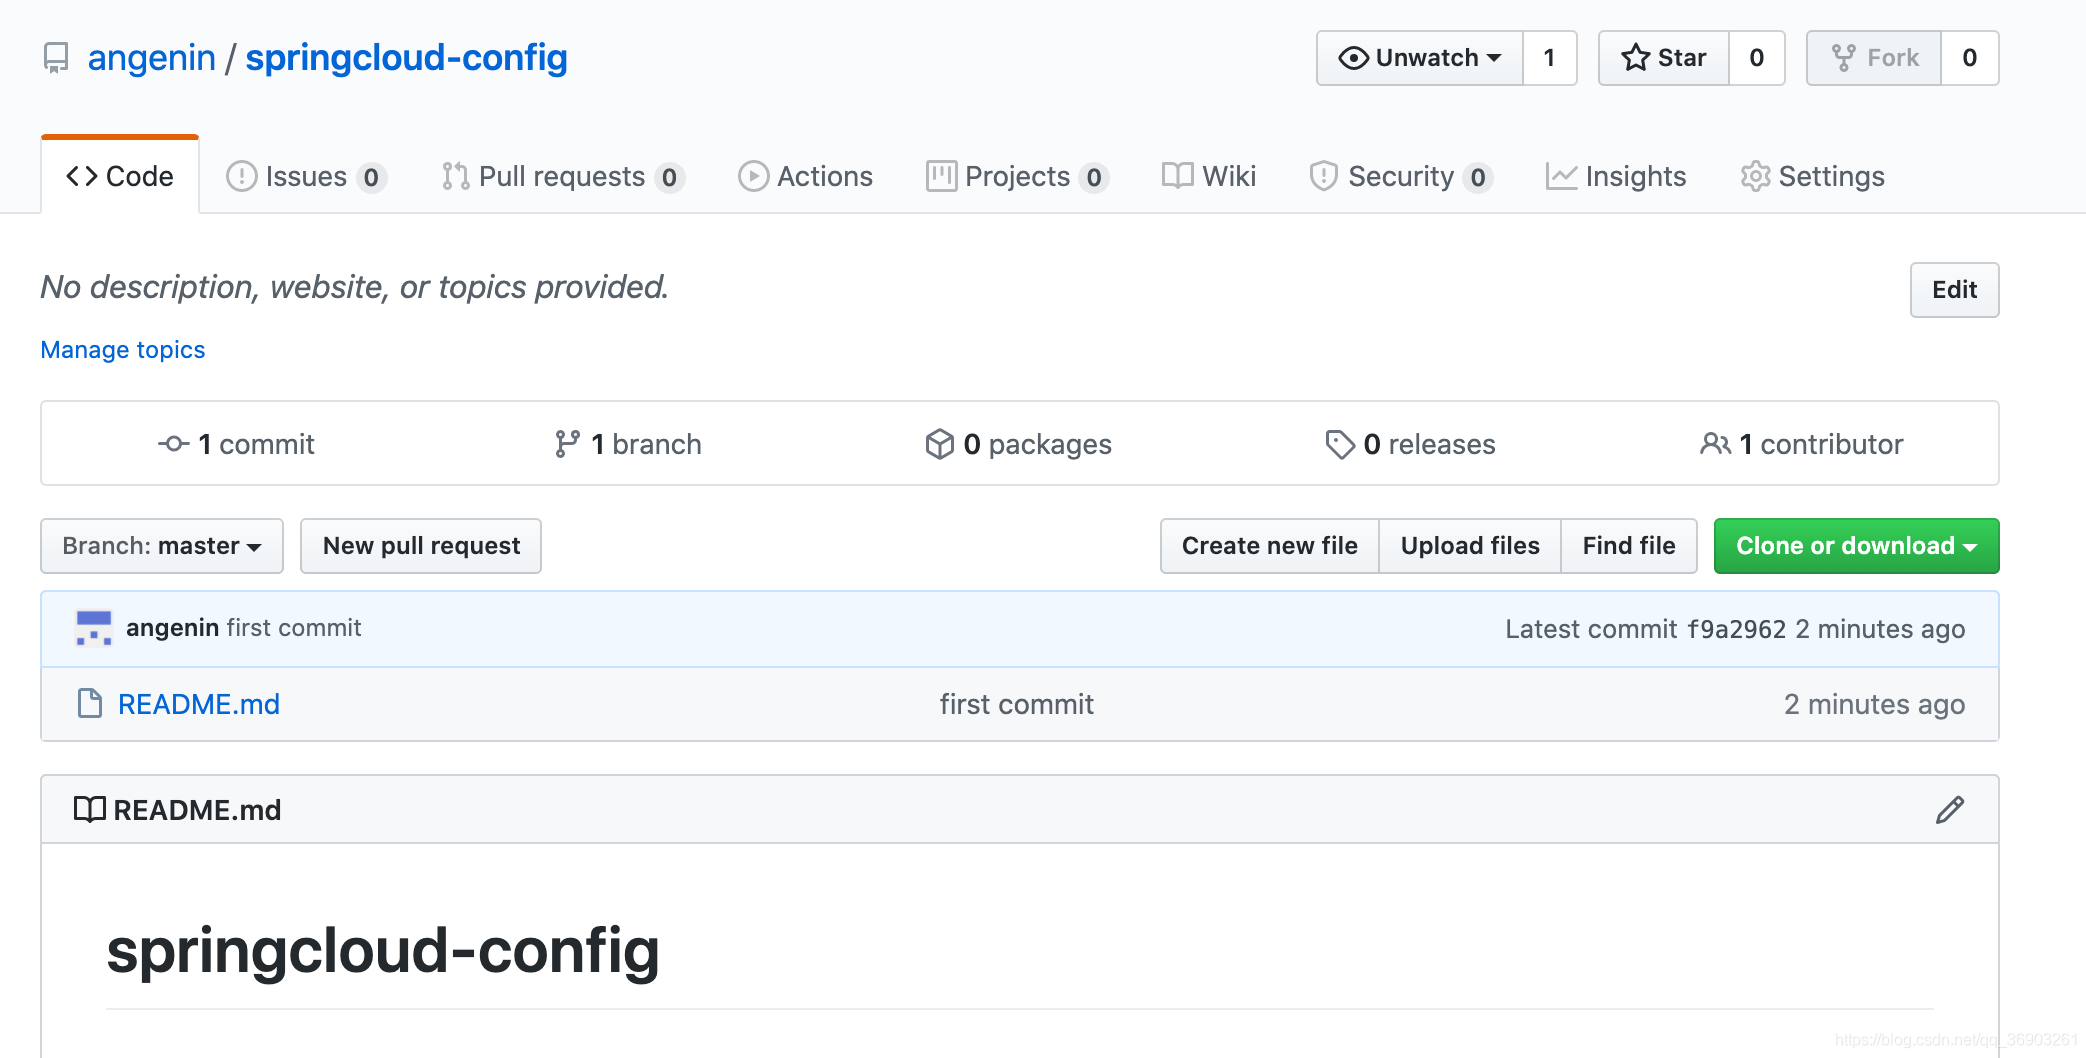
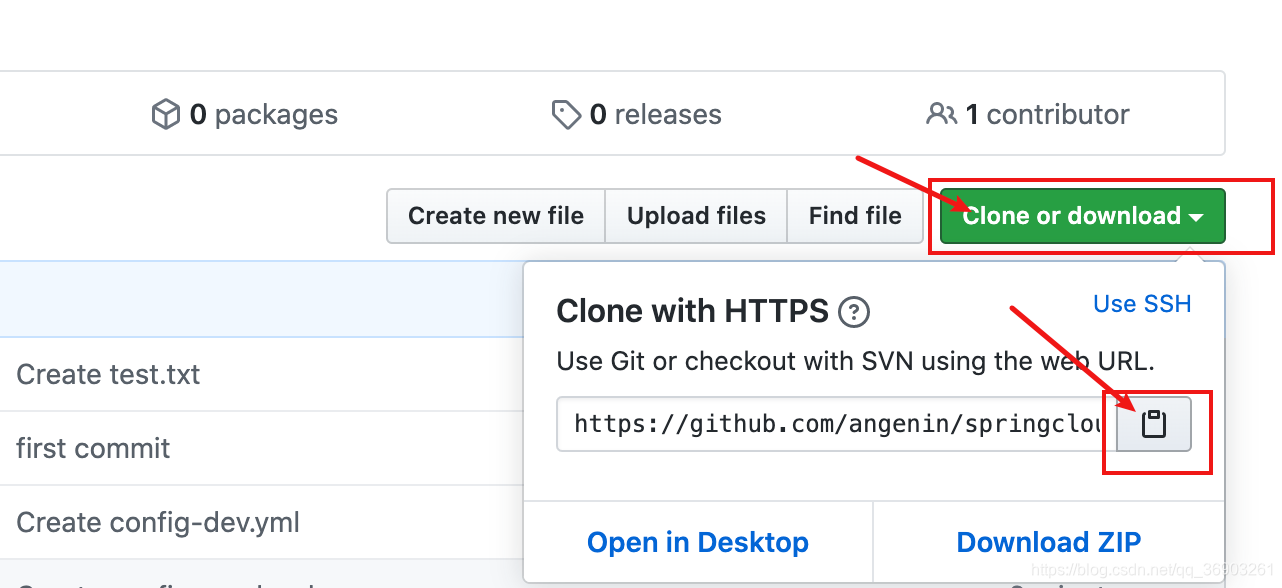
在GitHub上新建一个名为springcloud-config的新Repository(需要是public的仓库,private的访问不了)
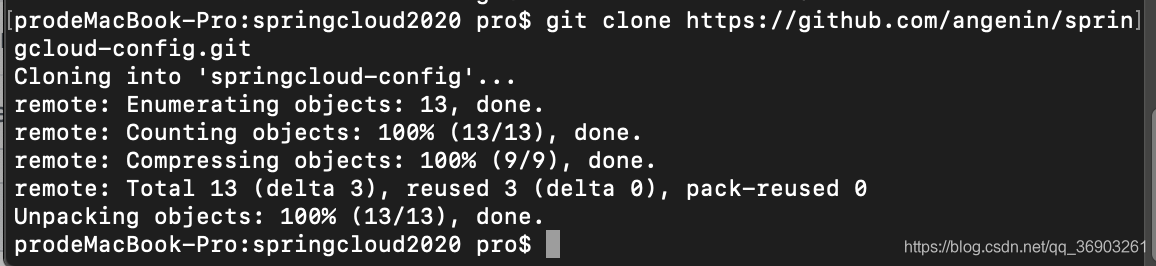
创建后,点击复制,然后黏贴到终端(可以先新建一个springcloud2020目录,等下用来clone到本地的存放目录)。(需要在本地安装好git)git clone https://github.com/qq995931576/springcloud-config.git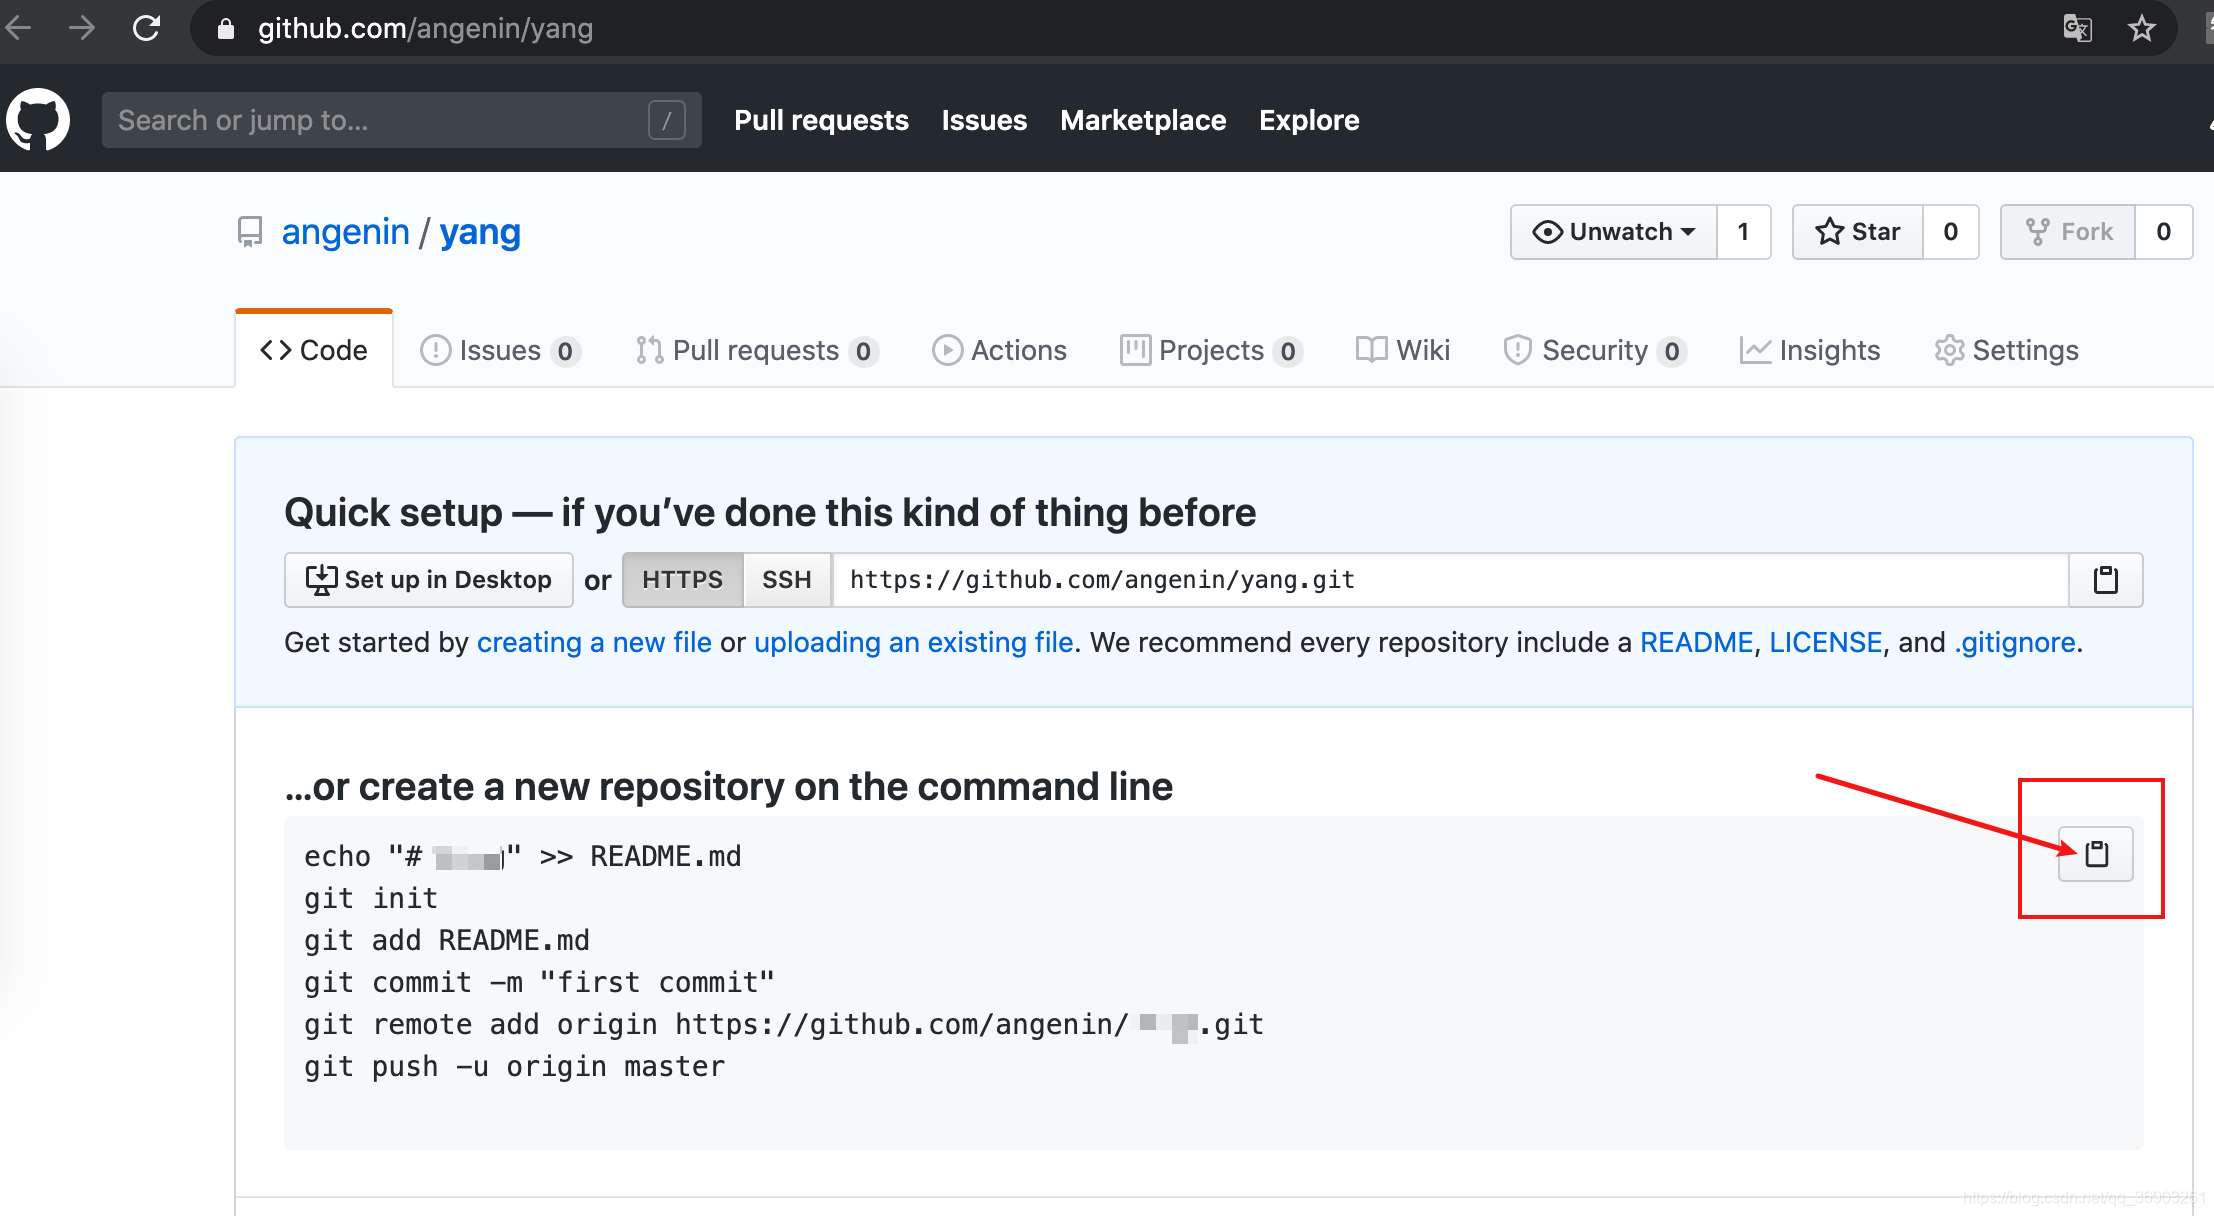

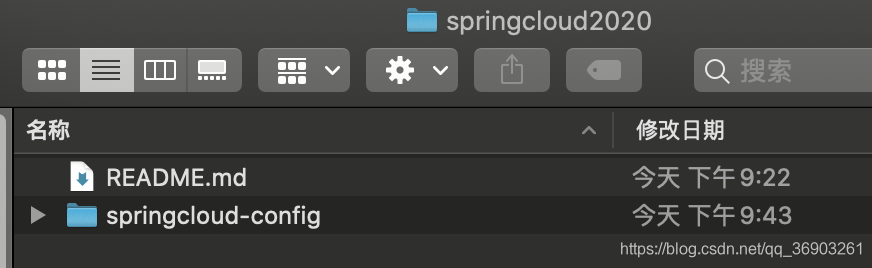
此时,这个springcloud2021就是我们本地的一个新的git仓库了(git init)。

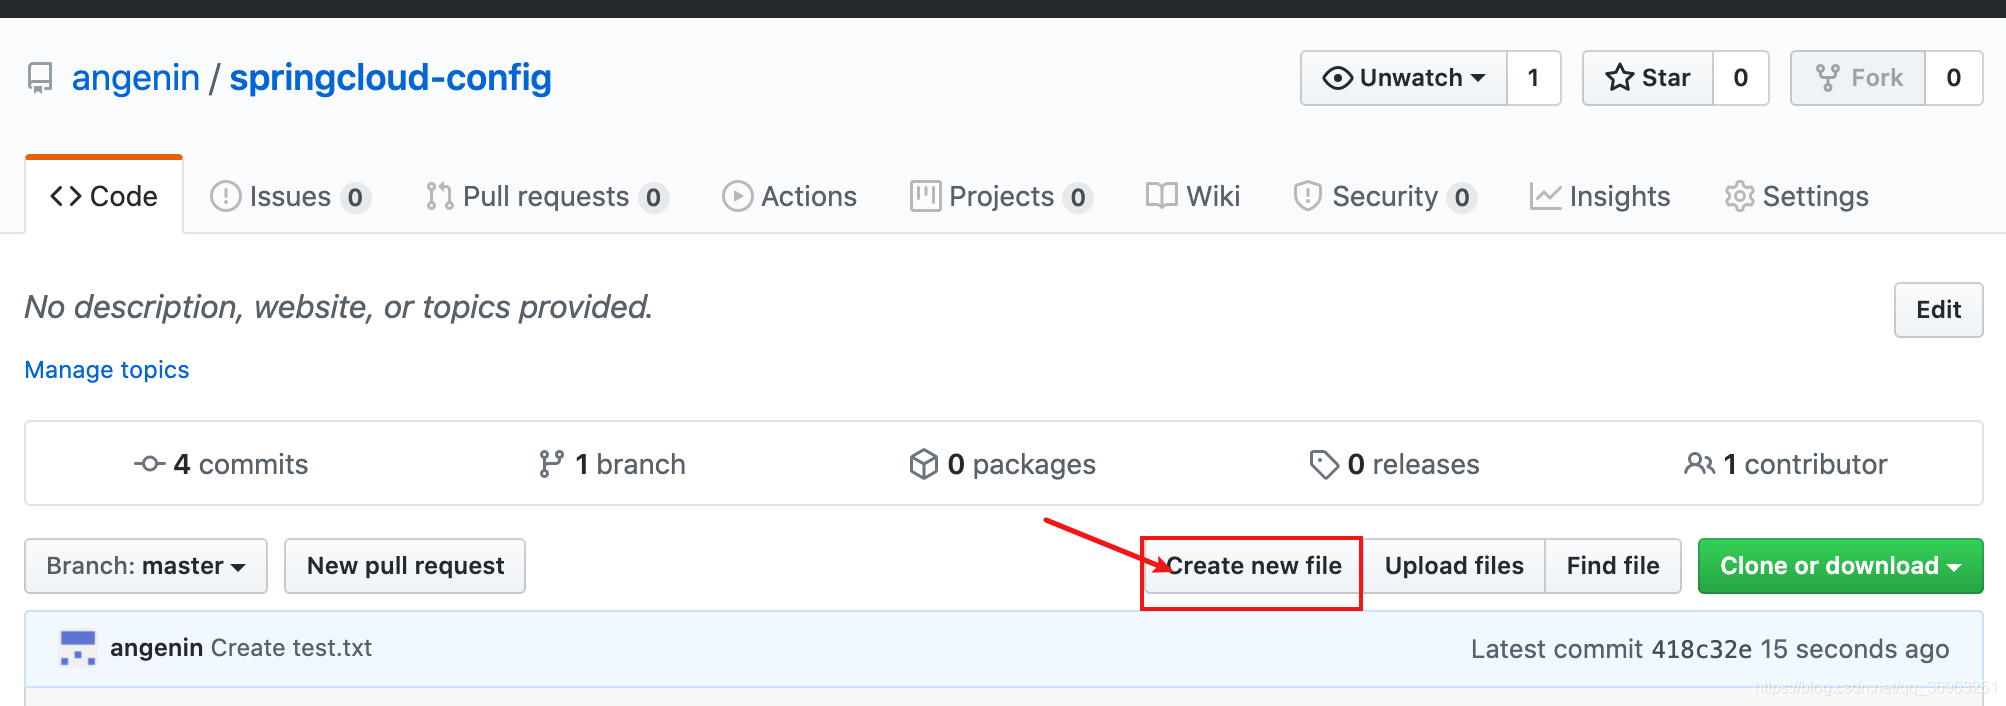
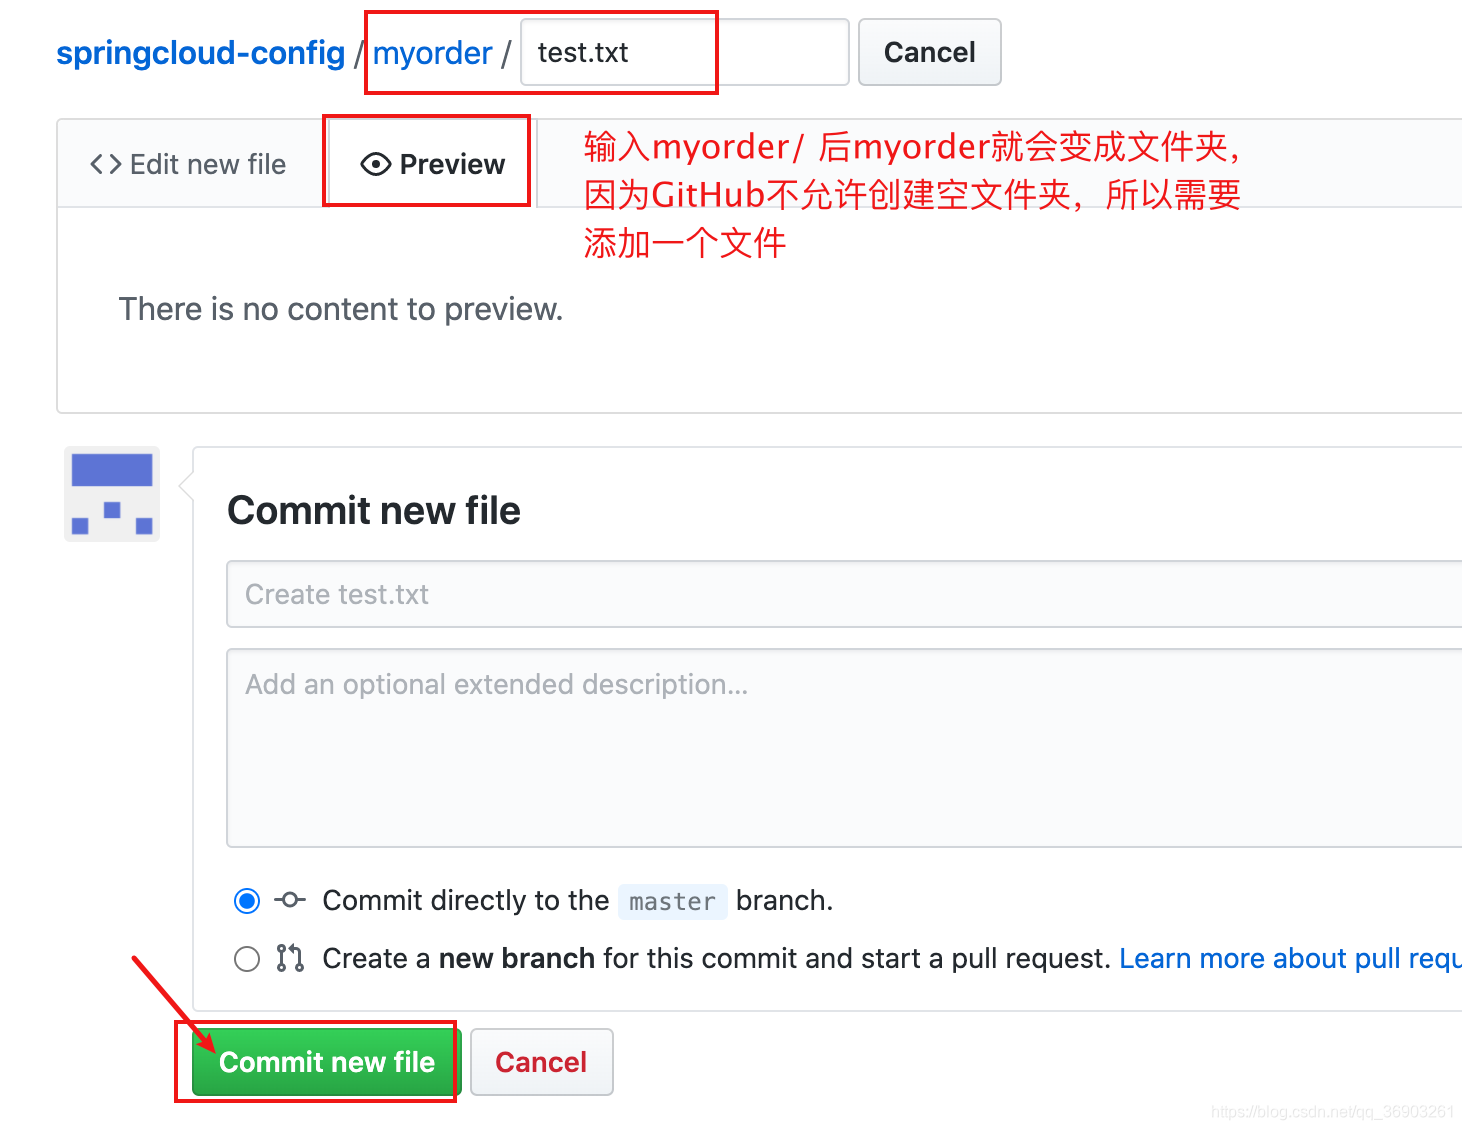
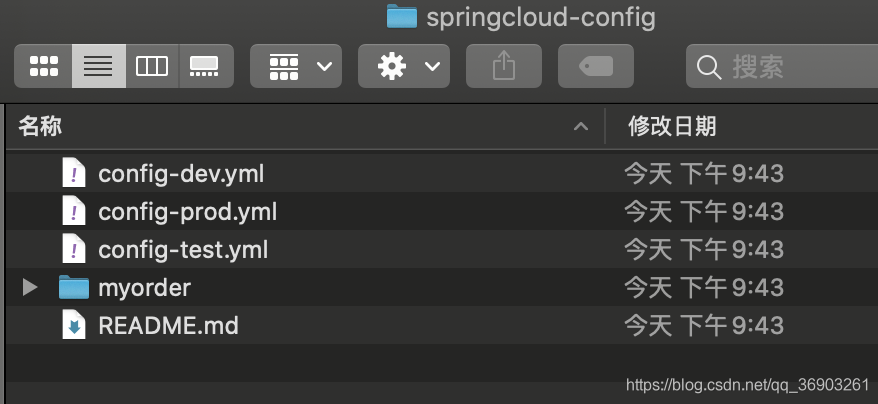
创建myorder文件夹
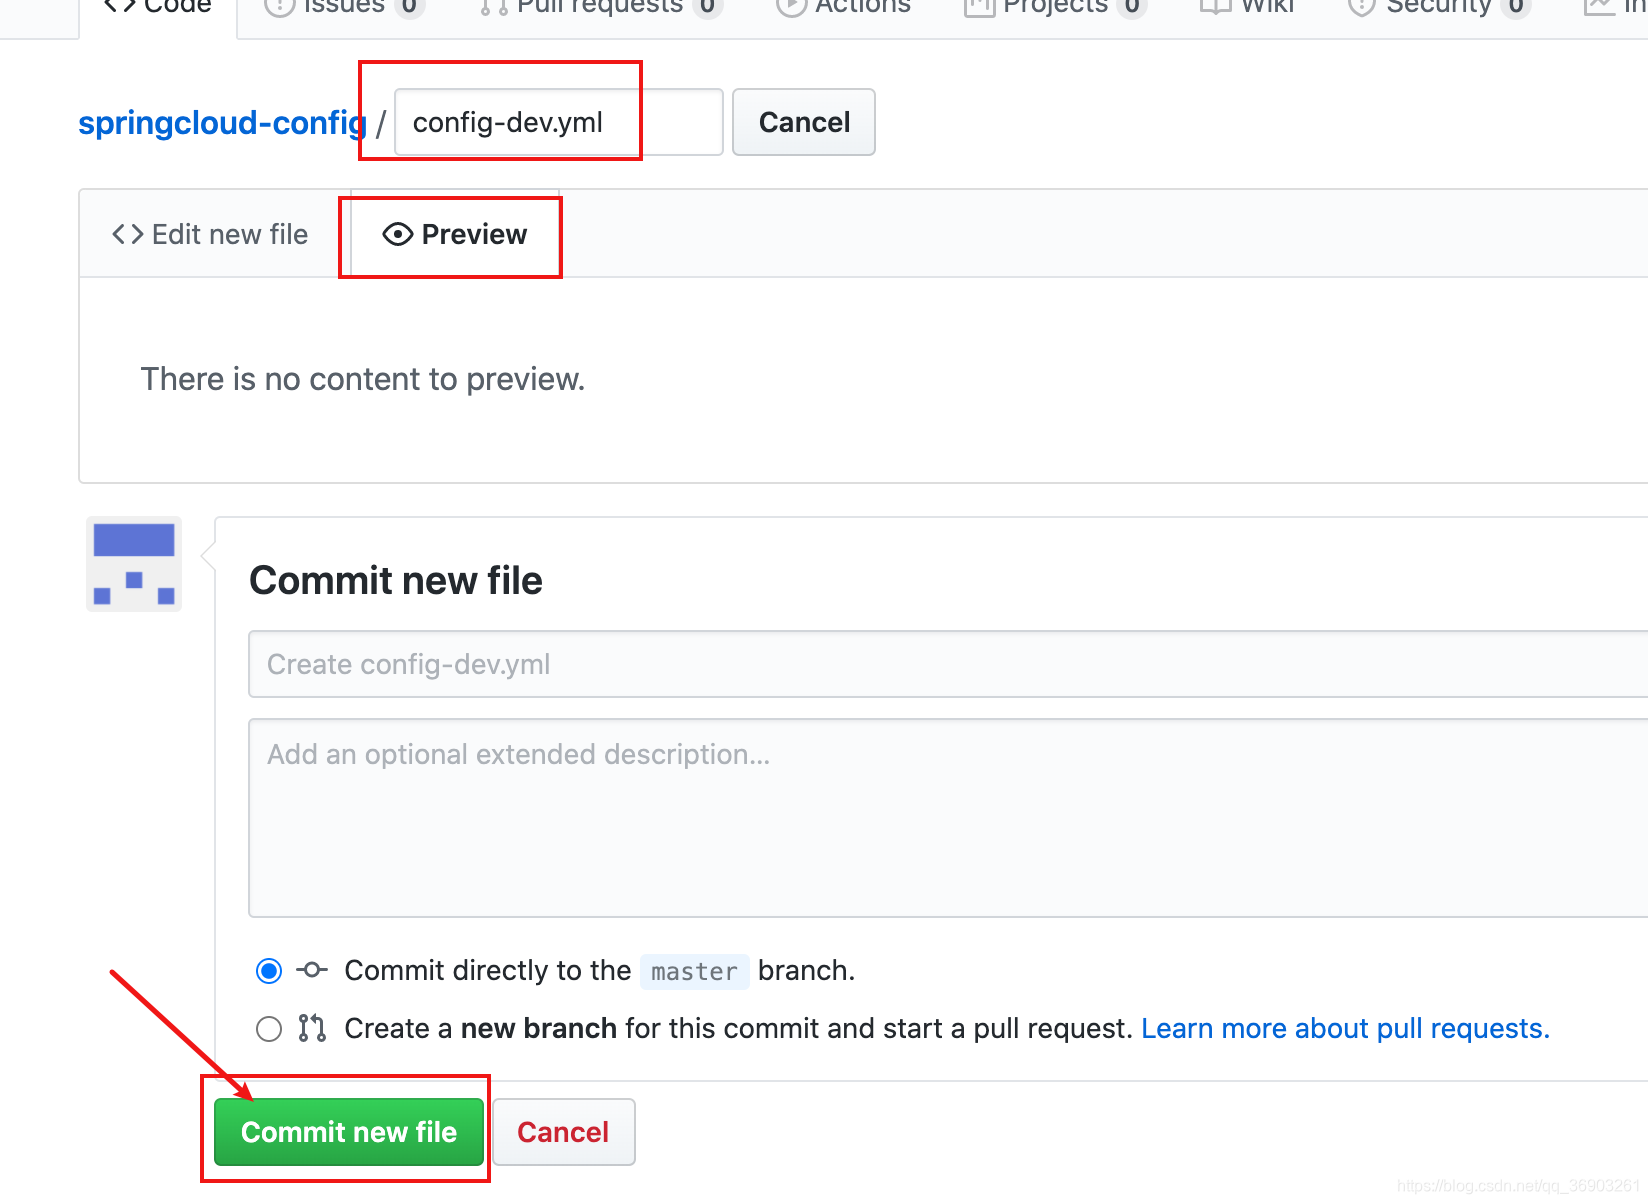
创建视频中的yml文件

-
clone到本地,复制地址,然后终端进入springcloud2021文件夹里,输入
git clone 你们的仓库地址
-
新建模块cloud-config-center-3344
-
pom
<dependencies> <!--config server--> <dependency> <groupId>org.springframework.cloud</groupId> <artifactId>spring-cloud-config-server</artifactId> </dependency> <!--eureka client(通过微服务名实现动态路由)--> <dependency> <groupId>org.springframework.cloud</groupId> <artifactId>spring-cloud-starter-netflix-eureka-client</artifactId> </dependency> <dependency> <groupId>org.springframework.boot</groupId> <artifactId>spring-boot-starter-web</artifactId> </dependency> <dependency> <groupId>org.springframework.boot</groupId> <artifactId>spring-boot-starter-actuator</artifactId> </dependency> <!--热部署--> <dependency> <groupId>org.springframework.boot</groupId> <artifactId>spring-boot-devtools</artifactId> <scope>runtime</scope> <optional>true</optional> </dependency> <dependency> <groupId>org.projectlombok</groupId> <artifactId>lombok</artifactId> <optional>true</optional> </dependency> <dependency> <groupId>org.springframework.boot</groupId> <artifactId>spring-boot-starter-test</artifactId> <scope>test</scope> </dependency> </dependencies> -
yml
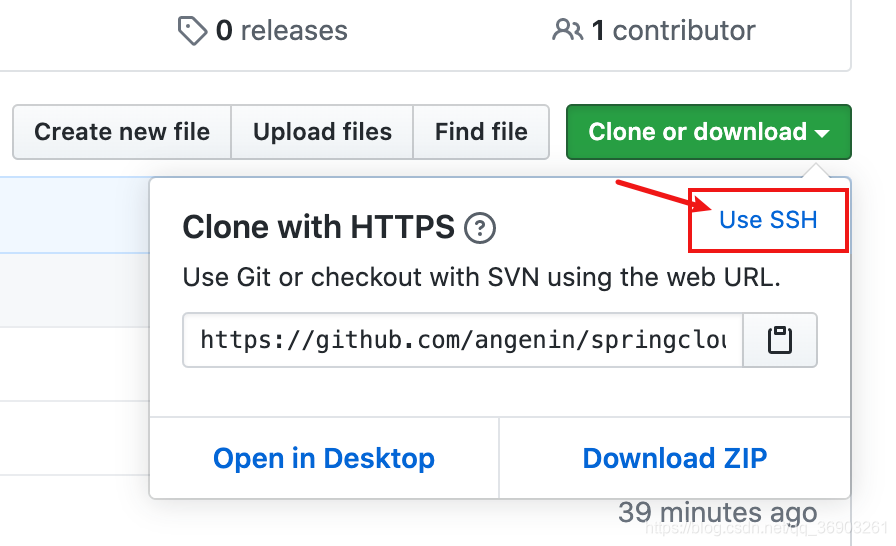
点击可以切换为ssh模式的地址(就是视频中的@git… ,不过ssh需要先配置才能使用,所以用https模式的地址比较方便)GitHub添加公钥:
https://blog.csdn.net/fenghuibian/article/details/73350890
server: port: 3344 spring: application: name: cloud-config-center #注册进Eureka服务器的微服务名 cloud: config: server: git: uri: https://github.com/qq995931576/springcloud-config.git #git的仓库地址 search-paths: #搜索目录 - springcloud-config label: main #读取的分支 eureka: client: service-url: defaultZone: http://localhost:7001/eureka #服务注册到的eureka地址 -
主启动类
@EnableConfigServer //激活配置中心功能 @SpringBootApplication public class ConfigCenterMain3344 { public static void main(String[] args) { SpringApplication.run(ConfigCenterMain3344.class,args); } } -
修改hosts文件,增加映射
window版本hosts文件在:C:\Windows\System32\drivers\etc添加如下:
127.0.0.1 config-3344.com![[外链图片转存失败,源站可能有防盗链机制,建议将图片保存下来直接上传(img-Ceo5cCaz-1612964141092)(C:\Users\PePe\AppData\Roaming\Typora\typora-user-images\image-20210210120858202.png)]](https://img-blog.csdnimg.cn/20210210213758445.png?x-oss-process=image/watermark,type_ZmFuZ3poZW5naGVpdGk,shadow_10,text_aHR0cHM6Ly9ibG9nLmNzZG4ubmV0L3FxXzQzMjg0NDY5,size_16,color_FFFFFF,t_70)
-
在GitHub中的配置文件加入(点击这个文件,然后点击笔形状的按钮进行编辑)
#config-dev.yml config: info: "main branch,springcloud-config/config-dev.yml version=1" ####################################### #config-prod.yml config: info: "main branch,springcloud-config/config-prod.yml version=1" ####################################### #config-test.yml config: info: "main branch,springcloud-config/config-test.yml version=1" -
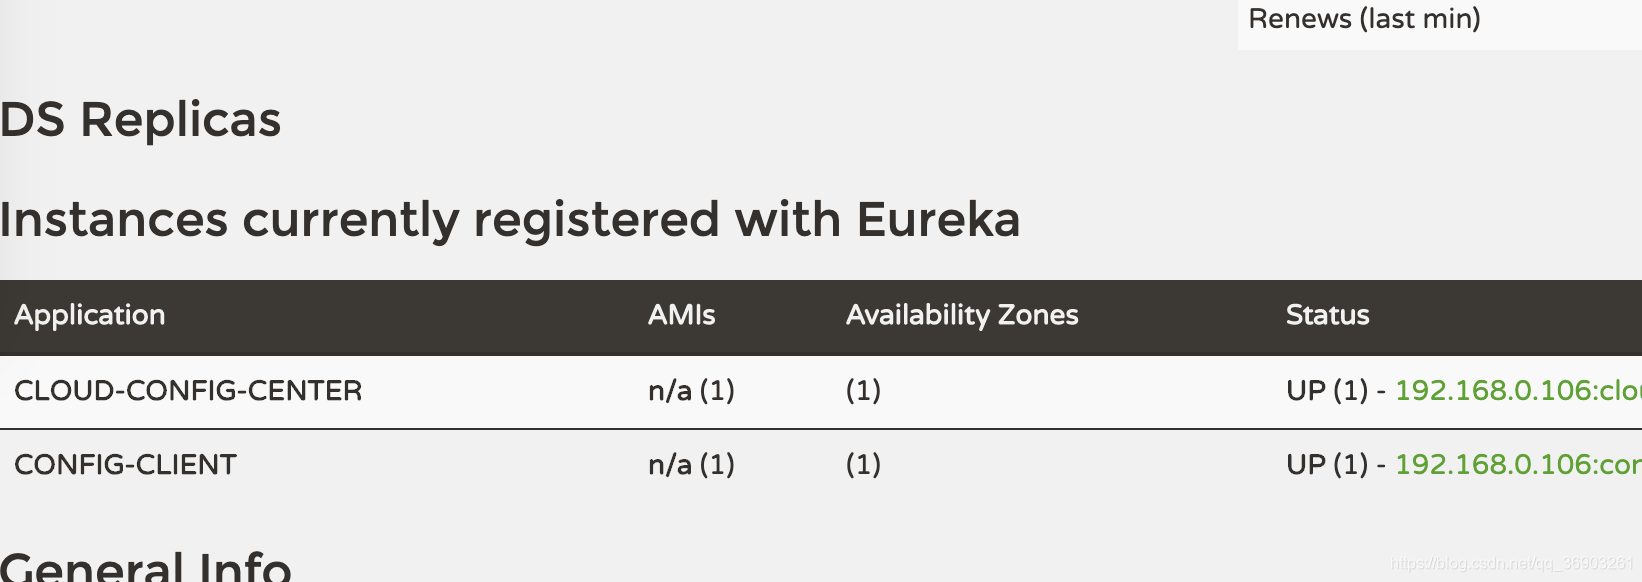
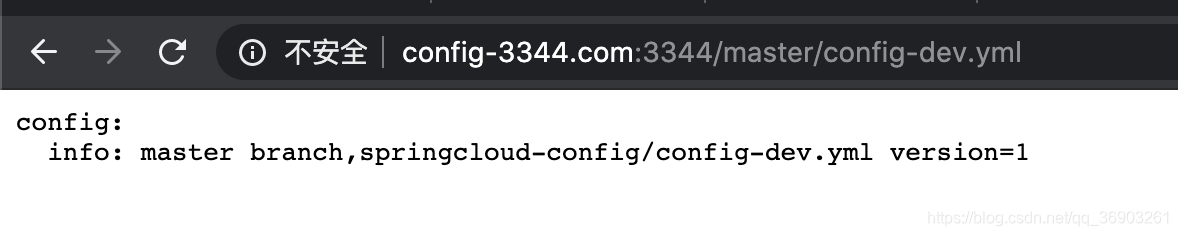
启动7001,3344,然后在浏览器输入
http://config-3344.com:3344/main/config-dev.yaml(成功获取到github上的配置文件数据)![[外链图片转存失败,源站可能有防盗链机制,建议将图片保存下来直接上传(img-7R7685Sv-1612964141096)(C:\Users\PePe\AppData\Roaming\Typora\typora-user-images\image-20210210122908033.png)]](https://img-blog.csdnimg.cn/20210210213809322.png)
配置的读取规则
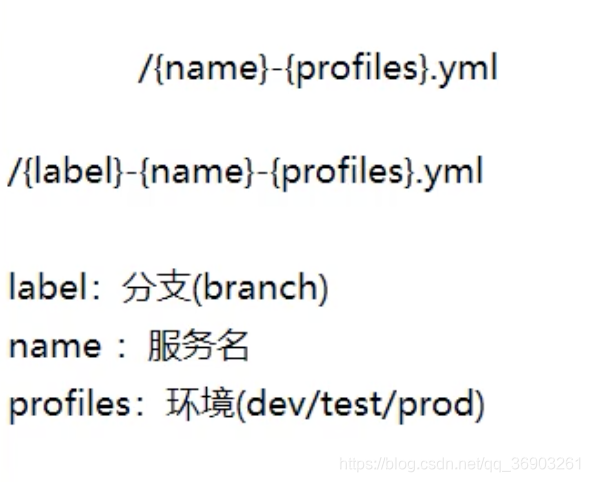

第一种(我们上面用的就是这一种)
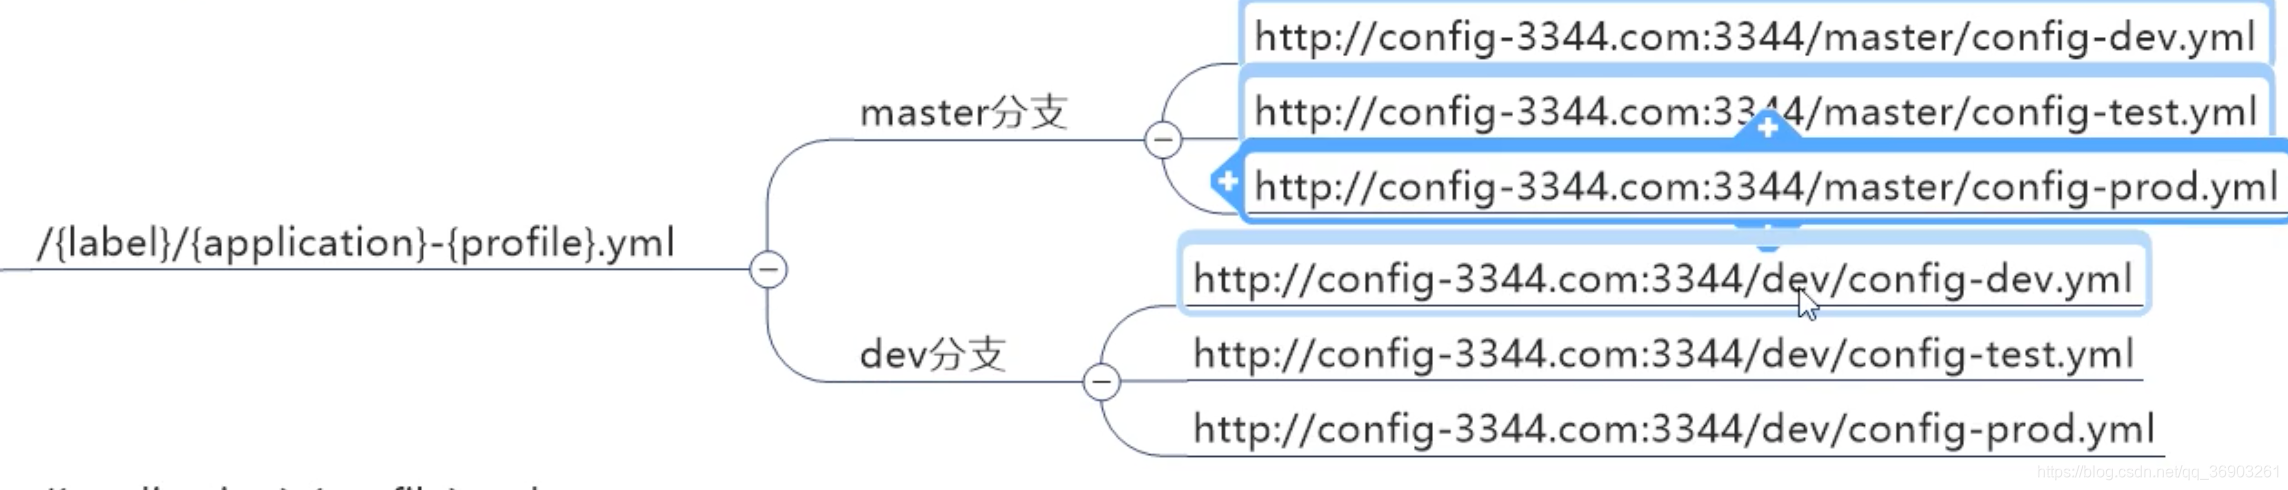
http://config-3344.com:3344/main/config-test.yaml

第二种(分支不写,默认master分支)

http://config-3344.com:3344/config-test.yaml

第三种(反着写)

http://config-3344.com:3344/config/test/main

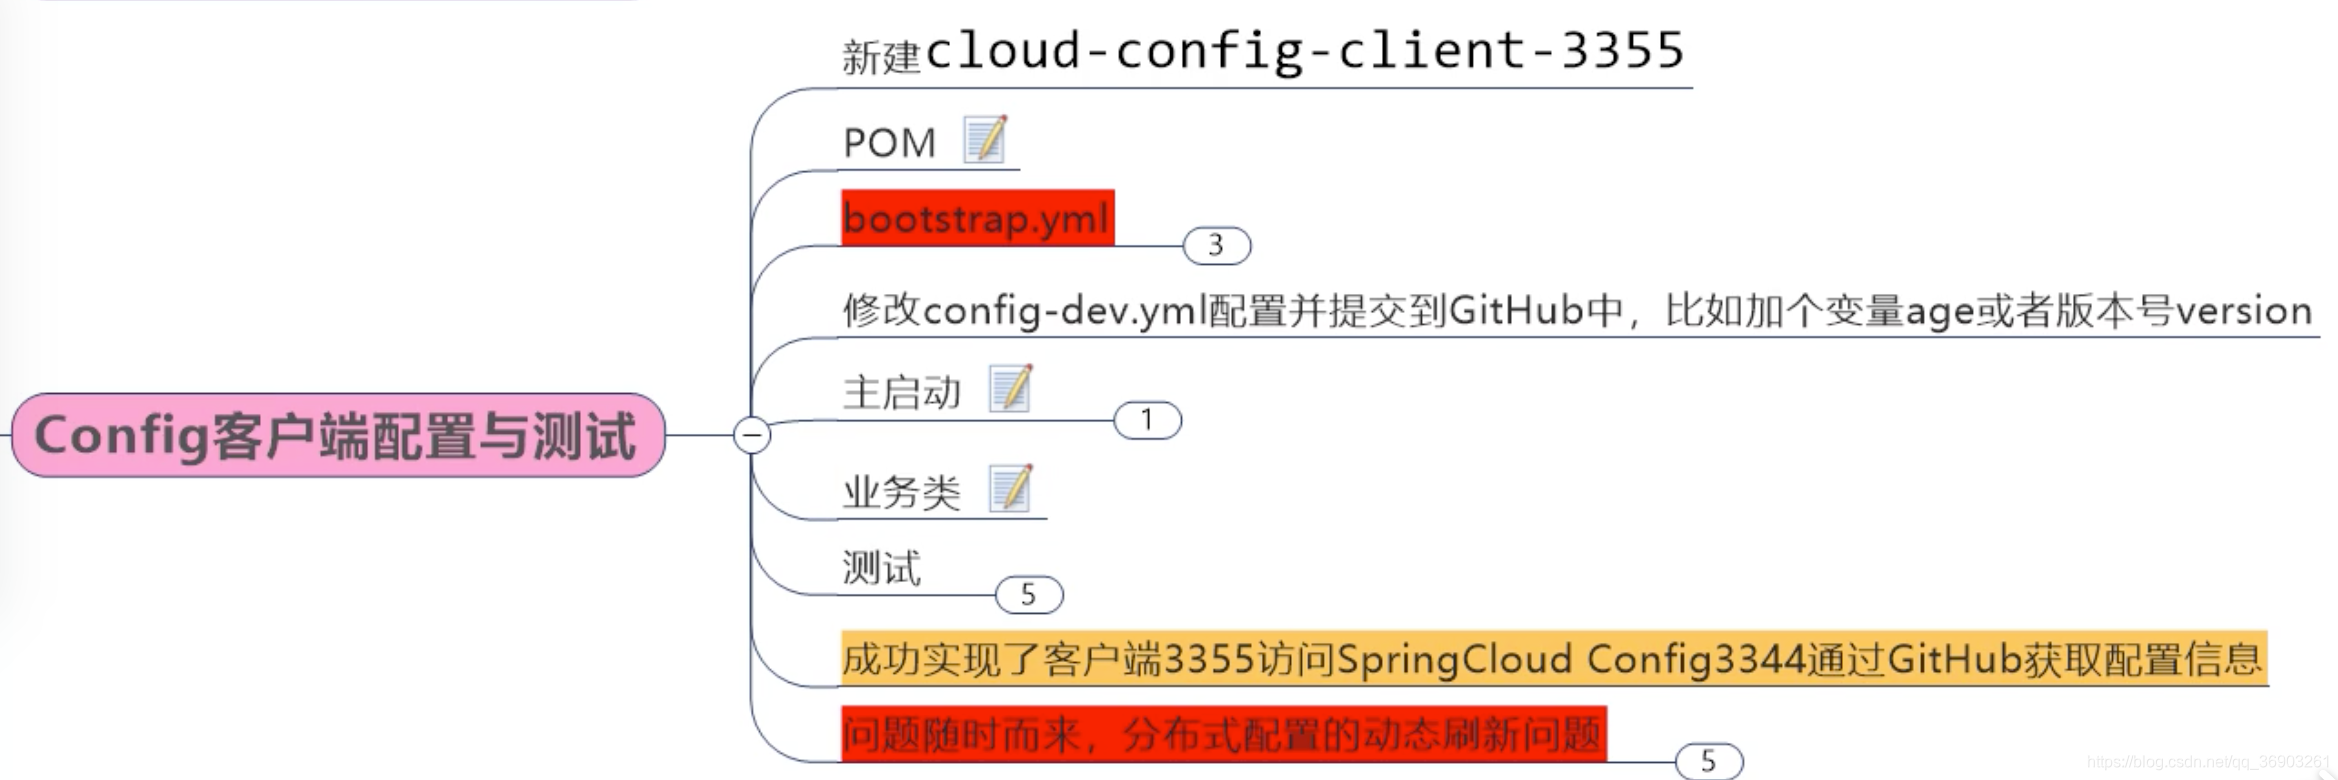
Config【客户端】配置与测试
-
新建模块cloud-config-client-3355
-
pom
<dependencies> <!--config server--> <dependency> <groupId>org.springframework.cloud</groupId> <artifactId>spring-cloud-starter-config</artifactId> </dependency> <!--eureka client(通过微服务名实现动态路由)--> <dependency> <groupId>org.springframework.cloud</groupId> <artifactId>spring-cloud-starter-netflix-eureka-client</artifactId> </dependency> <dependency> <groupId>org.springframework.boot</groupId> <artifactId>spring-boot-starter-web</artifactId> </dependency> <dependency> <groupId>org.springframework.boot</groupId> <artifactId>spring-boot-starter-actuator</artifactId> </dependency> <!--热部署--> <dependency> <groupId>org.springframework.boot</groupId> <artifactId>spring-boot-devtools</artifactId> <scope>runtime</scope> <optional>true</optional> </dependency> <dependency> <groupId>org.projectlombok</groupId> <artifactId>lombok</artifactId> <optional>true</optional> </dependency> <dependency> <groupId>org.springframework.boot</groupId> <artifactId>spring-boot-starter-test</artifactId> <scope>test</scope> </dependency> </dependencies> -
bootstrap.yaml(系统级别的配置文件)
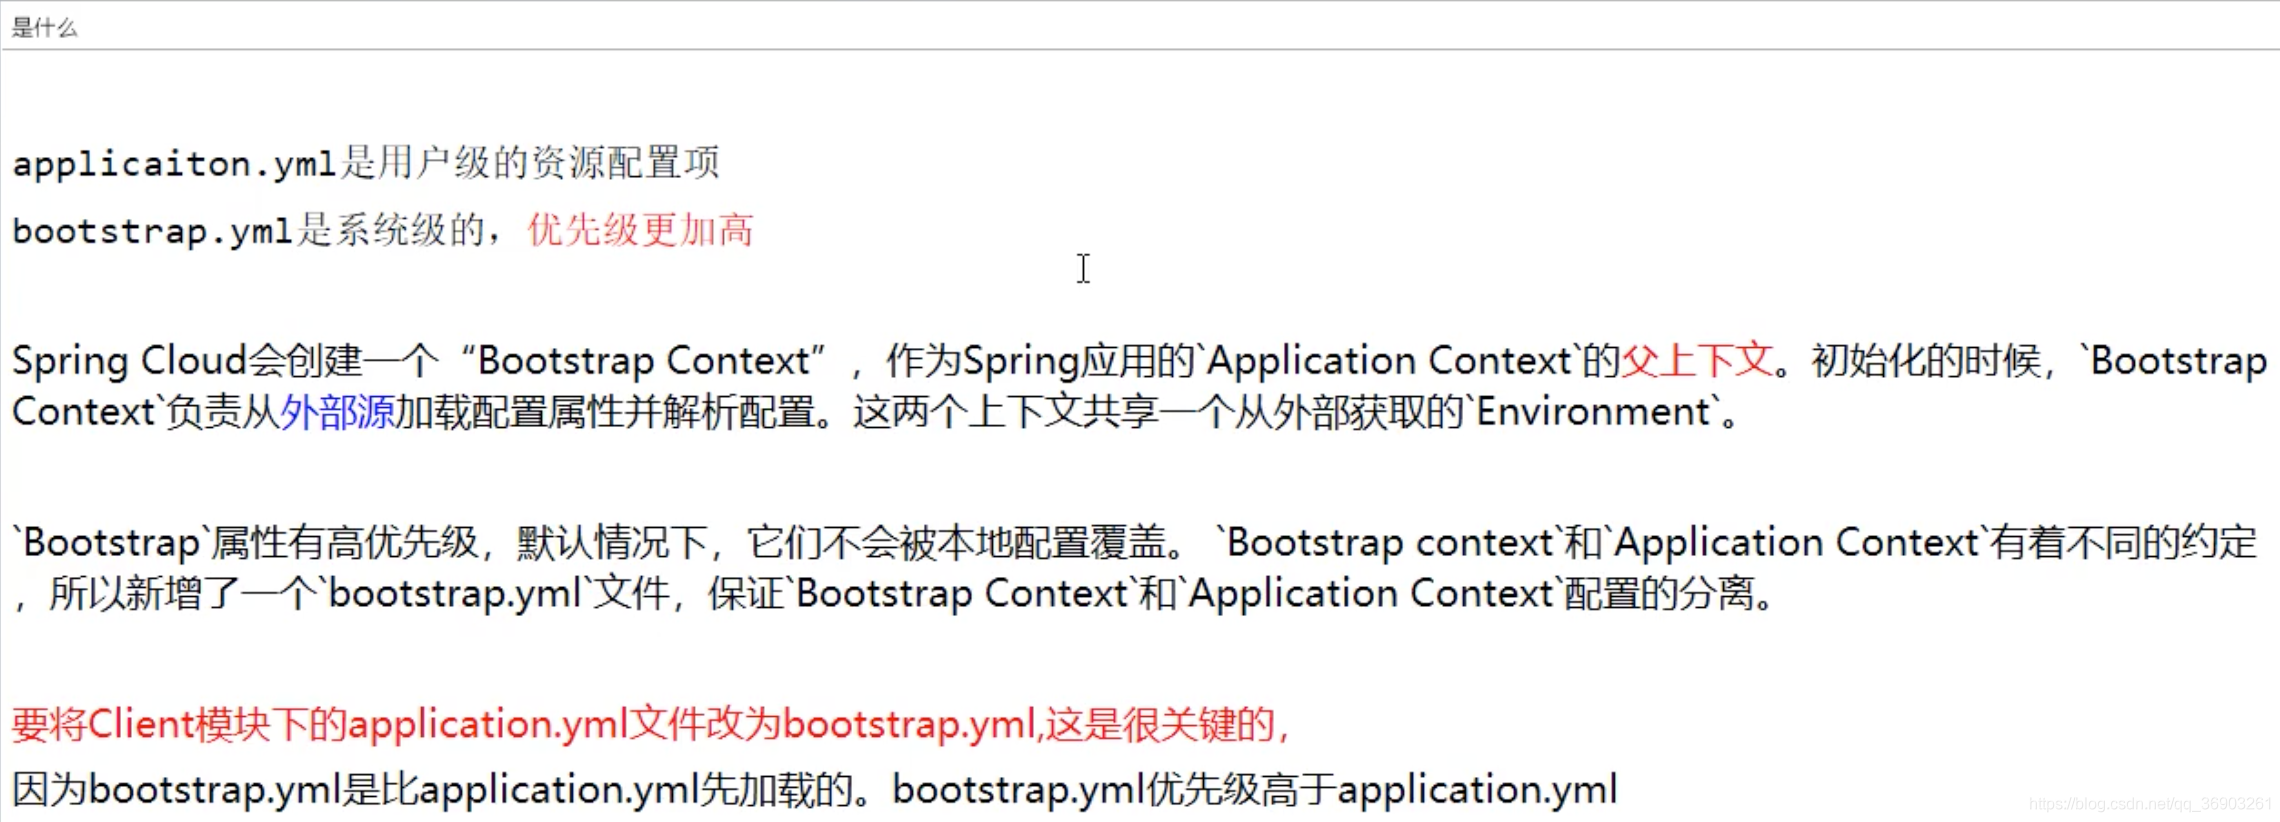
server: port: 3355 spring: application: name: config-client cloud: config: #config客户端配置 label: main #分支名称 name: config #配置文件名称 这三个综合:master分支上的config-dev.yml的配置文件 profile: dev #读取后缀名称 被读取到http://config-3344.com:3344/main/config/dev uri: http://localhost:3344 #配置中心地址 记得加上【http://】 eureka: client: service-url: defaultZone: http://localhost:7001/eureka #服务注册到的eureka地址 #defaultZone: http://eureka7001.com:7001/eureka,http://eureka7002.com:7002/eureka,http://eureka7003.com:7003/eureka -
主启动类
@EnableEurekaClient @SpringBootApplication public class ConfigClientMain3355 { public static void main(String[] args) { SpringApplication.run(ConfigClientMain3355.class, args); } } -
controller(读取GitHub的配置文件)
![[外链图片转存失败,源站可能有防盗链机制,建议将图片保存下来直接上传(img-sWamhSYw-1612964141103)(C:\Users\PePe\AppData\Roaming\Typora\typora-user-images\image-20210210130800481.png)]](https://img-blog.csdnimg.cn/20210210213828927.png?x-oss-process=image/watermark,type_ZmFuZ3poZW5naGVpdGk,shadow_10,text_aHR0cHM6Ly9ibG9nLmNzZG4ubmV0L3FxXzQzMjg0NDY5,size_16,color_FFFFFF,t_70)
@RestController public class ConfigClientController { //来读取github上面的配置文件config.info的信息 @Value("${config.info}") //spring的@Value注解 private String configInfo; @GetMapping("/configInfo") public String getConfigInfo(){ return configInfo; } } -
测试,启动7001,3344,3355
3344自测,
http://config-3344.com:3344/main/config-dev.yaml
3355测试,
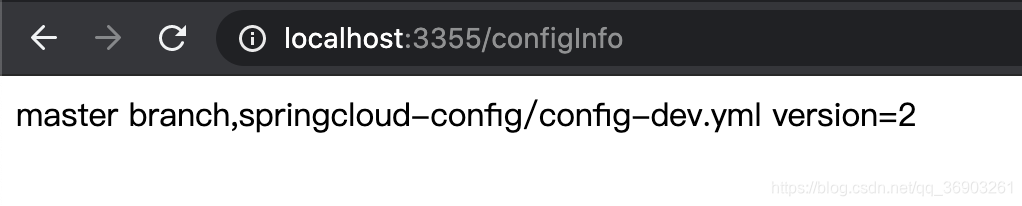
http://localhost:3355/configInfo
![[外链图片转存失败,源站可能有防盗链机制,建议将图片保存下来直接上传(img-F2JtGjkI-1612964141110)(C:\Users\PePe\AppData\Roaming\Typora\typora-user-images\image-20210210131120201.png)]](https://img-blog.csdnimg.cn/20210210213836728.png?x-oss-process=image/watermark,type_ZmFuZ3poZW5naGVpdGk,shadow_10,text_aHR0cHM6Ly9ibG9nLmNzZG4ubmV0L3FxXzQzMjg0NDY5,size_16,color_FFFFFF,t_70)
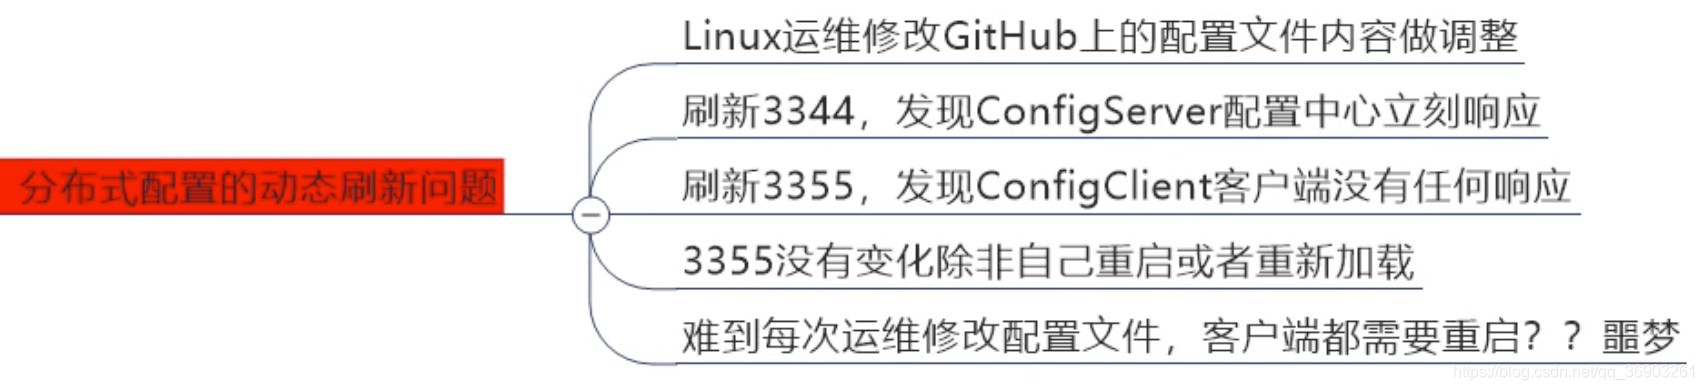
动态刷新问题
-
修改GitHub上的config-dev.yml文件的版本号为2。
-
刷新
http://config-3344.com:3344/main/config-test.yaml,版本号发生改变。
![[外链图片转存失败,源站可能有防盗链机制,建议将图片保存下来直接上传(img-y5IQgfXz-1612964141112)(C:\Users\PePe\AppData\Roaming\Typora\typora-user-images\image-20210210132524124.png)]](https://img-blog.csdnimg.cn/20210210213849334.png)
-
刷新
http://localhost:3355/configInfo,没有改变。 -
重启3355,刷新
http://localhost:3355/configInfo,读取到最新的版本号。
![[外链图片转存失败,源站可能有防盗链机制,建议将图片保存下来直接上传(img-3EiiLFfW-1612964141113)(C:\Users\PePe\AppData\Roaming\Typora\typora-user-images\image-20210210132601336.png)]](https://img-blog.csdnimg.cn/20210210213854590.png)
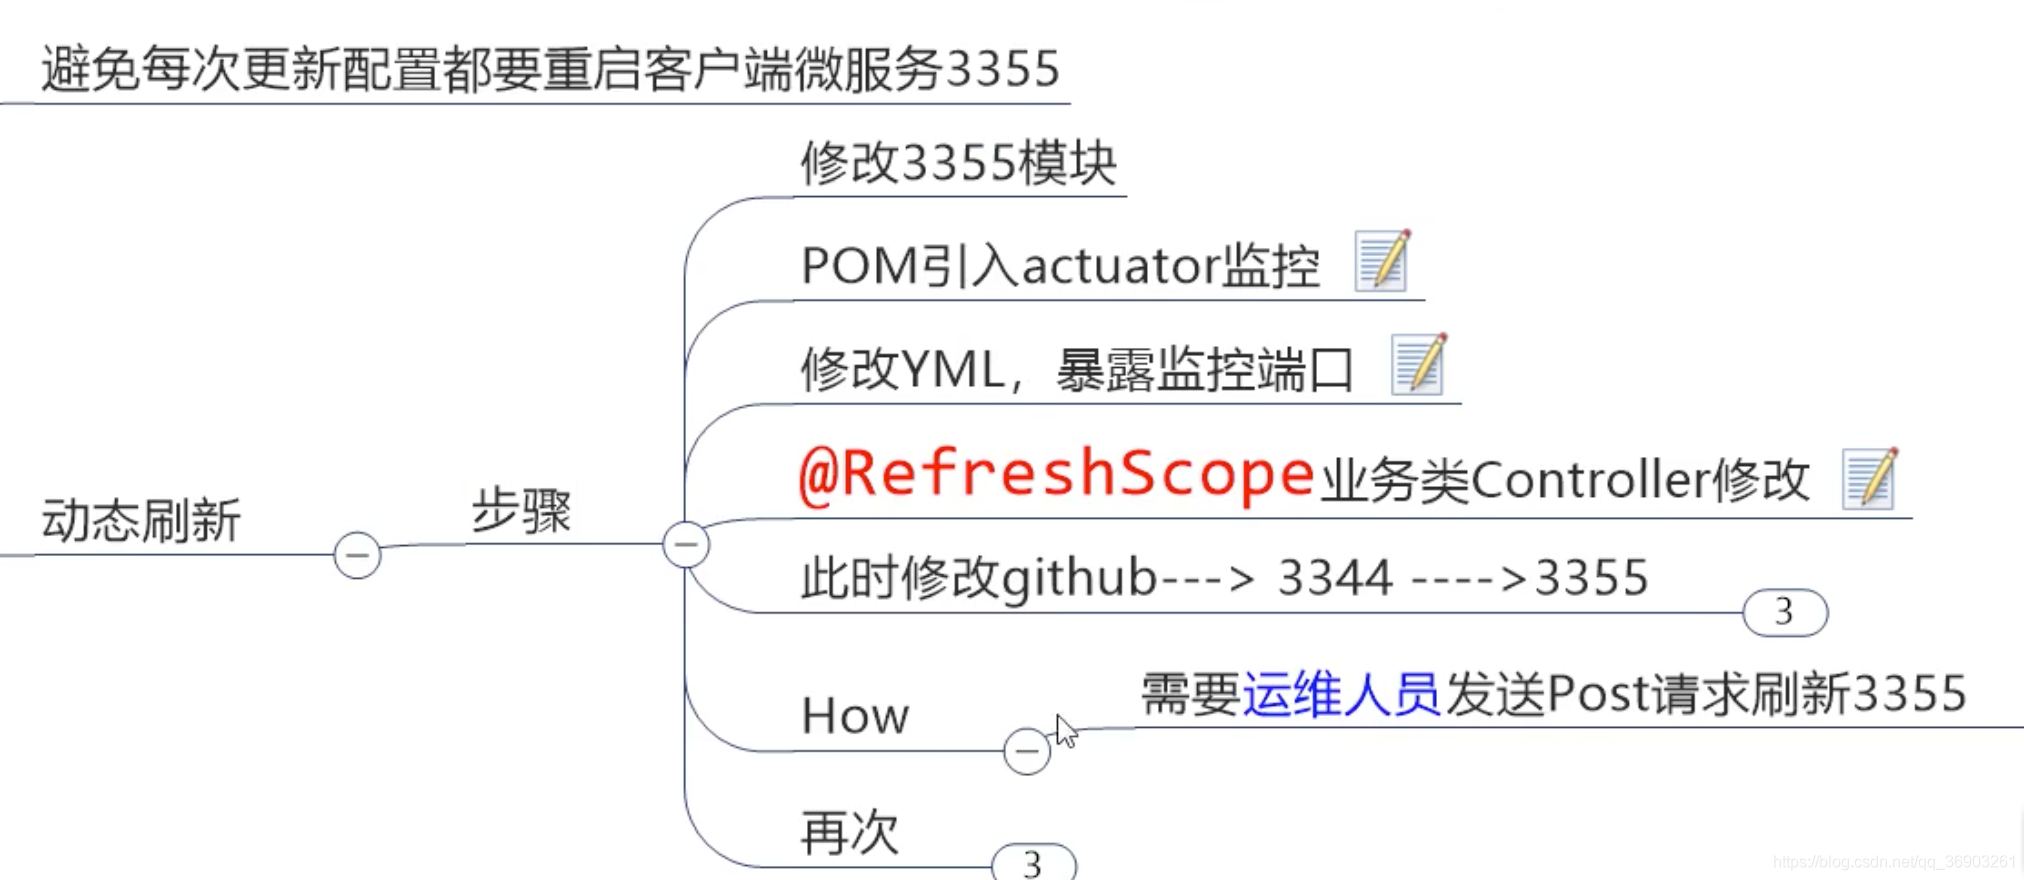
Config客户端之【手动动态刷新】
-
往config客户端3355在pom中添加(上面已经加了)
<dependency> <groupId>org.springframework.boot</groupId> <artifactId>spring-boot-starter-actuator</artifactId> </dependency> -
然后在bootstrap.yml中添加
server: port: 3355 spring: application: name: config-client cloud: config: #config客户端配置 label: main #分支名称 name: config #配置文件名称 这三个综合:master分支上的config-dev.yml的配置文件 profile: test #读取后缀名称 被读取到http://config-3344.com:3344/main/config/dev uri: http://localhost:3344 #配置中心地址 记得加上【http://】 eureka: client: service-url: defaultZone: http://localhost:7001/eureka #服务注册到的eureka地址 #defaultZone: http://eureka7001.com:7001/eureka,http://eureka7002.com:7002/eureka,http://eureka7003.com:7003/eureka ========================================== #暴露监控端点 management: endpoints: web: exposure: include: "*" ============================================= -
在ConfigClientController类上加上
@RefreshScope注解。@RestController @RefreshScope //开启刷新功能 public class ConfigClientController { @Value("${config.info}") //spring的@Value注解 private String configInfo; @GetMapping("/configInfo") public String getConfigInfo(){ return configInfo; } } -
重启3355。
-
修改GitHub上文件的版本号,然后访问3344和3355。(启动完成后再修改)
http://config-3344.com:3344/main/config-test.yaml
![[外链图片转存失败,源站可能有防盗链机制,建议将图片保存下来直接上传(img-M2M8fUPQ-1612964141115)(C:\Users\PePe\AppData\Roaming\Typora\typora-user-images\image-20210210133922957.png)]](https://img-blog.csdnimg.cn/20210210213904302.png)
http://localhost:3355/configInfo(没读取到,需要发送post请求刷新3355才能生效)
-
打开终端,输入
curl -X POST "http://localhost:3355/actuator/refresh"这里需要运维人员,发送post请求,刷新一下3355,激活一下

-
刷新
http://localhost:3355/configInfo
![[外链图片转存失败,源站可能有防盗链机制,建议将图片保存下来直接上传(img-ZLLfcN28-1612964141116)(C:\Users\PePe\AppData\Roaming\Typora\typora-user-images\image-20210210134448005.png)]](https://img-blog.csdnimg.cn/20210210213910449.png)
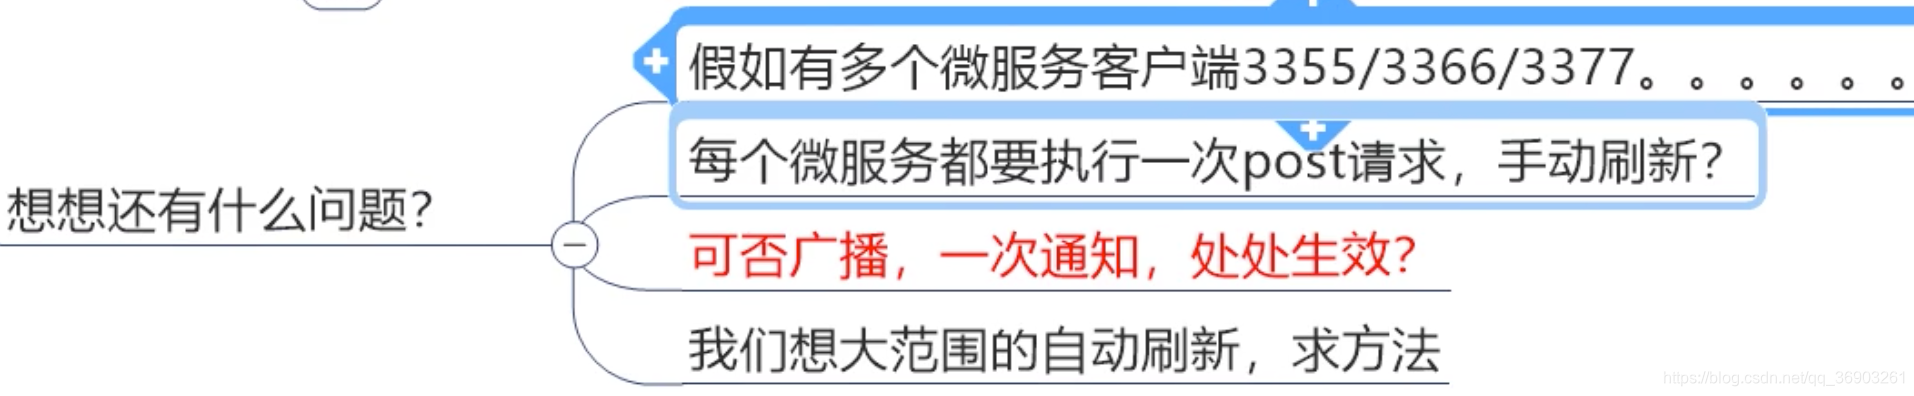
出现的弊端:
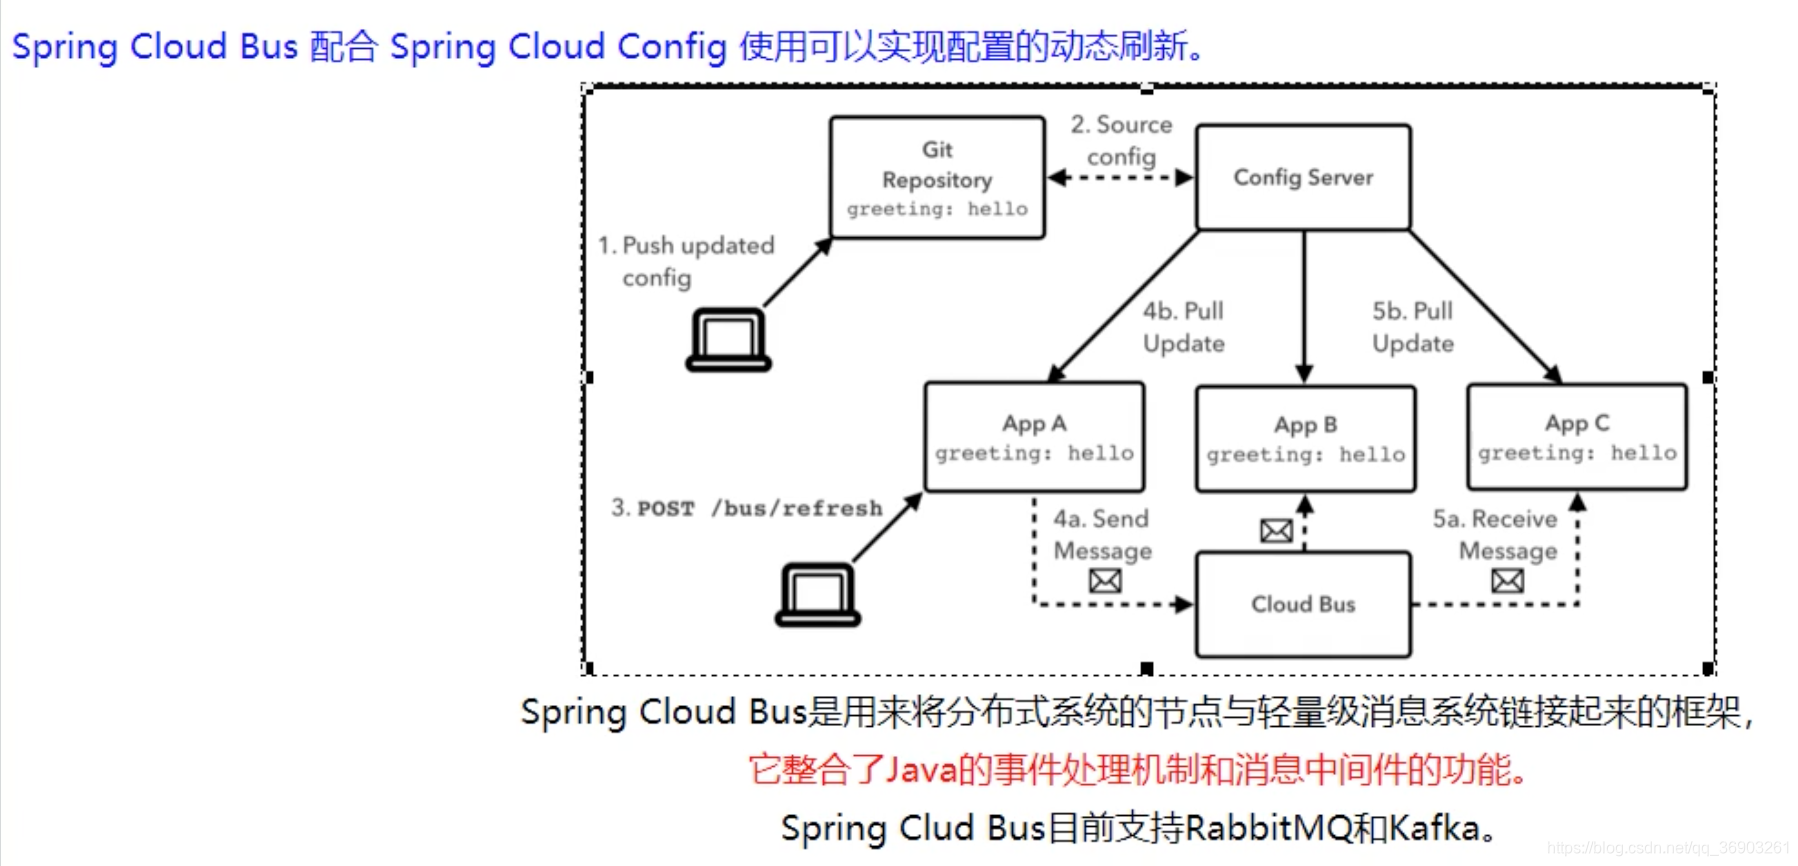
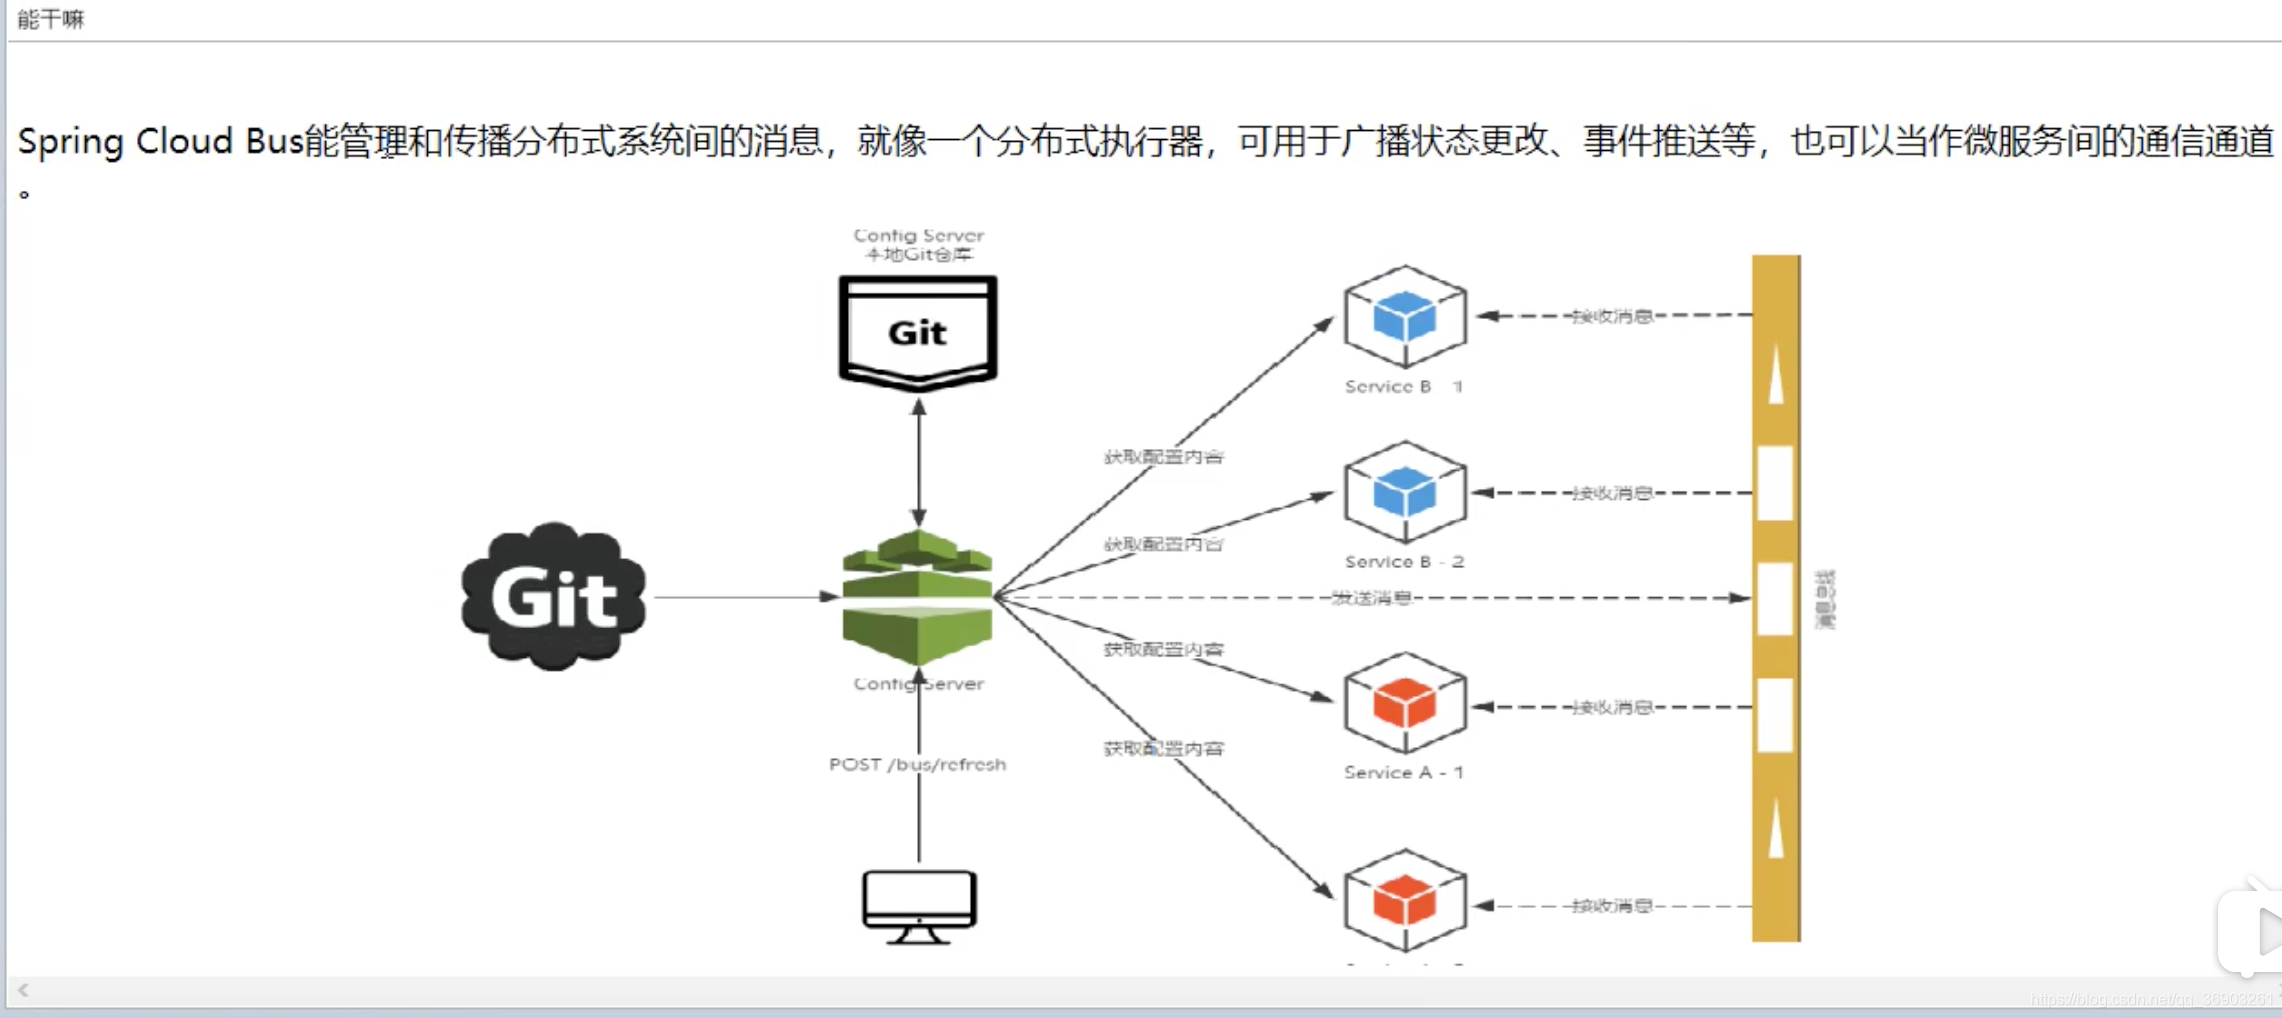
十四、SpringCloud Bus消息总线【自动广播动态刷新】
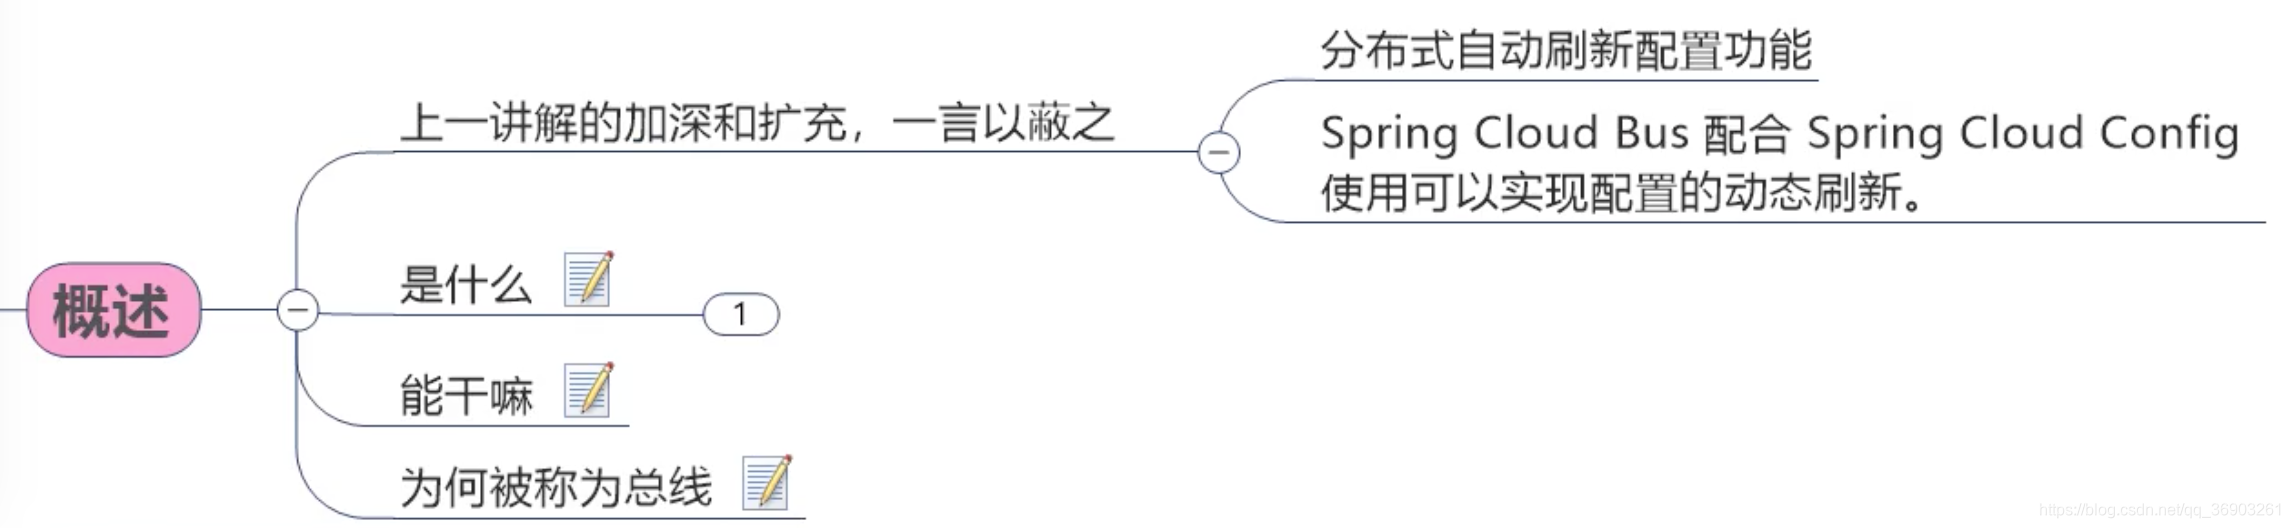
Bus支持两种消息代理:RabbitMQ和Kafka。
RabbitMQ粗浅的理论和使用的学习笔记,有兴趣可以看一下。
Docker安装RabbitMQ
Docker基础入门学习笔记,有兴趣的可以看一下。
在linux的docker里拉取RabbitMQ镜像docker pull rabbitmq:3.8.3-management(management是带web的管理界面)。
![[外链图片转存失败,源站可能有防盗链机制,建议将图片保存下来直接上传(img-9ZJGE2GP-1612964141118)(C:\Users\PePe\AppData\Roaming\Typora\typora-user-images\image-20210210140607465.png)]](https://img-blog.csdnimg.cn/20210210213921895.png?x-oss-process=image/watermark,type_ZmFuZ3poZW5naGVpdGk,shadow_10,text_aHR0cHM6Ly9ibG9nLmNzZG4ubmV0L3FxXzQzMjg0NDY5,size_16,color_FFFFFF,t_70)
5672是客户端和RabbitMQ进行通信的端口。
15672是管理界面访问web页面的端口。
运行RabbitMQ
docker run -d -p 5672:5672 -p 15672:15672 --name myRabbitMQ 容器id
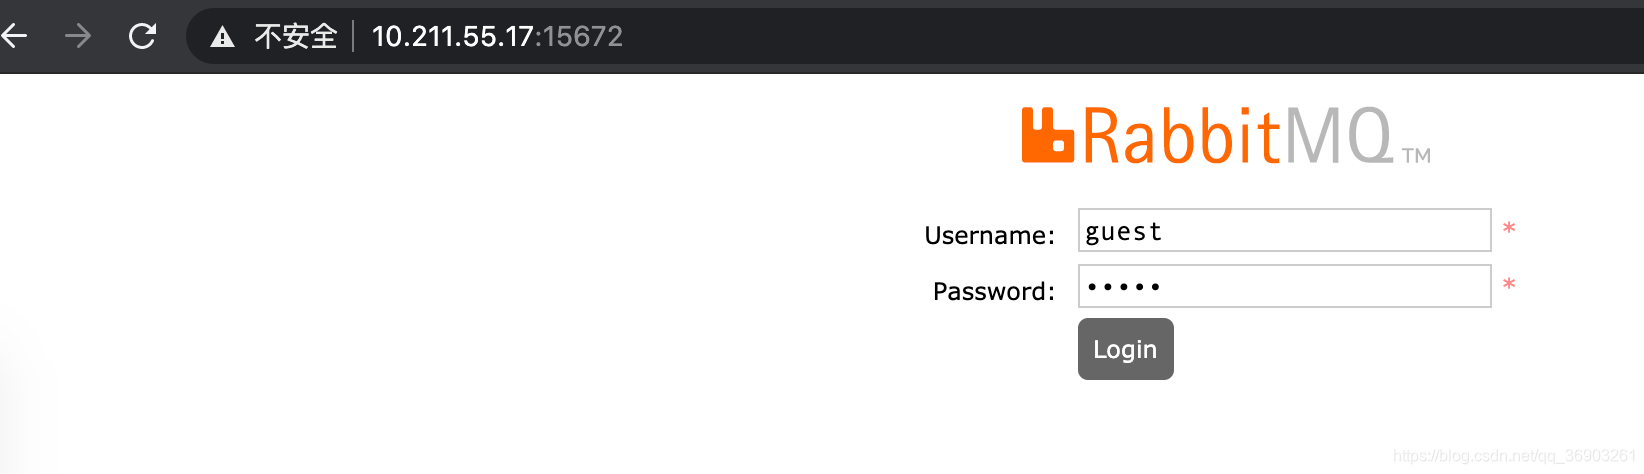
在浏览器中输入http://47.130.247.134:15672/访问RabbitMQ的管理页面,用户名和密码默认guest。(47.130.247.134是我linux的IP地址)
我这里使用的是阿里云服务器,记得打开安全组端口
![[外链图片转存失败,源站可能有防盗链机制,建议将图片保存下来直接上传(img-PjV4GXLN-1612964141119)(C:\Users\PePe\AppData\Roaming\Typora\typora-user-images\image-20210210141421855.png)]](https://img-blog.csdnimg.cn/20210210213930842.png?x-oss-process=image/watermark,type_ZmFuZ3poZW5naGVpdGk,shadow_10,text_aHR0cHM6Ly9ibG9nLmNzZG4ubmV0L3FxXzQzMjg0NDY5,size_16,color_FFFFFF,t_70)
SpringCloud Bus动态刷新全局广播
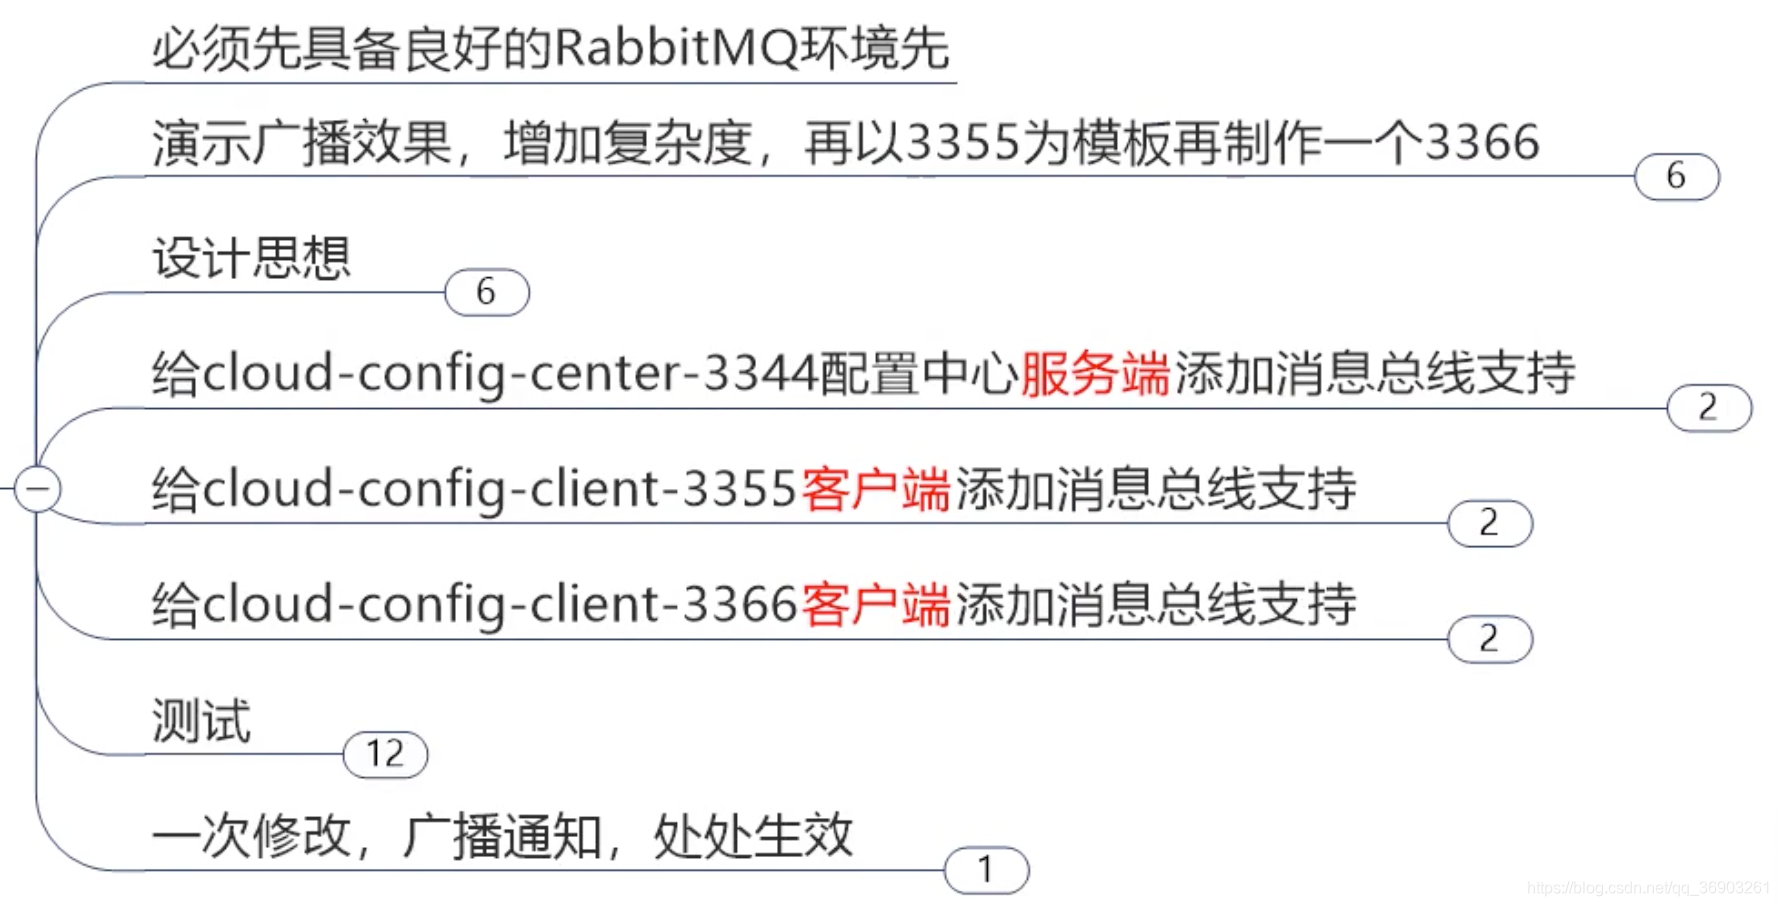
**按照3355新建3366:**↓
pom:
    <dependencies>
        <!--config server-->
        <dependency>
            <groupId>org.springframework.cloud</groupId>
            <artifactId>spring-cloud-starter-config</artifactId>
        </dependency>

        <!--eureka client(通过微服务名实现动态路由)-->
        <dependency>
            <groupId>org.springframework.cloud</groupId>
            <artifactId>spring-cloud-starter-netflix-eureka-client</artifactId>
        </dependency>
        <dependency>
            <groupId>org.springframework.boot</groupId>
            <artifactId>spring-boot-starter-web</artifactId>
        </dependency>
        <dependency>
            <groupId>org.springframework.boot</groupId>
            <artifactId>spring-boot-starter-actuator</artifactId>
        </dependency>
        <!--热部署-->
        <dependency>
            <groupId>org.springframework.boot</groupId>
            <artifactId>spring-boot-devtools</artifactId>
            <scope>runtime</scope>
            <optional>true</optional>
        </dependency>
        <dependency>
            <groupId>org.projectlombok</groupId>
            <artifactId>lombok</artifactId>
            <optional>true</optional>
        </dependency>
        <dependency>
            <groupId>org.springframework.boot</groupId>
            <artifactId>spring-boot-starter-test</artifactId>
            <scope>test</scope>
        </dependency>
    </dependencies>
bootstrap.yaml:
server:
  port: 3366


spring:
  application:
    name: config-client
  cloud:
    config: #config客户端配置
      label: main   #分支名称
      name: config    #配置文件名称       这三个综合:master分支上的config-dev.yml的配置文件
      profile: test    #读取后缀名称       被读取到http://config-3344.com:3344/main/config/dev
      uri: http://localhost:3344  #配置中心地址   记得加上【http://】


eureka:
  client:
    service-url:
      defaultZone: http://localhost:7001/eureka   #服务注册到的eureka地址
      #defaultZone: http://eureka7001.com:7001/eureka,http://eureka7002.com:7002/eureka,http://eureka7003.com:7003/eureka


#暴露监控端点
management:
  endpoints:
    web:
      exposure:
        include: "*"
主启动类:
@EnableEurekaClient
@SpringBootApplication
public class ConfigClientMain3355 {


    public static void main(String[] args) {


        SpringApplication.run(ConfigClientMain3355.class, args);
    }
}
controller:
@RestController
@RefreshScope  //开启刷新功能
public class ConfigClientController {


    @Value("${config.info}")	//spring的@Value注解
    private String configInfo;

    @Value("${server.port}")
    private String serverPort;


    @GetMapping("/configInfo")
    public String getConfigInfo(){


        return "serverPort: " + serverPort+ "configInfo: " + configInfo;
    }
}

利用消息总线触发一个客户端/bus/refresh而刷新所有客户端的配置:
通过实例1去传递给另外的实例2/3/4…


利用消息总线触发一个服务端 ConfigServer的/bus/refresh端点,而刷新所有客户端的配置:
通过配置中心去传递发送给实例1/2/3/4…

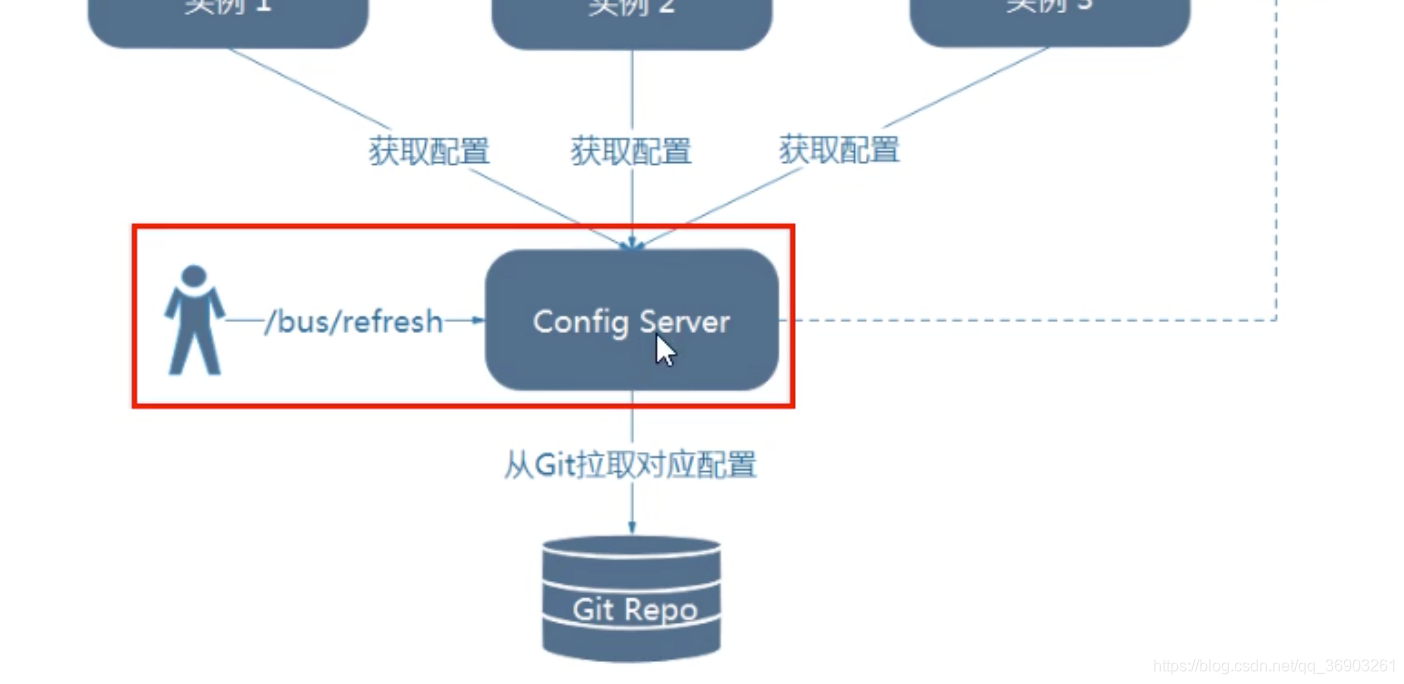
图二的架构显然更加适合,图一不适合的原因如下:

给【服务端】3344添加消息总线支持
消息总线:我通俗的来理解就是,去通知变化的那个服务
pom添加:
  <!--添加消息总线RabbitMQ的支持-->
  <dependency>
     <groupId>org.springframework.cloud</groupId>
     <artifactId>spring-cloud-starter-bus-amqp</artifactId>
 </dependency>
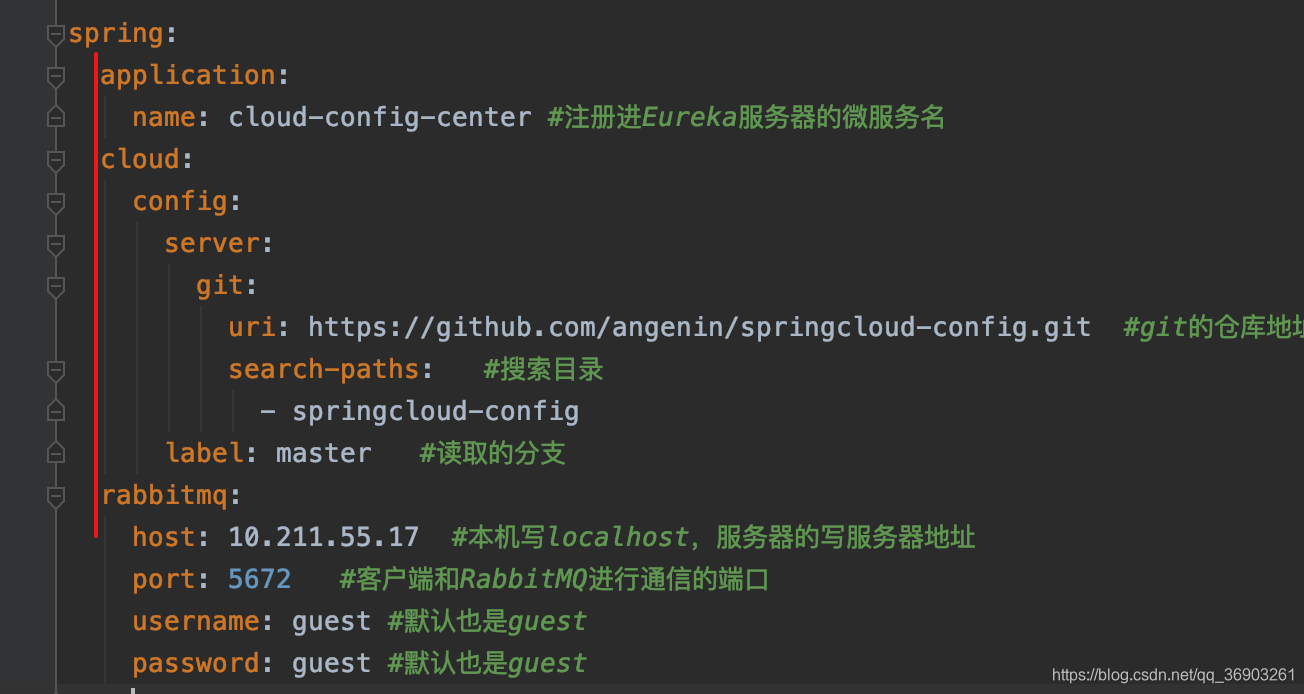
yml添加:
spring:
  ...:

  rabbitmq:
    host: 47.110.247.184  #本机写localhost,服务器的写服务器地址
    port: 5672   #客户端和RabbitMQ进行通信的端口
    username: guest #默认也是guest
    password: guest #默认也是guest


#RabbitMQ相关配置,将其设置为消息总线
management:
  endpoints:  #暴露bus刷新配置的端点
    web:
      exposure:
        include: 'bus-refresh'
给【客户端】3355和3366添加消息总线支持
pom添加:
  <!--添加消息总线RabbitMQ的支持-->
  <dependency>
      <groupId>org.springframework.cloud</groupId>
      <artifactId>spring-cloud-starter-bus-amqp</artifactId>
  </dependency>
yml添加:
spring:
  ...:

  rabbitmq:
    host: 47.110.247.184  #本机写localhost,服务器的写服务器地址
    port: 5672   #客户端和RabbitMQ进行通信的端口
    username: guest #默认也是guest
    password: guest #默认也是guest
spring的下一级,不要写错了。

测试
-
启动7001,3344,3355,3366。
-
修改GitHub上文件的版本号为 1。
-
运维工程师修改上面的内容后,给消息总线的3344发送广播刷新,在终端输入:
curl -X POST "http://localhost:3344/actuator/bus-refresh"发送post请求广播刷新 -
在浏览器输入
http://localhost:3355/configInfohttp://localhost:3366/configInfo
![[外链图片转存失败,源站可能有防盗链机制,建议将图片保存下来直接上传(img-kn7hhtC3-1612964141122)(C:\Users\PePe\AppData\Roaming\Typora\typora-user-images\image-20210210151907585.png)]](https://img-blog.csdnimg.cn/20210210213950568.png)
![[外链图片转存失败,源站可能有防盗链机制,建议将图片保存下来直接上传(img-fM5Y6Hkp-1612964141124)(C:\Users\PePe\AppData\Roaming\Typora\typora-user-images\image-20210210151913503.png)]](https://img-blog.csdnimg.cn/20210210213955481.png)
查看http://47.110.247.184:15672/
![[外链图片转存失败,源站可能有防盗链机制,建议将图片保存下来直接上传(img-FrRzMqXD-1612964141125)(C:\Users\PePe\AppData\Roaming\Typora\typora-user-images\image-20210210152528677.png)]](https://img-blog.csdnimg.cn/2021021021400234.png?x-oss-process=image/watermark,type_ZmFuZ3poZW5naGVpdGk,shadow_10,text_aHR0cHM6Ly9ibG9nLmNzZG4ubmV0L3FxXzQzMjg0NDY5,size_16,color_FFFFFF,t_70)
![[外链图片转存失败,源站可能有防盗链机制,建议将图片保存下来直接上传(img-ewD0jc5f-1612964141126)(C:\Users\PePe\AppData\Roaming\Typora\typora-user-images\image-20210210152701231.png)]](https://img-blog.csdnimg.cn/20210210214010592.png?x-oss-process=image/watermark,type_ZmFuZ3poZW5naGVpdGk,shadow_10,text_aHR0cHM6Ly9ibG9nLmNzZG4ubmV0L3FxXzQzMjg0NDY5,size_16,color_FFFFFF,t_70)
项目先不停止,下面要用。
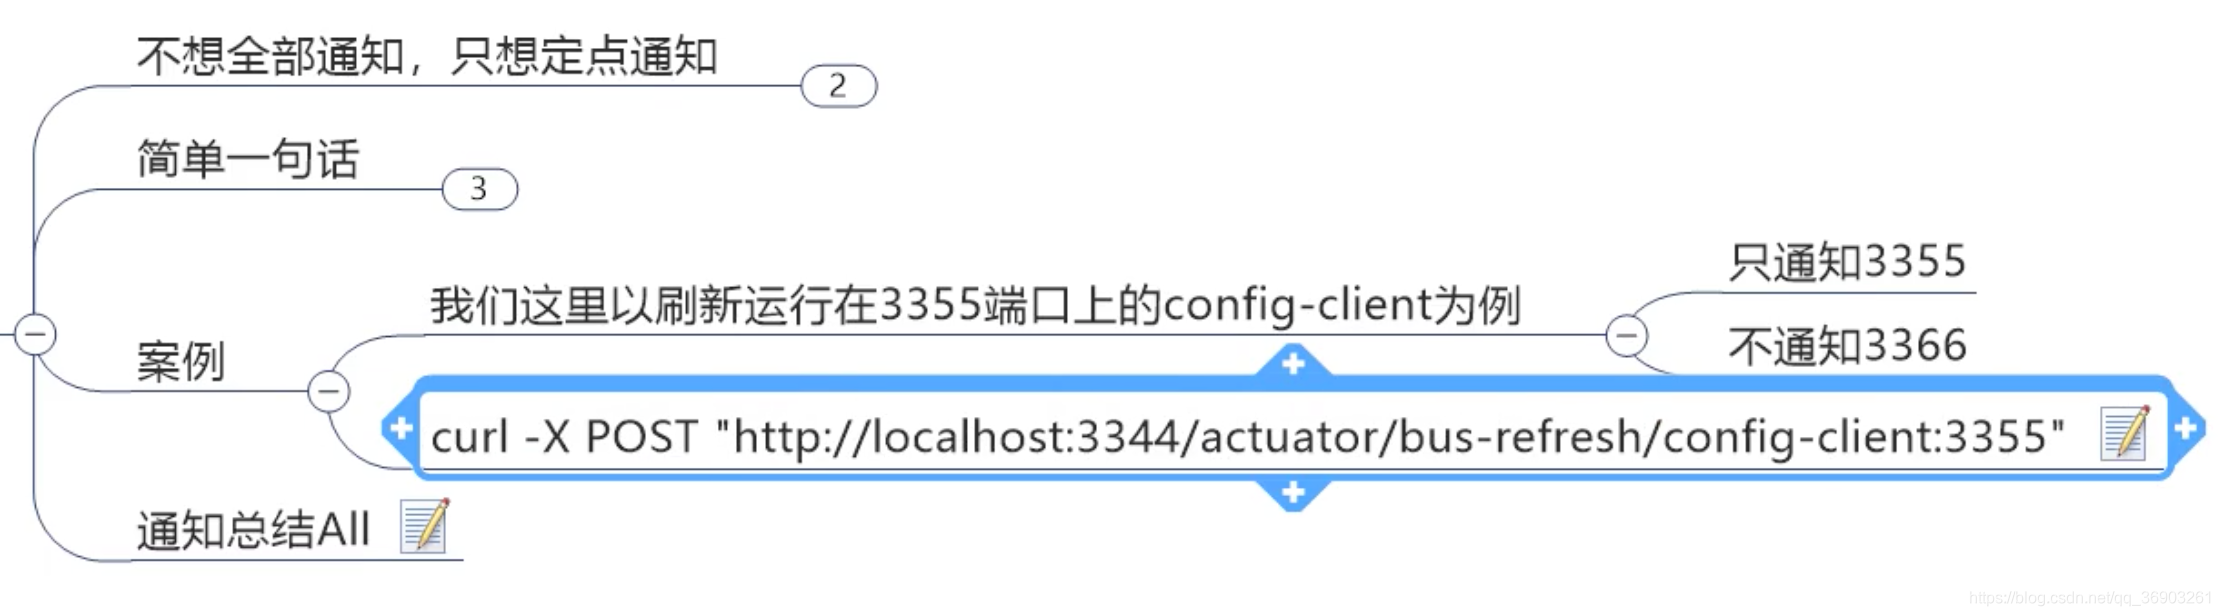
SpringCloud Bus动态刷新定点通知
精确打击,定点清除

-
修改GitHub的文件版本号 修改为 2。
-
在终端输入:
之前是:
curl -X POST "http://localhost:3344/actuator/bus-refresh"现在是:
curl -X POST "http://localhost:3344/actuator/bus-refresh/config-client:3355"
多加了/服务名:端口号即可定点通知。
http://localhost:3355/configInfo
![[外链图片转存失败,源站可能有防盗链机制,建议将图片保存下来直接上传(img-kJyWZhxI-1612964141127)(C:\Users\PePe\AppData\Roaming\Typora\typora-user-images\image-20210210153316373.png)]](https://img-blog.csdnimg.cn/2021021021401811.png)
http://localhost:3366/configInfo
![[外链图片转存失败,源站可能有防盗链机制,建议将图片保存下来直接上传(img-2QvDZnYk-1612964141128)(C:\Users\PePe\AppData\Roaming\Typora\typora-user-images\image-20210210153332885.png)]](https://img-blog.csdnimg.cn/20210210214023785.png)
总结:
