文章目录
◆ Pycharm如何生成决策树?
Ⅰ.决策树基本步骤
- 以下代码在jupyter中可以直接生成,但是在Pyharm中生成的结果是用文字形式表示的树模型。
"""
 决策树:
   决策树是一种非参数的有监督学习,可以从一系列有特征和标签的数据中总结出决策规则,并用树状图来展示出这些规则,解决分类和回归的问题。
   决策树的本质是一种图结构
"""
import pandas  as  pd
from sklearn.datasets import load_wine
from sklearn.model_selection import train_test_split
from sklearn.tree import DecisionTreeClassifier

# 获取数据集
wine_data = load_wine()
x = pd.DataFrame(wine_data.data)
y = wine_data.target
feature = wine_data.feature_names
x.columns = feature

# 划分测试集、训练集
xtrain,xtest,ytrain,ytest = train_test_split(x,y,test_size=0.3,random_state=420)

# 建模
clf = DecisionTreeClassifier(criterion="entropy").fit(xtrain,ytrain)
# 返回预测的准确度 accuracy
score = clf.score(xtest,ytest)  # 0.9629629629629629

# 绘制树
feature_name = ['酒精','苹果酸','灰','灰的碱性','镁','总酚','类黄酮','非黄烷类酚类','花青素','颜
色强度','色调','od280/od315稀释葡萄酒','脯氨酸']
import graphviz
dot_data = tree.export_graphviz(clf
                               ,feature_names= feature_name
                               ,class_names=["琴酒","雪莉","贝尔摩德"]
                               ,filled=True
                               ,rounded=True
                               )
graph = graphviz.Source(dot_data)
print(graph)
digraph Tree {


node [shape=box, style="filled, rounded", color="black", fontname=helvetica] ;
edge [fontname=helvetica] ;
0 [label="类黄酮 <= 1.575\nentropy = 1.557\nsamples = 124\nvalue = [34, 53, 37]\nclass = 雪莉", fillcolor="#dbfae8"] ;
1 [label="色调 <= 0.92\nentropy = 0.747\nsamples = 47\nvalue = [0, 10, 37]\nclass = 贝尔摩德", fillcolor="#a36fec"] ;
0 -> 1 [labeldistance=2.5, labelangle=45, headlabel="True"] ;
2 [label="entropy = 0.0\nsamples = 36\nvalue = [0, 0, 36]\nclass = 贝尔摩德", fillcolor="#8139e5"] ;
1 -> 2 ;
3 [label="酒精 <= 13.515\nentropy = 0.439\nsamples = 11\nvalue = [0, 10, 1]\nclass = 雪莉", fillcolor="#4de88e"] ;
1 -> 3 ;
4 [label="entropy = 0.0\nsamples = 10\nvalue = [0, 10, 0]\nclass = 雪莉", fillcolor="#39e581"] ;
3 -> 4 ;
5 [label="entropy = 0.0\nsamples = 1\nvalue = [0, 0, 1]\nclass = 贝尔摩德", fillcolor="#8139e5"] ;
3 -> 5 ;
6 [label="酒精 <= 12.785\nentropy = 0.99\nsamples = 77\nvalue = [34, 43, 0]\nclass = 雪莉", fillcolor="#d6fae5"] ;
0 -> 6 [labeldistance=2.5, labelangle=-45, headlabel="False"] ;
7 [label="entropy = 0.0\nsamples = 38\nvalue = [0, 38, 0]\nclass = 雪莉", fillcolor="#39e581"] ;
6 -> 7 ;
8 [label="脯氨酸 <= 655.0\nentropy = 0.552\nsamples = 39\nvalue = [34, 5, 0]\nclass = 琴酒", fillcolor="#e99456"] ;
6 -> 8 ;
9 [label="entropy = 0.0\nsamples = 4\nvalue = [0, 4, 0]\nclass = 雪莉", fillcolor="#39e581"] ;
8 -> 9 ;
10 [label="色调 <= 1.295\nentropy = 0.187\nsamples = 35\nvalue = [34, 1, 0]\nclass = 琴酒", fillcolor="#e6853f"] ;
8 -> 10 ;
11 [label="entropy = 0.0\nsamples = 34\nvalue = [34, 0, 0]\nclass = 琴酒", fillcolor="#e58139"] ;
10 -> 11 ;
12 [label="entropy = 0.0\nsamples = 1\nvalue = [0, 1, 0]\nclass = 雪莉", fillcolor="#39e581"] ;
10 -> 12 ;
}
Ⅱ.实现生成决策树图
# 绘制树
import pydotplus
from sklearn import tree
from IPython.display import Image

feature_name = ['酒精','苹果酸','灰','灰的碱性','镁','总酚','类黄酮','非黄烷类酚类','花青素','颜色强度','色调','od280/od315稀释葡萄酒','脯氨酸']
dot_tree = tree.export_graphviz(clf   # 构建的决策树模型
                               ,feature_names= feature_name  # 特征名
                               ,class_names=["琴酒","雪莉","贝尔摩德"]  # 分出的类名 --- 酒名
                               ,filled=True
                               ,rounded=True
                               )
graph = pydotplus.graph_from_dot_data(dot_tree)
img = Image(graph.create_png())
graph.write_png("G:\Projects\pycharmeProject\Python_Sklearn\决策树\picture\wine.png")
- 通过网上查找,找到了如上的解决方案。但是运行时报错:
InvocationException: GraphViz's executables not found。
Ⅲ.InvocationException: GraphViz’s executables not found 解决方案
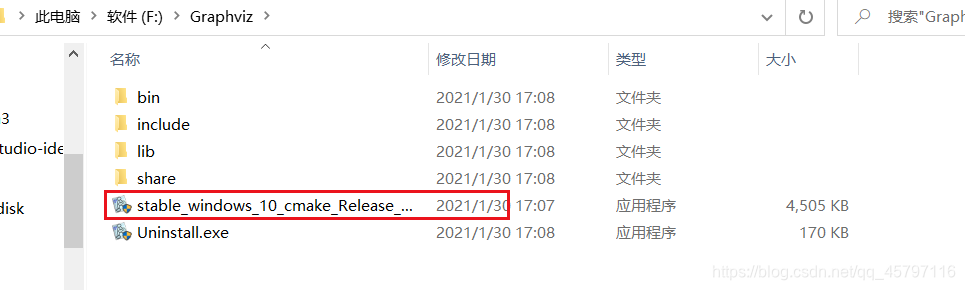
下载安装GraphViz(这是一个独立软件)
https://graphviz.gitlab.io/_pages/Download/Download_windows.html
- 下载完后解压缩后,进行安装,安装过程中选择添加至环境变量中。
- 不过我手工在环境变量中添加了bin路径不行,还是运行下边这个语句好。
import os
os.environ["PATH"] += os.pathsep + r'F:\Graphviz\bin'
- 然后在进行图像保存的时候,最好指明图片保存路径方便查找。
graph.write_png("G:\Projects\pycharmeProject\Python_Sklearn\决策树\picture\wine.png")
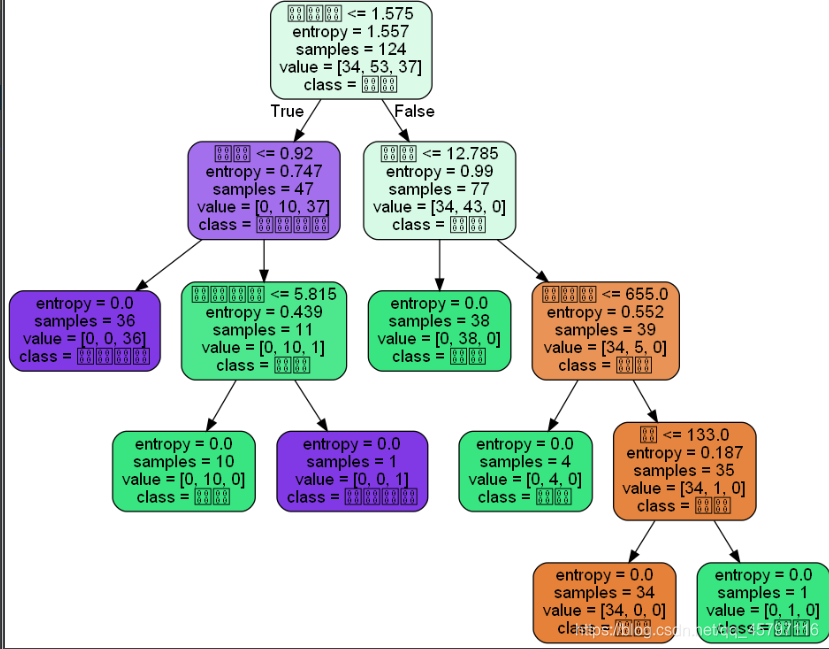
◆ 生成的决策树中文乱码问题
通过上述步骤后,可以生成树模型图。但是由于本人在设置名称时用的是中文,问题又来了,最后显示的图片中中文乱码。
with open('G:\Projects\pycharmeProject\Python_Sklearn\决策树\picture\dot_data.txt', 'w',
          encoding='utf-8') as f:  ##将生成树写入,因为含有中文,所以encoding='utf-8'
    f.writelines(dot_tree)

import codecs
txt_dir = r'G:\Projects\pycharmeProject\Python_Sklearn\决策树\picture\dot_data.txt'
txt_dir_utf8 = r'G:\Projects\pycharmeProject\Python_Sklearn\决策树\picture\dot_data_utf8.txt'

with codecs.open(txt_dir, 'r', encoding='utf-8') as f, codecs.open(txt_dir_utf8, 'w', encoding='utf-8') as wf:
    for line in f:
        lines = line.strip().split('\t')
        print(lines)
        if 'label' in lines[0]:
            newline = lines[0].replace('\n', '').replace(' ', '')
        else:
            newline = lines[0].replace('\n','').replace('SimSun-ExtB', 'Microsoft YaHei')
        wf.write(newline + '\t')