threshold在图像滤波中经常用到,把像素中高于或者低于某一值得像素置零,同时其他的像素保持不变。
函数原型
CV_EXPORTS_W double threshold( InputArray src,
							   OutputArray dst,
                               double thresh,
                               double maxval,
                               int type );
src:输入矩阵(多通道、8位或32位浮点)。
dst:输出与src相同大小和类型以及相同数量的通道的数组。
thresh:阈值。
maxval:与THRESH_BINARY和THRESH_BINARY_INV阈值设定一起使用的最大值
类型。
type :阈值类型(见下方)
type阈值类型表
| 枚举 | 值 | 描述 |
|---|---|---|
| THRESH_BINARY | 0 | dst = src> thresh?maxval:0 |
| THRESH_BINARY_INV | 1 | dst = src> thresh?0:maxval |
| THRESH_TRUNC | 2 | dst = src> thresh?thresh:src |
| THRESH_TOZERO | 3 | dst = src> thresh?src:0 |
| THRESH_TOZERO_INV | 4 | dst = src> thresh?0:src |
| THRESH_MASK | 7 | 无 |
| THRESH_OTSU | 8 | 采用Otsu算法选择最优阈值(不支持32位的) |
| THRESH_TRIANGLE | 16 | 采用三角形算法选择最优阈值(不支持32位的) |
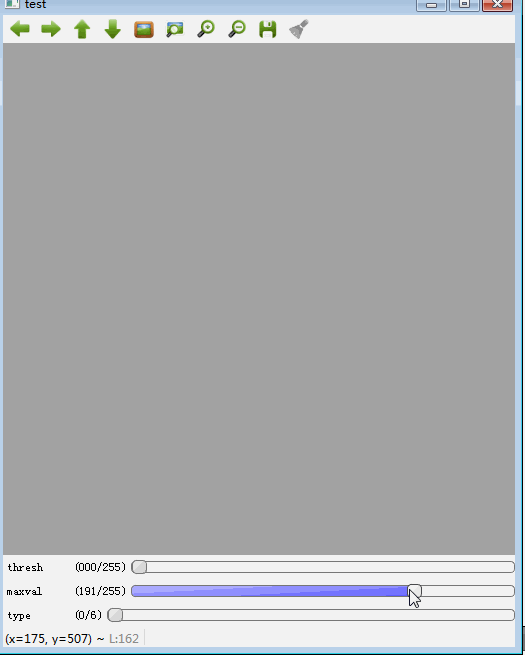
下面将使用3个例子使用
例1:使用cvtColor( InputArray src, OutputArray dst, int code, int dstCn = 0 )
效果:
代码:
void example1()
{


    cv::Mat str1 = cv::imread("C:\\Users\\chuan\\Desktop\\picture\\test.jpg"), str2;
	cv::namedWindow("test",cv::WINDOW_AUTOSIZE);
	int thresh = 0, maxval = 0, type_tmp = 0, type = 0;
	cv::createTrackbar("thresh", "test", &thresh, 255);
	cv::createTrackbar("maxval", "test", &maxval, 255);
	cv::createTrackbar("type", "test", &type_tmp, 6);
	for(;;)
	{


		cv::cvtColor(str1, str2, CV_BGR2GRAY);
		if(type_tmp == 5)
		    type = 8;
		else if(type_tmp == 6)
		    type = 16;
		else
		    type = type_tmp;
		cv::threshold(str2, str2, thresh, maxval, type);
		cv::imshow("test", str2);
	    if(cv::waitKey(100) == 27)
	        break;
	}
}
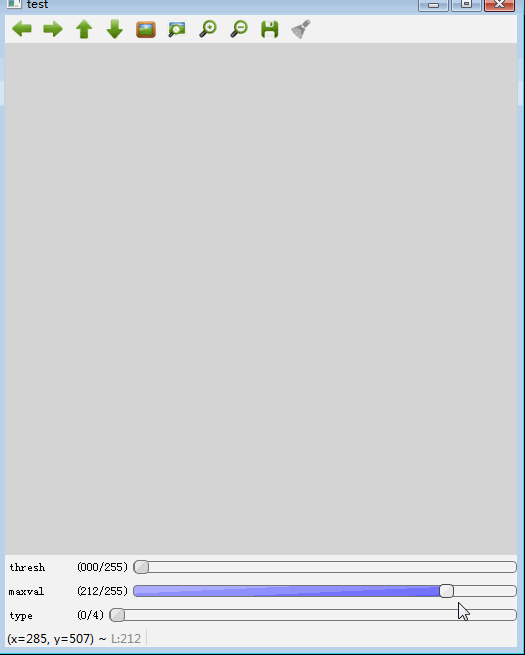
例子2:将图像的3个通道的值相加,并把值控制在100以内。
效果:
代码:
void example2()
{


    cv::Mat str1 = cv::imread("C:\\Users\\chuan\\Desktop\\picture\\test.jpg"), str2;
	cv::namedWindow("test",cv::WINDOW_AUTOSIZE);
	std::vector<cv::Mat> planes;
	cv::split(str1, planes);
	cv::Mat b = planes[0], g = planes[1], r = planes[2];
	cv::Mat s = cv::Mat::zeros(b.size(), CV_32F);
	cv::addWeighted(r, 1./3., g, 1./3., 0.0, s);
	cv::addWeighted(s, 1, b, 1./3, 0.0, s);

	int thresh = 0,maxval = 0, type = 0;
	cv::createTrackbar("thresh", "test", &thresh, 255);
	cv::createTrackbar("maxval", "test", &maxval, 255);
	cv::createTrackbar("type", "test", &type , 4);
	for(;;)
	{


		cv::threshold(s, str2, thresh, maxval, type);
	    cv::imshow("test", str2);
	    if(cv::waitKey(100)==27)
	        break;
	}
}
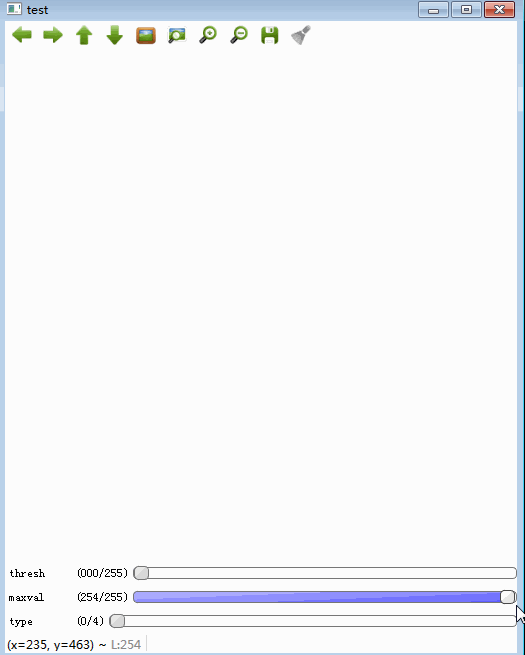
例子3:利用cv::accumulate()将8位整型的图像累加到一幅浮点型的图像中。
效果:
代码:
void example3()
{


    cv::Mat str1 = cv::imread("C:\\Users\\chuan\\Desktop\\picture\\test.jpg"), str2;
	cv::namedWindow("test", cv::WINDOW_AUTOSIZE);
	std::vector<cv::Mat> planes;
	cv::split(str1, planes);
	cv::Mat b = planes[0], g = planes[1], r = planes[2];
	cv::Mat s = cv::Mat::zeros(b.size(), CV_32F), tmp;
	cv::accumulate(b, s);
	cv::accumulate(g, s);
	cv::accumulate(r, s);

	int thresh = 0, maxval = 0, type = 0;
	cv::createTrackbar("thresh", "test", &thresh, 255);
	cv::createTrackbar("maxval", "test", &maxval, 255);
	cv::createTrackbar("type", "test", &type, 4);

	for(;;)
	{


		cv::threshold(s, str2, thresh, maxval, type);
		str2.convertTo(tmp, CV_8U);
	    cv::imshow("test", tmp);
	    if(cv::waitKey(100) == 27)
	        break;
	}
}