LCD(ili9341)驱动及汉字显示
LCD
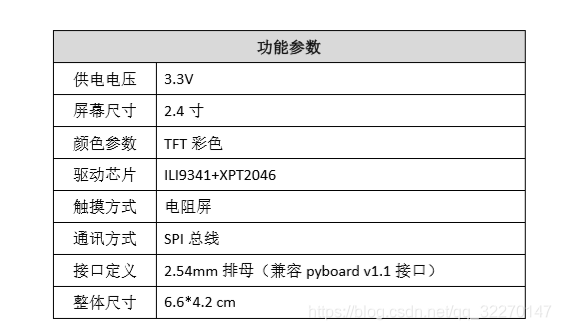
参数
引脚定义

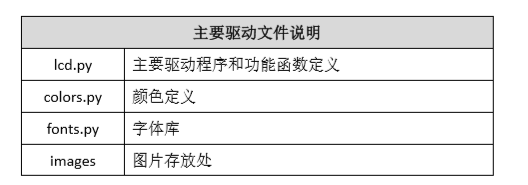
驱动代码
移步至我的仓库
注意,内部flash空间不够,要使用SD卡
| 构造函数 |
|---|
| d=LCD(rstPin=‘Y4’, csxPin=‘Y5’, dcxPin=‘Y3’,port=2, portrait=True) |
| 构建 LCD 对象 d。rstPin:复位,csxPin:片选,dcxPin:数据/指令,port=2: SPI(2),portrait:True(竖屏),False(横屏) |
| c = d.initCh(color, bgcolor, font) |
| 构建字符对象 c。color:颜色,bgcolor:字符背景颜色,font:字体 |
使用方法
| 函数 | 参数 |
|---|---|
| d. fillMonocolor (color) | 填充:color:颜色 |
| d.drawPixel(x, y, color, pixels=4) | 画点,x:横坐标,y:纵坐标,color:颜色,pixels:像素[1-4] |
| d.drawVline(x, y, length, color, width=1) | 画垂直线,x:横坐标,y:纵坐标,length:长度,color:颜色,width:线宽[1-10 |
| d.drawHline(x, y, length, color, width=1) | 画水平线,x:横坐标,y:纵坐标,length:长度,color:颜色,width:线宽[1-10 |
| drawLine(self, x, y, x1, y1, color) | 画线段,x,y:起始坐标,x1,y1:终点坐标,color:颜 色 |
| d.drawRect(x, y, width, height, color, border=1, fillcolor=None) | 画矩形,x,y:起始坐标,width:宽度,length:长度, color:颜色,border:边宽,fillcolor:填充颜色,None 为不填充 |
| d.drawCircle(x, y, radius, color, border=1, degrees=360, startangle=0) | 画圆。x, y:圆心,radius:半径,color:颜色,border:边宽,degrees:圆弧度数,startangle:起始角 |
| c.printChar(char, x, y,) | 写单个字符,char:字符,x,y:起始坐 |
| c.printLn(string, x, y,) | 写字符串,string:字符串,x,y:起始坐标 |
| d.renderBmp(filename, pos=None) | 显示图片,filename: images 文件夹下的 BMP 文件名称;pos:起始坐标,格式(x,y)。 注意事项:BMP 文件格式是 16 位(R5,G6,B5)格式。分辨率小于240*320。 |
汉字显示
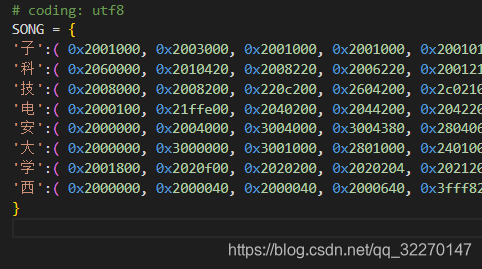
取模
学过单片机的同学们都知道,在单片机上显示汉字是要取模。在本次实验中依然是取模,不过本次不再用常用的取模软件。我在GitHub中找到一个的取模软件——freetype-generator但是他只能制作32-255号的拓展ascii码表,我自己重构了一下更好的匹配中文。我的仓库
python ILI9341Fonts-generate.py <ttf_file> <ttf_size> <out_python_file> <Object_name> (--file=|--string== )
例如
python ILI9341Fonts-generate.py ttf-fonts/FZFSJW.TTF 26 ili-fonts/ZH-CN-SONG.py SONG --string 西安电子科技大学
python ILI9341Fonts-generate.py ttf-fonts/FZFSJW.TTF 26 ili-fonts/ZHCNSONG.py SONG --file contant.txt
表示 ttf文件为 FZFSJW.ttf 字体大小为 26,生成的取模文件为ZHCNSONG.py 内容(字典)为SONG 字符串为 西安电子科技大学 (内容文件 contant.txt)
这个方法依赖于freetype和docopt模块
安装freetype
python -m pip install freetype-py
安装docopt
docopt的依赖模块很多,建议使用conda安装
conda install docopt
main.py文件中导入字体文件即可。
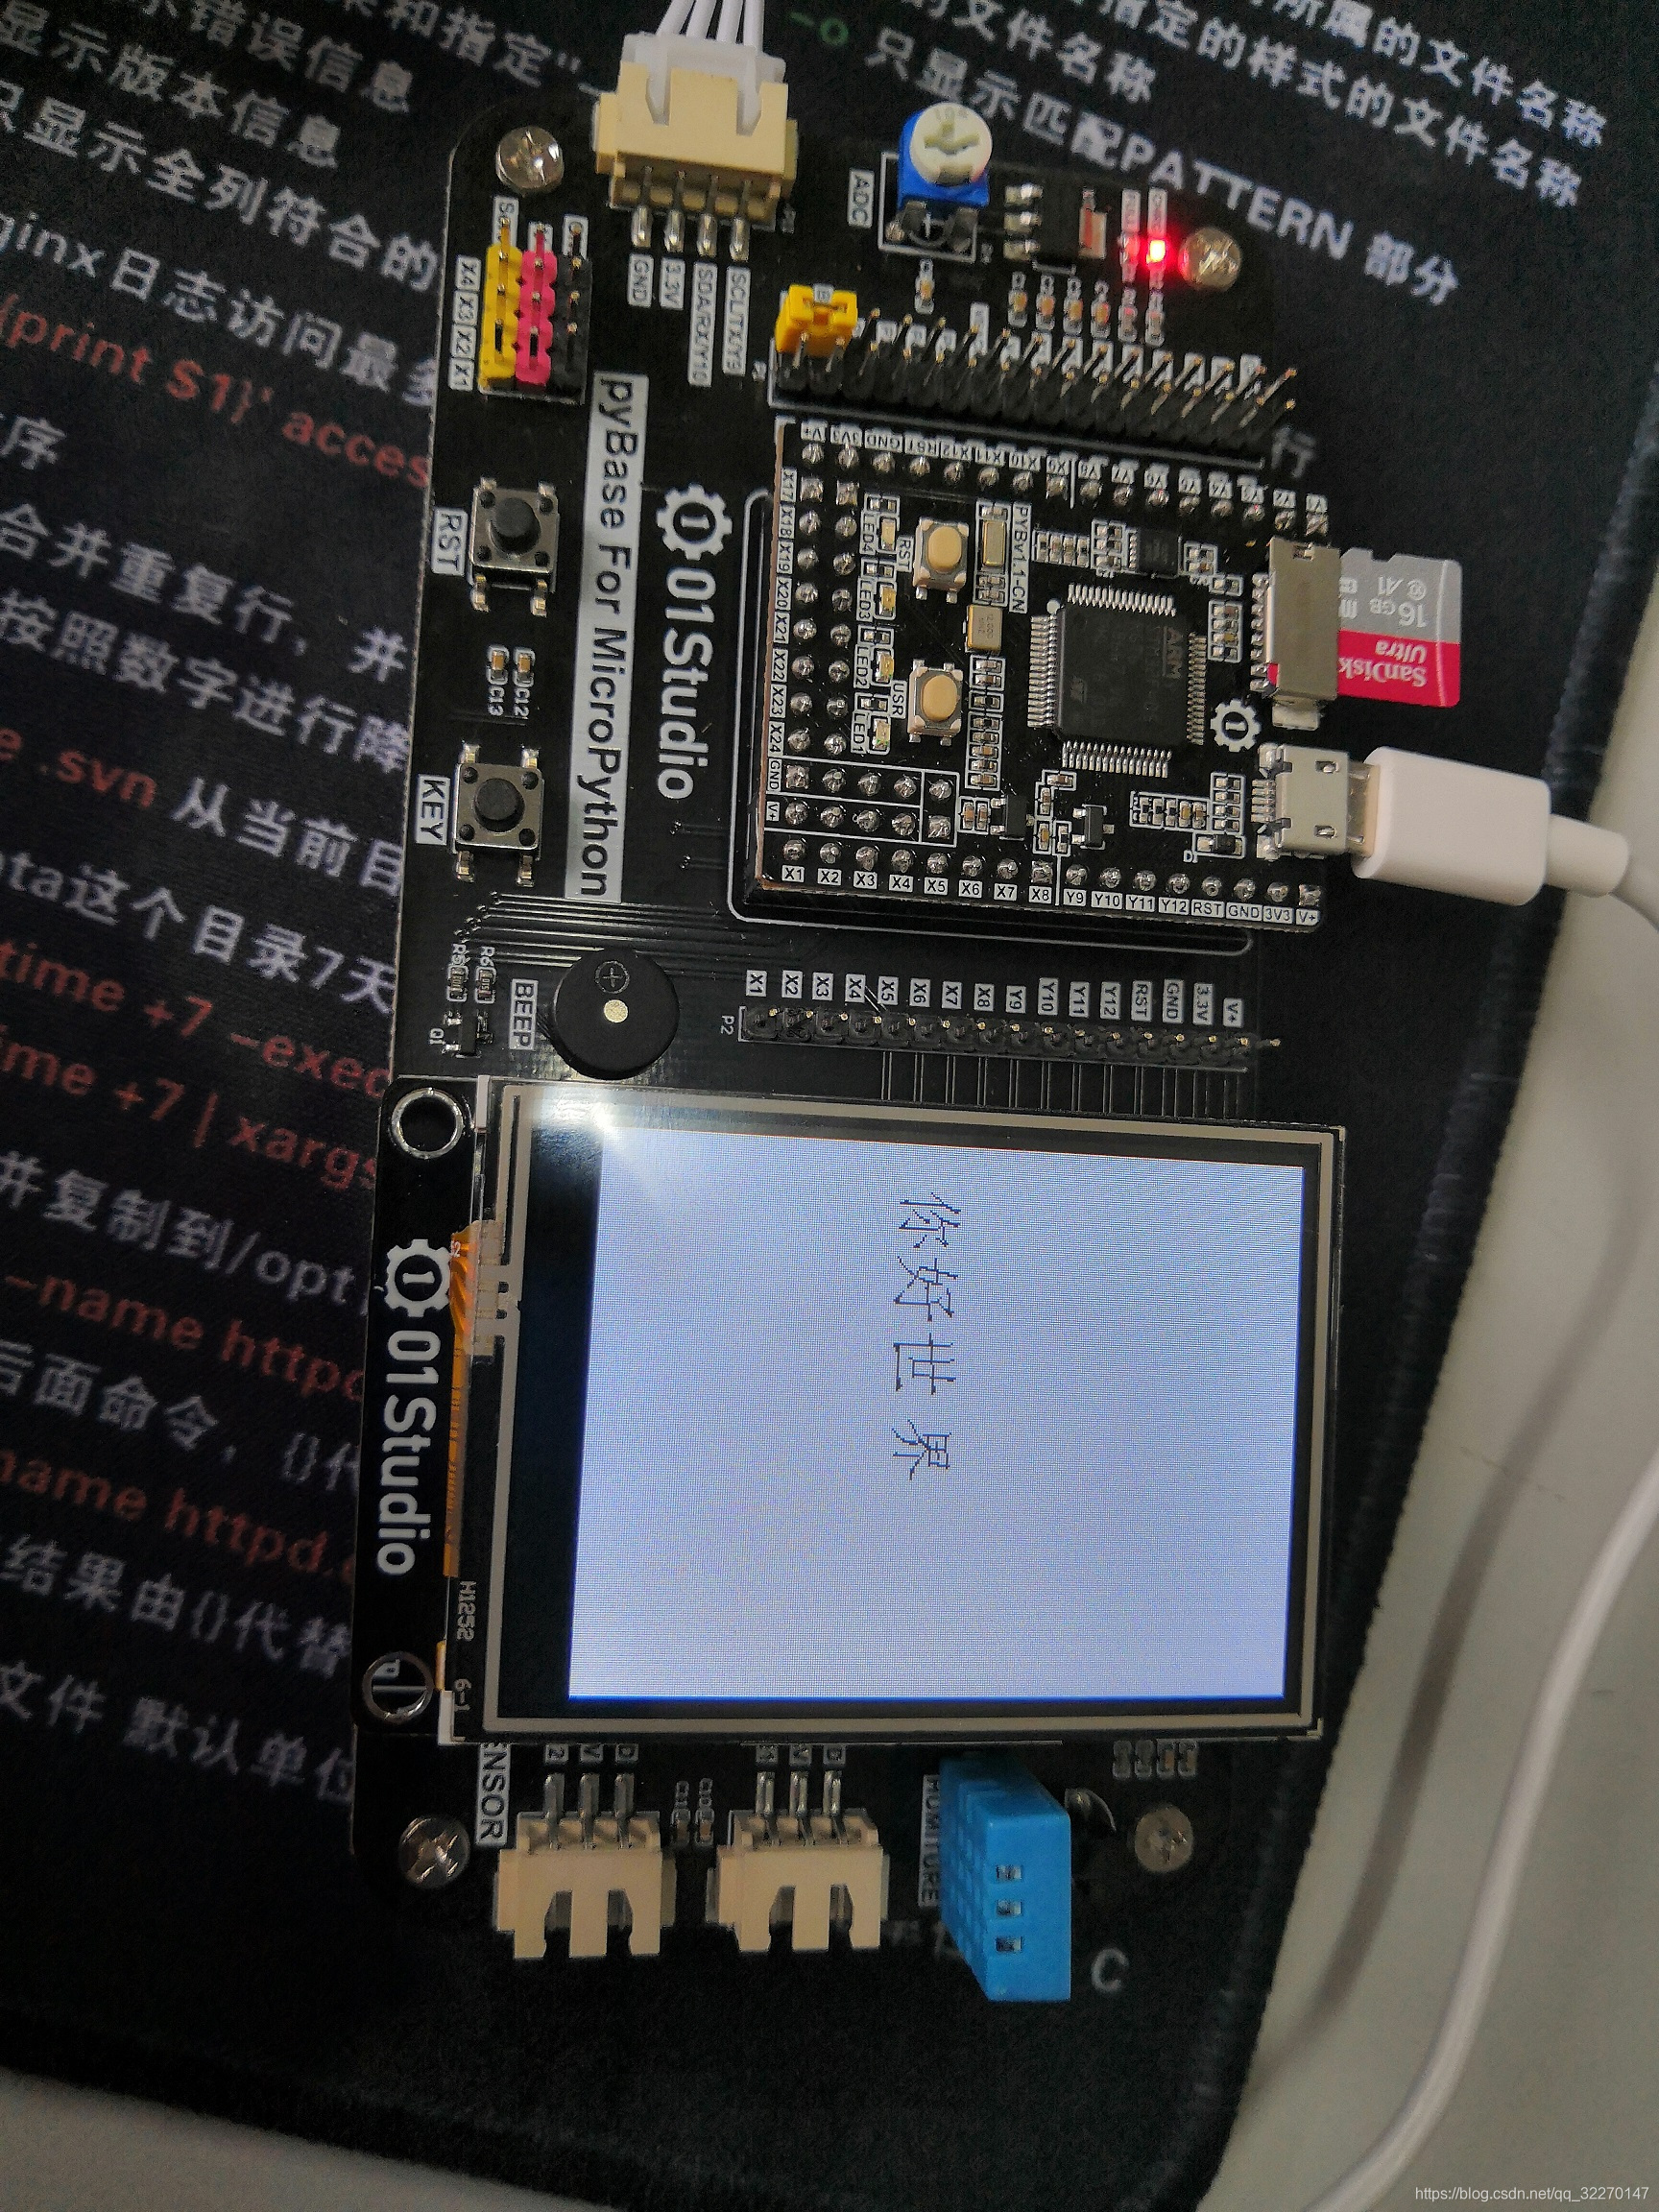
实测