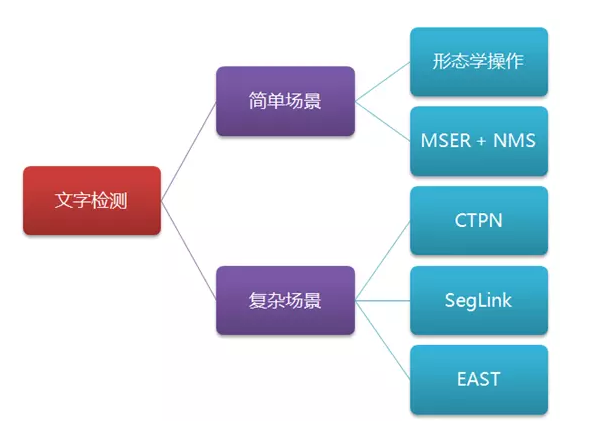
文字检测可以使用的方法:形态学、MSER、CTPN、SegLink、EAST等。
可以使用的深度学习文本行定位:CTPN、YOLO、
文字检测的目的是为了文字识别。文字检测是文字识别的必经之路。文字检测的场景分为两种,一种是简单场景,另一种是复杂场景。其中,简单场景的文字检测较为简单,例如像书本扫描、屏幕截图、或者清晰度高、规整的照片等;而复杂场景,主要是指自然场景,情况比较复杂,例如像街边的广告牌、产品包装盒、设备上的说明、商标等等,存在着背景复杂、光线忽明忽暗、角度倾斜、扭曲变形、清晰度不足等各种情况,文字检测的难度更大。
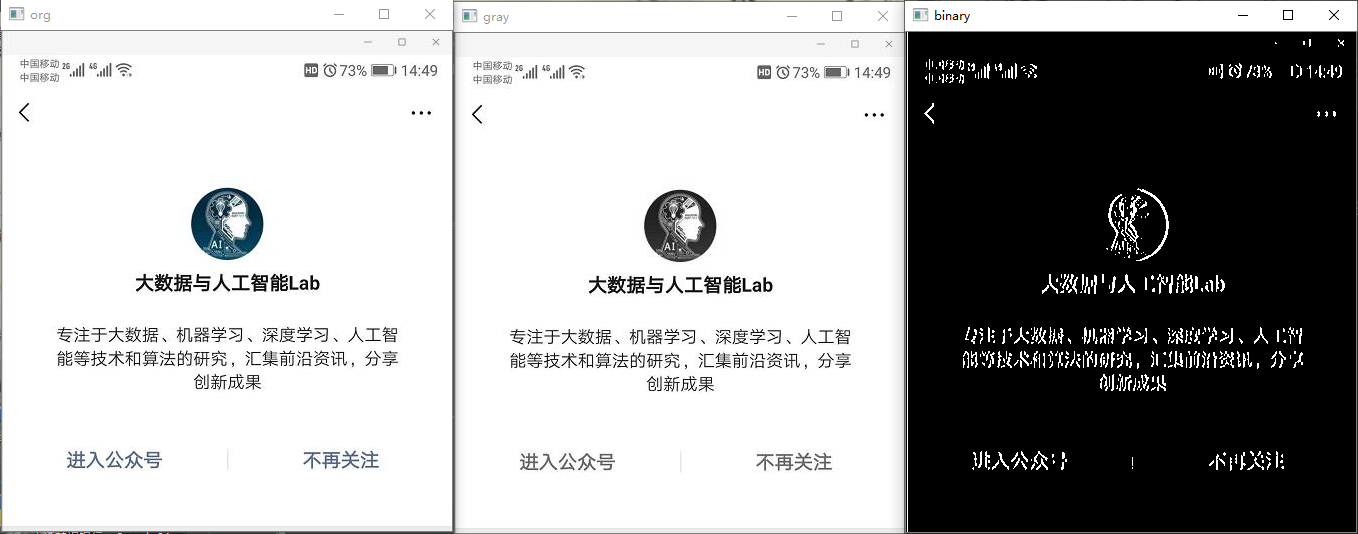
1、形态学操作
 1 # -*- coding: utf-8 -*-
 2
 3 import cv2
 4 import numpy as np
 5
 6 # 读取图片
 7 imagePath = 'D:/documents/pycharm/text_line_detect/test.jpg'
 8 img = cv2.imread(imagePath)
 9 cv2.imshow('org', img)
10 # 转化成灰度图
11 gray = cv2.cvtColor(img, cv2.COLOR_BGR2GRAY)
12
13 cv2.imshow('gray', gray)
14 # cv2.waitKey(0)
15 # 利用Sobel边缘检测生成二值图
16 sobel = cv2.Sobel(gray, cv2.CV_8U, 1, 0, ksize=3)
17 # 二值化
18 ret, binary = cv2.threshold(sobel, 0, 255, cv2.THRESH_OTSU + cv2.THRESH_BINARY)
19 cv2.imshow('binary', binary)
20 # 膨胀、腐蚀
21 element1 = cv2.getStructuringElement(cv2.MORPH_RECT, (30, 9))
22 element2 = cv2.getStructuringElement(cv2.MORPH_RECT, (24, 6))
23
24 # 膨胀一次,让轮廓突出
25 dilation = cv2.dilate(binary, element2, iterations=1)
26 cv2.imshow('dilation', dilation)
27 # 腐蚀一次,去掉细节
28 erosion = cv2.erode(dilation, element1, iterations=1)
29 cv2.imshow('erosion', erosion)
30 # 再次膨胀,让轮廓明显一些
31 # dilation2 = cv2.dilate(erosion, element2, iterations=2)
32 # cv2.imshow('dilation2', dilation2)
33 #  查找轮廓和筛选文字区域
34 region = []
35 contours, hierarchy = cv2.findContours(erosion, cv2.RETR_TREE, cv2.CHAIN_APPROX_SIMPLE)
36 for i in range(len(contours)):
37     cnt = contours[i]
38
39     # 计算轮廓面积,并筛选掉面积小的
40     area = cv2.contourArea(cnt)
41     if (area < 600):
42         continue
43
44     # 找到最小的矩形
45     rect = cv2.minAreaRect(cnt)
46     print ("rect is: ")
47     print (rect)
48
49     # box是四个点的坐标
50     box = cv2.boxPoints(rect)
51     box = np.int0(box)
52
53     # 计算高和宽
54     height = abs(box[0][1] - box[2][1])
55     width = abs(box[0][0] - box[2][0])
56
57     # 根据文字特征,筛选那些太细的矩形,留下扁的
58     if (height > width * 1.3):
59         continue
60
61     region.append(box)
62
63 # 绘制轮廓
64 for box in region:
65     cv2.drawContours(img, [box], 0, (0, 255, 0), 2)
66
67 cv2.imshow('img', img)
68 cv2.waitKey(0)
69 cv2.destroyAllWindows()
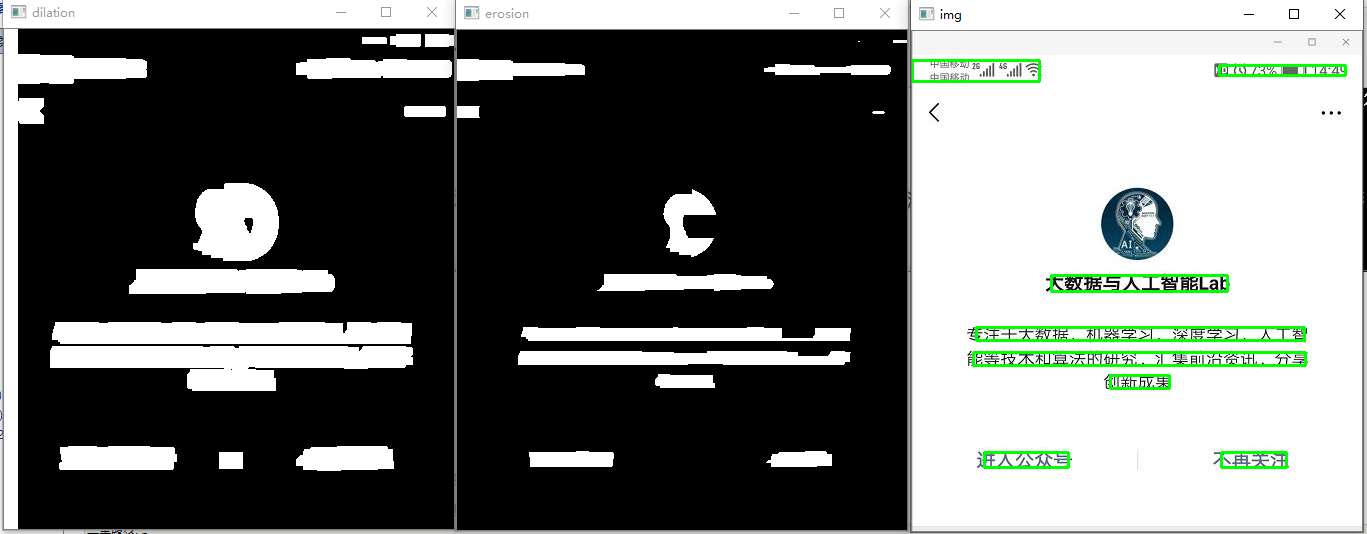
文本框坐标:
rect is:
((341.5, 428.5), (65.0, 15.0), 0.0)
rect is:
((114.0, 428.5), (84.0, 15.0), -0.0)
rect is:
((227.5, 350.5), (59.0, 13.0), -0.0)
rect is:
((227.0, 327.5), (332.0, 13.0), -0.0)
rect is:
((228.49996948242188, 303.4999694824219), (328.99993896484375, 12.999998092651367), 0.0)
rect is:
((227.99996948242188, 252.0), (175.99996948242188, 15.999998092651367), 0.0)
rect is:
((231.27243041992188, 192.2310333251953), (66.85161590576172, 51.90342712402344), -85.2363510131836)
rect is:
((370.0, 39.0), (126.0, 10.0), -0.0)
rect is:
((63.5, 39.5), (21.0, 127.0), -90.0)
参考博客:https://www.csdn.net/gather_25/MtTaggxsNjU4OS1ibG9n.html