1. 环境说明
[root@localhost ~]# cat /etc/redhat-release
CentOS Linux release 7.7.1908 (Core)
[root@localhost ~]# uname -r
3.10.0-1062.el7.x86_64
主机
| 角色 | ip |
|---|---|
| mysql01 | 192.168.20.131 |
| mysql02 | 192.168.20.132 |
2. 安装mysql并做基本设置
由于源码安装比较慢,使用yum安装官方的mysql也比较慢,这里我们使用mariadb进行操作演示 效果是一样的 差异只是mysql版本的区别
两个mysql主机操作相同 如下
[root@localhost ~]# yum -y install mariadb-devel mariadb-server
[root@localhost ~]# systemctl start mariadb
[root@localhost ~]# mysqladmin -uroot password 123456
查看mysql版本 可以发现 mariadb是mysql 5.5的版本
[root@localhost ~]# mysql -V
mysql  Ver 15.1 Distrib 5.5.65-MariaDB, for Linux (x86_64) using readline 5.1
3. 主从复制的实现(数据从mysql01—> mysql02)
核心思想:实现数据库的集群化 和 主库数据的备份 当业务量比较大的时候 可以实现读写分离
3.1 mysql01服务器的操作
创库 授权
[root@localhost ~]# mysql -uroot -p123456
Welcome to the MariaDB monitor.  Commands end with ; or \g.
Your MariaDB connection id is 3
Server version: 5.5.65-MariaDB MariaDB Server

Copyright (c) 2000, 2018, Oracle, MariaDB Corporation Ab and others.

Type 'help;' or '\h' for help. Type '\c' to clear the current input statement.
MariaDB [(none)]> create database course;
Query OK, 1 row affected (0.00 sec)

MariaDB [(none)]> grant replication slave on *.* to 'bakcuper'@'192.168.20.132' identified by '12345678';
Query OK, 0 rows affected (0.00 sec)

MariaDB [(none)]> flush privileges;
Query OK, 0 rows affected (0.00 sec)

MariaDB [(none)]> exit
Bye
修改mysql01配置
[root@localhost ~]# vim /etc/my.cnf
  1 [mysqld] #在mysqld下添加内容
  2 server-id=1
  3 binlog-do-db=course
  4 binlog-ignore-db=mysql
  5 log-bin=mysql-bin

参数释义:
server-id  服务器id编号
binlog-do-db=course 同步的库
binlog-ignore-db=mysql 不同步的库
log-bin=mysql-bin 二进制日志的文件名
重启服务
[root@localhost ~]# systemctl restart mariadb
进入数据库 查看主库状态
[root@localhost ~]# mysql -uroot -p123456
Welcome to the MariaDB monitor.  Commands end with ; or \g.
Your MariaDB connection id is 2
Server version: 5.5.65-MariaDB MariaDB Server

Copyright (c) 2000, 2018, Oracle, MariaDB Corporation Ab and others.

Type 'help;' or '\h' for help. Type '\c' to clear the current input statement.
MariaDB [(none)]> show master status;
+------------------+----------+--------------+------------------+
| File             | Position | Binlog_Do_DB | Binlog_Ignore_DB |
+------------------+----------+--------------+------------------+
| mysql-bin.000001 |      245 | course       | mysql            |
+------------------+----------+--------------+------------------+
1 row in set (0.00 sec)
3.2 mysql02的操作
创建用于主从同步的库
[root@localhost ~]# mysql -uroot -p123456
Welcome to the MariaDB monitor.  Commands end with ; or \g.
Your MariaDB connection id is 3
Server version: 5.5.65-MariaDB MariaDB Server

Copyright (c) 2000, 2018, Oracle, MariaDB Corporation Ab and others.

Type 'help;' or '\h' for help. Type '\c' to clear the current input statement.
MariaDB [(none)]> create database course;
Query OK, 1 row affected (0.01 sec)
修改mysql02的配置(与mysql01修改配置基本相同)
[root@localhost ~]# vim /etc/my.cnf
[mysqld] #在mysqld下添加
server-id=2
binlog-do-db=course
binlog-ignore-db=mysql
log-bin=mysql-bin
重启服务
[root@localhost ~]# systemctl restart mariadb
设置主从复制
[root@localhost ~]# mysql -uroot -p123456
Welcome to the MariaDB monitor.  Commands end with ; or \g.
Your MariaDB connection id is 2
Server version: 5.5.65-MariaDB MariaDB Server

Copyright (c) 2000, 2018, Oracle, MariaDB Corporation Ab and others.

Type 'help;' or '\h' for help. Type '\c' to clear the current input statement.
MariaDB [(none)]> stop slave;
Query OK, 0 rows affected, 1 warning (0.00 sec)

MariaDB [(none)]> change master to
    -> master_user='bakcuper',
    -> master_password='12345678',
    -> master_host='192.168.20.131',
    -> master_port=3306,
    -> master_log_file='mysql-bin.000001',
    -> master_log_pos=245;
Query OK, 0 rows affected (0.03 sec)

MariaDB [(none)]> start slave;
Query OK, 0 rows affected (0.01 sec)
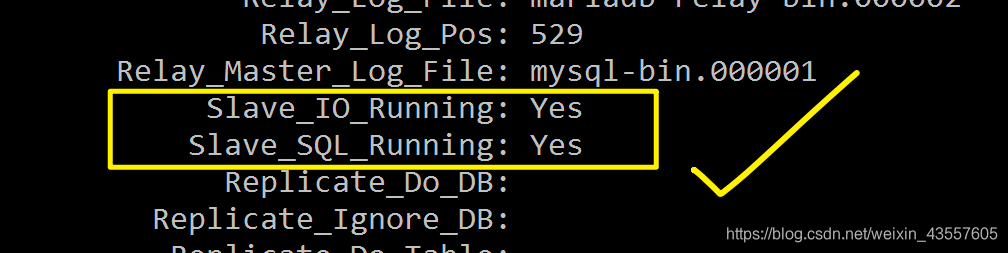
验证主从复制是否成功
MariaDB [(none)]> show slave status\G
*************************** 1. row ***************************
               Slave_IO_State: Waiting for master to send event
                  Master_Host: 192.168.20.131
                  Master_User: bakcuper
                  Master_Port: 3306
                Connect_Retry: 60
              Master_Log_File: mysql-bin.000001
          Read_Master_Log_Pos: 245
               Relay_Log_File: mariadb-relay-bin.000002
                Relay_Log_Pos: 529
        Relay_Master_Log_File: mysql-bin.000001
             Slave_IO_Running: Yes
            Slave_SQL_Running: Yes
              Replicate_Do_DB:
          Replicate_Ignore_DB:
           Replicate_Do_Table:
       Replicate_Ignore_Table:
      Replicate_Wild_Do_Table:
  Replicate_Wild_Ignore_Table:
                   Last_Errno: 0
                   Last_Error:
                 Skip_Counter: 0
          Exec_Master_Log_Pos: 245
              Relay_Log_Space: 825
              Until_Condition: None
               Until_Log_File:
                Until_Log_Pos: 0
           Master_SSL_Allowed: No
           Master_SSL_CA_File:
           Master_SSL_CA_Path:
              Master_SSL_Cert:
            Master_SSL_Cipher:
               Master_SSL_Key:
        Seconds_Behind_Master: 0
Master_SSL_Verify_Server_Cert: No
                Last_IO_Errno: 0
                Last_IO_Error:
               Last_SQL_Errno: 0
               Last_SQL_Error:
  Replicate_Ignore_Server_Ids:
             Master_Server_Id: 1
1 row in set (0.00 sec)
异常处理:
如果对防火墙进行了处理 ,并且确保命令也是没问题的 可以重新做主从复制 步骤如下
stop slave;
reset slave;

下边还是主从复制的三个命令
stop slave;
change master to ....;
start slave;
4. 双主数据库的实现
主从同步完成之后,主库可以完成数据写入,从库复制和备份数据,这种情况下,只有主库可以在course库里写入数据 并且 写入的数据会同步给从库 从库也可以在course库里写入数据 但是不会同步给主库 视为无效的数据 course库的数据以主库的以依据 如果想让两者都可以写入数据 并且都能同步和生效 就需要做双主数据库
4.1 mysql02的操作
mysql02 修改配置
[root@localhost ~]# vim /etc/my.cnf
[mysqld]在mysqld下添加
read-only=0
auto-increment-increment=2
auto-increment-offset=2
log_slave_updates=ON
重启服务
[root@localhost ~]# systemctl restart mariadb
给授权用户 用户从mysql02-mysql01的数据复制
[root@localhost ~]# mysql -uroot -p123456
MariaDB [(none)]> grant replication slave on *.* to 'bak'@'192.168.20.131' identified by '12345678';
Query OK, 0 rows affected (0.00 sec)

MariaDB [(none)]> flush privileges;
Query OK, 0 rows affected (0.00 sec)
查看master状态
MariaDB [(none)]> show master status;
+------------------+----------+--------------+------------------+
| File             | Position | Binlog_Do_DB | Binlog_Ignore_DB |
+------------------+----------+--------------+------------------+
| mysql-bin.000002 |      486 | course       | mysql            |
+------------------+----------+--------------+------------------+
1 row in set (0.00 sec)
4.2 mysql01的操作
修改配置并重启服务
[root@localhost ~]# vim /etc/my.cnf
[mysqld]#mysqld下添加内容
read-only=0
auto-increment-increment=2
auto-increment-offset=1
log_slave_updates=ON
[root@localhost ~]# systemctl restart mariadb
登陆数据库
[root@localhost ~]# mysql -uroot -p123456
做从mysql02->mysql01的数据同步
MariaDB [(none)]> stop slave;
Query OK, 0 rows affected, 1 warning (0.00 sec)

MariaDB [(none)]> change master to
    -> master_user='bak',
    -> master_password='12345678',
    -> master_host='192.168.20.132',
    -> master_port=3306,
    -> master_log_file='mysql-bin.000002',
    -> master_log_pos=486;
Query OK, 0 rows affected (0.10 sec)

MariaDB [(none)]> start slave;
Query OK, 0 rows affected (0.00 sec)
查看slave状态
MariaDB [(none)]> show slave status\G
*************************** 1. row ***************************
               Slave_IO_State: Waiting for master to send event
                  Master_Host: 192.168.20.132
                  Master_User: bak
                  Master_Port: 3306
                Connect_Retry: 60
              Master_Log_File: mysql-bin.000002
          Read_Master_Log_Pos: 486
               Relay_Log_File: mariadb-relay-bin.000002
                Relay_Log_Pos: 529
        Relay_Master_Log_File: mysql-bin.000002
             Slave_IO_Running: Yes
            Slave_SQL_Running: Yes
              Replicate_Do_DB:
          Replicate_Ignore_DB:
           Replicate_Do_Table:
       Replicate_Ignore_Table:
      Replicate_Wild_Do_Table:
  Replicate_Wild_Ignore_Table:
                   Last_Errno: 0
                   Last_Error:
                 Skip_Counter: 0
          Exec_Master_Log_Pos: 486
              Relay_Log_Space: 825
              Until_Condition: None
               Until_Log_File:
                Until_Log_Pos: 0
           Master_SSL_Allowed: No
           Master_SSL_CA_File:
           Master_SSL_CA_Path:
              Master_SSL_Cert:
            Master_SSL_Cipher:
               Master_SSL_Key:
        Seconds_Behind_Master: 0
Master_SSL_Verify_Server_Cert: No
                Last_IO_Errno: 0
                Last_IO_Error:
               Last_SQL_Errno: 0
               Last_SQL_Error:
  Replicate_Ignore_Server_Ids:
             Master_Server_Id: 2
1 row in set (0.00 sec)
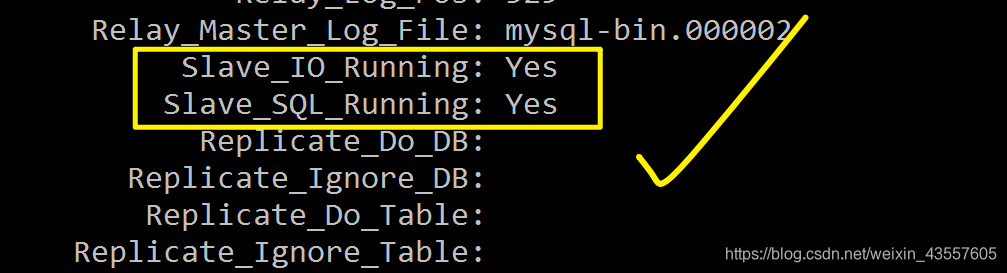
4.3 双主的验证
两侧的数据库 查看slave 状态 都是两个YES 就OK