GITLAB(gitlab)安装和使用
[root@localhost github]# yum -y install curl policycoreutils-python openssh-server # 安装依赖
[root@localhost opt]# yum -y install lrzsz 方便文件上传和下载
使用rz和re的命令即可
[root@localhost opt]# rpm -ivh gitlab-ce-10.2.2-ce.0.el7.x86_64.rpm
[root@localhost opt]# vim /etc/gitlab/gitlab.rb

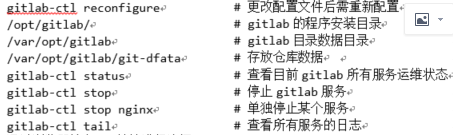
[root@localhost opt]# gitlab-ctl reconfigure
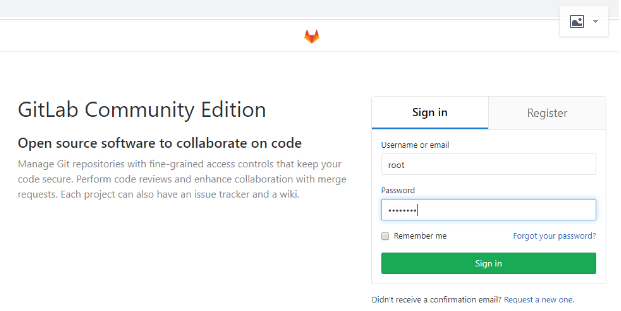
通过浏览器输入IP地址进行访问
gitlab‐workhorse: 轻量级的反向代理服务器logrotate:日志文件管理工具
postgresql:数据库redis:缓存数据库
sidekiq:用于在后台执行队列任务(异步执行)。(Ruby)unicorn:An HTTP server for Rack applications,GitLab Rails应用是托管在这个服务器上面的。(Ruby Web Server,主要使用Ruby编写)
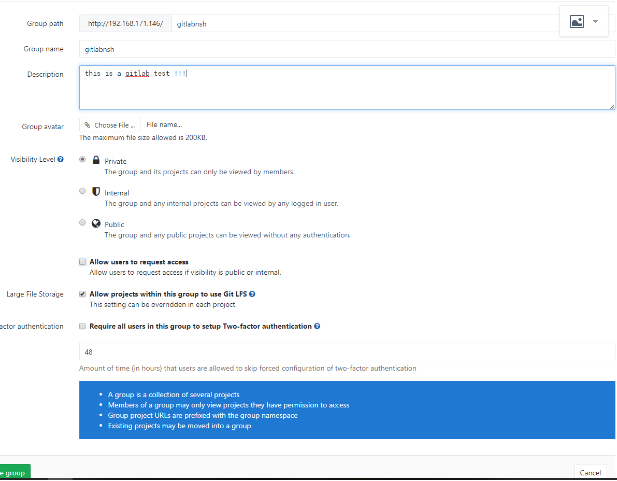
创建组
创建项目
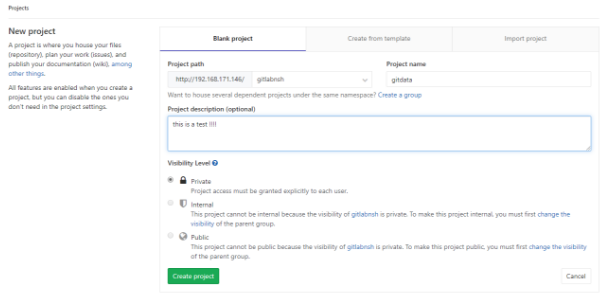

接上图

[root@localhost ~]# cd git_data/
[root@localhost git_data]# ls
a.txt b.txt c.txt
[root@localhost git_data]# git remote rename origin old-origin
[root@localhost git_data]# git remote
old-origin
[root@localhost git_data]# git remote add origin [email protected]:gitlabnsh/gitdata.git
[root@localhost git_data]# git remote
old-origin
origin
[root@localhost git_data]# git push -u origin --all
Counting objects: 3, done.
Compressing objects: 100% (2/2), done.
Writing objects: 100% (3/3), 207 bytes | 0 bytes/s, done.
Total 3 (delta 0), reused 0 (delta 0)
To [email protected]:gitlabnsh/gitdata.git
- [new branch] master -> master
Branch master set up to track remote branch master from origin.
[root@localhost git_data]# git push -u origin --tags
Everything up-to-date
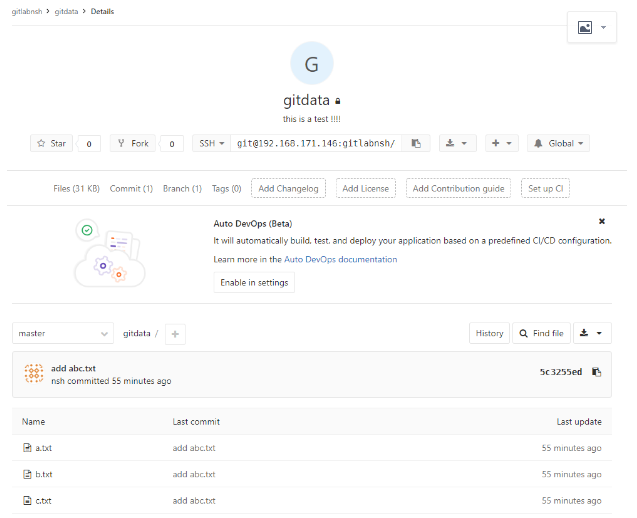
之后刷新页面如下图发现推送成功!!!
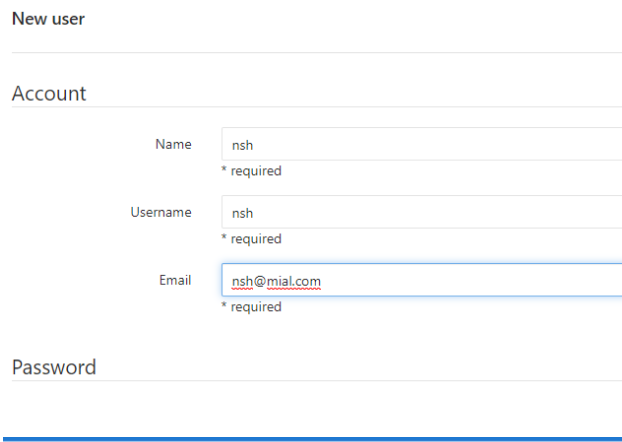
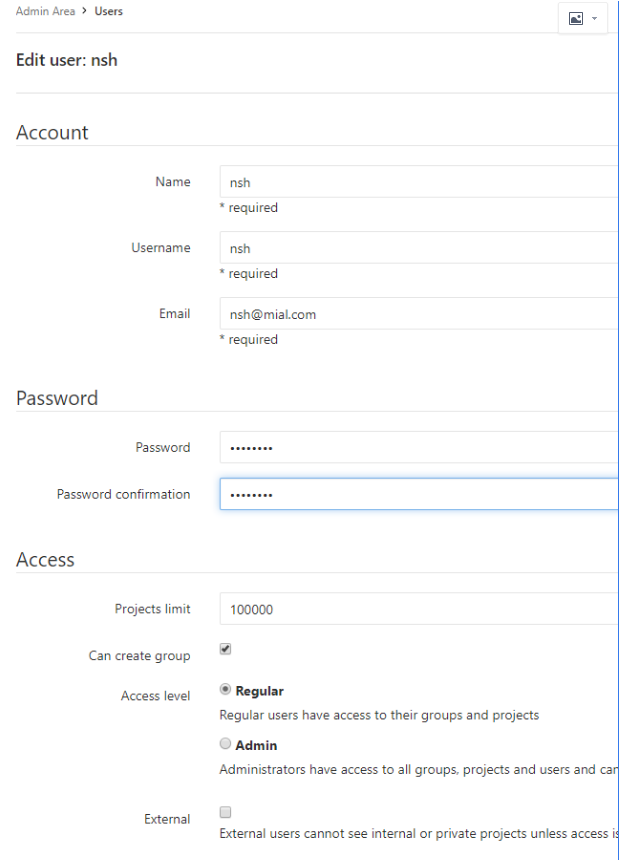
创建用户