文章目录
springboot发展至今,已经可以变得很轻巧了。需要用什么配置只需导入对应的依赖也就是对应的starter即可,为何加入了对应的start就可以实现对应的配置和功能呢?我们带着问题来探讨一下:
举例
我们以mybatis为例,看看它的starter实现
<dependency>
    <groupId>org.mybatis.spring.boot</groupId>
    <artifactId>mybatis-spring-boot-starter</artifactId>
    <version>2.1.1</version>
</dependency>
加入此依赖,maven会为我们加载两个依赖:
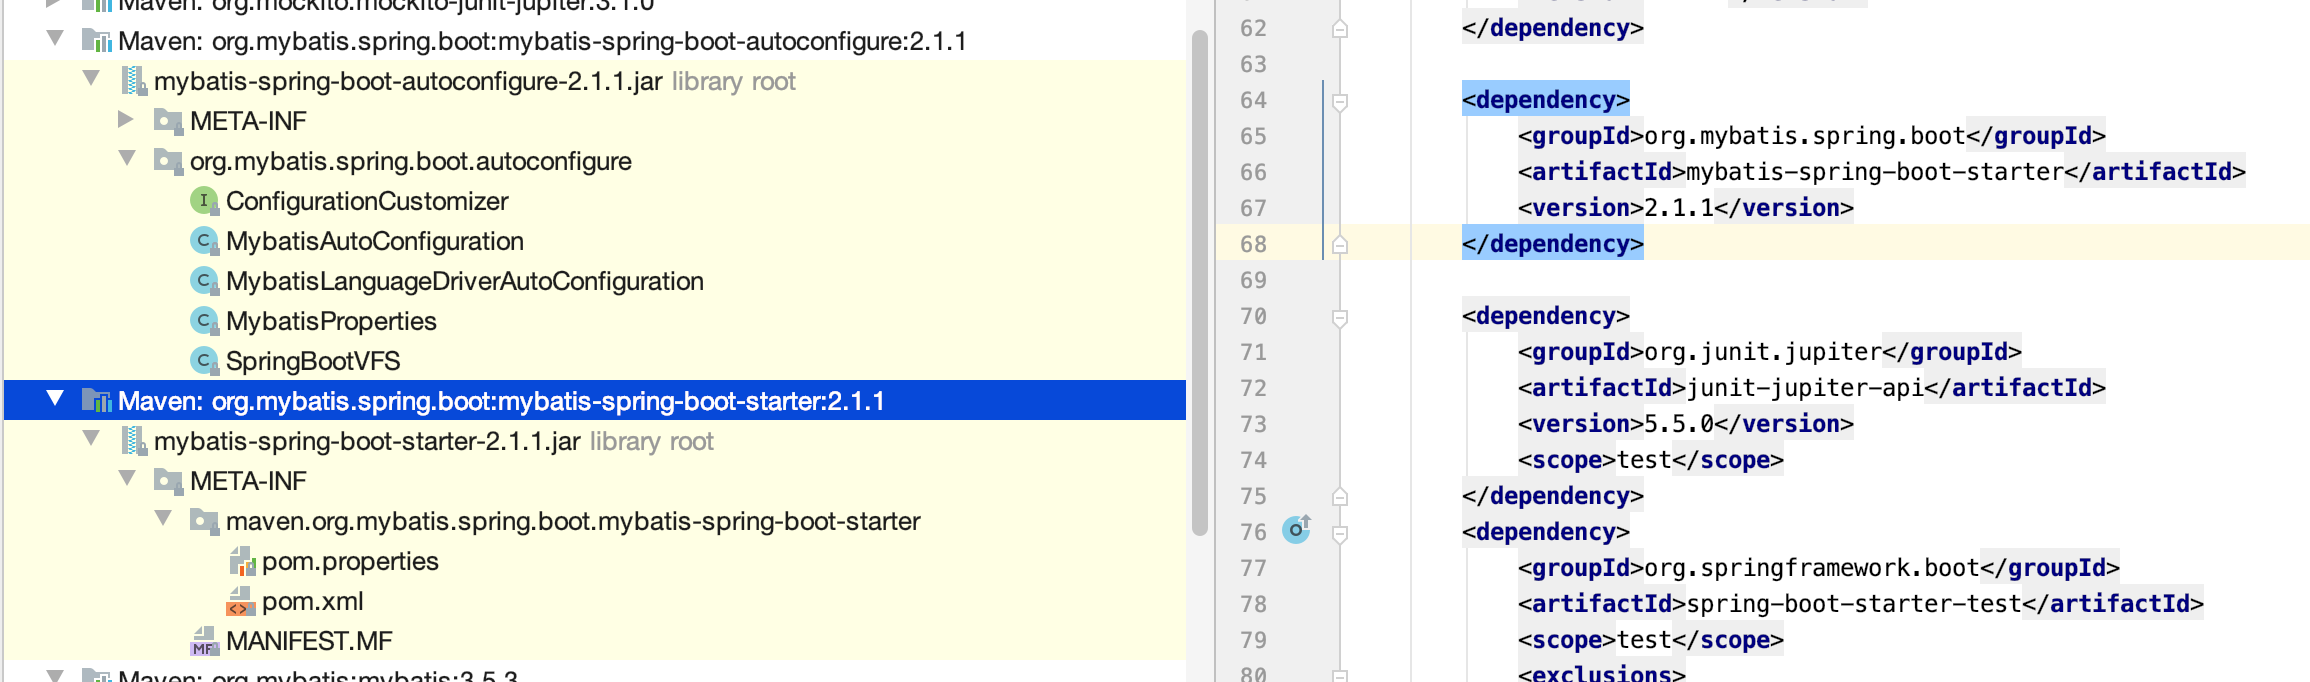
一个是autoconfigure, 一个是starter
先看看里面MATE-INF都有些什么?
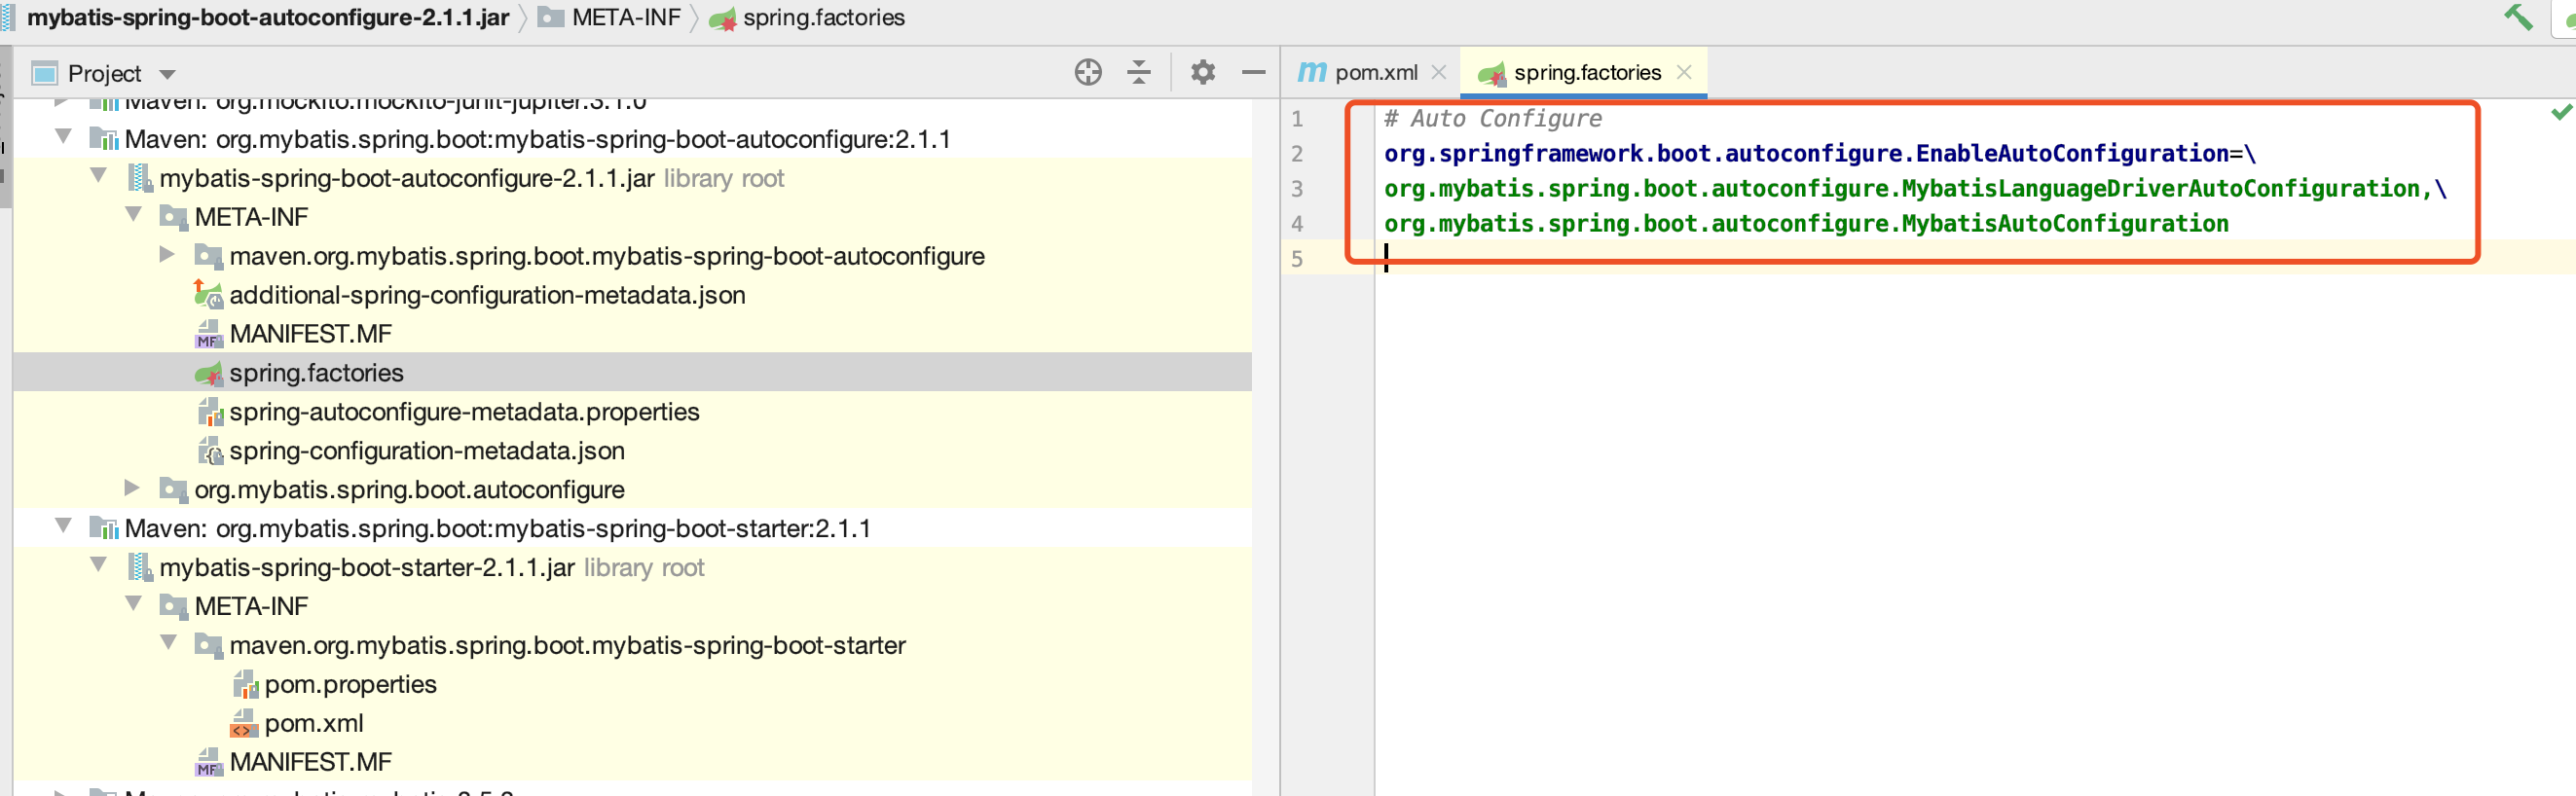
定义了EnableAutoConfiguration 要加载的两个配置的地址
我们再看看对应starter下的pom.xml 和pom.properties,看下里面都有些什么
pom.properties:
#Created by Apache Maven 3.6.1
groupId=org.mybatis.spring.boot
artifactId=mybatis-spring-boot-starter
version=2.1.1
可以看出其实是声明了自己的版本
pom.xml:
<?xml version="1.0" encoding="UTF-8"?>
<!--

       Copyright 2015-2019 the original author or authors.

       Licensed under the Apache License, Version 2.0 (the "License");
       you may not use this file except in compliance with the License.
       You may obtain a copy of the License at

          http://www.apache.org/licenses/LICENSE-2.0

       Unless required by applicable law or agreed to in writing, software
       distributed under the License is distributed on an "AS IS" BASIS,
       WITHOUT WARRANTIES OR CONDITIONS OF ANY KIND, either express or implied.
       See the License for the specific language governing permissions and
       limitations under the License.

-->
<project xmlns="http://maven.apache.org/POM/4.0.0" xmlns:xsi="http://www.w3.org/2001/XMLSchema-instance" xsi:schemaLocation="http://maven.apache.org/POM/4.0.0 http://maven.apache.org/xsd/maven-4.0.0.xsd">
  <modelVersion>4.0.0</modelVersion>
  <parent>
    <groupId>org.mybatis.spring.boot</groupId>
    <artifactId>mybatis-spring-boot</artifactId>
    <version>2.1.1</version>
  </parent>
  <artifactId>mybatis-spring-boot-starter</artifactId>
  <name>mybatis-spring-boot-starter</name>
  <properties>
    <module.name>org.mybatis.spring.boot.starter</module.name>
  </properties>
  <dependencies>
    <dependency>
      <groupId>org.springframework.boot</groupId>
      <artifactId>spring-boot-starter</artifactId>
    </dependency>
    <dependency>
      <groupId>org.springframework.boot</groupId>
      <artifactId>spring-boot-starter-jdbc</artifactId>
    </dependency>

    <!--可以看见这里导入了对应的一个配置依赖-->
    <dependency>
      <groupId>org.mybatis.spring.boot</groupId>
      <artifactId>mybatis-spring-boot-autoconfigure</artifactId>
    </dependency>

    <dependency>
      <groupId>org.mybatis</groupId>
      <artifactId>mybatis</artifactId>
    </dependency>
    <dependency>
      <groupId>org.mybatis</groupId>
      <artifactId>mybatis-spring</artifactId>
    </dependency>
  </dependencies>
</project>
那么starter中没有什么,真正的配置在其autoconfigure中
可以看出autoconfigure中一个接口,4个类。
我们从下往上解读一下:
- SpringBootVFS 是一个读取文件的类 继承自VFS抽象类
- MybatisProperties 顾名思义 mybatis 属性类
- MybatisLanguageDriverAutoConfiguration mybatis语言驱动类
- MybatisAutoConfiguration mybatis 自动配置类
- ConfigurationCustomizer 函数式接口 提供了一个customize()方法可以设置自己的配置
customize()方法配置可以参考:博客
那么重要的就是看MybatisAutoConfiguration 这个类了
我们来看下其源码:
@Configuration
@ConditionalOnClass({SqlSessionFactory.class, SqlSessionFactoryBean.class})
@ConditionalOnSingleCandidate(DataSource.class)
@EnableConfigurationProperties({MybatisProperties.class})
@AutoConfigureAfter({DataSourceAutoConfiguration.class, MybatisLanguageDriverAutoConfiguration.class})
public class MybatisAutoConfiguration implements InitializingBean {
    private static final Logger logger = LoggerFactory.getLogger(MybatisAutoConfiguration.class);
    private final MybatisProperties properties;
    private final Interceptor[] interceptors;
    private final TypeHandler[] typeHandlers;
    private final LanguageDriver[] languageDrivers;
    private final ResourceLoader resourceLoader;
    private final DatabaseIdProvider databaseIdProvider;
    private final List<ConfigurationCustomizer> configurationCustomizers;
    ...省略其余代码
首先我们看下类上的注解:
- @ConditionalOnBean,仅在当前上下文中存在某个bean时,才会实例化这个Bean。
- @ConditionalOnClass,某个class位于类路径上,才会实例化这个Bean。
- @ConditionalOnExpression,当表达式为true的时候,才会实例化这个Bean。
- @ConditionalOnMissingBean,仅在当前上下文中不存在某个bean时,才会实例化这个Bean。
- @ConditionalOnMissingClass,某个class在类路径上不存在的时候,才会实例化这个Bean。
- @ConditionalOnNotWebApplication,不是web应用时才会实例化这个Bean。
- @AutoConfigureAfter,在某个bean完成自动配置后实例化这个bean。
- @AutoConfigureBefore,在某个bean完成自动配置前实例化这个bean
要完成Mybatis的自动配置,需要在类路径中存在SqlSessionFactory.class、SqlSessionFactoryBean.class这两个类,需要存在DataSource这个bean且这个bean要完成自动注册
@Configuration @Bean正是完成bean注册的关键!
那完成bean注册后又是如何找到对应的bean的呢?我们来看下面的一个类:
public static class AutoConfiguredMapperScannerRegistrar implements BeanFactoryAware, ImportBeanDefinitionRegistrar {
        private BeanFactory beanFactory;

        public AutoConfiguredMapperScannerRegistrar() {
        }

        public void registerBeanDefinitions(AnnotationMetadata importingClassMetadata, BeanDefinitionRegistry registry) {
            if (!AutoConfigurationPackages.has(this.beanFactory)) {
                MybatisAutoConfiguration.logger.debug("Could not determine auto-configuration package, automatic mapper scanning disabled.");
            } else {
                MybatisAutoConfiguration.logger.debug("Searching for mappers annotated with @Mapper");
                List<String> packages = AutoConfigurationPackages.get(this.beanFactory);
                if (MybatisAutoConfiguration.logger.isDebugEnabled()) {
                    packages.forEach((pkg) -> {
                        MybatisAutoConfiguration.logger.debug("Using auto-configuration base package '{}'", pkg);
                    });
                }

                BeanDefinitionBuilder builder = BeanDefinitionBuilder.genericBeanDefinition(MapperScannerConfigurer.class);
                builder.addPropertyValue("processPropertyPlaceHolders", true);
                builder.addPropertyValue("annotationClass", Mapper.class);
                builder.addPropertyValue("basePackage", StringUtils.collectionToCommaDelimitedString(packages));
                BeanWrapper beanWrapper = new BeanWrapperImpl(MapperScannerConfigurer.class);
                Stream.of(beanWrapper.getPropertyDescriptors()).filter((x) -> {
                    return x.getName().equals("lazyInitialization");
                }).findAny().ifPresent((x) -> {
                    builder.addPropertyValue("lazyInitialization", "${mybatis.lazy-initialization:false}");
                });
                registry.registerBeanDefinition(MapperScannerConfigurer.class.getName(), builder.getBeanDefinition());
            }
        }

        public void setBeanFactory(BeanFactory beanFactory) {
            this.beanFactory = beanFactory;
        }
    }
AutoConfiguredMapperScannerRegistrar 故名思义 自动配置扫描注册 好了我们基本已经知道了starter的原理,再去照猫画虎写一个类似的例子就可以加深理解了
新建项目
新建一个空的项目,增加两个module
规约:Spring 自带的spring-boot-starter-xxx 自己定义或第三方提供的xxx-spring-boot-starter
starter的pom.xml配置中新增autoconfigure的依赖:
<dependencies>
    <dependency>
        <groupId>com.coding</groupId>
        <artifactId>coding-spring-boot-start-autoconfigure</artifactId>
        <version>0.0.1-SNAPSHOT</version>
    </dependency>
</dependencies>
autoconfigure 的 pom.xml中新增spring-boot-starter的依赖:
<dependencies>
    <!--所有启动器的基础模块-->
    <dependency>
        <groupId>org.springframework.boot</groupId>
        <artifactId>spring-boot-starter</artifactId>
    </dependency>
</dependencies>
autoconfiguer 模块新增三个类:
[外链图片转存失败,源站可能有防盗链机制,建议将图片保存下来直接上传(img-NyPc4OxJ-1586914559303)(https://s1.ax1x.com/2020/03/19/8Dfsc6.png)]
代码如下:
package com.coding;

import org.springframework.boot.context.properties.ConfigurationProperties;
/**
* 不要使用Lombok 写上get set方法 如果别人不用Lombok 亦要保证可用
*/
@ConfigurationProperties(prefix = "coding.hello")
public class HelloProperties {
    private String prefix;
    private String suffix;

    public String getPrefix() {
        return prefix;
    }
    public void setPrefix(String prefix) {
        this.prefix = prefix;
    }
    public String getSuffix() {
        return suffix;
    }
    public void setSuffix(String suffix) {
        this.suffix = suffix;
    }
}
package com.coding;

public class HelloService {
    //注入配置类
    HelloProperties helloProperties;
    public HelloProperties getHelloProperties() {
        return helloProperties;
    }

    public void setHelloProperties(HelloProperties helloProperties) {
        this.helloProperties = helloProperties;
    }

    public String sayHello(String userName){
        return helloProperties.getPrefix() +userName+ helloProperties.getSuffix();
    }
}
package com.coding;

import org.springframework.beans.factory.annotation.Autowired;
import org.springframework.boot.autoconfigure.EnableAutoConfiguration;
import org.springframework.boot.autoconfigure.condition.ConditionalOnWebApplication;
import org.springframework.boot.context.properties.EnableConfigurationProperties;
import org.springframework.context.annotation.Bean;
import org.springframework.context.annotation.Configuration;

// 自动配置类
@Configuration
@EnableConfigurationProperties(HelloProperties.class) // 关联配置文件
@ConditionalOnWebApplication // 只在web项目才生效
public class HelloServiceAutoconfiguration {
    @Autowired
    HelloProperties helloProperties;

    @Bean //将HelloSerive 放入容器  并和helloProperties 配置关联
    public  HelloService helloService(){
        HelloService helloService = new HelloService();
        helloService.setHelloProperties(helloProperties);
        return  helloService;
    }
}
在autoconfigure模块下resource下增加META-INF 下添加spring.factories
# Auto Configure
org.springframework.boot.autoconfigure.EnableAutoConfiguration=\
com.coding.HelloServiceAutoconfiguration
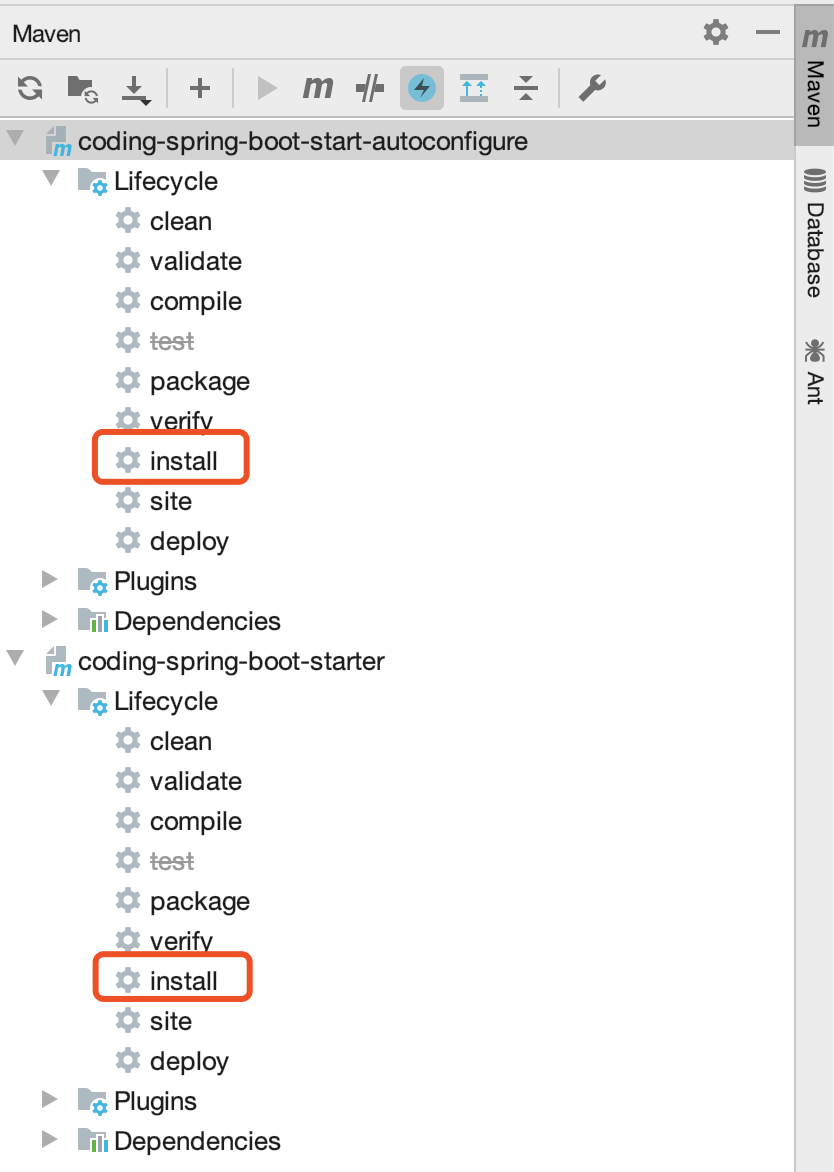
install到本地仓库
注:⚠️ 两个都要install完成
新建项目测试
在新建的pom.xml文件中添加starter依赖:
<dependency>
    <groupId>com.coding</groupId>
    <artifactId>coding-spring-boot-starter</artifactId>
    <version>1.0-SNAPSHOT</version>
</dependency>
看到依赖已新增:

在application.properties中添加配置:
coding.hello.prefix = "hello, "
coding.hello.suffix = " hao are you?"
新增接口测试:
package com.coding;

import org.springframework.beans.factory.annotation.Autowired;
import org.springframework.web.bind.annotation.GetMapping;
import org.springframework.web.bind.annotation.PathVariable;
import org.springframework.web.bind.annotation.RestController;

@RestController
public class HelloController {

    @Autowired
    HelloService helloService;

    @GetMapping("/sayHello/{name}")
    public String sayHello(@PathVariable("name") String name){
        return helloService.sayHello(name);
    }
}
可以看到 配置类通过starter依赖项已经读取到了。至此我们实现了一个简单的starter定义,后面我们如果一些重复的功能我们是不是可以考虑以这种方式放到我们自己的maven上面,谁要使用引入对应的starter即可,还可以支持对应的配置!
