一.主题式网络爬虫设计方案
1.主题式网络爬虫名称:爬取京东手机信息。
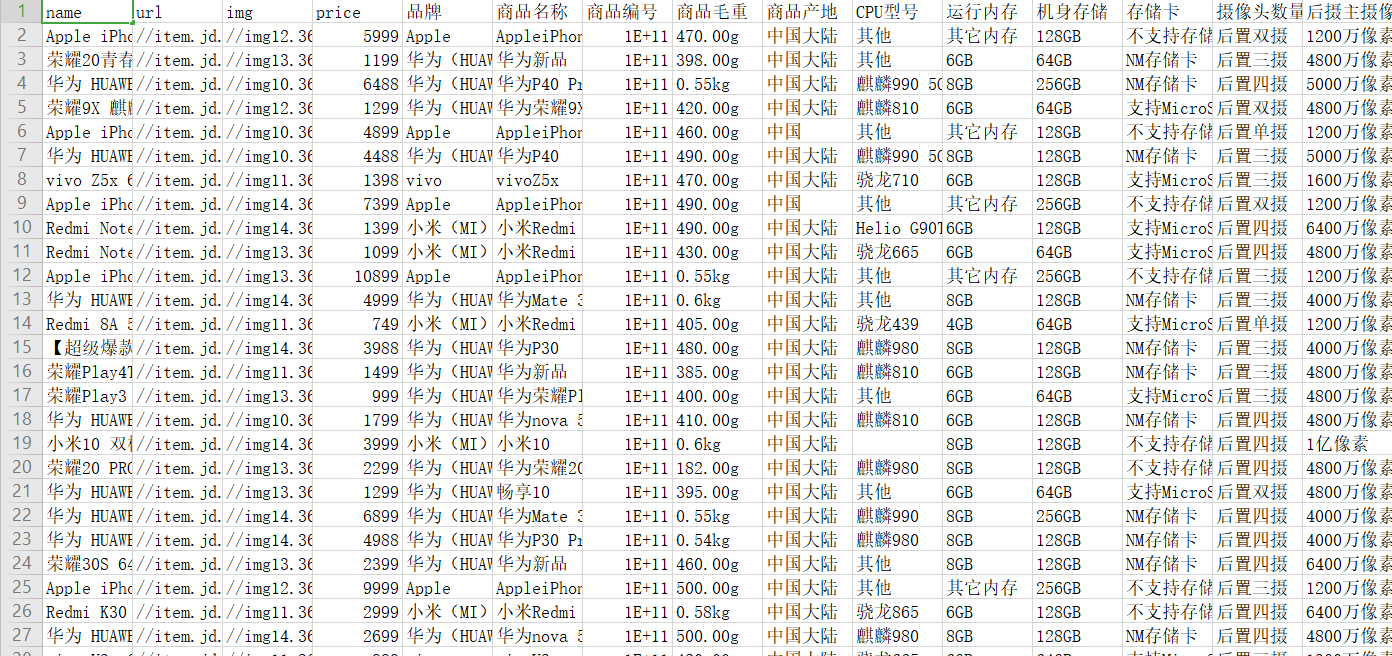
2.主题式网络爬虫爬取的内容与数据特征分析:每个页面(目前141个页面)的商品名称,详情页url以及图片地址,价格,和进入每个手机详情页后在商品介绍里的‘品牌’、‘运行内存’、‘机身存储’、‘摄像头数量’等信息。
3.主题式网络爬虫设计方案概述:思路:使用网络爬虫方式经行数据分析,通过网源代码找到要爬取的数据对象,将爬取到数据经行存储再绘图分析。
scrapy框架快速爬取,xpath数据提取,csv数据保存。
二.主题页面的结构特征分析
1.主题页面的结构特征分析:
scrapy的概念:Scrapy是一个为了爬取网站数据,提取结构性数据而编写的应用框架。
scrapy框架的运行流程以及数据传递过程:
- 爬虫中起始的url构造成request对象-->爬虫中间件-->引擎-->调度器
- 调度器把request-->引擎-->下载中间件--->下载器
- 下载器发送请求,获取response响应---->下载中间件---->引擎--->爬虫中间件--->爬虫
- 爬虫提取url地址,组装成request对象---->爬虫中间件--->引擎--->调度器,重复步骤2
爬虫提取数据--->引擎--->管道处理和保存数据:

2.Htmls页面解析:
3.节点(标签)查找方法与遍历方法:
创建项目:
a) 首先创建名为jdSpider的scrapy项目: scrapy startproject jdSpider
b) 然后切换到创建好的项目文件夹:cd jdSpider
c) 创建名为jd的爬虫:scrapy genspider jd list.jd.com(这里的list.jd.com为允许爬取的域名,后面可做相应修改)
三.网络爬虫程序设计
1.数据爬取与采集
import re
import scrapy
import requests
class JdSpider(scrapy.Spider):
num = 1
# 爬虫名字
name = 'jd'
# 允许爬取的域名
allowed_domains = ['list.jd.com', 'item.jd.com'] # list. 列表页域名 item. 详情页域名
# 开始爬取的url地址
start_urls = ['https://list.jd.com/list.html?cat=9987,653,655&page=1&sort=sort_rank_asc&trans=1&JL=6_0_0#J_main']
# start_urls = ['https://list.jd.com/list.html?cat=9987,653,655&page=143&sort=sort_rank_asc&trans=1&JL=6_0_0#J_main']
# 数据提取的方法,接收下载中间件传过来的response
def parse(self, response):
# print('查看user-Agent是否有变化')
# print(response.request.headers['User-Agent'])
# print('-'*100)
# 利用xpath进行数据提取
li_list = response.xpath('//li[@class="gl-item"]')
# 遍历提取出来单个数据
for li in li_list:
# 图片链接
img = li.xpath('./div/div[@class="p-img"]/a/img/@src').extract_first()
if not img:
img = li.xpath('./div/div[@class="p-img"]/a/img/@data-lazy-img').extract_first()
# 商品名称
name_list = li.xpath('./div/div/a/em/text()').extract() # extract 返回一个列表
name = name_list[0] if len(name_list) == 1 else name_list[1] # 因为京东国际商品名特殊
# 商品url
url = li.xpath('./div/div[@class="p-img"]/a/@href').extract_first()
# 提取商品id
sku_id = re.search(r'\d+', url).group()
# 调用API获取商品价格
headers = {"User-Agent": response.request.headers['User-Agent'].decode(),
'Connection': 'close'}
price_response = requests.get("https://p.3.cn/prices/mgets?skuIds="+sku_id, headers=headers)
# [{'cbf': '0', 'id': 'J_100006947212', 'm': '9999.00', 'op': '1399.00', 'p': '1289.00'}]
# p为目前价格
dict_response = price_response.json()[0] #
price = dict_response['p']
# 让pipelines.py处理数据 strip()去除字符串的前后空格符
# yield {"name": name.strip(), "url": url, "img": img, "price": price}
data_dict = {"name": name.strip(), "url": url, "img": img, "price": price}
if len(name_list)==1:
yield scrapy.Request("https:"+url, callback=self.parse_detail, meta={"data_dict": data_dict})
else:
yield data_dict # 京东国际不进入详情页,直接进行数据存储
# break
print('第', JdSpider.num, "页已爬取完毕")
JdSpider.num += 1
# 提取下一页的url
next_page_url = response.xpath("//a[@class='pn-next']/@href").extract_first()
# print('-'*200)
# print(next_page_url, type(next_page_url))
# print('-'*200)
if next_page_url:
yield scrapy.Request('https://list.jd.com'+next_page_url, callback=self.parse)
def parse_detail(self, response):
"""处理每个商品详情"""
data_dict = response.meta["data_dict"]
if response.status == 200:
# 品牌
brand = response.xpath('//ul[@id="parameter-brand"]/li/@title').extract_first()
if brand:
# 普通商品
data_dict["品牌"] = brand
# 其他数据
li_list = response.xpath('//ul[@class="parameter2 p-parameter-list"]/li')
for li in li_list:
data = li.xpath('./text()').extract_first()
# 正则提取描述和数据
ret = re.match(r'(.+?):(.+)', data) # 为中文: ?非贪婪
key = ret.group(1)
value = ret.group(2)
data_dict[key] = value
# else:
# # 京东国际
# li_list = response.xpath('//ul[@class="parameter2"]/li')
# for li in li_list:
# data = li.xpath('./text()').extract_first()
# if "店铺: " == data:
# data_dict["店铺"] = li.xpath('./a/text()').extract_first()
# continue
# # 正则提取描述和数据
# ret = re.match(r'(.+?):(.+)', data) # 为中文: ?非贪婪
# key = ret.group(1)
# value = ret.group(2)
# data_dict[key] = value
# 让pipelines.py处理数据
yield data_dict
from pymongo import MongoClient
import csv
# Define your item pipelines here
#
# Don't forget to add your pipeline to the ITEM_PIPELINES setting
# See: https://docs.scrapy.org/en/latest/topics/item-pipeline.html
fieldnames = ['name', 'url', 'img', 'price', '品牌', '商品名称', "商品编号",
"商品毛重", "商品产地", "CPU型号", "运行内存", "机身存储", "存储卡",
"摄像头数量", "后摄主摄像素", "前摄主摄像素", "主屏幕尺寸(英寸)",
"分辨率", "屏幕比例", "屏幕前摄组合", "充电器", "热点", "特殊功能",
"操作系统", "游戏性能", "电池容量(mAh)", "机身颜色", "屏占比",
"充电功率", "游戏配置", "老人机配置", "店铺", "货号"]
class JdspiderPipeline(object):
def open_spider(self, spider): # 在爬虫开启的时候仅执行一次
print('爬虫开启')
# # 链接mongoDB数据库
# client = MongoClient("127.0.0.1", 27017)
# self.collection = client["jd"]["info"] # 数据库名为jd,表名为info 没有则创建
with open('data.csv', 'w', newline='') as csvfile:
writer = csv.DictWriter(csvfile, fieldnames=fieldnames)
writer.writeheader()
def close_spider(self, spider): # 在爬虫关闭的时候仅执行一次
print('爬虫关闭')
def process_item(self, item, spider):
# # 插入数据
# print(item)
# self.collection.insert(item)
with open('data.csv', 'a', newline='') as csvfile:
writer = csv.DictWriter(csvfile, fieldnames=fieldnames)
writer.writerow(item)
2.数据清洗和处理:
可以在settings中设置ROBOTS协议:

设置日志等级:

3.文本分析:
为了实现不同的请求有不同的user_agent,我们可在settings.py中添加列表USER_AGENTS_LIST:

并在middlewares.py中完善代码:

这时候还需回到setting.py中开启中间件,从而实现每次请求进行随机选取user_agent:

4.数据分析与可视化(例如:数据柱形图,直方图,散点图,合图,分布图):
绘制分布图:

5.根据数据之间的关系,分析两个变量之间的相关系数,画出散点图,并建立变量之间的回归方程:

6.数据持久化:

7.完整程序代码:
import re
import scrapy
import requests
class JdSpider(scrapy.Spider):
num = 1
# 爬虫名字
name = 'jd'
# 允许爬取的域名
allowed_domains = ['list.jd.com', 'item.jd.com'] # list. 列表页域名 item. 详情页域名
# 开始爬取的url地址
start_urls = ['https://list.jd.com/list.html?cat=9987,653,655&page=1&sort=sort_rank_asc&trans=1&JL=6_0_0#J_main']
# start_urls = ['https://list.jd.com/list.html?cat=9987,653,655&page=143&sort=sort_rank_asc&trans=1&JL=6_0_0#J_main']
# 数据提取的方法,接收下载中间件传过来的response
def parse(self, response):
# print('查看user-Agent是否有变化')
# print(response.request.headers['User-Agent'])
# print('-'*100)
# 利用xpath进行数据提取
li_list = response.xpath('//li[@class="gl-item"]')
# 遍历提取出来单个数据
for li in li_list:
# 图片链接
img = li.xpath('./div/div[@class="p-img"]/a/img/@src').extract_first()
if not img:
img = li.xpath('./div/div[@class="p-img"]/a/img/@data-lazy-img').extract_first()
# 商品名称
name_list = li.xpath('./div/div/a/em/text()').extract() # extract 返回一个列表
name = name_list[0] if len(name_list) == 1 else name_list[1] # 因为京东国际商品名特殊
# 商品url
url = li.xpath('./div/div[@class="p-img"]/a/@href').extract_first()
# 提取商品id
sku_id = re.search(r'\d+', url).group()
# 调用API获取商品价格
headers = {"User-Agent": response.request.headers['User-Agent'].decode(),
'Connection': 'close'}
price_response = requests.get("https://p.3.cn/prices/mgets?skuIds="+sku_id, headers=headers)
# [{'cbf': '0', 'id': 'J_100006947212', 'm': '9999.00', 'op': '1399.00', 'p': '1289.00'}]
# p为目前价格
dict_response = price_response.json()[0] #
price = dict_response['p']
# 让pipelines.py处理数据 strip()去除字符串的前后空格符
# yield {"name": name.strip(), "url": url, "img": img, "price": price}
data_dict = {"name": name.strip(), "url": url, "img": img, "price": price}
if len(name_list)==1:
yield scrapy.Request("https:"+url, callback=self.parse_detail, meta={"data_dict": data_dict})
else:
yield data_dict # 京东国际不进入详情页,直接进行数据存储
# break
print('第', JdSpider.num, "页已爬取完毕")
JdSpider.num += 1
# 提取下一页的url
next_page_url = response.xpath("//a[@class='pn-next']/@href").extract_first()
# print('-'*200)
# print(next_page_url, type(next_page_url))
# print('-'*200)
if next_page_url:
yield scrapy.Request('https://list.jd.com'+next_page_url, callback=self.parse)
def parse_detail(self, response):
"""处理每个商品详情"""
data_dict = response.meta["data_dict"]
if response.status == 200:
# 品牌
brand = response.xpath('//ul[@id="parameter-brand"]/li/@title').extract_first()
if brand:
# 普通商品
data_dict["品牌"] = brand
# 其他数据
li_list = response.xpath('//ul[@class="parameter2 p-parameter-list"]/li')
for li in li_list:
data = li.xpath('./text()').extract_first()
# 正则提取描述和数据
ret = re.match(r'(.+?):(.+)', data) # 为中文: ?非贪婪
key = ret.group(1)
value = ret.group(2)
data_dict[key] = value
# else:
# # 京东国际
# li_list = response.xpath('//ul[@class="parameter2"]/li')
# for li in li_list:
# data = li.xpath('./text()').extract_first()
# if "店铺: " == data:
# data_dict["店铺"] = li.xpath('./a/text()').extract_first()
# continue
# # 正则提取描述和数据
# ret = re.match(r'(.+?):(.+)', data) # 为中文: ?非贪婪
# key = ret.group(1)
# value = ret.group(2)
# data_dict[key] = value
# 让pipelines.py处理数据
yield data_dict
from pymongo import MongoClient
import csv
# Define your item pipelines here
#
# Don't forget to add your pipeline to the ITEM_PIPELINES setting
# See: https://docs.scrapy.org/en/latest/topics/item-pipeline.html
fieldnames = ['name', 'url', 'img', 'price', '品牌', '商品名称', "商品编号",
"商品毛重", "商品产地", "CPU型号", "运行内存", "机身存储", "存储卡",
"摄像头数量", "后摄主摄像素", "前摄主摄像素", "主屏幕尺寸(英寸)",
"分辨率", "屏幕比例", "屏幕前摄组合", "充电器", "热点", "特殊功能",
"操作系统", "游戏性能", "电池容量(mAh)", "机身颜色", "屏占比",
"充电功率", "游戏配置", "老人机配置", "店铺", "货号"]
class JdspiderPipeline(object):
def open_spider(self, spider): # 在爬虫开启的时候仅执行一次
print('爬虫开启')
# # 链接mongoDB数据库
# client = MongoClient("127.0.0.1", 27017)
# self.collection = client["jd"]["info"] # 数据库名为jd,表名为info 没有则创建
with open('data.csv', 'w', newline='') as csvfile:
writer = csv.DictWriter(csvfile, fieldnames=fieldnames)
writer.writeheader()
def close_spider(self, spider): # 在爬虫关闭的时候仅执行一次
print('爬虫关闭')
def process_item(self, item, spider):
# # 插入数据
# print(item)
# self.collection.insert(item)
with open('data.csv', 'a', newline='') as csvfile:
writer = csv.DictWriter(csvfile, fieldnames=fieldnames)
writer.writerow(item)
完善代码:
from jdSpider.settings import USER_AGENTS_LIST
class UserAgentMiddleware(obkect):
def process_request(self,request,spider):
user_agent=random.choice(USER_AGENTS_LIST)
request.headers['User-Agent']=user_agent
request.headers["Connection"]="close"
class CheckUA(object):
def process_response(self,request,response,spider):
return response
import matplotlib.pyplot as plt
x_values = range(1, 1001)
y_values = [x*x for x in x_values]
'''
scatter()
x:横坐标 y:纵坐标 s:点的尺寸
'''
plt.scatter(x_values, y_values, s=10)
# 设置图表标题并给坐标轴加上标签
plt.title('Square Numbers', fontsize=24)
plt.xlabel('Value', fontsize=14)
plt.ylabel('Square of Value', fontsize=14)
# 设置刻度标记的大小
plt.tick_params(axis='both', which='major', labelsize=14)
# 设置每个坐标轴的取值范围
plt.axis([0, 1100, 0, 1100000])
plt.show()