1,关闭防火墙和selinux,同步系统时间,并安装zabbix和mysql
[root@localhost ~] systemctl stop firewalld
[root@localhost ~] setenforce 0
#同步系统时间
[root@localhost ~] ntpdate pool.ntp.org
#上传阿里云yum源至/etc/yum.repos.d/
[root@localhost ~] cat zabbix_Aliyun.repo
[zabbix]
name=Zabbix Official Repository - $basearch
baseurl=http://mirrors.aliyun.com/zabbix/zabbix/4.4/rhel/7/$basearch/
enabled=1
gpgcheck=0
gpgkey=file:///etc/pki/rpm-gpg/RPM-GPG-KEY-ZABBIX-A14FE591

[zabbix-debuginfo]
name=Zabbix Official Repository debuginfo - $basearch
baseurl=http://mirrors.aliyun.com/zabbix/zabbix/4.4/rhel/7/$basearch/debuginfo/
enabled=0
gpgkey=file:///etc/pki/rpm-gpg/RPM-GPG-KEY-ZABBIX-A14FE591
gpgcheck=0

[zabbix-non-supported]
name=Zabbix Official Repository non-supported - $basearch
baseurl=http://mirrors.aliyun.com/zabbix/non-supported/rhel/7/$basearch/
enabled=1
gpgkey=file:///etc/pki/rpm-gpg/RPM-GPG-KEY-ZABBIX
gpgcheck=0
#复制到yum仓库yum.repos。d
[root@localhost ~] cp zabbix_Aliyun.repo /etc/yum.repos.d/
2,安装zabbix-server,zabbix-agent和mysql
[root@localhost ~] yum -y install zabbix-server-mysql zabbix-web-mysql zabbix-agent mariadb mariadb-server
3,启动mysql,并建库和授权用户
[root@localhost ~] systemctl enable mariadb
[root@localhost ~] systemctl start mariadb
[root@localhost ~] mysql

MariaDB [(none)]> create database zabbix character set utf8 collate utf8_bin; #创建zabbix库,字符集utf8
MariaDB [(none)]> grant all on zabbix.* to zabbix@localhost identified by 'zabbix'; #创建zabbix授权用户
MariaDB [(none)]> flush privileges; #刷新
4,从zabbix导入mysql数据库
[root@localhost ~] zcat /usr/share/doc/zabbix-server-mysql-4.4.7/create.sql.gz |mysql -uzabbix -pzabbix zabbix
5,修改zabbix配置文件,并更改时区
#修改zabbix配置
[root@localhost ~] vim /etc/zabbix/zabbix_server.conf
[root@localhost ~] cat /etc/zabbix/zabbix_server.conf |grep "DB"|sed '/^#/d'
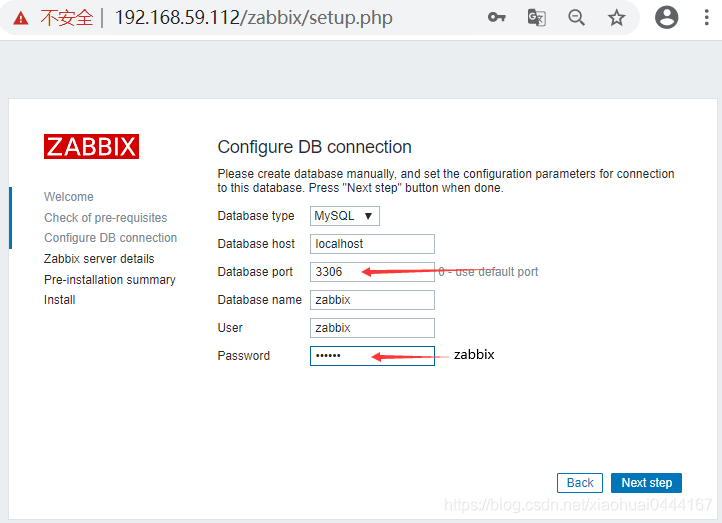
DBHost=localhost
DBName=zabbix #数据库名称
DBUser=zabbix #用户名
DBPassword=zabbix #数据库密码
[root@localhost ~] vim /etc/httpd/conf.d/zabbix.conf
[root@localhost ~] cat /etc/httpd/conf.d/zabbix.conf|sed -n '20p'
        php_value date.timezone Asia/Shanghai #更改时区为-亚洲/上海
6,启动zabbix和httpd
#zabbix-web-mysql为自带httpd
[root@localhost ~] systemctl enable zabbix-server zabbix-agent httpd
[root@localhost ~] systemctl start zabbix-server zabbix-agent httpd
#查看端口是否启动
[root@localhost ~] netstat -nuptl|egrep "80|10050|10051"
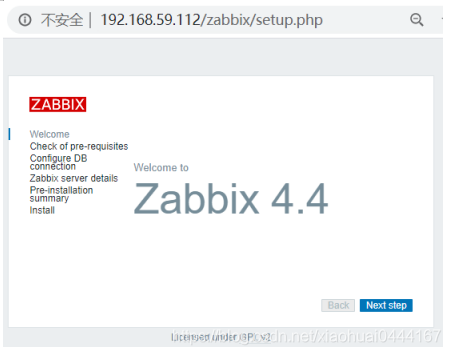
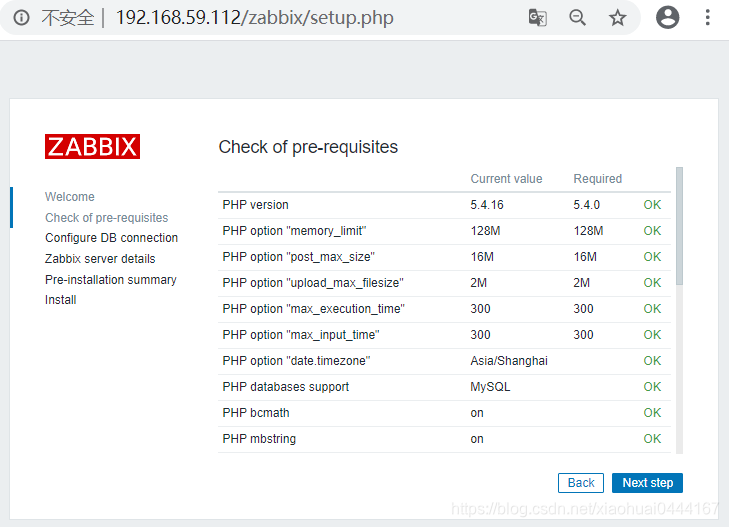
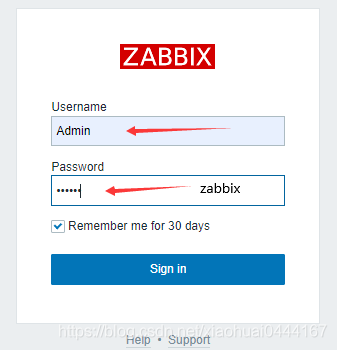
7,在浏览器web端测试

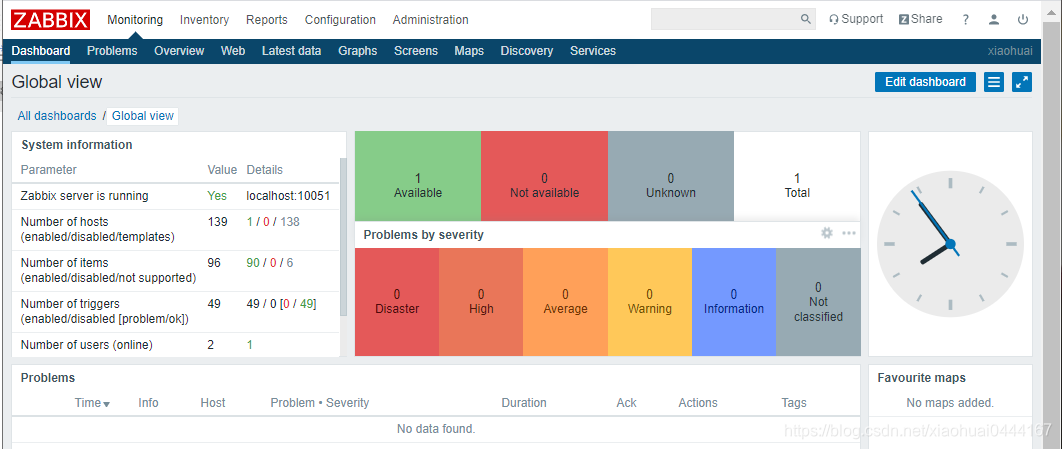
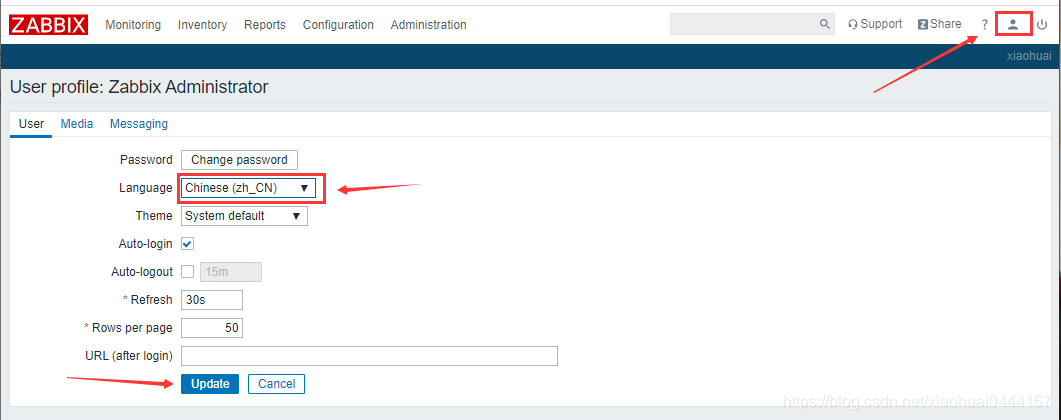
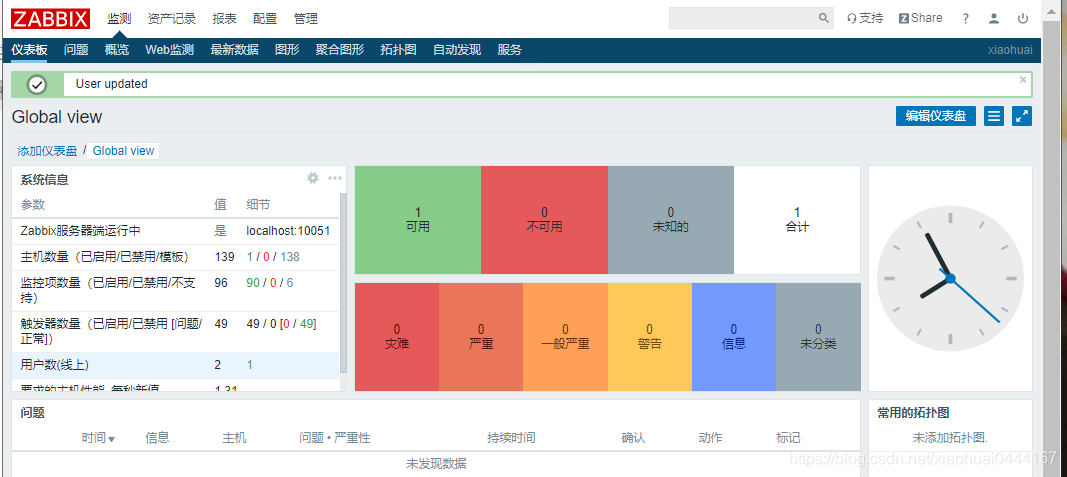
设置中文格式