本文内容参考《OpenCV3编程入门》,目的是对OpenCV图像处理有一个初步的认识,了解OpenCV图像处理的基本操作。
1. 图像显示
图像显示非常简单,不废话,直接上代码。
//
//  main.cpp
//  cvpro
//
//  Created by apple on 2020/2/29.
//  Copyright © 2020年 apple. All rights reserved.
//
#include <opencv2/opencv.hpp>
using namespace cv;

int main(int argc, const char * argv[]) {
    // insert code here...
    std::string path = "/Volumes/本地磁盘/Picture/头条号/影视/想见你/XJN-200206-20.png";
    Mat image = imread(path);
    imshow("origin", image);
    waitKey(0);

    system("pause");
    return 0;
}
其中,imread函数载入图像并将图像数据存储在数据结构Mat类中;imshow函数显示图像。#include <opencv2/opencv.hpp>为OpenCV头文件的包含;using namespace cv;为命名空间的包含;waitKey函数等待按键按下,关闭图像窗口。
这个测试用例相对比较简单,这里不再展示测试结果。
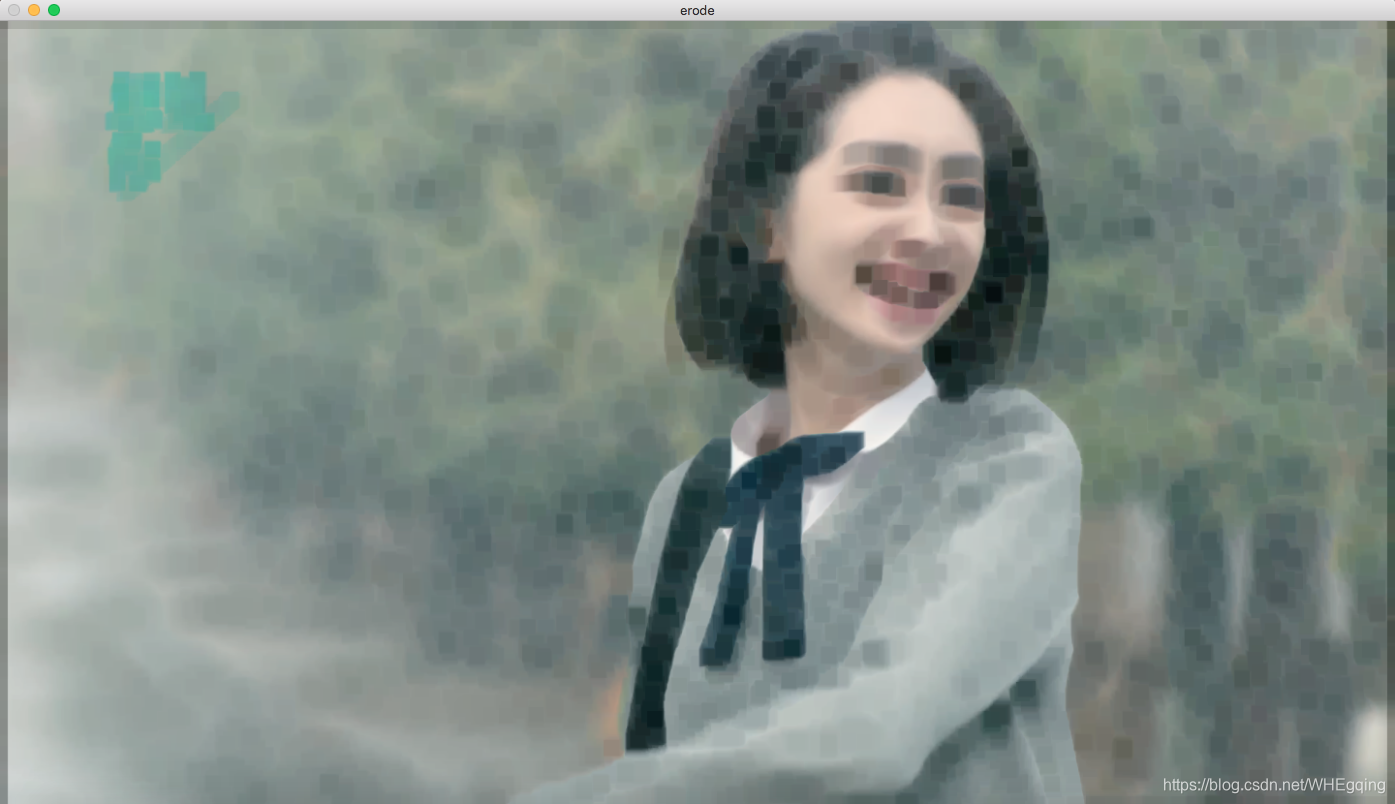
2. 图像腐蚀
图像腐蚀,即用图像中的暗色部分“腐蚀”掉图像中的高亮部分,是最基本的形态学运算之一。
//
//  main.cpp
//  cvpro
//
//  Created by apple on 2020/2/29.
//  Copyright © 2020年 apple. All rights reserved.
//

#include <iostream>

#include <opencv2/opencv.hpp>
#include <opencv2/imgproc.hpp>

using namespace cv;

int main(int argc, const char * argv[]) {
    // insert code here...
    std::string path = "/Volumes/本地磁盘/Picture/头条号/影视/想见你/XJN-200206-20.png";
    Mat image = imread(path);
    imshow("origin", image);

    Mat element=getStructuringElement(MORPH_RECT, Size(15,15));
    Mat dstimage;
    erode(image, dstimage, element);
    imshow("erode", dstimage);
    waitKey(0);

    system("pause");
    return 0;
}
其中,前几行表示载入并显示图像,getStructuringElement函数的返回值为Mat类型的结构元素,是一个指定形状和尺寸的内核矩阵;erode函数进行图像腐蚀操作。原始图像和腐蚀图像如下所示:

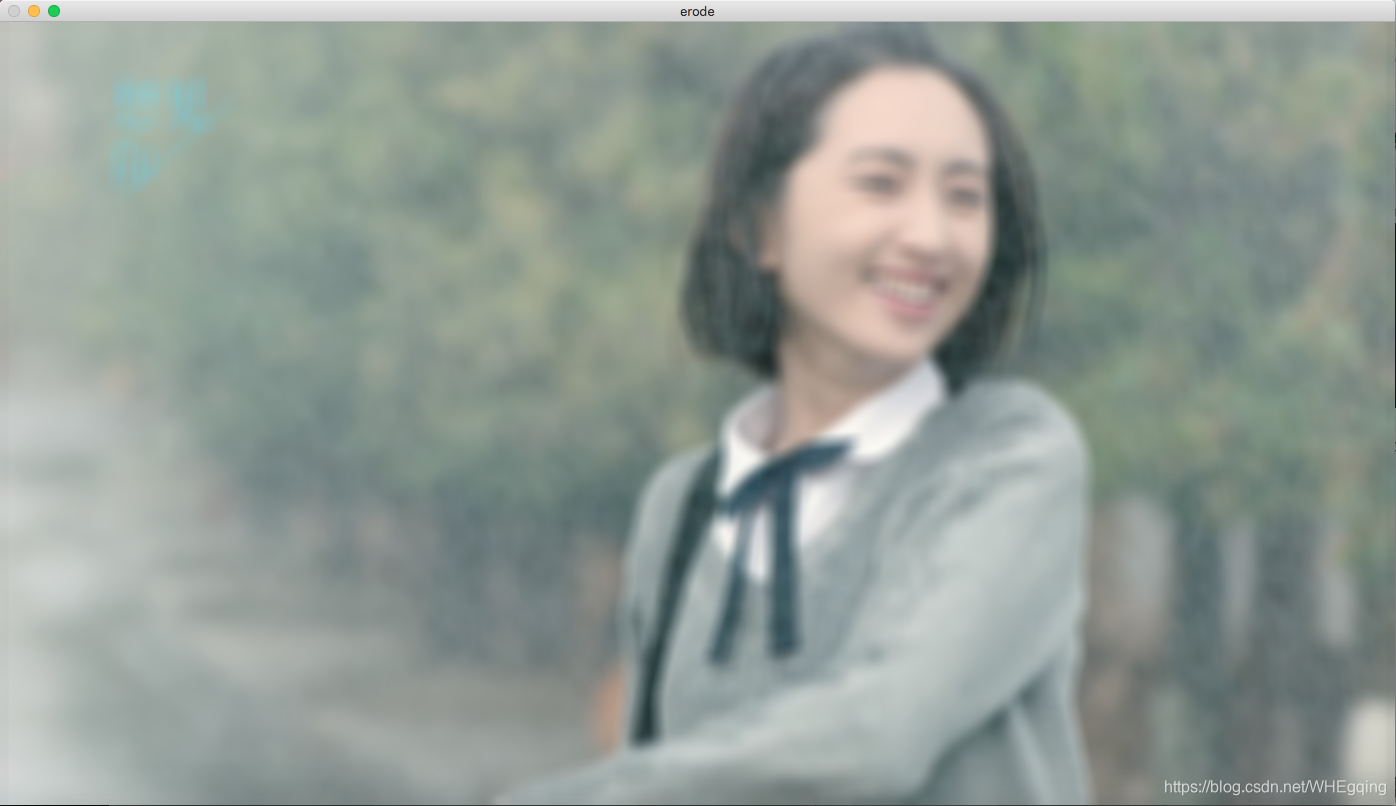
3. 图像模糊
OpenCV对图像进行均值滤波操作,可以模糊一幅图像。
//
//  main.cpp
//  cvpro
//
//  Created by apple on 2020/2/29.
//  Copyright © 2020年 apple. All rights reserved.
//

#include <iostream>

//#include <opencv2/opencv.hpp>
//#include <opencv2/core.hpp>
#include <opencv2/imgproc.hpp>
#include <opencv2/highgui.hpp>
//#include <opencv2/videoio.hpp>

using namespace cv;

int main(int argc, const char * argv[]) {
    // insert code here...
    std::string path = "/Volumes/本地磁盘/Picture/头条号/影视/想见你/XJN-200206-20.png";
    Mat image = imread(path);
    imshow("origin", image);

    Mat dstimage;
    blur(image, dstimage, Size(17,17));
    imshow("erode", dstimage);
    waitKey(0);

    system("pause");
    return 0;
}
其中,blur函数的功能是进行均值滤波操作,比较简单。不再展示原图,这里只给出模糊处理后的图像,如下所示:
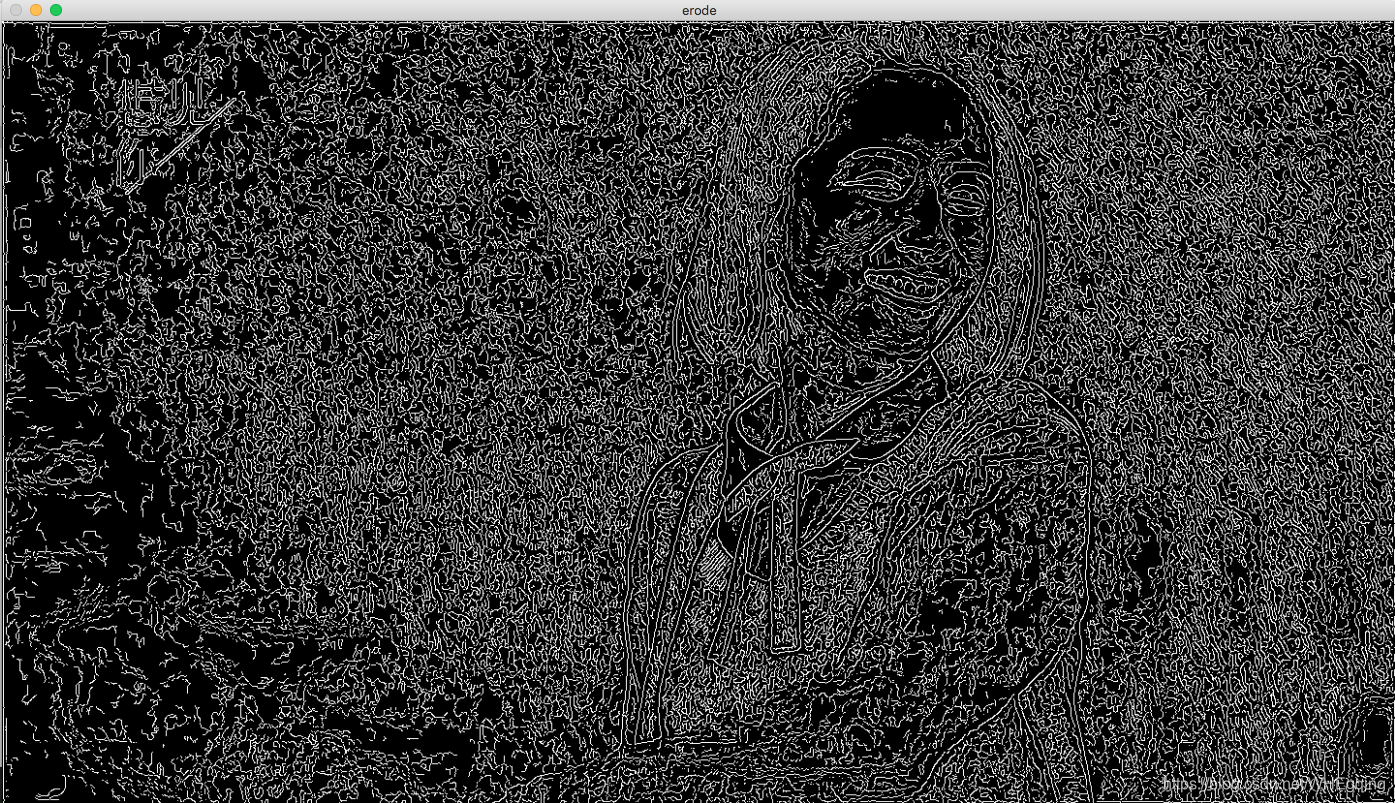
4. canny边缘检测
OpenCV进行canny边缘检测,首先载入原图,将其转换为灰度图像,再用blur函数进行图像模糊降低噪声,然后用canndy函数进行边缘检测,最后显示图像。
//
//  main.cpp
//  cvpro
//
//  Created by apple on 2020/2/29.
//  Copyright © 2020年 apple. All rights reserved.
//

#include <iostream>

#include <opencv2/opencv.hpp>
//#include <opencv2/core.hpp>
#include <opencv2/imgproc.hpp>
//#include <opencv2/highgui.hpp>
//#include <opencv2/videoio.hpp>

using namespace cv;

int main(int argc, const char * argv[]) {
    // insert code here...
    std::string path = "/Volumes/本地磁盘/Picture/头条号/影视/想见你/XJN-200206-20.png";
    Mat image = imread(path);
    imshow("origin", image);

    Mat dstimage,edge,grayimage;
    dstimage.create(image.size(), image.type());
    cvtColor(image, grayimage, COLOR_BGR2GRAY);

    blur(grayimage, edge, Size(3,3));

    Canny(edge, dstimage, 3, 9.3);
    imshow("erode", dstimage);
    waitKey(0);

    system("pause");
    return 0;
}
其中,首先载入原始图像,用 create创建与原始图像同类型和大小的矩阵(sdt),cvtcolor函数将原始图像转换为灰度图像,blur函数对灰度图像进行模糊处理降噪,Canny函数进行边缘检测,并将输出数据存入dstimage中。边缘检测的效果图如下: