目录
1.安装 vs2015、cuda9.0、python3.5+
7.vs无法解析的外部符号与powershell编译出现无法解析的外部符号错误
8.准备tensorflow的dll、lib、include
8.1 简版tensorflow的dll、lib、include
这篇博客写着,是因为windows+bazel+tensorflow-r1.12(GPU)编译生成dll与lib,上一篇,虽然编译成功了,但是在使用tensorflow\examples\label_image\main.cc怎么都不能成功生成解决方案,因为缺很多链接库。所以写了这篇。
其中,我已经编译好的tensorflow-v1.12.0 dll,lib,include,如何出现缺链接库的话,自己可以将错误的符号加入tf_exported_symbols_msvc.lds文件中,自己编译生成自己的dll与lib文件:
下载链接:
tensorflow-v1.12.0 dll,lib,include
提取码:
0ugf0.最终环境
win10
vs2015
cuda9.0
cudnn7.6
python3.5.2
tensorflow-v1.12.0
bazel0.22.0
msys2-x86_64-20190524
1.安装 vs2015、cuda9.0、python3.5+
2.安装 MSYS2

其中这个最好按照默认路径安装,否则编译时没过几秒钟,可能会出现下面的问题:
/usr/bin/env: 'python': No such file or directory windows所有安装步骤都默认一路next下去,安装完成以后,需要配置:
- 将目录C:\msys64和C:\msys64\usr\bin 加入系统环境变量path
- 打开cmd.exe,输入一下命令(有时可能安装不了,多试几次好了):
pacman -Syuu patch3.安装 Bazel
在github下载Bazel,https://github.com/bazelbuild/bazel/releases,这里我下载的bazel-0.22.0-windows-x86_64.exe
![]()
将下载好的 bazel-0.22.1-windows-x86_64.exe复制到C:\msys64下,更名为bazel.exe。
配置bazel:新建环境变量:BAZEL_SH,BAZEL_VC ,BAZEL_VS

4.下载tensorflow-v1.12
git与直接下载都可以,我是直接下载的压缩包。
5.修改文件配置
此处参考https://github.com/guikarist/tensorflow-windows-build-script
1.将tensorflow-1.12.0.zip解压到tensorflow-1.12.0目录下,并将目录下的tensorflow-1.12.0文件夹重命名为source;
2.下载tensorflow-windows-build-script的压缩包,解压,将其中的patchs与build.ps.1复制到tensorflow-1.12.0目录下;

3.将patchs下的eigen_half.patch复制到tensorflow-1.12.0\source\third_party下;
![]()

4.将patchs下的tf_exported_symbols_msvc.lds复制到tensorflow-1.12.0\source\tensorflow下,这里使用我编译使用过的tf_exported_symbols_msvc.lds替换;
![]()

5.可以使用Notepad++修改build.ps1文件如下(后面可能会出现Copy-Item命令的问题);
修改 line154-182:
# Apply patches to source.
if ($buildVersion -eq "v1.11.0") {
    # Eigen Patch for v1.11.0
    git apply --ignore-space-change --ignore-white "..\patches\eigen.1.11.0.patch"
    Copy-Item ..\patches\eigen_half.patch third_party\
} elseif ($buildVersion -eq "v1.12.0") {
    # Eigen Patch for v1.12.0
    git apply --ignore-space-change --ignore-white "..\patches\eigen.1.12.0.patch"
    Copy-Item ..\patches\eigen_half.patch third_party\
} elseif ($buildVersion -eq "v1.13.1") {
    [Net.ServicePointManager]::SecurityProtocol = [Net.SecurityProtocolType]::Tls12
    (Invoke-WebRequest https://github.com/tensorflow/tensorflow/commit/ec727016282383aacf9d26386b01f6bdbd65b14b.patch).Content | git apply -v --ignore-space-change --ignore-white
}

if ($BuildCppAPI) {
    if ($buildVersion -eq "v1.11.0") {
        # C++ Symbol Patch for v1.11.0
        git apply --ignore-space-change --ignore-white "..\patches\cpp_symbol.1.11.0.patch"
        Copy-Item ..\patches\tf_exported_symbols_msvc.lds tensorflow\
    } elseif ($buildVersion -eq "v1.12.0") {
        # C++ Symbol Patch for v1.12.0
        git apply --ignore-space-change --ignore-white "..\patches\cpp_symbol.1.12.0.patch"
        Copy-Item ..\patches\tf_exported_symbols_msvc.lds tensorflow\
    } elseif ($buildVersion -eq "v1.13.1") {
        # C++ Symbol Patch for v1.13.1
        git apply --ignore-space-change --ignore-white "..\patches\cpp_symbol.1.13.1.patch"
        Copy-Item ..\patches\tf_exported_symbols_msvc.lds tensorflow\
    }
}
为:
为:
# Apply patches to source.
if ($buildVersion -eq "v1.11.0") {
    # Eigen Patch for v1.11.0
    git apply --ignore-space-change --ignore-white "..\patches\eigen.1.11.0.patch"
    Copy-Item ..\patches\eigen_half.patch third_party\
} elseif ($buildVersion -eq "v1.12.0") {
    # Eigen Patch for v1.12.0
    git apply --ignore-space-change --ignore-white "..\patches\eigen.1.12.0.patch"
    #Copy-Item ..\patches\eigen_half.patch third_party\
} elseif ($buildVersion -eq "v1.13.1") {
    [Net.ServicePointManager]::SecurityProtocol = [Net.SecurityProtocolType]::Tls12
    (Invoke-WebRequest https://github.com/tensorflow/tensorflow/commit/ec727016282383aacf9d26386b01f6bdbd65b14b.patch).Content | git apply -v --ignore-space-change --ignore-white
}

if ($BuildCppAPI) {
    if ($buildVersion -eq "v1.11.0") {
        # C++ Symbol Patch for v1.11.0
        git apply --ignore-space-change --ignore-white "..\patches\cpp_symbol.1.11.0.patch"
        Copy-Item ..\patches\tf_exported_symbols_msvc.lds tensorflow\
    } elseif ($buildVersion -eq "v1.12.0") {
        # C++ Symbol Patch for v1.12.0
        git apply --ignore-space-change --ignore-white "..\patches\cpp_symbol.1.12.0.patch"
        #Copy-Item ..\patches\tf_exported_symbols_msvc.lds tensorflow\
    } elseif ($buildVersion -eq "v1.13.1") {
        # C++ Symbol Patch for v1.13.1
        git apply --ignore-space-change --ignore-white "..\patches\cpp_symbol.1.13.1.patch"
        Copy-Item ..\patches\tf_exported_symbols_msvc.lds tensorflow\
    }
}
6.使用powershell进行配置与编译
1.打开powershell
输入下面命令,这是bazel编译的选项,为不同的语言(python、c、c++)其//后对应的都不一样:
$parameterString = "--config=opt --config=cuda --define=no_tensorflow_py_deps=true --copt=-nvcc_options=disable-warnings //tensorflow:libtensorflow_cc.so --verbose_failures"bazel编译的选项,为不同的语言(python、c、c++)其//后对应的都不一样,参考https://github.com/guikarist/tensorflow-windows-build-script:

然后输入:
.\build.ps1 `
    -BazelBuildParameters $parameterString `
    -BuildCppAPI -ReserveSource
会出现build.ps1错误:无法加载文件 ******.ps1,因为在此系统中禁止执行脚本,参考https://www.cnblogs.com/zhaozhan/archive/2012/06/01/2529384.html,解决输入一下命令:
set-executionpolicy remotesigned下面执行开始需要互动配置了如下(如果出错重新编译的话,最好删除编译目录下,建的venv文件夹):
(venv) PS D:\Users\tensorflow-1.12.0> .\build.ps1 `
>>     -BazelBuildParameters $parameterString `
>>     -BuildCppAPI -ReserveSource

Select a Tensorflow version:
[1] 1 - v1.13.1  [2] 2 - v1.12.0  [3] 3 - v1.11.0  [S] Select another version  [?] 帮助 (默认值为“1”): 2
...
Starting local Bazel server and connecting to it...
.
INFO: Starting clean.
WARNING: --batch mode is deprecated. Please instead explicitly shut down your Bazel server using the command "bazel shutdown".
You have bazel 0.15.0 installed.
Do you wish to build TensorFlow with Apache Ignite support? [Y/n]: n
No Apache Ignite support will be enabled for TensorFlow.

Do you wish to build TensorFlow with XLA JIT support? [y/N]: n
No XLA JIT support will be enabled for TensorFlow.

Do you wish to build TensorFlow with ROCm support? [y/N]: n
No ROCm support will be enabled for TensorFlow.

Do you wish to build TensorFlow with CUDA support? [y/N]: y
CUDA support will be enabled for TensorFlow.

Please specify the CUDA SDK version you want to use. [Leave empty to default to CUDA 9.0]:


Please specify the location where CUDA 9.0 toolkit is installed. Refer to README.md for more details. [Default is C:/Program Files/NVIDIA GPU Computing Toolkit/CUDA/v9.0]: D:\Users\CUDA9.0

Please specify the cuDNN version you want to use. [Leave empty to default to cuDNN 7]:


Please specify the location where cuDNN 7 library is installed. Refer to README.md for more details. [Default is D:/Users/CUDA9.0]:


Please specify a list of comma-separated Cuda compute capabilities you want to build with.
You can find the compute capability of your device at: https://developer.nvidia.com/cuda-gpus.
Please note that each additional compute capability significantly increases your build time and binary size. [Default is: 3.5,7.0]: 5.0


Please specify optimization flags to use during compilation when bazel option "--config=opt" is specified [Default is /arch:AVX]:


Would you like to override eigen strong inline for some C++ compilation to reduce the compilation time? [Y/n]: y
Eigen strong inline overridden.

Starting local Bazel server and connecting to it...
.....................
WARNING: The following configs were expanded more than once: [cuda]. For repeatable flags, repeats are counted twice and may lead to unexpected behavior.
编译好以后,将
7.vs无法解析的外部符号与powershell编译出现无法解析的外部符号错误
出现下面问题都按这个步骤做,只不过第4步中,vs是加上,powershell可能会加上或者去掉tf_exported_symbols_msvc.lds文件EXPORTS中的链接:

1.如果是vs无法解析的外部符号,这样解决,错误与解决方案如下(为了能清):
- 错误:
无法解析的外部符号 "public: virtual __cdecl tensorflow::internal::LogMessage::~LogMessage(void)" (??1LogMessage@internal@tensorflow@@UEAA@XZ),该符号在函数 "public: void __cdecl tensorflow::internal::LogMessage::`vbase destructor'(void)" (??_DLogMessage@internal@tensorflow@@QEAAXXZ) 中被引用huawei_video_tensorflow- 解决方法:函数调用后与(该符号该符号在函数)前括号内的内容添加
??1LogMessage@internal@tensorflow@@UEAA@XZ复制到tensorflow-1.12.0\source\tensorflow\tf_exported_symbols_msvc.lds文件的EXPORTS最后面。
2.如果powershell编译出现无法解析的外部符号错误
- 错误:
无法解析的外部符号 "public: virtual __cdecl tensorflow::internal::LogMessage::~LogMessage(void)" (??1LogMessage@internal@tensorflow@@UEAA@XZ),该符号在函数 "public: void __cdecl tensorflow::internal::LogMessage::`vbase destructor'(void)" (??_DLogMessage@internal@tensorflow@@QEAAXXZ) 中被引用- 解决方法:(该符号该符号在函数)前括号内的内容,从tensorflow-1.12.0\source\tensorflow\tf_exported_symbols_msvc.lds文件中所有包含的部分全部删除:
??1LogMessage@internal@tensorflow@@UEAA@XZ
最后不断解决重复解决遇到的头文件与无法解析外部符号问题,终于编译工程并能够正常运行程序了。

通过这个步骤,在另外一台机器上也测试成功了:

8.准备tensorflow的dll、lib、include
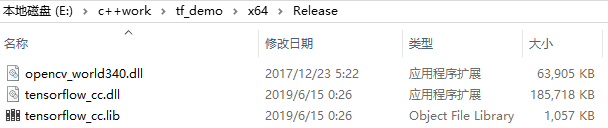
新建tensorflow文件夹,然后在目录下再新建两个目录,dll与lib
dll:将上面图片中路径的libtensorflow_cc.so改名为tensorflow_cc.dll,放到tensorflow\dll目录下(vs调试时会调用的文件,路径要加入到环境变量中,或者也可以将文件加到当前工程运行的release目录下)
lib:将上面图片路径下的liblibtensorflow_cc.so.ifso改名为tensorflow_cc.lib,放到tensorflow\lib目录下 (路径要加入到vs包含库目录中,或将文件放到当前工程运行的release目录下,并添加库目录)
include:将bazel_source目录下,不管是快捷方式(可能会复制不全,可以去上图中目录下,找到对应文件,反正一定要复制全,不要有空目录,不然就会缺失头文件,报错),还是文件内的文件,都需要一起复制到tensorflow下。
下面是我自己编译好的tensorflow-v1.12.0 dll,lib,include,如何出现缺链接库的话,自己可以将错误的符号加入tf_exported_symbols_msvc.lds文件中,自己编译生成自己的dll与lib文件:
提取码:
0ugf可以使用Dependency Walker工具查看该DLL:

8.1 简版tensorflow的dll、lib、include
此处感谢cjAlgthm!!!
1.首先给出文件结构图:
libtensorflow
│
├─bin
│      tensorflow_cc.dll
│
├─include
│      ...
│
└─lib
        tensorflow_cc.lib
2.下载链接:
链接:libtensorflow
提取码:rgzf
3.使用
--解压后,将libtensorflow/include加入包含目录;

--将lib路径包含到库目录,也可以放到对应工程的生成目录中,比如x64/Release/,同样也需要包含到库目录下;(这里我是放到对应工程的生成目录下,使用的相对路径)

且需要放到附加依赖项中:

--将dll放到对应工程的生成目录中,比如x64/Release/,或者将路径添加到系统环境变量中也可以。
4.如何整理此环境,可以参考
https://blog.csdn.net/carbon06/article/details/82588150

5.对于想更改tensorflow_cc名的
请注意:
不要改,很麻烦,lib里面已经将dll名称写固定了;
想尝试的,备份!!!lib修改后,有可能损坏。
6.demo测试结果

6.对tensorflow的库做了如下修改
修改了下面三个文件:
![]()
将这几个文件中的min与max修改成下面这样:
string_view.h
line491-493

 private:
  static constexpr size_type kMaxSize =
      std::numeric_limits<difference_type>::max();

改为
 private:
  static constexpr size_type kMaxSize =
(std::numeric_limits<difference_type>::max)(); 
9.调用模型测试程序
下面是我自己的批处理测试单张图像代码:
#define COMPILER_MSVC
#define NOMINMAX
#define PLATFORM_WINDOWS   // 指定使用tensorflow/core/platform/windows/cpu_info.h

#include<iostream>
#include<opencv2/opencv.hpp>
#include"tensorflow/core/public/session.h"
#include "tensorflow/core/platform/env.h"
#include <time.h>

using namespace tensorflow;
using namespace cv;
using std::cout;
using std::endl;

int main() {
	const std::string model_path = "E:/c++work/tf_testdemo/tf_testdemo/latest_model_MobileUNet_0603.pb";// tensorflow模型文件,注意不能含有中文
	const std::string image_path = "E:/c++work/tf_testdemo/tf_testdemo/001_00045.png";    // 待inference的图片grace_hopper.jpg
	// 设置输入图像
	cv::Mat img = cv::imread(image_path);
	cv::cvtColor(img, img, cv::COLOR_BGR2RGB);
	//resize(img, img, cv::Size(512, 512),0,0, INTER_NEAREST);
	int height = img.rows;
	int width = img.cols;
	int depth = img.channels();

	// 图像预处理
	img = (img - 0) / 255.0;
	img.convertTo(img, CV_32F);

	// 取图像数据,赋给tensorflow支持的Tensor变量中
	const float* source_data = (float*)img.data;
	tensorflow::Tensor input_tensor(DT_FLOAT, TensorShape({ 1, height, width, depth })); //这里只输入一张图片,参考tensorflow的数据格式NHWC
	auto input_tensor_mapped = input_tensor.tensor<float, 4>(); // input_tensor_mapped相当于input_tensor的数据接口,“4”表示数据是4维的。后面取出最终结果时也能看到这种用法

																// 把数据复制到input_tensor_mapped中,实际上就是遍历opencv的Mat数据
	for (int i = 0; i < height; i++) {
		const float* source_row = source_data + (i * width * depth);
		for (int j = 0; j < width; j++) {
			const float* source_pixel = source_row + (j * depth);
			for (int c = 0; c < depth; c++) {
				const float* source_value = source_pixel + c;
				input_tensor_mapped(0, i, j, c) = *source_value;
				//printf("%d");
			}
		}
	}
	// 初始化tensorflow session
	Session* session;
	Status status = NewSession(SessionOptions(), &session);
	if (!status.ok()) {
		std::cerr << status.ToString() << endl;
		return -1;
	}
	else {
		cout << "Session created successfully" << endl;
	}


	// 读取二进制的模型文件到graph中
	tensorflow::GraphDef graph_def;
	status = ReadBinaryProto(Env::Default(), model_path, &graph_def);
	if (!status.ok()) {
		std::cerr << status.ToString() << endl;
		return -1;
	}
	else {
		cout << "Load graph protobuf successfully" << endl;
	}


	// 将graph加载到session
	status = session->Create(graph_def);
	if (!status.ok()) {
		std::cerr << status.ToString() << endl;
		return -1;
	}
	else {
		cout << "Add graph to session successfully" << endl;
	}
	// 输入inputs,“ x_input”是我在模型中定义的输入数据名称
	std::vector<std::pair<std::string, tensorflow::Tensor>> inputs = {
		{ "input_x:0", input_tensor },
	};

	// 输出outputs
	//tensorflow::Tensor outputs(DT_FLOAT, TensorShape({ 1, height, width, depth }));
	std::vector<tensorflow::Tensor> outputs;

	//批处理识别
	for (int k = 0; k < 200; k++) {

		double start = clock();
		// 运行会话,计算输出"x_predict",即我在模型中定义的输出数据名称,最终结果保存在outputs中
		status = session->Run(inputs, { "outimage:0" }, {}, &outputs);
		if (!status.ok()) {
			std::cerr << status.ToString() << endl;
			return -1;
		}
		else {
			cout << "Run session successfully" << endl;
		}

		// 下面进行输出结果的可视化
		// 下面进行输出结果的可视化
		tensorflow::Tensor output = std::move(outputs.at(0)); // 模型只输出一个结果,这里首先把结果移出来(也为了更好的展示)
		auto out_shape = output.shape(); // 这里的输出结果为1x4x16
		auto out_val = output.tensor<float, 4>(); // 与开头的用法对应,4代表结果的维度

		cv::Mat out_image(height, width, CV_32FC(depth));
		float* data = (float*)out_image.data;
		for (int y = 0; y < height; ++y)
		{
			float* dataRow = data + (y * width * depth);
			for (int x = 0; x < width; ++x)
			{
				float* dataPixel = dataRow + (x * depth);
				for (int c = 0; c < depth; ++c)
				{
					float* dataValue = dataPixel + c;
					*dataValue = out_val(0, y, x, c);
				}
			}

		}


		cv::imshow("outimage", out_image);
		cv::waitKey(1);
		double	finish = clock();
		double duration = (double)(finish - start) / CLOCKS_PER_SEC;
		cout <<"spend time:" << duration << endl;
	}
	/*cv::cvtColor(out_image, out_image, cv::COLOR_RGB2BGR);
	cv::cvtColor(out_image_final, out_image_final, cv::COLOR_RGB2BGR);
	cv::imwrite("E:/c++work/tf_testdemo/tf_testdemo/001_00045_out.png", out_image*255);
	cv::imwrite("E:/c++work/tf_testdemo/tf_testdemo/001_00045_out_final.png", out_image_final * 255);*/
	system("PAUSE");
}
环境配置:
包含目录:
E:\Users\tensorflow\bazel-source;E:\Users\tensorflow\bazel-source\external\org_tensorflow;E:\Users\tensorflow\bazel-source\external\protobuf_archive\src;E:\Users\tensorflow\bazel-source\external\com_google_absl;E:\Users\tensorflow\bazel-source\external\eigen_archive;E:\Users\tensorflow\bazel-source\bazel-out\x64_windows-opt\genfiles;E:\Users\tensorflow;E:\Opencv-vs2015\opencv342\include;E:\Opencv-vs2015\opencv342\include\opencv;E:\Opencv-vs2015\opencv342\include\opencv2;E:\Users\tensorflow\bazel-source;E:\Users\tensorflow\bazel-source\external\org_tensorflow;E:\Users\tensorflow\bazel-source\external\protobuf_archive\src;E:\Users\tensorflow\bazel-source\external\com_google_absl;E:\Users\tensorflow\bazel-source\external\eigen_archive;E:\Users\tensorflow\bazel-source\bazel-out\x64_windows-opt\genfiles;E:\Users\tensorflow;E:\Opencv-vs2015\opencv342\include;E:\Opencv-vs2015\opencv342\include\opencv;E:\Opencv-vs2015\opencv342\include\opencv2;
库目录:
E:\Opencv-vs2015\opencv342\lib;E:\c++work\tf_testdemo\x64\Debug;链接器输入附加依赖项:
opencv_world342d.lib;opencv_world342.lib;tensorflow_cc.lib;10.尝试编译debug版本
因为项目需要,我自己也尝试了编译tensorflow的debug版本:
$parameterString = "-c fastbuild --config=cuda --define=no_tensorflow_py_deps=true --copt=-nvcc_options=disable-warnings //tensorflow:libtensorflow_cc.so --verbose_failures"
.\build.ps1 `
    -BazelBuildParameters $parameterString `
    -BuildCppAPI -ReserveSource -ReserveVenv
与
$parameterString = "-c dbg--config=cuda --define=no_tensorflow_py_deps=true --copt=-nvcc_options=disable-warnings //tensorflow:libtensorflow_cc.so --verbose_failures"
.\build.ps1 `
    -BazelBuildParameters $parameterString `
    -BuildCppAPI -ReserveSource -ReserveVenv
但是卡在了下面的错误
tensorflow::io::GetTempFilename这个错误相关的github issue有这两个issue1,issue2和我自己开了一个issue,但是都建议编译release version。所以这里我暂停了继续编译debug版本。
11.遇到的问题
1.c++运行相同的pb模型,使用gpu,测试单张图像速度比python慢?
python测试单张图像20ms,c++测试单张图像26ms;
2.编译时遇到max的问题:


string_view.h
line491-493

 private:
  static constexpr size_type kMaxSize =
      std::numeric_limits<difference_type>::max();

改为
 private:
  static constexpr size_type kMaxSize =
      (std::numeric_limits<difference_type>::max)();
其他出错的头文件部分一一修改。
![]()
12.参考
[1]编译windows tensorflowv1.11-1.13 dll release version
[3]Tensorflow C++的Tensor和OpenCV的Mat相互转换
这里非常感谢TerryBryant,给我解答问题,应用部分主要参考他的;也非常感谢guikarist分享的编译方法。
