作者推荐使用layer编辑器,更加美观,文档地址
https://www.layui.com/doc/modules/layedit.html
第一步:到官方下载ueditor
https://ueditor.baidu.com/website/download.html(ueditor下载地址)
github项目地址https://github.com/yssyhw/springboot,下载后,运行访问http://localhost:8080/admin/test (防止大家懒得看,我直接给了项目源代码,这是一个简单的案例,以下是我用了自己项目做得教程,所以路劲不一样,直接下载请注意,修改路劲)
如果还搞不出来加我QQ:1023732997
demo下载链接下载运行,访问localhost:9090即可

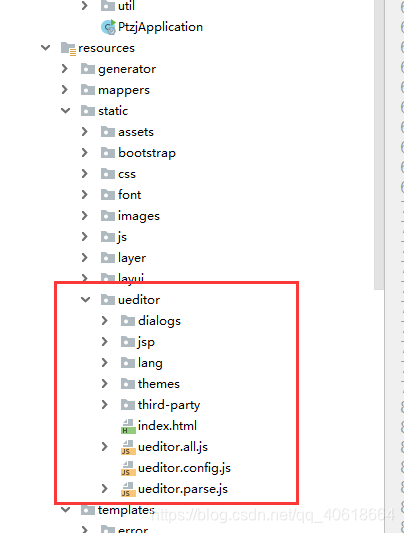
解压,放到项目目录static下
第二步:引入到前端页面中
<!DOCTYPE html>
<html lang="en">
<head>
    <meta charset="UTF-8">
    <title>Title</title>
    <script src="/admin/ueditor/ueditor.config.js"></script>
    <script src="/admin/ueditor/ueditor.all.min.js"></script>
    <script src="/admin/ueditor/lang/zh-cn/zh-cn.js"></script>
    <script src="/ueditor/ueditor.all.js"></script>
</head>
<body>
<textarea name="content" id="content" style="min-height: 500px"></textarea>
</body>
<script type="text/javascript">
    UE.getEditor('content');

</script>
</html>
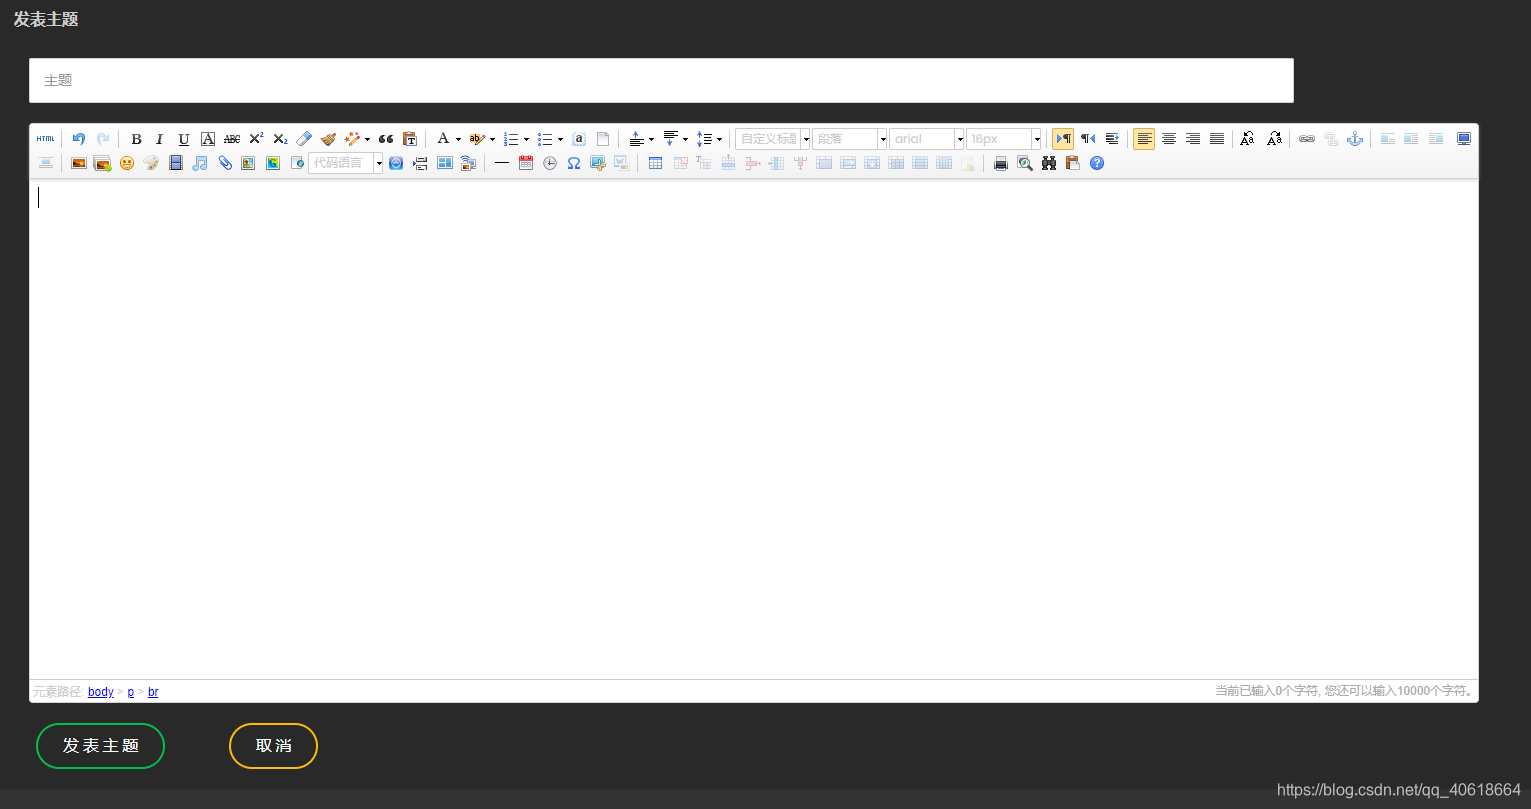
效果,图片展示用了自己项目的图片
第三步:修改源代码,因为官方提供的是JSP,所以引入之后图片上传等一些功能无法使用:注意了以下每一步都是重点
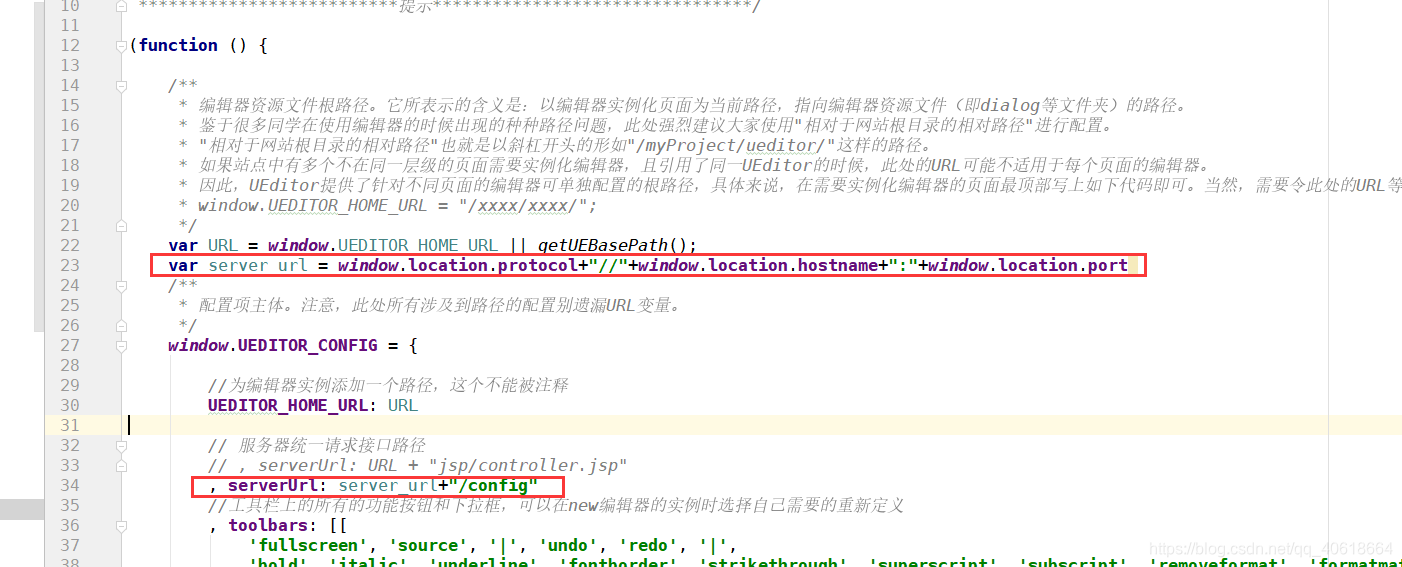
1.修改ueditor.config.js,防止大家懒得自己写,给大家贴一下代码
var server_url = window.location.protocol+"//"+window.location.hostname+":"+window.location.port
serverUrl: server_url+"/config"

修改后
2.新增一个ServerController(一定要单独建一个,不要在其他Controller里写)
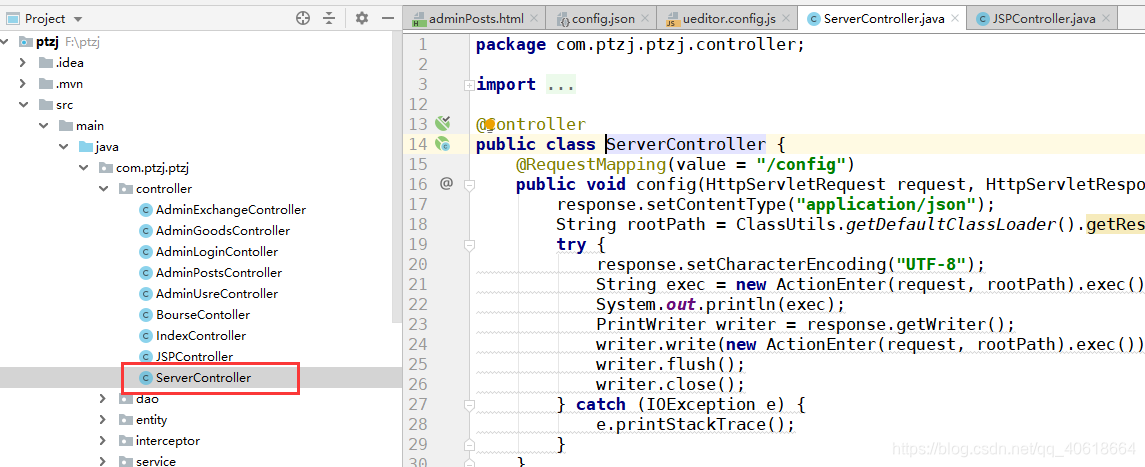
代码:
@Controller
public class ServerController {
    @RequestMapping(value = "/config")
    public void config(HttpServletRequest request, HttpServletResponse response) {
        response.setContentType("application/json");
        String rootPath = ClassUtils.getDefaultClassLoader().getResource("").getPath() + "static/ueditor/jsp";
        try {
            response.setCharacterEncoding("UTF-8");
            String exec = new ActionEnter(request, rootPath).exec();
            System.out.println(exec);
            PrintWriter writer = response.getWriter();
            writer.write(new ActionEnter(request, rootPath).exec());
            writer.flush();
            writer.close();
        } catch (IOException e) {
            e.printStackTrace();
        }
    }`
注意:
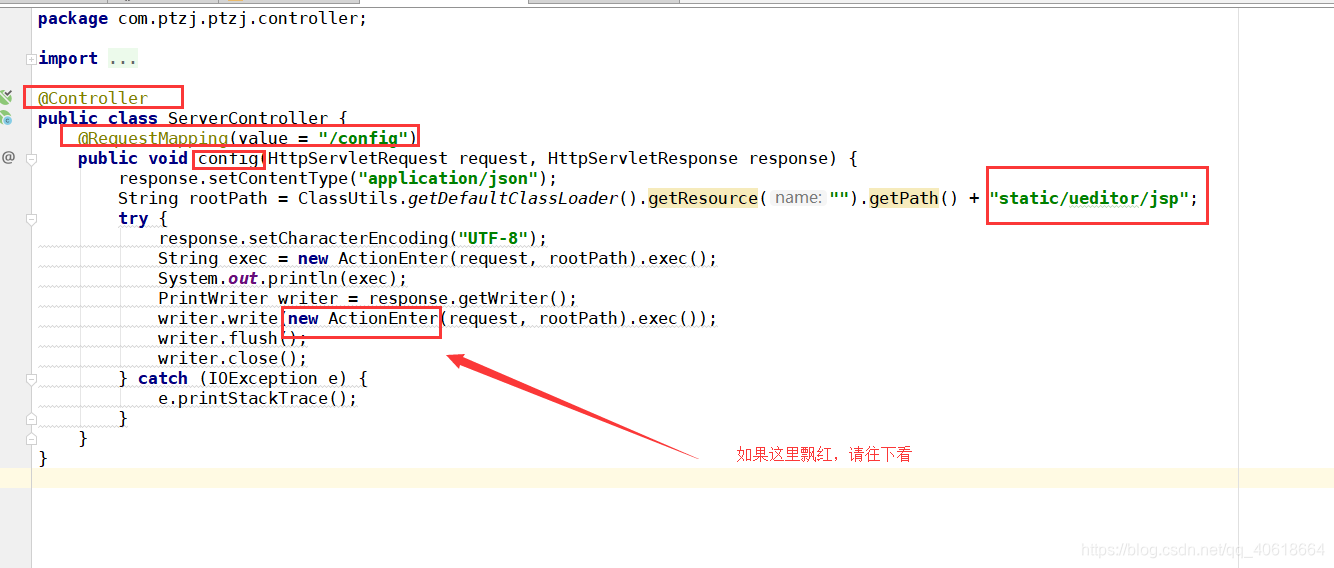
ActionEnter类是ueditor里一个jar包的,添加以下依赖
 <dependency>
            <groupId>com.gitee.qdbp.thirdparty</groupId>
            <artifactId>ueditor</artifactId>
            <version>1.4.3.3</version>
        </dependency>
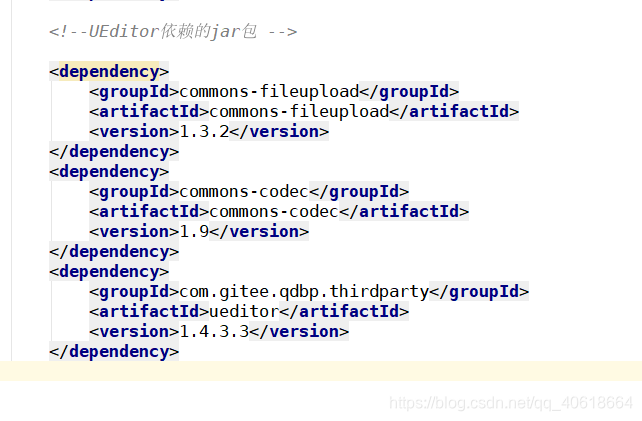
如果还有问题请添加以上截图里多出的两个依赖
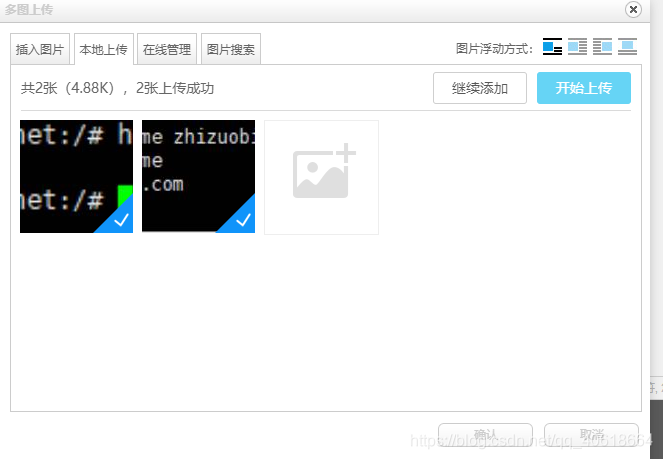
至此就会发现,控制台不在报后端配置错误,单图上传可以点击了,文件上传,多图上传也可以选择文件了
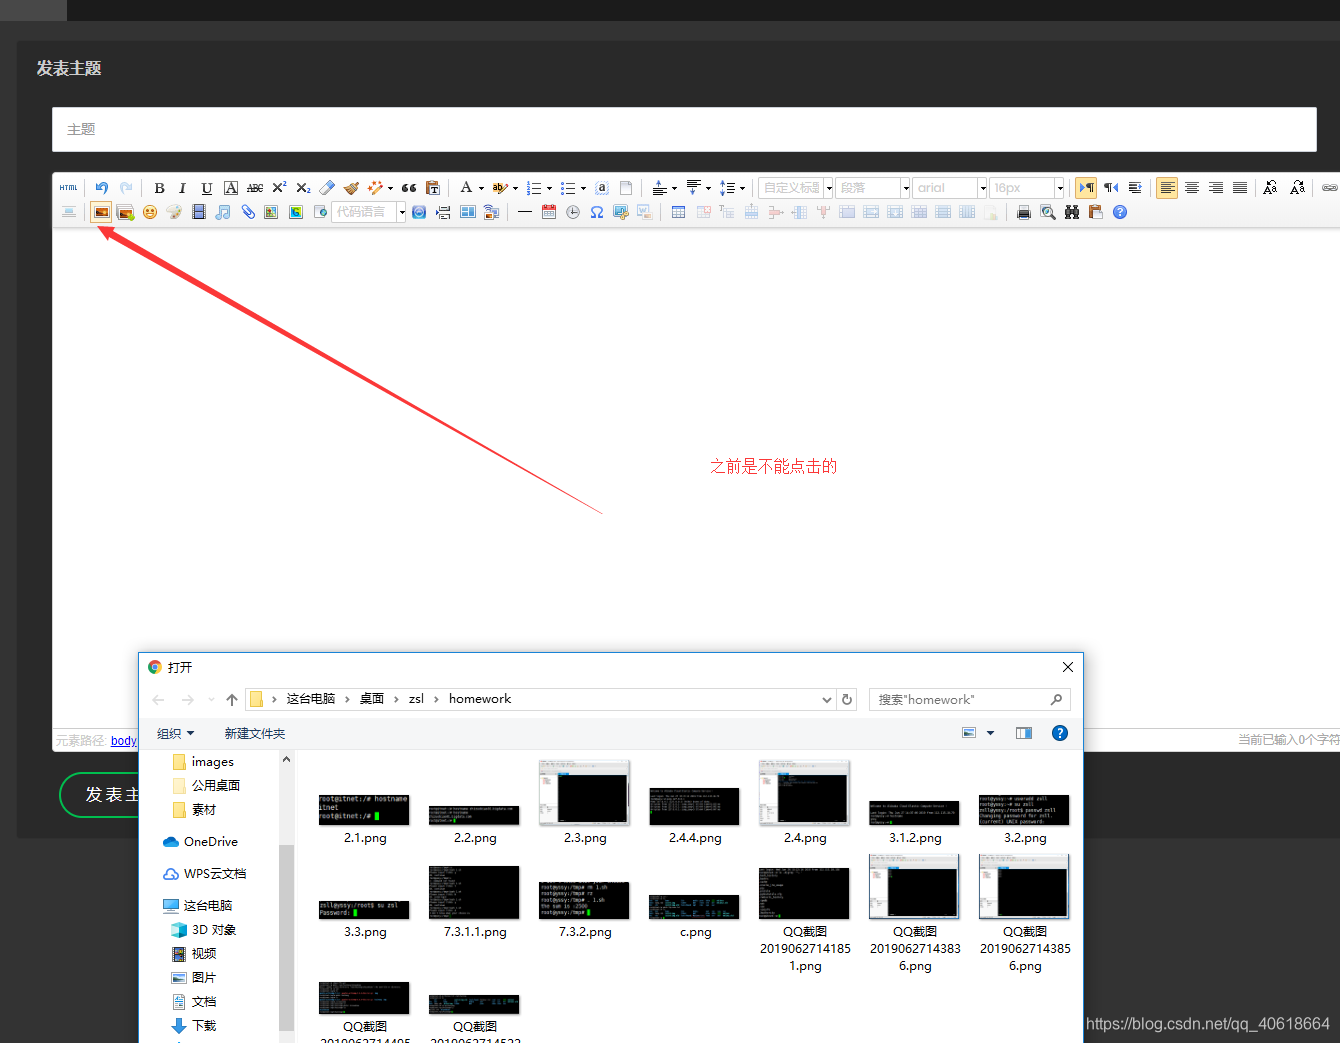
但是还是会点击之后无法在编辑器正常显示图片
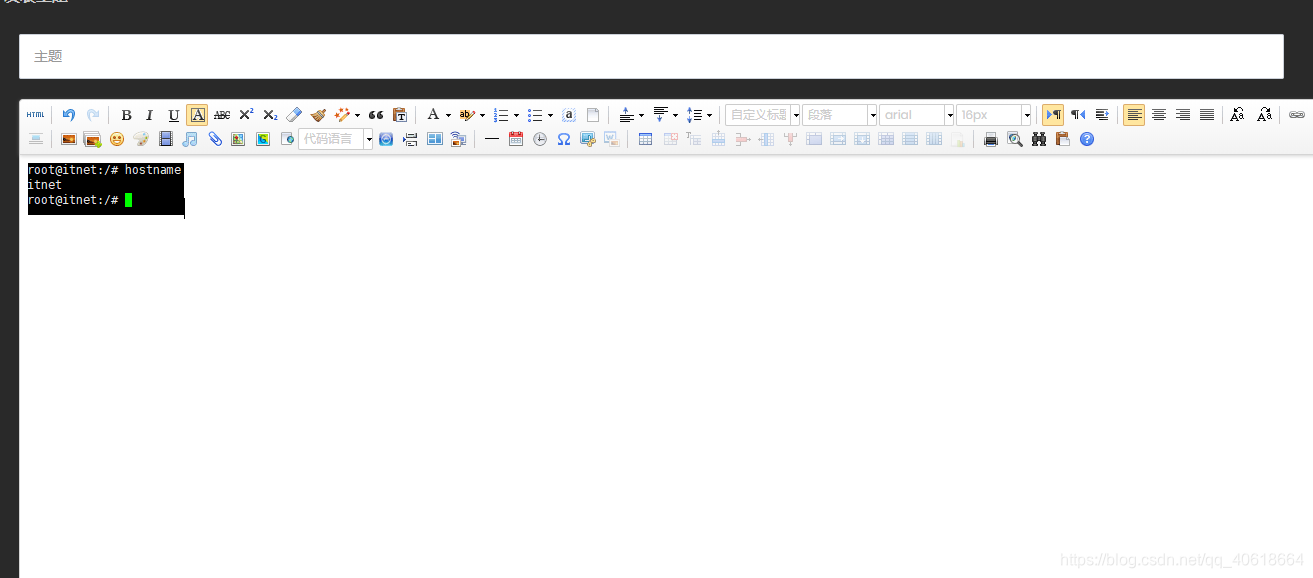
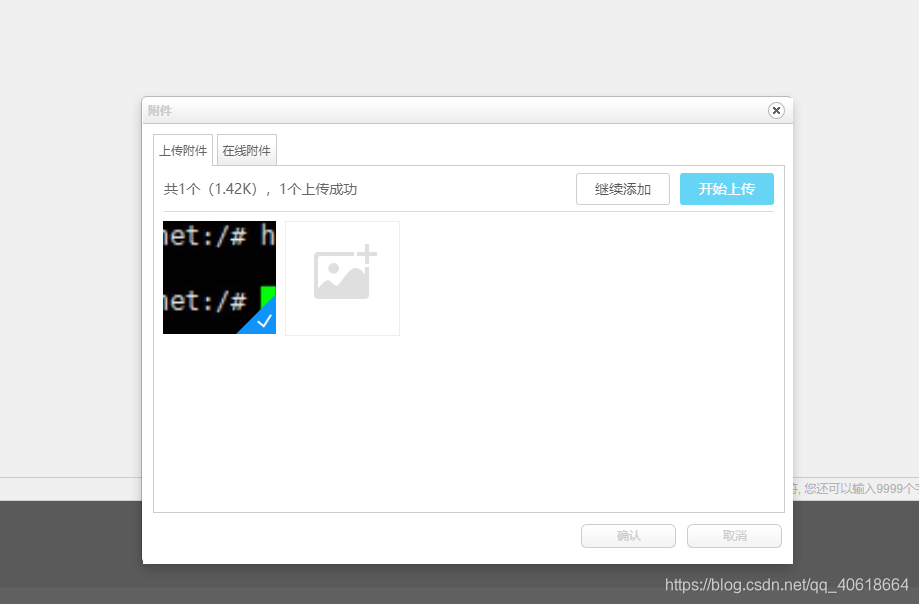
最后一步:修改config.json

填写所有图片访问路径前缀为“/ueditor/jsp”,大概有七八个地方,否则多图上传,文件上传那些也是不可以使用
最后效果
如果对你有帮助请打开淘宝搜索店铺,未来能量 双击关注
