Java实现读图像并作直方图均衡与灰度拉伸
北京航空航天大学计算机学院-2020春季图像处理与模式识别课程作业,使用Java实现读入图像,并对图像作直方图均衡与灰度拉伸
直方图均衡和灰度拉伸是数字图像处理中常见的灰度图像变换方法。本文通过Java实现读入图像后,对其转化为灰度图,压缩为统一高度后作直方图均衡与灰度拉伸,并随变换后的图像附上其直方图。
Java读入图像
Java有已经封装好的类 BufferedImage 可供我们方便地实现图像的读入和操作。在本文代码中用到两种方式创建 BufferedImage 对象,一是直接利用 ImageIO.read(file) ,读入的图像为 Image 类型,类型转换为BufferedImage 。二是直接通过 new BufferedImage(width, height, BufferedImage.TYPE_INT_RGB) 构造方法新建 BufferedImage 对象,再对其进行操作。
首先是读入原始图像:
import javax.imageio.ImageIO;
import java.awt.Image;
import java.awt.image.BufferedImage;
import java.io.File;
import java.io.IOException;

public class ImageProcess {
    // Original image
    private BufferedImage image;

    private ImageProcess(String fileStr) {
        File file = new File(fileStr);
        if (!file.exists()) {
            System.out.println("File does not exist.");
            return;
        }
        try {
            this.image = (BufferedImage) ImageIO.read(file);
        } catch (IOException e) {
            e.printStackTrace();
        }
    }

    public static void main(String[] args) {
        ImageProcess i1 = new ImageProcess("image01.jpg");
        System.out.println("done");
    }
}
原始图像读入后,我们希望对图像作预处理,将其放缩到我们希望的大小(等比例),并转化为灰度图。放缩和转化为灰度图的过程中每一步都新建 BufferedImage 来存储其处理后的图像。在转换为灰度图的过程中,已经根据直方图的定义存储了直方图的信息,由一维256数组存储,每个位置统计其对应的频数。
private void compress() {
    width = image.getWidth() * height / image.getHeight();
    compressedImg = new BufferedImage(width, height,
                                      BufferedImage.TYPE_INT_RGB);
    compressedImg.getGraphics().
        drawImage(image.getScaledInstance(width, height, Image.SCALE_SMOOTH),
                  0, 0, null);
}

private void toGrayScale() {
    grayScale = new int[width][height];
    grayScaleImg = new BufferedImage(width, height, BufferedImage.TYPE_INT_RGB);
    for(int i = 0; i < width; i++) {
        for(int j = 0; j < height; j++) {
            //将24bit中存储的RGB值单个提取出来,可以理解为byte转int
            int r = (compressedImg.getRGB(i, j) & 0xff0000) >> 16;
            int g = (compressedImg.getRGB(i, j) & 0xff00) >> 8;
            int b = (compressedImg.getRGB(i, j) & 0xff);
            //这里是将RGB分别乘上一个权重,得出相应的灰度值gray
            int gray = (30*r + 59*g + 11*b) / 100;
            histogram[gray]++;
            grayScale[i][j] = gray;
            //将得出的灰度值转换成计算机中存储的模式
            int grayStd = ((gray & 0xff)<<16 ) | ((gray & 0xff)<<8) |
                (gray & 0xff);
            grayScaleImg.setRGB(i, j, grayStd);
        }
    }
}
为了验证读入图像,并为后面输出处理效果做准备,在此使用 Graphics 来绘制 BufferedImage 中的图像,其用法如下:
import javax.swing.JFrame;
import java.awt.Color;
import java.awt.Font;
import java.awt.Graphics;
import java.awt.image.BufferedImage;

class ImagePlot extends JFrame{
    private BufferedImage image;
    private int[] histogram = null;

    public void paint(Graphics g) {
        super.paint(g);
        int width = image.getWidth();
        int height = image.getHeight();
        int ix = width / 10, iy = height / 3;
        g.drawImage(image, ix, iy, null);
    }

    ImagePlot(BufferedImage image) {
        super();
        this.image = image;
        this.setVisible(true);
    }
}
直方图均衡
直方图是反映一幅图像灰度级与该灰度级出现概率(或频数)之间关系的柱状图。其横坐标是灰度级(0-255),纵坐标是该灰度级出现的概率或频数。直方图均衡的方法将图像像素值概率分别拉升,扩大分别范围,提高了对比度。离散的直方图均衡其映射公式为:
: 目标像素值,
: 原始像素值,
: 灰度级(8位256),
: 在原始图中的概率, : 图像总像素数(宽×高), 原始图像中,像素值为 的个数。
根据上面的公式,不难逐个像素计算出直方图均衡后每个点所映射的像素值:
private void histogramEqualization() {
    equalizationImg =
        new BufferedImage(width, height, BufferedImage.TYPE_INT_RGB);
    for (int i = 0; i < width; i++) {
        for (int j = 0; j < height; j++) {
            int value = 0;
            for (int k = 0; k < grayScale[i][j]; k++)
                value += histogram[k];
            value = 255 * value / (width * height);
            equalization[value]++;
            int valueStd = ((value & 0xff) << 16 ) | ((value & 0xff) << 8) |
                (value & 0xff);
            equalizationImg.setRGB(i, j, valueStd);
        }
    }
}
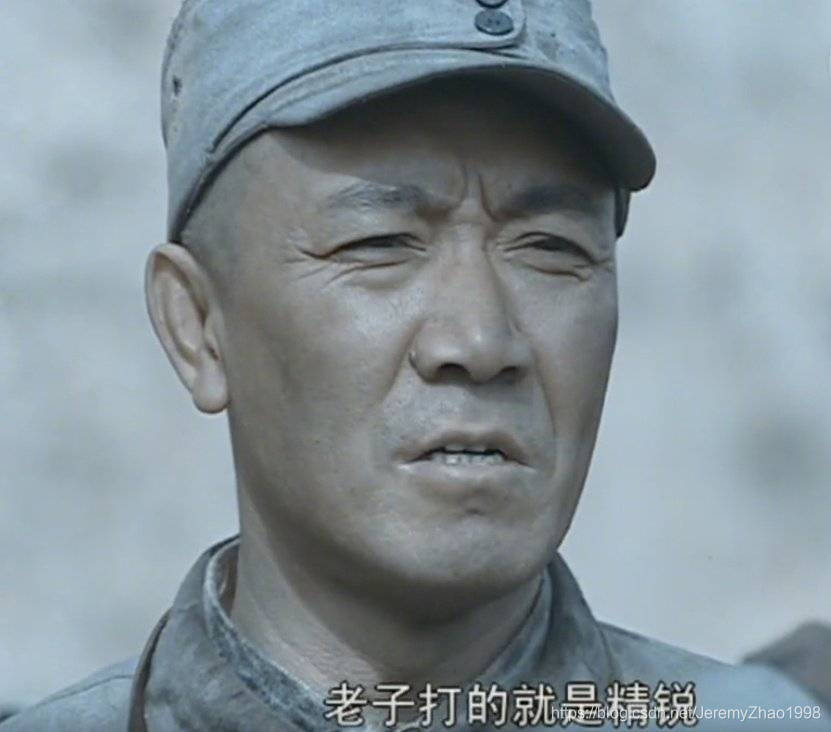
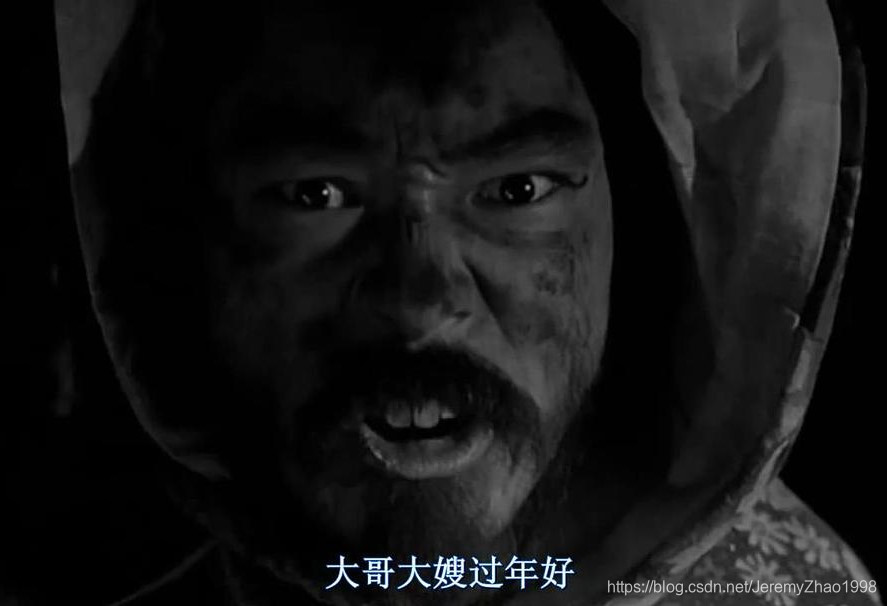
原始的图像:
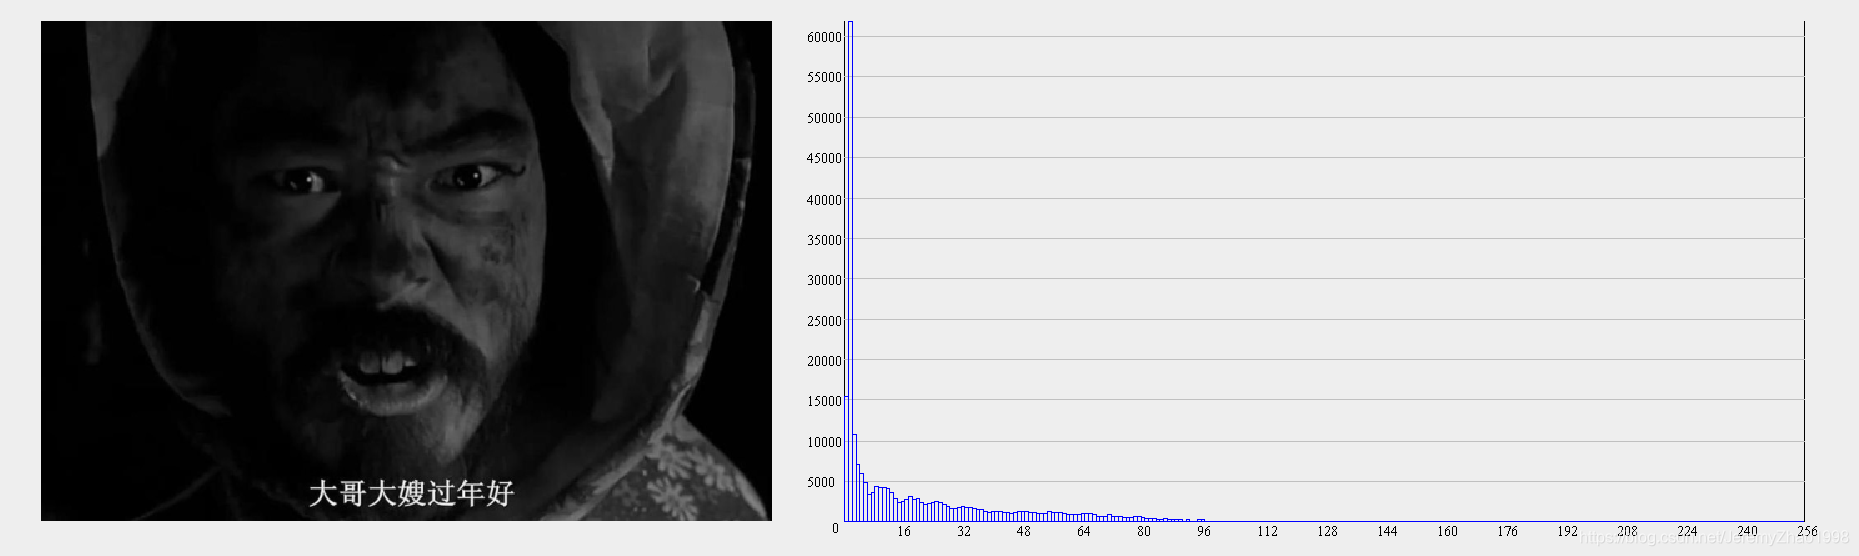
经过压缩与转化为灰度图后,灰度图与其直方图如下:
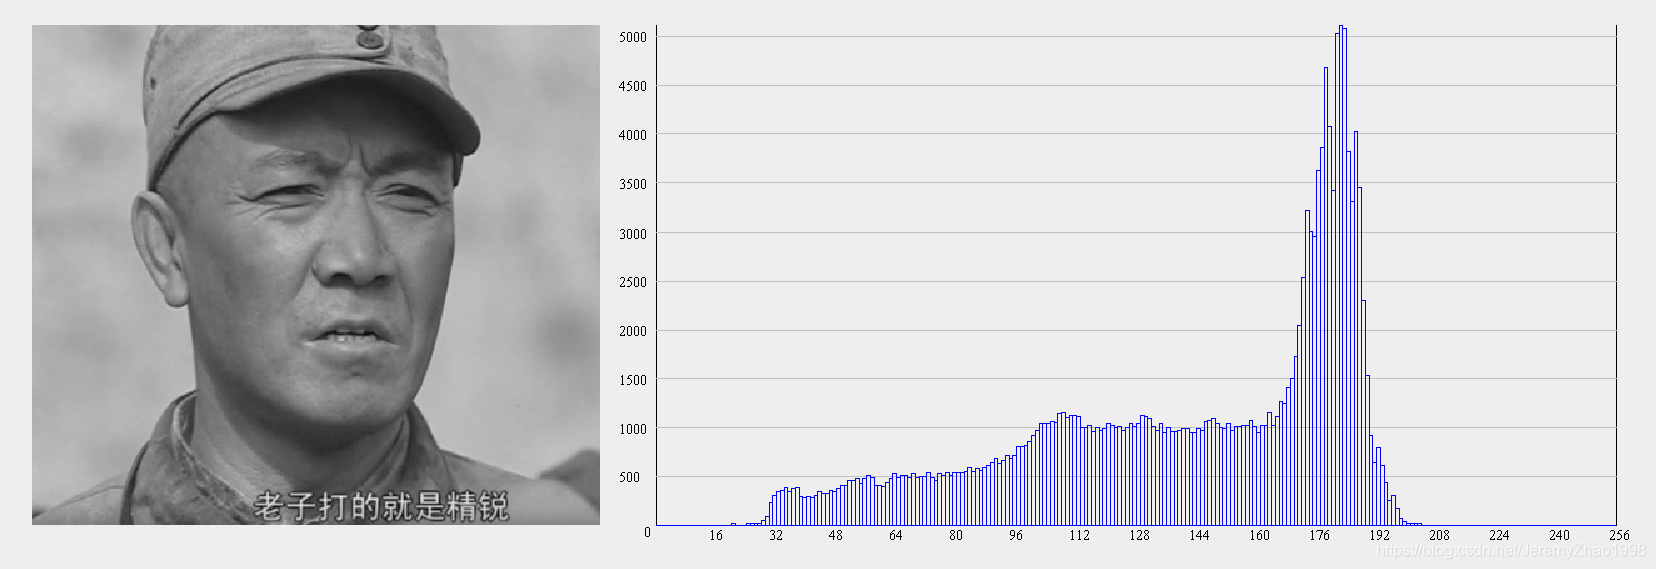
而经过直方图均衡后的灰度图及其直方图效果如下:
可以看出图像的对比度提升,细节得到了突出。
灰度拉伸
灰度变换是设计函数对灰度图中各个像素的灰度值作直接点变换。所谓拉伸是指将原本局限在某一灰度级范围内的图像,将其局限范围内的像素灰度拉伸到更广的范围(或将较广范围内的灰度值压缩到较小范围)。本文的代码采用了分段线性拉伸,首先设定一个阈值,直方图中该阈值之下频数对应的灰度级看作不活跃的灰度级,然后从0-255范围两端开始寻找图像较为活跃的灰度区间。得到该区间后,将该区间拉伸为原来的5倍,作为图像主要信息拉伸后的区间。而没有落在该区间内的点也分别线性压缩至两端。整个函数是分段线性函数,如下:
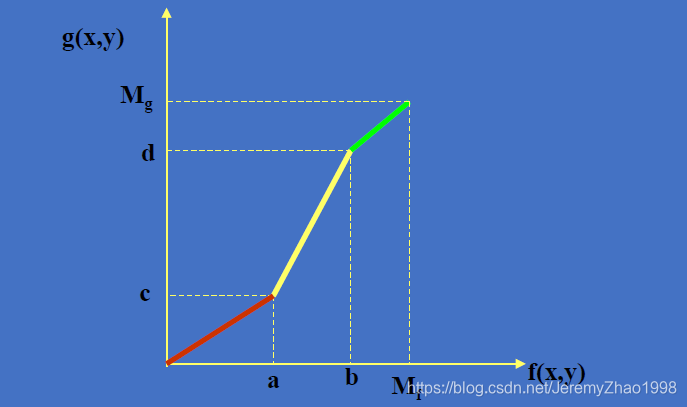
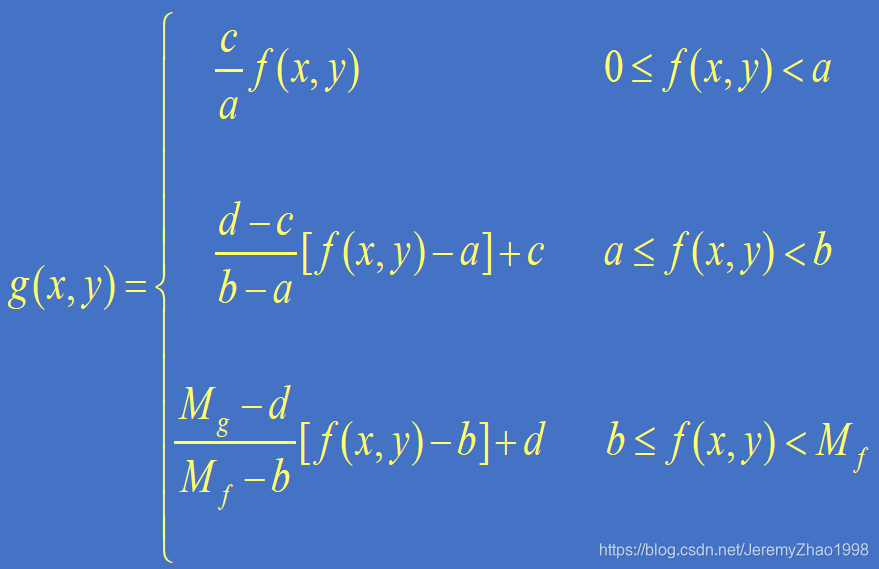
在本文的代码中,上图中的
,
,
。当上述c、d超出0-255范围时,取0或255
private void grayScaleStretching() {
    stretchingImg = new BufferedImage(width, height, BufferedImage.TYPE_INT_RGB);
    int threshold = 100;
    int a = 0, b = 255, c, d;
    int stretchRatio = 5;
    for (int i = 0; i < 256; i++) {
        if (histogram[i] > threshold) {
            a = i;
            break;
        }
    }
    for (int i = 255; i >= 0; i--) {
        if (histogram[i] > threshold) {
            b = i;
            break;
        }
    }
    c = (a + b) / 2 - (b - a) * (stretchRatio / 2);
    if (c < 0) c = 0;
    d = (a + b) / 2 + (b - a) * (stretchRatio / 2);
    if (d > 255) d = 255;
    for (int i = 0; i < width; i++) {
        for (int j = 0; j < height; j++) {
            int value = grayScale[i][j];
            if (value < a) value = c * value / a;
            else if (value > b) value = (255 - d) * (value - b) / (255 - b) + d;
            else value = (d - c) * (value - a) / (b - a) + c;
            stretching[value]++;
            int valueStd = ((value & 0xff) << 16 ) | ((value & 0xff) << 8) |
            (value & 0xff);
            stretchingImg.setRGB(i, j, valueStd);
        }
    }
}
原始的图像:
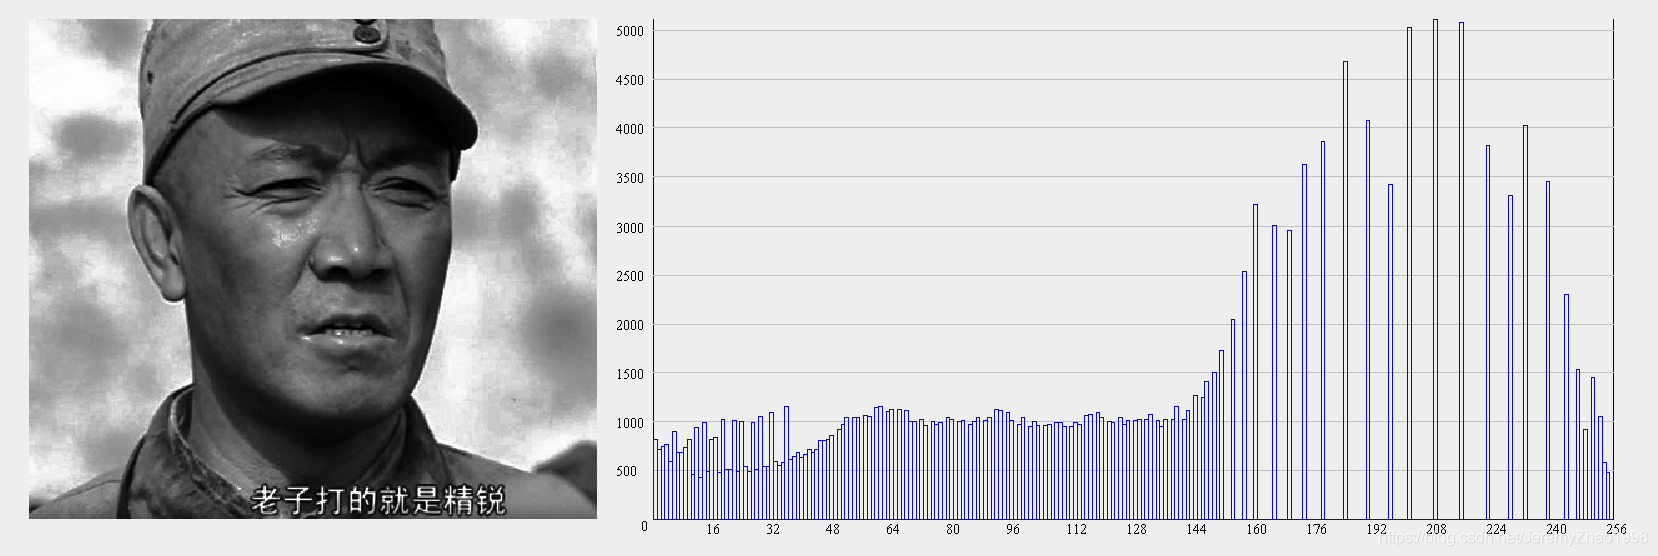
经压缩与转换为灰度图像后,灰度图与其直方图如下:
而经过灰度线性拉伸后的灰度图及其直方图效果如下:
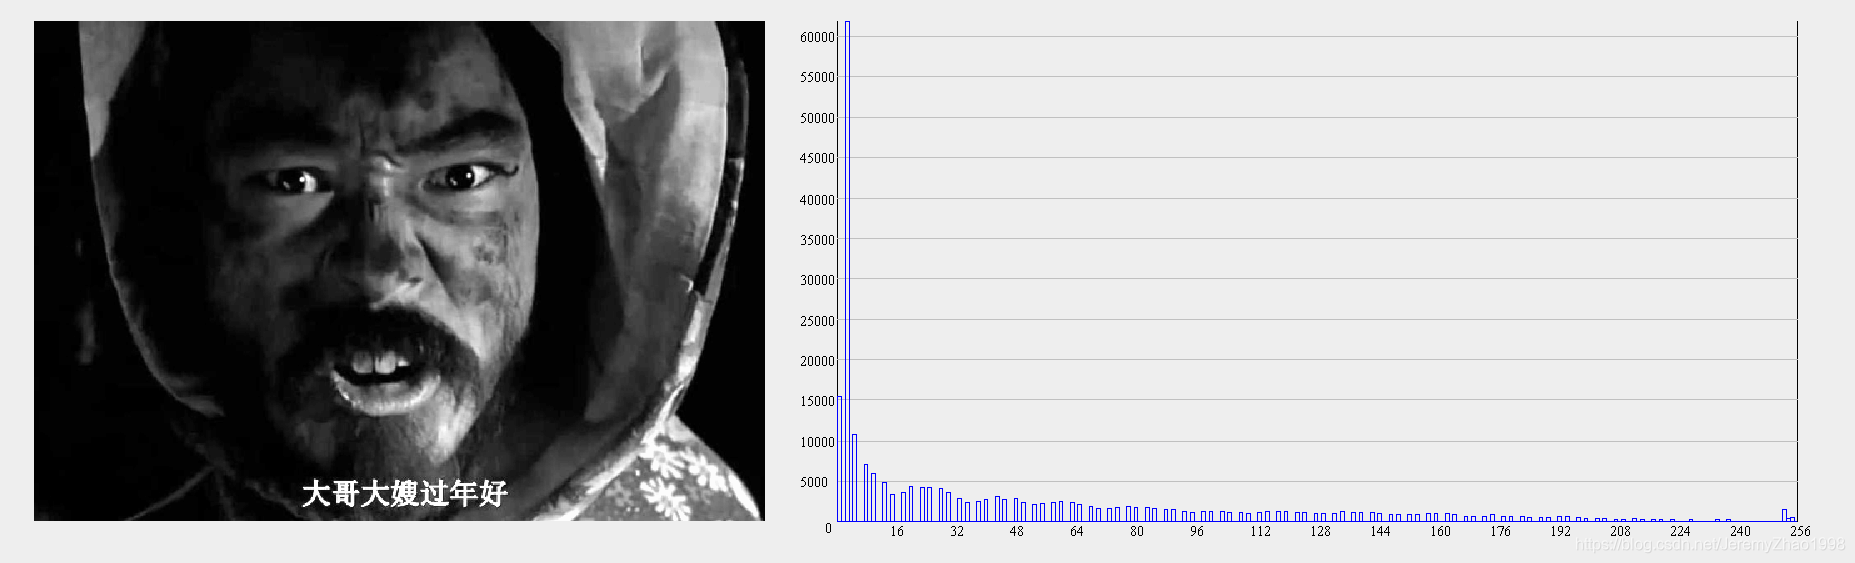
可以看出,灰度级的范围做了扩展,图像原本看上去无法分辨的部分可以看到细节。
完整的代码包含了绘制直方图的部分,如下:
// ImageProcess.java

import javax.imageio.ImageIO;
import java.awt.Image;
import java.awt.image.BufferedImage;
import java.io.File;
import java.io.IOException;

public class ImageProcess {
    // Original image
    private BufferedImage image;
    // Compressed image, height: 500, maintain the original ratio.
    private int width;
    private static int height = 400;
    private BufferedImage compressedImg;
    // Gray scale Image
    private int[][] grayScale;
    private BufferedImage grayScaleImg;
    // Histogram of the original image
    private int[] histogram = new int[256];
    // Output image of histogram equalization
    private BufferedImage equalizationImg;
    // Histogram of the equalization output
    private int[] equalization = new int[256];
    // Output image of gray scale stretching
    private BufferedImage stretchingImg;
    // Histogram of the gray scale stretching output
    private int[] stretching = new int[256];


    private ImageProcess(String fileStr) {
        File file = new File(fileStr);
        if (!file.exists()) {
            System.out.println("File does not exist.");
            return;
        }
        try {
            this.image = (BufferedImage) ImageIO.read(file);
        } catch (IOException e) {
            e.printStackTrace();
        }
    }

    private void compress() {
        width = image.getWidth() * height / image.getHeight();
        compressedImg = new BufferedImage(width, height,
                                          BufferedImage.TYPE_INT_RGB);
        compressedImg.getGraphics().
            drawImage(image.getScaledInstance(width, height, Image.SCALE_SMOOTH),
                0, 0, null);
    }

    private void toGrayScale() {
        grayScale = new int[width][height];
        grayScaleImg = new BufferedImage(width, height, BufferedImage.TYPE_INT_RGB);
        for(int i = 0; i < width; i++) {
            for(int j = 0; j < height; j++) {
                //将24bit中存储的RGB值单个提取出来,可以理解为byte转int
                int r = (compressedImg.getRGB(i, j) & 0xff0000) >> 16;
                int g = (compressedImg.getRGB(i, j) & 0xff00) >> 8;
                int b = (compressedImg.getRGB(i, j) & 0xff);
                //这里是将RGB分别乘上一个权重,得出相应的灰度值gray
                int gray = (30*r + 59*g + 11*b) / 100;
                histogram[gray]++;
                grayScale[i][j] = gray;
                //将得出的灰度值转换成计算机中存储的模式
                int grayStd = ((gray & 0xff)<<16 ) | ((gray & 0xff)<<8) |
                    (gray & 0xff);
                grayScaleImg.setRGB(i, j, grayStd);
            }
        }
    }

    private void histogramEqualization() {
        equalizationImg =
            new BufferedImage(width, height, BufferedImage.TYPE_INT_RGB);
        for (int i = 0; i < width; i++) {
            for (int j = 0; j < height; j++) {
                int value = 0;
                for (int k = 0; k < grayScale[i][j]; k++)
                    value += histogram[k];
                value = 255 * value / (width * height);
                equalization[value]++;
                int valueStd = ((value & 0xff) << 16 ) | ((value & 0xff) << 8) |
                    (value & 0xff);
                equalizationImg.setRGB(i, j, valueStd);
            }
        }
    }

    private void grayScaleStretching() {
        stretchingImg =
            new BufferedImage(width, height, BufferedImage.TYPE_INT_RGB);
        int threshold = 100;
        int a = 0, b = 255, c, d;
        int stretchRatio = 5;
        for (int i = 0; i < 256; i++) {
            if (histogram[i] > threshold) {
                a = i;
                break;
            }
        }
        for (int i = 255; i >= 0; i--) {
            if (histogram[i] > threshold) {
                b = i;
                break;
            }
        }
        c = (a + b) / 2 - (b - a) * (stretchRatio / 2);
        if (c < 0) c = 0;
        d = (a + b) / 2 + (b - a) * (stretchRatio / 2);
        if (d > 255) d = 255;
        for (int i = 0; i < width; i++) {
            for (int j = 0; j < height; j++) {
                int value = grayScale[i][j];
                if (value < a) value = c * value / a;
                else if (value > b) value = (255 - d) * (value - b) / (255 - b) + d;
                else value = (d - c) * (value - a) / (b - a) + c;
                stretching[value]++;
                int valueStd = ((value & 0xff) << 16 ) | ((value & 0xff) << 8) |
                    (value & 0xff);
                stretchingImg.setRGB(i, j, valueStd);
            }
        }
    }

    private void show_image(int img) {
        new ImagePlot(grayScaleImg, histogram);
        if (img == 1) new ImagePlot(equalizationImg, equalization);
        if (img == 2) new ImagePlot(stretchingImg, stretching);
    }

    public static void main(String[] args) {
        ImageProcess i1 = new ImageProcess("image01.jpg");
        i1.compress();
        i1.toGrayScale();
        i1.histogramEqualization();
        i1.show_image(1);

        ImageProcess i2 = new ImageProcess("image02.jpg");
        i2.compress();
        i2.toGrayScale();
        i2.grayScaleStretching();
        i2.show_image(2);
        System.out.println("done");
    }
}
// ImagePlot.java

import javax.swing.JFrame;
import java.awt.Color;
import java.awt.Font;
import java.awt.Graphics;
import java.awt.image.BufferedImage;

class ImagePlot extends JFrame{
    private BufferedImage image;
    private int[] histogram = null;

    public void paint(Graphics g) {
        super.paint(g);
        int width = image.getWidth();
        int height = image.getHeight();
        int ix = width / 10, iy = height / 3;
        g.drawImage(image, ix, iy, null);
        if (histogram != null) {
            int recWidth = 3;
            g.drawLine(ix + width + ix, iy, ix + width + ix, iy + height);
            g.drawLine(ix + width + ix, iy + height,
                       ix + width + ix + 256 * recWidth, iy + height);
            g.drawLine(ix + width + ix + 256 * recWidth, iy,
                       ix + width + ix + 256 * recWidth, iy + height);
            g.setFont(new Font("Times New Roman", Font.PLAIN, 12));
            g.drawString("0", ix + width + ix - 10, iy + height + 10);
            int x = ix + width + ix, y = iy + height;
            int yMax = 0;
            for (int i = 0; i < 256; i++) {
                if (histogram[i] > yMax) yMax = histogram[i];
            }
            int lineSpace = 500;
            if (yMax > 10000) lineSpace = 2000;
            if (yMax > 50000) lineSpace = 5000;
            for (int i = 0; i < yMax / lineSpace; i++) {
                g.setColor(Color.lightGray);
                int h = iy + height - (i + 1) * lineSpace * height / yMax;
                g.drawLine(ix + width + ix, h, ix + width + ix + 256 * recWidth, h);
                g.setColor(Color.BLACK);
                g.setFont(new Font("Times New Roman", Font.PLAIN, 12));
                g.drawString(String.valueOf((i + 1) * lineSpace),
                             ix + width + ix - 30, h + 5);
            }
            for (int i = 0; i < 256; i++) {
                g.setColor(Color.blue);
                int h = histogram[i] * height / yMax;
                g.drawRect(x, y - h, recWidth, h);
                if ((i + 1) % 16 == 0) {
                    g.setColor(Color.BLACK);
                    g.setFont(new Font("Times New Roman", Font.PLAIN, 12));
                    g.drawString(String.valueOf(i + 1), x - recWidth, y + 12);
                }
                x += recWidth;
            }
        }
    }

    ImagePlot(BufferedImage image) {
        super();
        this.image = image;
        this.setVisible(true);
    }

    ImagePlot(BufferedImage image, int[] histogram) {
        super();
        this.image = image;
        this.histogram = histogram;
        this.setVisible(true);
    }
}
