Haproxy实现读写分离
注意:此实验是在上一篇博客的基础上完成的
(1)配置haproxy服务器
在server1:
[root@server1 html]# vim /etc/haproxy/haproxy.cfg
屏蔽掉上次实验所修改的,并添加读写方式  如下

 61 # main frontend which proxys to the backends
 62 #---------------------------------------------------------------------
 63 frontend  westos *:80
 64     acl url_static       path_beg       -i /images
 65     acl url_static       path_end       -i .jpg .gif .png
 66     acl read method GET
 67     acl read method HEAD                #两个read write 只用一个就行
 68     acl write method PUT
 69     acl write method POST
 70     #acl westos.org hdr_beg(host)       -i westos.org
 71     #acl 172.25.1.1 hdr_beg(host)       -i 172.25.1.1
 72     #errorloc 403 http://172.25.1.1:8000
 73     use_backend app          if write                   #如果是写的话就是动态页面
 74     default_backend             static                  #默认为静态页面
 75 #    redirect code 301 location http://www.westos.org if westos.org              #以westos.org访问就自动重定向到www.we    stos.org
 76 #    redirect code 301 location http://www.westos.org if 172.25.63.1             #以172.25.63.1访问就自动重定向到www.w    estos.org
重启服务:
[root@server1 ~]# systemctl restart haproxy.service
(2)配置后端服务器
在server2和server3做同样的操作:
[root@server2 ~]# yum install php -y
[root@server2 ~]# cd /var/www/html/
[root@server3 html]# mkdir upload
[root@server2 html]# ls
index.html  index.php  upload_file.php	upload			#放入测试脚本以及文件目录

[root@server2 html]# vim upload_file.php
  5 && ($_FILES["file"]["size"] < 2000000))

[root@server2 html]# chmod 777 upload
[root@server2 html]# systemctl restart httpd
(3)测试
在客户端浏览器输入 172.25.1.1/index.php 进行写测试:
点击Browse选择图片后,点击Submit提交


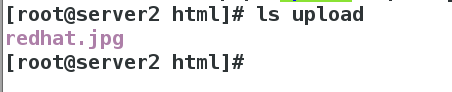
写的话会保存在server2服务器中
在客户端浏览器输入 172.25.1.1/images 进行读测试:

