一、基础概念
1.什么是HAProxy?
HAProxy 提供高可用性、负载均衡以及基于 TCP 和 HTTP 应用的代理,支持虚拟主机,它是免费、快速并且可靠的一种解决方案。HAProxy 特别适用于那些负载特大的 web 站点, 这些站点通常又需要会话保持或七层处理。HAProxy 运行在当前的硬件上,完全可以支持数以万计的并发连接。并且它的运行模式使得它可以很简单安全的整 合进您当前的架构中, 同时可以保护你的 web 服务器不被暴露到网络上。
主机环境:rhel6.5 selinux and iptables disabled
| 主机名 | ip | 服务 |
|---|---|---|
| server1 | 172.25.254.1 | haproxy |
| server2 | 172.25.254.2 | apache |
| server3 | 172.25.254.3 | apache |
二、负载均衡的实现(web页面的动态监控)
server1:代理
server2:后端服务器
server3:后端服务器
搭建步骤:
1.在server1上安装harpoxy软件(yum源必须高级)
[root@server1 ~]# yum install haproxy -y
2.配置代理策略
[root@server1 ~]# cd /etc/haproxy/
[root@server1 haproxy]# ls
haproxy.cfg
[root@server1 haproxy]# vim haproxy.cfg(将从5000开始到最后注释)
 87 listen westos *:80		#监听本机所有的80端口
 88         balance roundrobin		#轮询算法
 89         server web1 172.25.254.2:80 check	#后端负载
 90         server web2 172.25.254.3:80 check
3.在后端安装httpd,写默认发布页
[root@server2 ~]# yum install httpd -y
[root@server2 ~]# cd /var/www/html/
[root@server2 html]# vim index.html
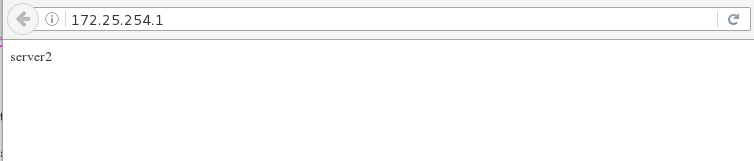
[root@server2 html]# cat index.html
server2
[root@server2 html]# /etc/init.d/httpd start
[root@server3 ~]# yum install httpd -y
[root@server3 ~]# cd /var/www/html/
[root@server3 html]# vim index.html
[root@server3 html]# cat index.html
server3
[root@server3 html]# /etc/init.d/httpd start
4.启动harpoxy服务
[root@server1 haproxy]# /etc/init.d/haproxy start
测试:
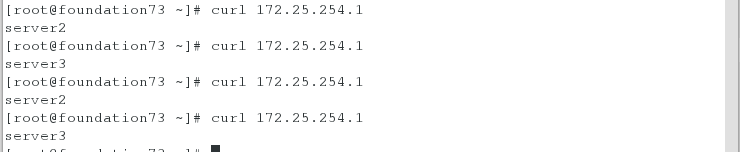
5.配置web动态监控页面配置文件
[root@server1 haproxy]# vim haproxy.cfg
 86 listen admin *:8080
 87         stats enable
 88         stats uri /status	#监控页面的目录
 89         stats auth admin:westos	#设置管理员及密码
 90         stats refresh 5s	#每隔5s刷新页面
 91
 92 listen westos *:80
 93         balance roundrobin
 94         server web1 172.25.254.2:80 check
 95         server web2 172.25.254.3:80 check
 [root@server1 haproxy]# /etc/init.d/haproxy restart
测试:
打开浏览器输入172.25.254.1:8080/status


测试1:将server2的httpd停掉
[root@server2 html]# /etc/init.d/httpd stop

web动态页面下可以看见web1变红

三、基于TCP和HTTP应用程序代理
- 动静分离的实现
1.编辑配置文件
[root@server1 haproxy]# vim haproxy.cfg
 86 listen admin *:8080
 87         stats enable
 88         stats uri /status
 89         stats auth admin:westos
 90         stats refresh 5s
 91
 92 frontend westos *:80		#定义模块
 93         acl url_static       path_beg       -i /images		#url访问的时候以images开头
 94         acl url_static       path_end       -i .jpg .gif .png 	#以.ipg或者.gif或者.png结尾的
 95
 96         use_backend static      if url_static	#如果是静态
 97         default_backend         app				#默认动态
 98
 99 backend static
100         server web2 172.25.254.3:80 check
101
102 backend app
103 #       balance roundrobin
104         server web1 172.25.254.2:80 check
105         server local 172.25.254.1:8000 backup
2.在server1上也安装httpd,编写默认发布页
[root@server1 haproxy]# yum install httpd -y
[root@server1 haproxy]# vim /etc/httpd/conf/httpd.conf
136 Listen 8000
[root@server1 haproxy]# cd /var/www/html/
[root@server1 html]# vim index.html
[root@server1 html]# cat index.html
server1
[root@server1 html]# /etc/init.d/httpd start
[root@server1 html]# netstat -antlpe| grep httpd

3.在server3上下载一张图片,用来观察实验效果
[root@server3 html]# mkdir images
[root@server3 html]# cd images/
[root@server3 images]# ls
redhat.jpg
4.在server1上重新加载配置
[root@server1 html]# /etc/init.d/haproxy reload
测试:(默认访问是动态的)
打开浏览器输入172.25.254.1/images,可以看到server3上的图片

另开窗口输入172.25.8.1,可以看到server2的内容
将server2的httpd关闭,清除浏览器缓存后再次输入地址可以看到backup的内容
[root@server2 html]# /etc/init.d/httpd stop

- 访问控制的实现(url重定向)
302:重定向(临时)旧地址依旧在,但网站希望你访问新的(盗链)
301:重定向(永久)旧地址永久移除
1.编辑配置文件
[root@server1 haproxy]# vim haproxy.cfg
 86 listen admin *:8080
 87         stats enable
 88         stats uri /status
 89         stats auth admin:westos
 90         stats refresh 5s
 91
 92 frontend westos *:80
 93         acl url_static       path_beg       -i /images
 94         acl url_static       path_end       -i .jpg .gif .png
 95
 96         acl badhost src 172.25.254.73
 97         block if badhost
 98
 99         use_backend static      if url_static
100         default_backend         app
101
102 backend static
103         server web2 172.25.254.3:80 check
104
105 backend app
106 #       balance roundrobin
107         server web1 172.25.254.2:80 check
[root@server1 haproxy]# /etc/init.d/haproxy reload
浏览器输入172.25.254.1会出现403 Forbidden 报错

显然将错误页面展示给客户不太好,所以需要将错误页面进行重定向
[root@server1 haproxy]# vim haproxy.cfg
96 acl badhost src 172.25.254.73
97 block if badhost
98 errorloc 403 http://172.25.254.1:8000
[root@server1 haproxy]# /etc/init.d/haproxy reload
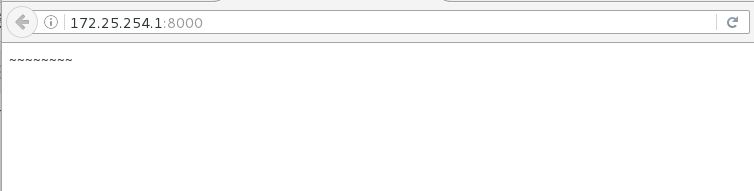
[root@server1 haproxy]# vim /var/www/html/index.html
[root@server1 haproxy]# cat /var/www/html/index.html
~~~~~~~~
[root@server1 haproxy]# /etc/init.d/httpd restart
浏览器输入网址172.25.254.1会发现被定向到172.25.254.1:8000出现编写的内容
当出现报错时重新定向,不只是403
[root@server1 haproxy]# vim haproxy.cfg
 96         acl badhost src 172.25.254.73
 97         #block if badhost
 98         #errorloc 403 http://172.25.254.1:8000
 99         redirect location http://172.25.254.1:8000 if badhost
[root@server1 haproxy]# /etc/init.d/haproxy reload
[root@server1 haproxy]# vim /var/www/html/index.html
[root@server1 haproxy]# cat /var/www/html/index.html
!!!!!~~~~~~~~
[root@server1 haproxy]# /etc/init.d/httpd restart
浏览器输入网址172.25.254.1会发现被定向到172.25.254.1:8000出现内容

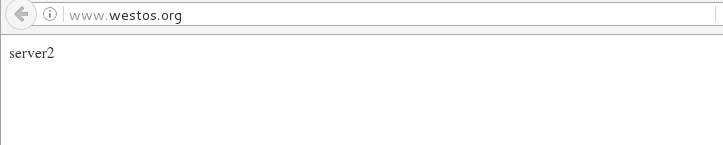
- 301 永久重定向的实现(类似于淘宝的,访问taobao.com也会被重新定向到www.taobao.com)
1.设置配置文件
[root@server1 haproxy]# vim haproxy.cfg
 96         acl badhost src 172.25.254.73
 97         acl westos.org hdr_beg(host) -i westos.org
 98         acl 172.25.254.1 hdr(host) -i 172.25.254.1
 99         redirect code 301 location http://www.westos.org if westos.org
100         redirect code 301 location http://www.westos.org if 172.25.254.1
2.重新加载服务
[root@server1 haproxy]# /etc/init.d/haproxy reload
3.在测试端写入解析文件
[root@foundation73 ~]# vim /etc/hosts

测试:
打开浏览器,此时发现输入www.westos.org或者westos.org或者172.25.8.3都会被重定向到www.westos.org
- 日志路径
1.修改日志配置文件(local2在haproxy的配置文件里看到的,1-7是本地的)

[root@server1 haproxy]# vim /etc/rsyslog.conf
 13 $ModLoad imudp
 14 $UDPServerRun 514
 43 local2.*                                                /var/log/haproxy.log
2.重启日志服务,查看生成文件
[root@server1 haproxy]# /etc/init.d/rsyslog restart

- 读写分离
一般图片保存(专有的图片服务器)在文件系统上
1.配置haproxy的配置文件,(如果是写入操作时访问的是server2)
[root@server1 haproxy]# vim haproxy.cfg
 92 frontend westos *:80
 93         acl url_static       path_beg       -i /images
 94         acl url_static       path_end       -i .jpg .gif .png
 95         acl read method GET
 96         acl read method HEAD
 97         acl write method PUT
 98         acl write method POST
 99
100         acl badhost src 172.25.254.73
101         acl westos.org hdr_beg(host) -i westos.org
102         acl 172.25.254.1 hdr(host) -i 172.25.254.1
103
104         use_backend app         if write
105         default_backend         static
106
107 backend static
108         server web2 172.25.254.3:80 check
109
110 backend app
111 #       balance roundrobin
112         server web1 172.25.254.2:80 check
2.在后端服务器安装php(server2、server3)
[root@server2 html]# yum install php -y
[root@server3 images]# yum install php -y
3.获得php脚本,放在/var/www/html下
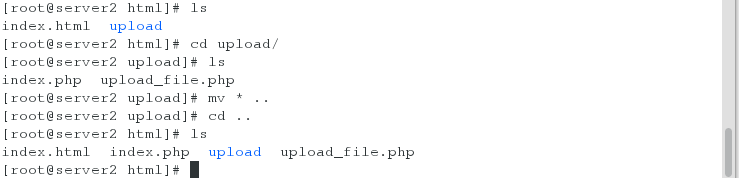
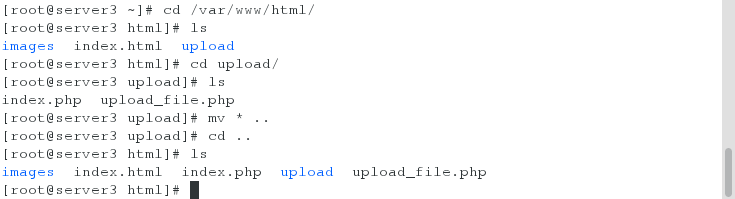
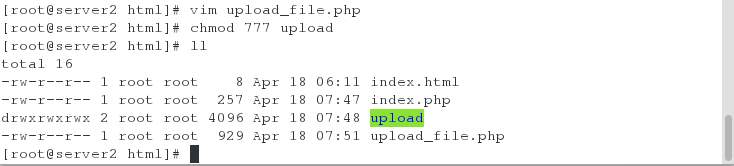
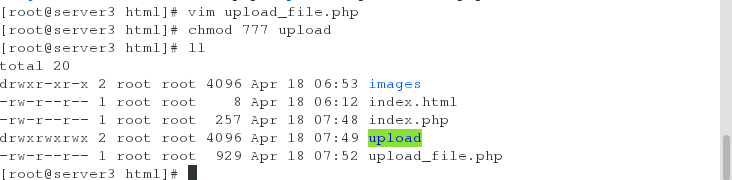
4.更改php支持的文件上传大小,给目录权限
[root@server2 html]# vim upload_file.php
 5 && ($_FILES["file"]["size"] < 2000000))
[root@server2 html]# chmod 777 upload
[root@server3 html]# vim upload_file.php
5 && ($_FILES["file"]["size"] < 2000000))
[root@server3 html]# chmod 777 upload
5.重启后端的httpd服务,将代理服务器的haproxy配置重新加载
[root@server2 html]# /etc/init.d/httpd restart
[root@server3 html]# /etc/init.d/httpd restart
[root@server1 haproxy]# /etc/init.d/haproxy reload
测试:
清除浏览器的缓存,输入www.westos.org后看到php页面

测试1:上传一张图片后可以看到

注意:因为上传是写属于动态的,我们在后端主机server2可以查看到

测试2:输入172.25.254.1/images/可以看到图片

注意:因为读是静态的,所以我们可以看到后端server3的文件
