Of course, you can first build the SSM framework according toIDEA [Configuration class, beginner guide]Complete the construction of the basic framework
Step 1: Design and implement the server-side user database
In this example, we will use the MySQL database. First, you need to install MySQL and create a database to store user information. Here are some basic steps:
- Install MySQL and make sure the MySQL server is running.
- Log in to the MySQL server using the MySQL client tool.
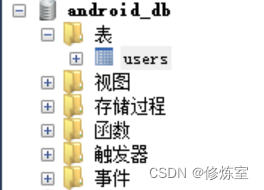
- Create a new database, for example "android".
CREATE DATABASE android_db;
- Create a user table to store user information, including username and password.
USE android_db;

CREATE TABLE users (
    id INT AUTO_INCREMENT PRIMARY KEY,
    username VARCHAR(255) NOT NULL,
    password VARCHAR(255) NOT NULL
);
Step 2: Use Spring Boot to build a web server
1. Create a Spring Boot project
You can use Spring Initializer (https://start.spring.io/) to generate project templates, including Web and MySQL dependencies.
2. Configure database connection information
Add the following to the application.properties or application.yml file:
spring.datasource.url=jdbc:mysql://localhost:3306/userdb
spring.datasource.username=your_username
spring.datasource.password=your_password
spring.datasource.driver-class-name=com.mysql.cj.jdbc.Driver
spring.jpa.hibernate.ddl-auto=update
spring:
  datasource:
    driver-class-name: com.mysql.cj.jdbc.Driver
    url: jdbc:mysql:///数据库名称?useSSL=false&useUnicode=true&characterEncoding=utf8
    username: 数据库用户名
    password: 数据库密码
mybatis:
  mapper-locations: classpath:mappers/*.xml
  type-aliases-package: com.leo.springbootbackend.pojo.do
  configuration:
    map-underscore-to-camel-case: true
Be sure to replace your_username and your_password with your database username and password.
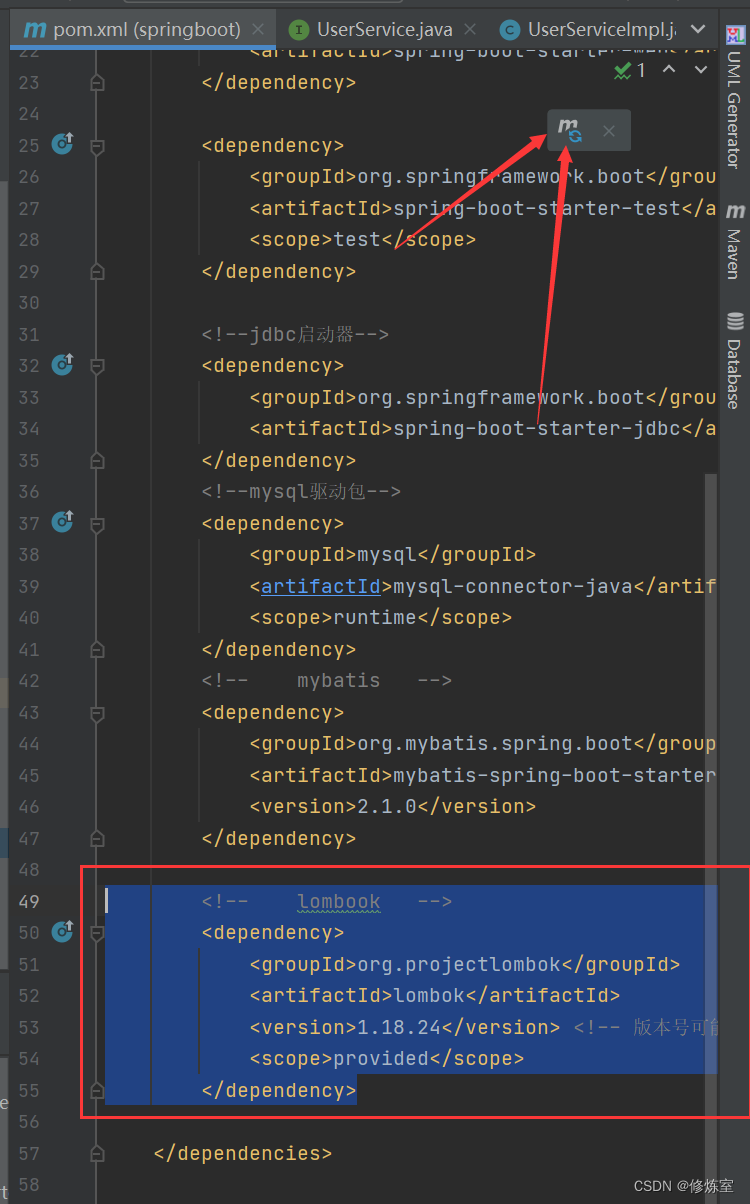
3. Import lombook
Introduce Lombok dependency into the project and enable the Lombok plug-in so that the compiler can correctly handle Lombok annotations. If you are using Maven, you can add the following dependencies inpom.xml:
        <!--    lombook   -->
        <dependency>
            <groupId>org.projectlombok</groupId>
            <artifactId>lombok</artifactId>
            <version>1.18.24</version> <!-- 版本号可能会有所不同 -->
            <scope>provided</scope>
        </dependency>
If you are using Gradle, you can add the following dependencies in the build.gradle file:
implementationOnly 'org.projectlombok:lombok:1.18.22' // 版本号可能会有所不同
annotationProcessor 'org.projectlombok:lombok:1.18.22' // 版本号可能会有所不同
Make sure the configuration is correct so that Lombok can work properly in your project.
4. Create an entity class User to represent user information.
package com.leo.springboot.pojo.entity;


import lombok.Data;
import lombok.NonNull;

@Data
public class User {


    @NonNull private Long id;
    @NonNull private String username;
    @NonNull private String password;
}
5. Create a user warehouse interface UserDAO.
package com.leo.springboot.dao;

import com.leo.springboot.pojo.entity.User;
import org.apache.ibatis.annotations.Insert;
import org.apache.ibatis.annotations.Mapper;
import org.apache.ibatis.annotations.Select;

@Mapper
public interface UserDao {


    @Select("SELECT * FROM users WHERE username = #{username}")
    User findByUsername(String username);

    @Insert("INSERT INTO users (username, password) VALUES (#{username}, #{password})")
    Integer save(User user);
}
Method 1: Use annotations:
package com.leo.springboot.dao;

import com.leo.springboot.pojo.entity.User;
import org.apache.ibatis.annotations.Insert;
import org.apache.ibatis.annotations.Mapper;
import org.apache.ibatis.annotations.Select;

@Mapper
public interface UserDao {


    @Select("SELECT * FROM user WHERE username = #{username}")
    User findByUsername(String username);

    @Insert("INSERT INTO user (username, password) VALUES (#{username}, #{password})")
    User save(User user);
}
In the above code, the SQL statement of the query operation is defined on the method through the @Select annotation. findByUsername
Method 2: Use XML mapping file:
If you prefer to define the SQL statement in an XML mapping file, you can define the SQL statement for the findByUsername method in the XML file, as shown before.
UserMapper.xml:
<?xml version="1.0" encoding="UTF-8" ?>
<!DOCTYPE mapper PUBLIC "-//mybatis.org//DTD Mapper 3.0//EN" "http://mybatis.org/dtd/mybatis-3-mapper.dtd">

<mapper namespace="com.leo.springboot.dao.UserDao">
    <select id="findByUsername" parameterType="java.lang.String" resultType="com.leo.springboot.pojo.entity.User">
        SELECT * FROM user WHERE username = #{username}
    </select>

    <insert id="save" parameterType="java.lang.Integer">
        INSERT INTO user (username, password) VALUES (#{username}, #{password})
    </insert>
</mapper>
Then, again make sure that the location of the mapping file is specified in your application.properties or application.yml:
mybatis.mapper-locations=classpath:mapper/*.xml
6. Create user service (Service)
1. Create an UserServiceinterface and implementation classUserServiceImpl:
UserService.java:
package com.leo.springboot.service;

import com.leo.springboot.pojo.entity.User;
import org.springframework.stereotype.Service;

public interface UserService {


    User getByUsername(String username);
    Integer save(User user);
}
UserServiceImpl.java:
package com.leo.springboot.service.impl;

import com.leo.springboot.dao.UserDao;
import com.leo.springboot.pojo.entity.User;
import com.leo.springboot.service.UserService;
import org.springframework.beans.factory.annotation.Autowired;
import org.springframework.stereotype.Service;

@Service
public class UserServiceImpl implements UserService {


    @Autowired
    private UserDao userRepository;

    @Override
    public User getByUsername(String username) {


        return userRepository.findByUsername(username);
    }

    @Override
    public Integer save(User user) {


        return userRepository.save(user);
    }
}
7. Create user controller (Controller)
package com.leo.springboot.controller;

import com.leo.springboot.pojo.entity.User;
import com.leo.springboot.service.UserService;
import org.springframework.beans.factory.annotation.Autowired;
import org.springframework.web.bind.annotation.*;

@RestController
@RequestMapping("/user")
public class UserController {


    @Autowired
    private UserService userService;

    @PostMapping("/login")
    public Boolean loginUser(@RequestBody User user) {


        String username = user.getUsername();
        String password = user.getPassword();
        User storedUser = userService.getByUsername(username);

        if (storedUser != null && storedUser.getPassword().equals(password)) {


            return true;
        }

        return false; // Return null or an error message for failed login
    }

    @PostMapping("/register")
    public Integer registerUser(@RequestBody User user) {


        // You can add validation and error handling here
        return userService.save(user);
    }
}
Use the
@RestControllerannotation to identify this as a REST controller.@RequestMappingThe annotation defines the base path of the controller.
8. Run the application
-
Use the IDE to run Spring Boot applications.
-
The application will start and listen on port 8080 (can be configured in the
application.propertiesorapplication.ymlfile).
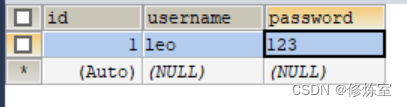
and insert data in database
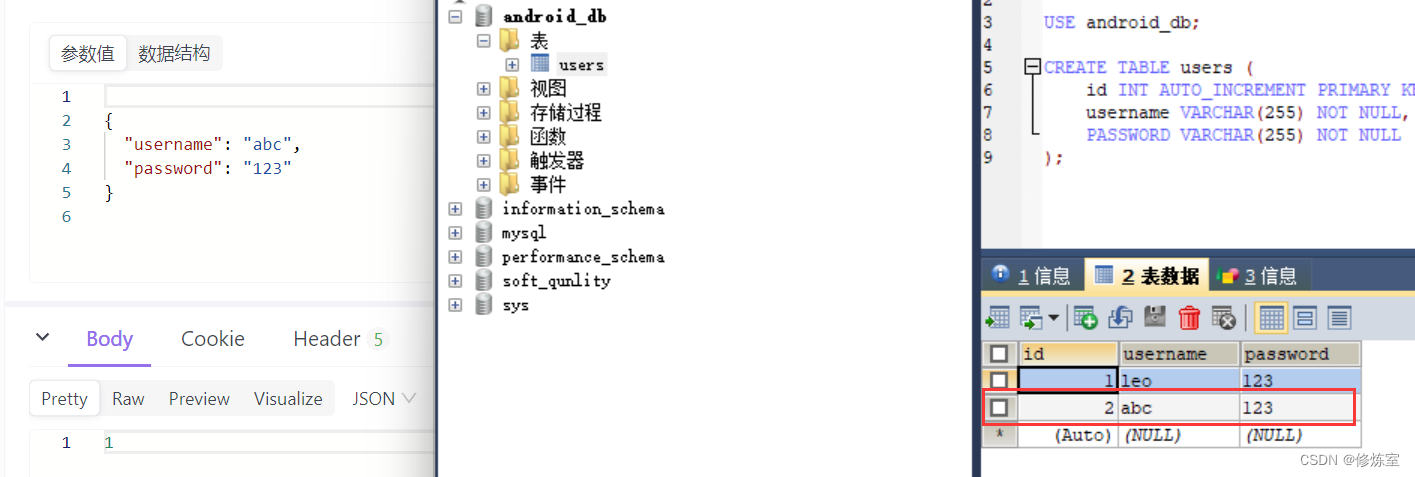
Step 8: Test the API
You can use tools like Postman or curl to test your API. Here are some example API calls:
- Registered user: POST request
http://localhost:8080/user/register, and pass in JSON data in the request body, for example:
{


  "username": "abc",
  "password": "123"
}
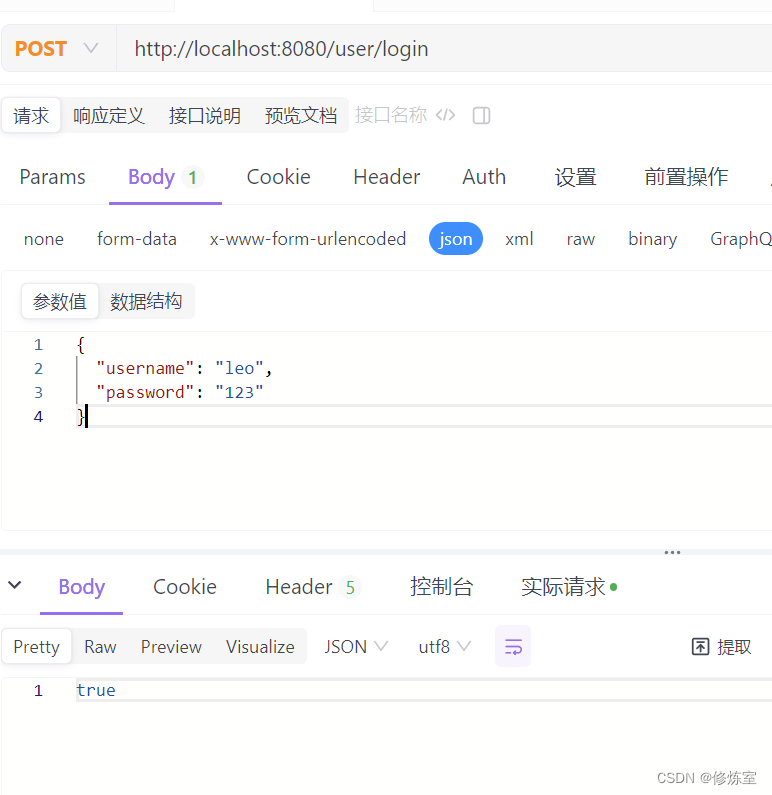
- User login: POST request
http://localhost:8080/users/login, and pass in JSON data in the request body, for example:
{


  "username": "leo",
  "password": "123"
}