Build Spring Boot Hello World from scratch
Learning website: http://developer.aliyun.com/adc/scenario/af334c34023e423785cdf06d9a92d692?spm=a2c6h.15013979.J_7591448770.11.60ff7077owk8FW
Learning Catalog
-
- Create resources
-
- Install Java development environment
-
- Install and configure IntelliJ IDEA
-
- Create Spring Boot project
-
- Package and upload the project to the ECS server
-
- Connect to ECS server
-
- Run the Java project on ECS
Create resources
-
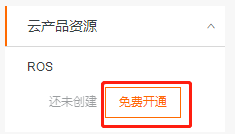
In the left side of the page, click on the cloud product resources drop-down menu to see this experiment resources.
-
Click the free open create the required resources.
Note: The resource creation process takes 1~3 minutes. When you finish creating experimental resources, you can cloud offerings resource view resource information has created a list, such as: IP address, user name and password.
Install Java development environment
-
Download and install JDK8, see Java SE 8u261 for the download address .
-
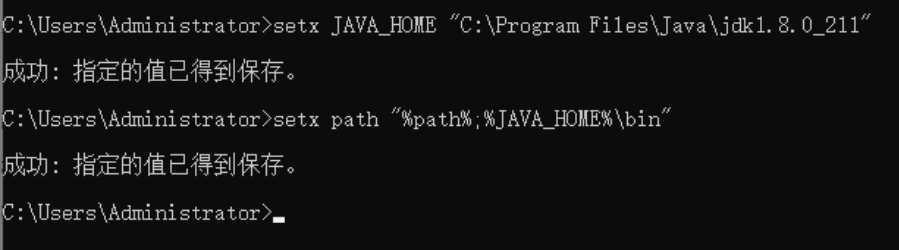
Configure Java environment variables.
a. Open a command window and execute the following commands.
**Note: **Before executing the command, please modify the JAVA_HOME parameter C:Program FilesJavajdk1.8.0_211to your JDK installation directory.
setx JAVA_HOME "C:Program FilesJavajdk1.8.0_211"
setx path "%path%;%JAVA_HOME%bin"
The results of the implementation are as follows.
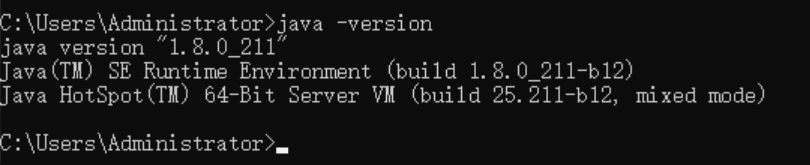
b. Execute the following command to verify whether the environment variable configuration is successful.
java -version
The results of the implementation are as follows.
Install and configure IntelliJ IDEA
This step mainly introduces the use of IntelliJ IDEA to install the Spring Assistant plug-in.
-
Download and install IntelliJ IDEA, see IntelliJ IDEA for the download address .
-
Double-click to run IntelliJ IDEA.
-
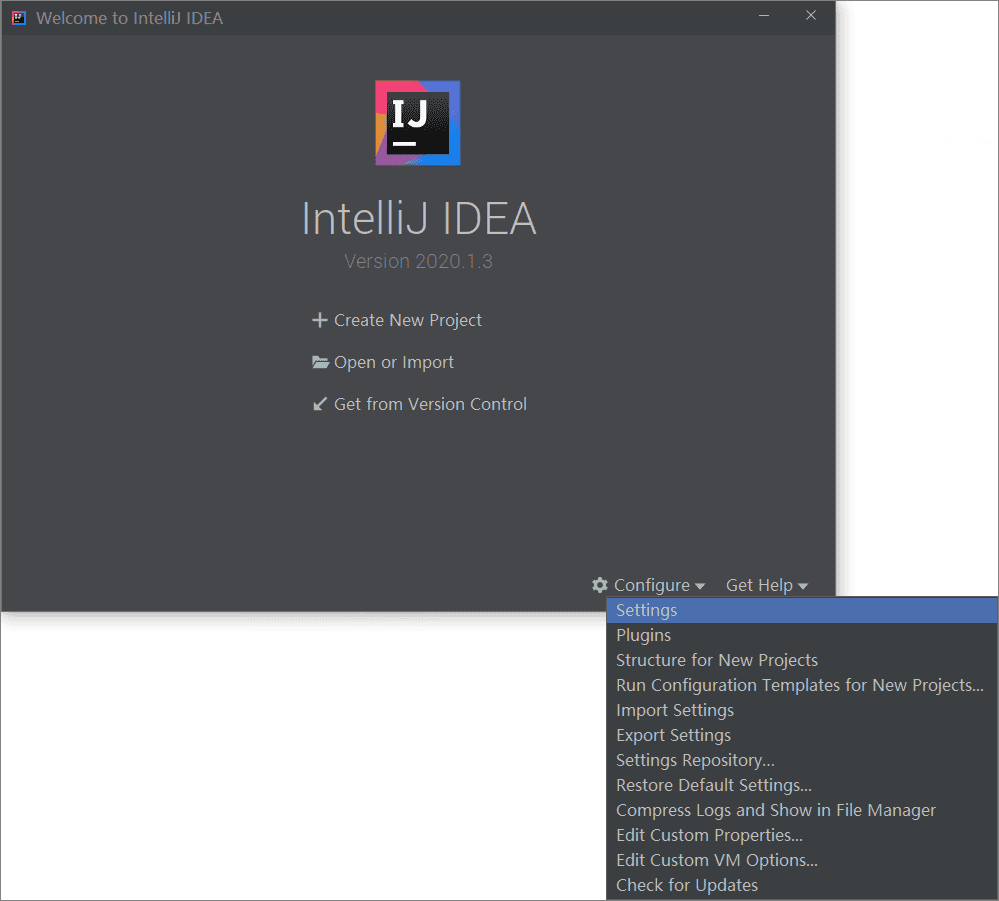
On the IntelliJ IDEA startup interface, click Configure > Settings in turn .
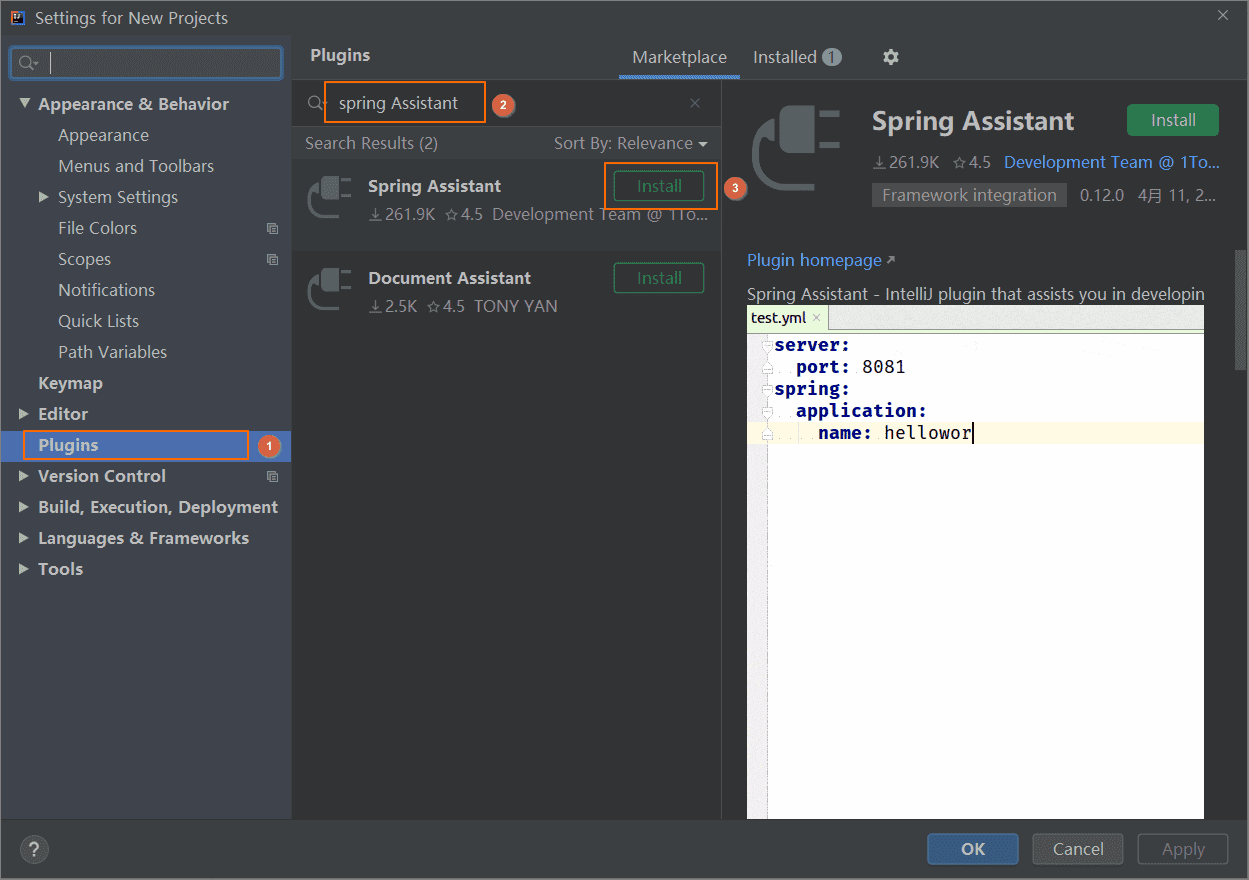
- Click Plugins and type in the search bar
spring Assistant. Finally, click Install to install the plug-in.
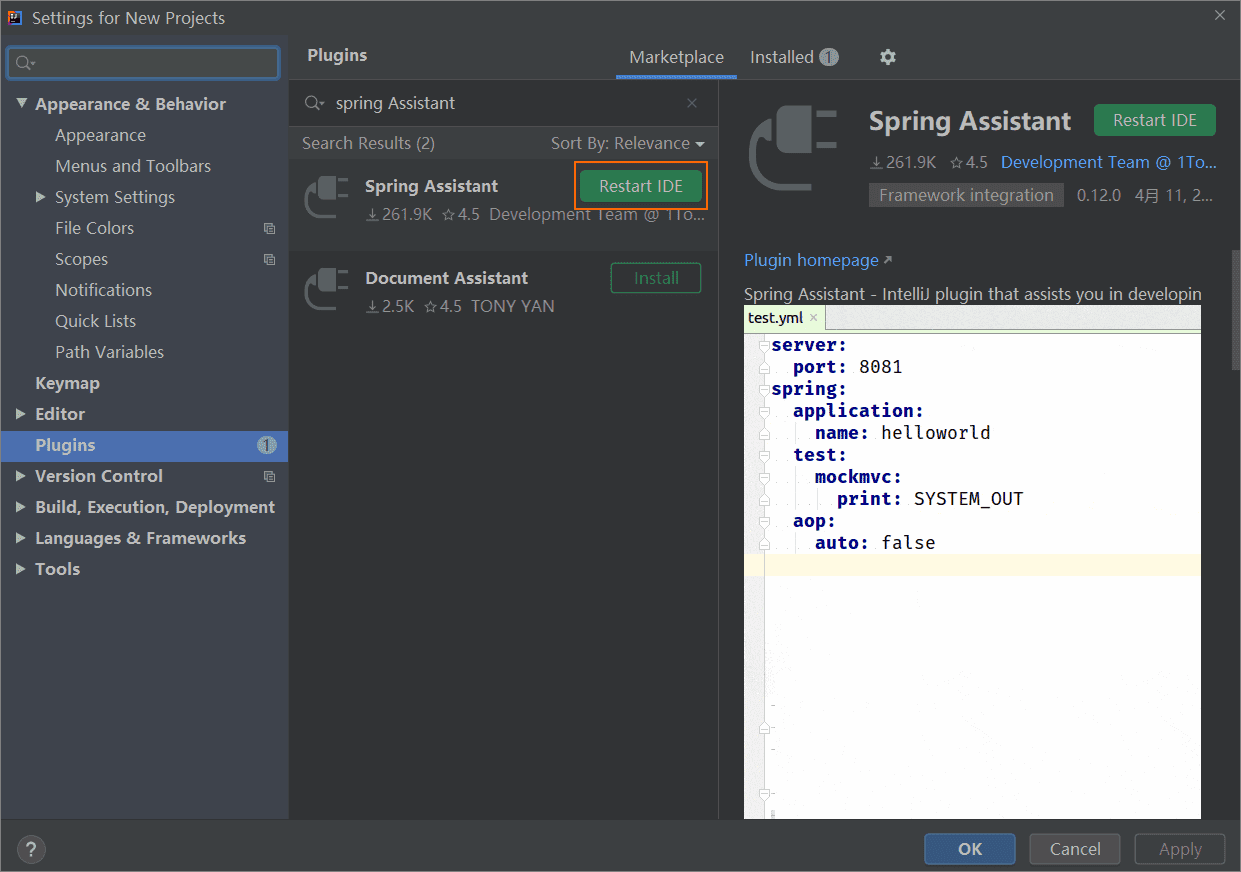
- Click Restart IDE .
Create Spring Boot project
This step mainly introduces the use of the Spring Assistant plug-in to build a simple Spring Boot project.
-
On the IntelliJ IDEA startup interface, click Create New Project .
-
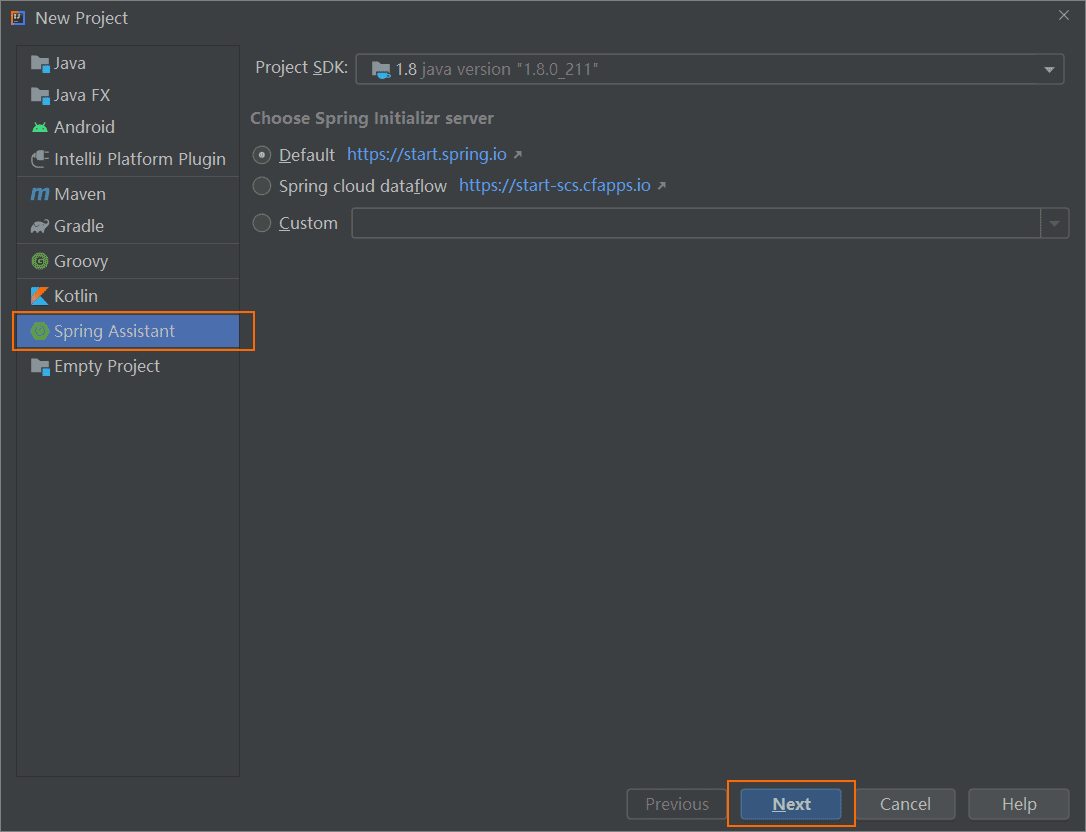
Click Spring Assistant on the left , and then click Next .
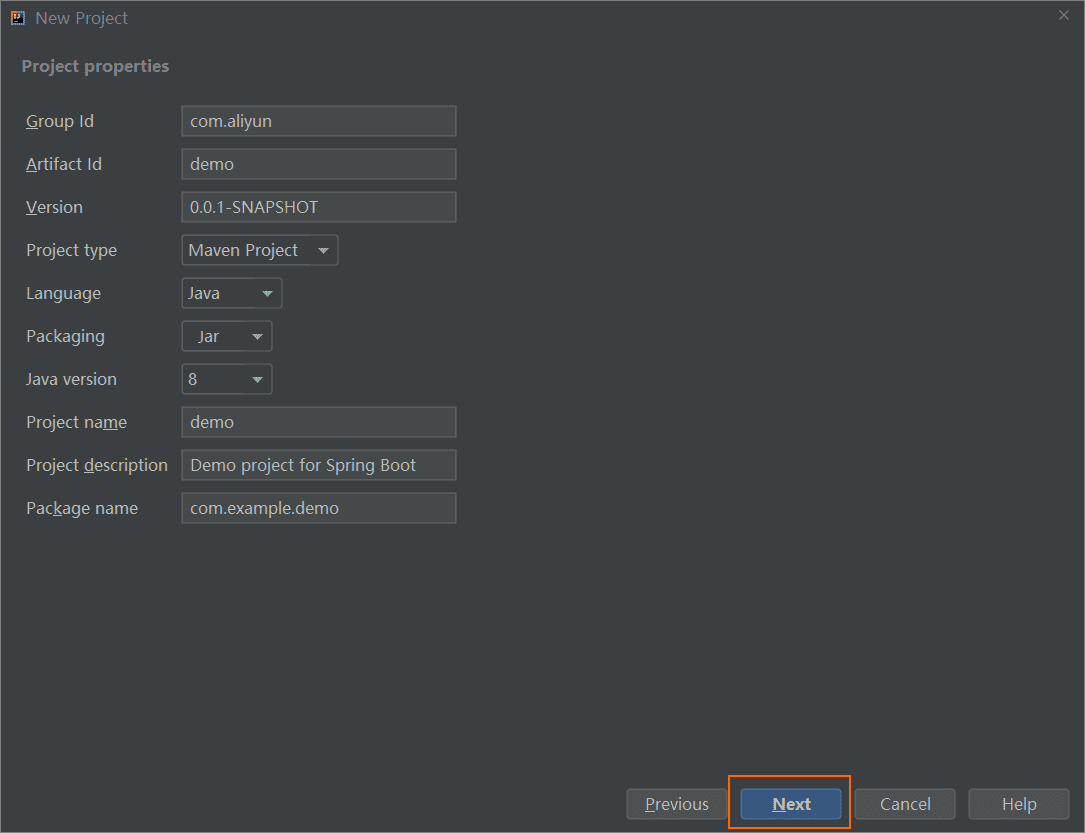
- As shown below, arranged in this order
Group Id,Artifact Id,Packagingand the like, and then click the Next .
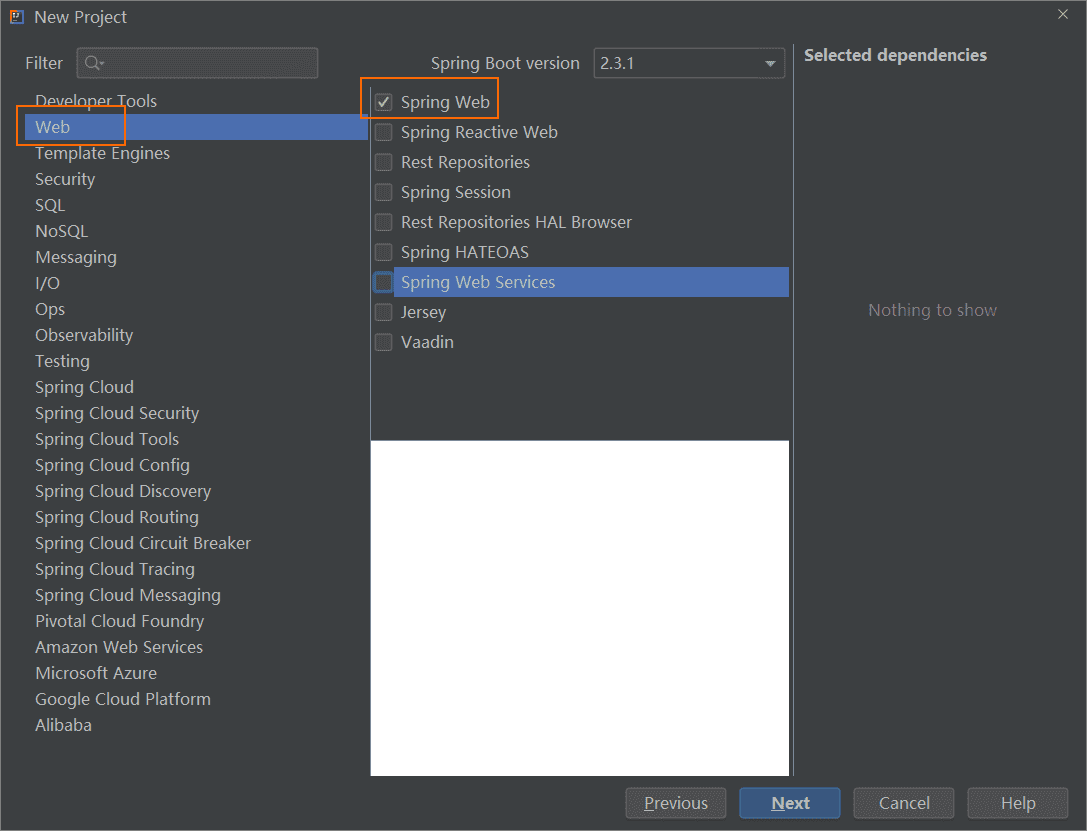
- Click Web on the left , then check Spring Web , and finally click Next .
- Click Finish and wait for the project to initialize.
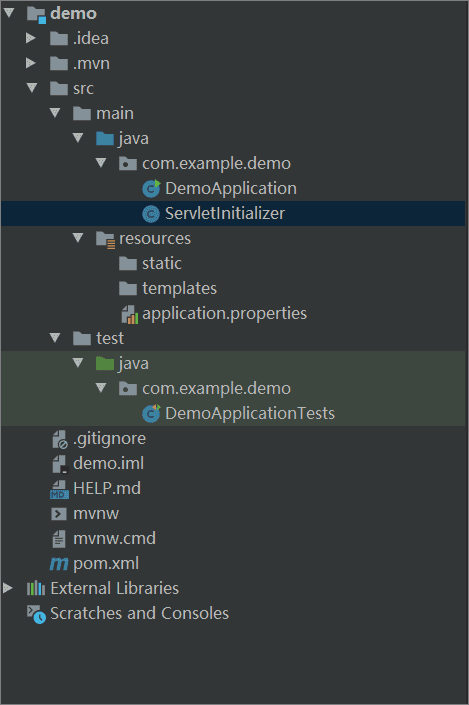
The complete directory structure is as follows.
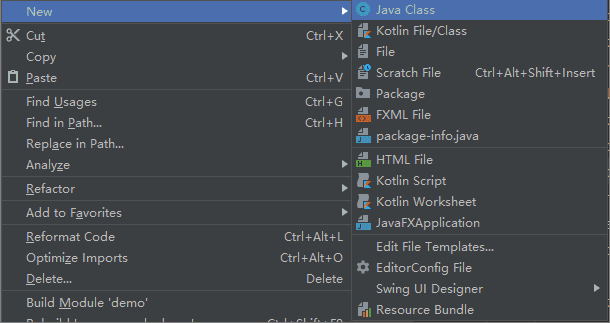
- After the initialization is complete, create the HelloAliyunController.java file in the com.example.demo directory.
- In the
HelloAliyunController.javafile, add the following code.
package com.example.demo;

import org.springframework.web.bind.annotation.RequestMapping;
import org.springframework.web.bind.annotation.RestController;

@RestController
public class HelloAliyunController {

    @RequestMapping("/")
    public String helloAliyun(){

        return "Hello Aliyun!!!";
    }
}
Package and upload the project to the ECS server
- Package the project.
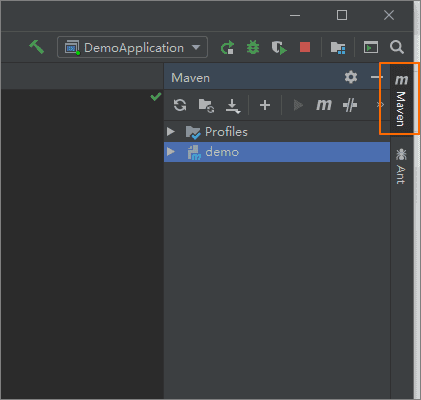
a. Click Maven in the upper right corner of IDEA .
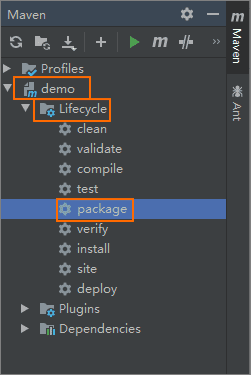
b. Double-click demo>Lifecycle>package in turn to start packaging.
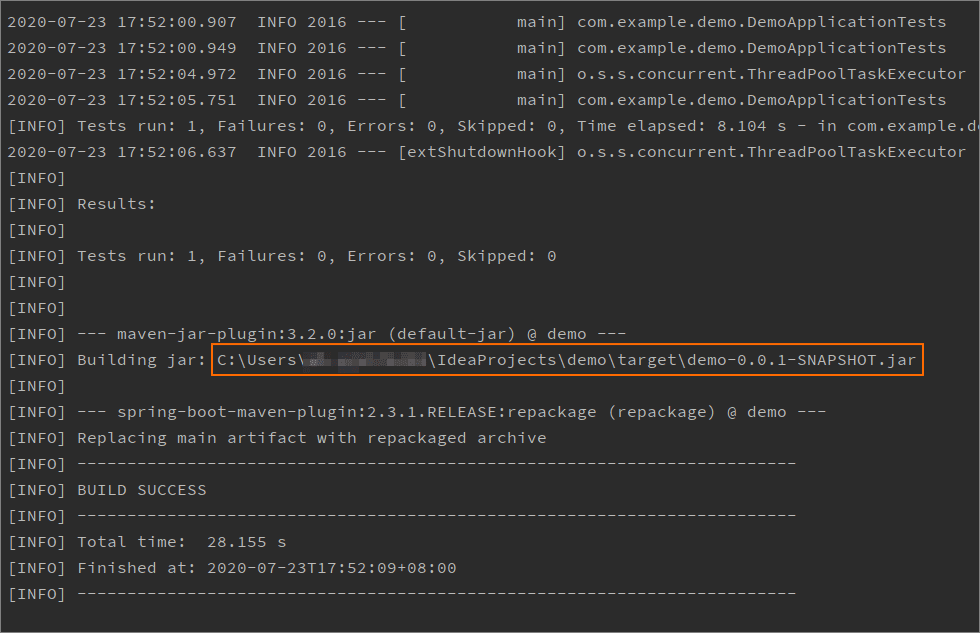
The execution result is as follows, the location marked in the figure is the path of the jar package after packaging.
- Open the terminal tool.
- Windows: Open a command window.
- MAC: Open the command line terminal Terminal.
For Windows users, please check whether the SSH tool is installed in the system. Inspection Method:
a. Enter the command ssh -V in the terminal.
ssh -V
If the SSH version is displayed, it means it has been installed, as shown in the figure below.

b. If it is not installed, please download and install the OpenSSH tool.
- Upload the jar package to the ECS server.
a. Execute the following commands on the command line.
scp C:UsersAdministratorIdeaProjectsdemotargetdemo-0.0.1-SNAPSHOT.jar [email protected]:/root
Explanation: Before executing the command, please replace the following parameters.
- C: UsersAdministratorIdeaProjectsdemotargetdemo-0.0.1-SNAPSHOT.jar is the storage path of the jar package.
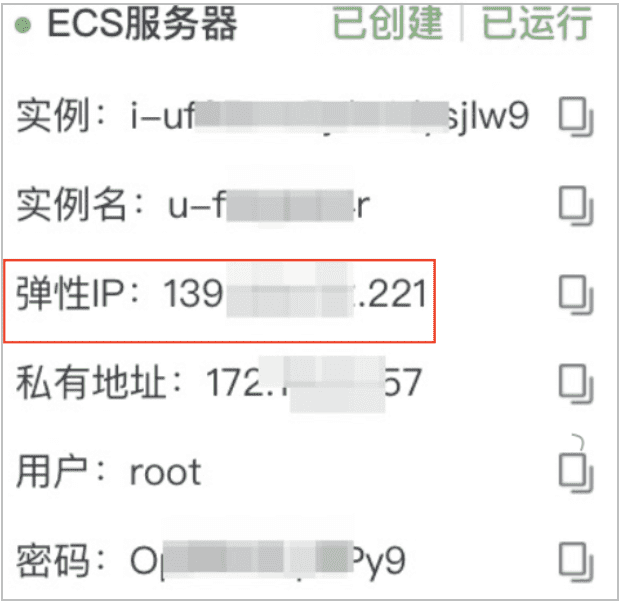
- 47.xx.xx.xx is the public network IP of the ECS instance.
The results of the implementation are as follows.

b. Enter the login password of the created ECS cloud server.
c. After the upload is successful, the following information will be displayed.

Connect to ECS server
- Enter the connection command ssh [username]@[ipaddress] in the terminal.
You need to replace username and ipaddress with the elastic public IP of the ECS server created in step 1. E.g:
ssh [email protected]
The command display results are as follows:
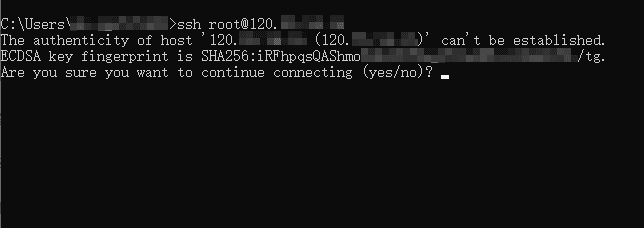
-
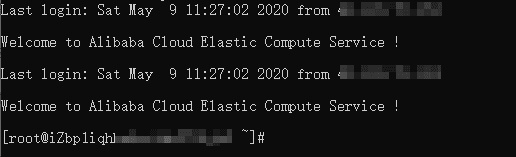
Enter yes.
-
After agreeing to continue, you will be prompted to enter the login password. The password is the login password of the ECS of the created cloud service.

After successful login, the following information will be displayed.
Run the Java project on ECS
- Execute the following command to install the Java runtime environment.
yum -y install java-1.8.0*
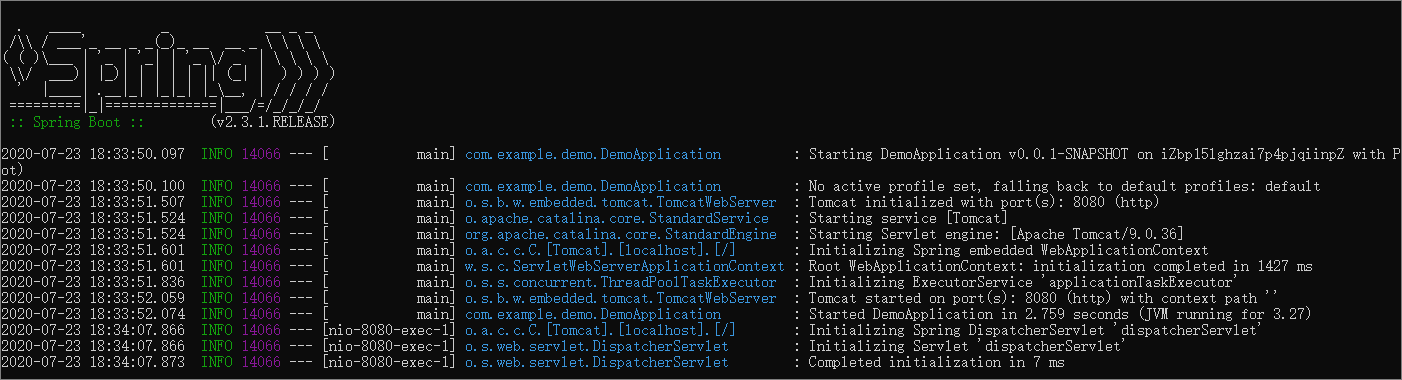
- Execute the following command to run the Java project.
java -jar demo-0.0.1-SNAPSHOT.jar
The results of the implementation are as follows.
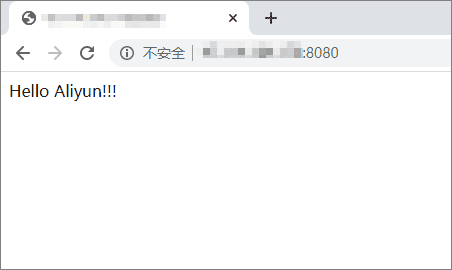
- Use a browser to access
http://<ECS公网IP>:8080.
Returning to the following interface indicates that the project started successfully.
Operating environment.
yum -y install java-1.8.0*
- Execute the following command to run the Java project.
java -jar demo-0.0.1-SNAPSHOT.jar
The results of the implementation are as follows.
[External link image is being transferred...(img-YAlrGcWg-1613440993036)]
- Use a browser to access
http://<ECS公网IP>:8080.
Returning to the following interface indicates that the project started successfully.