1. Install SSH
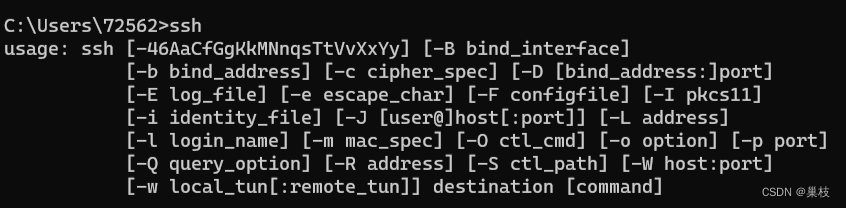
Use SSH to connect to the remote server, so Windows needs to support SSH
Open the cmd control window, directly enter ssh, the following prompt means that SSH has been installed successfully
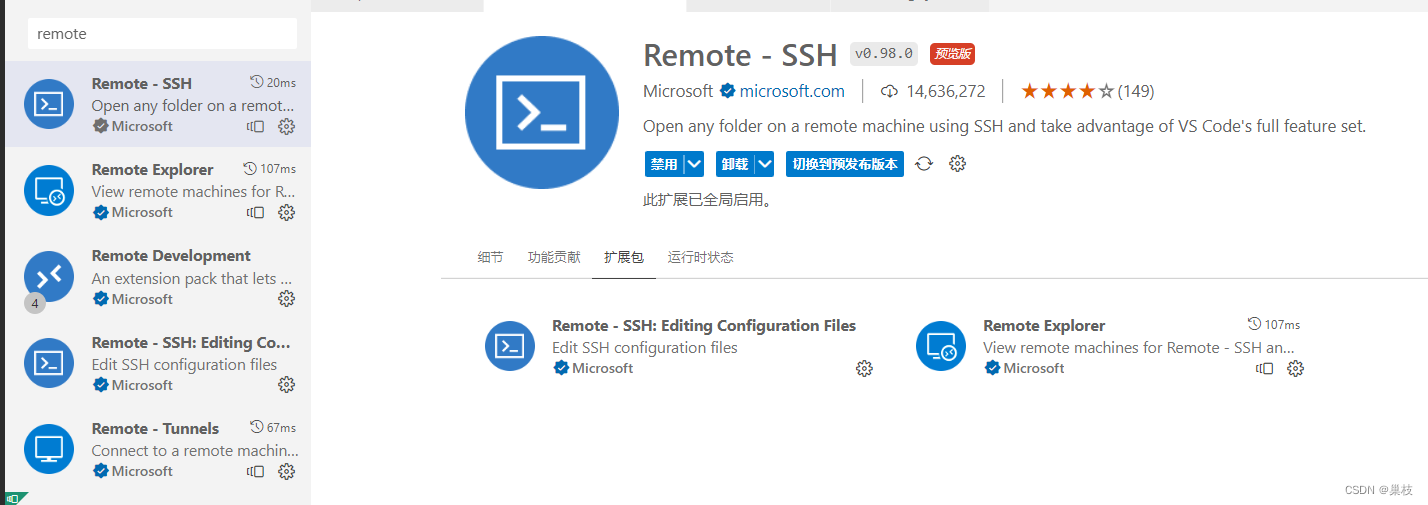
2. Add vscode plugin
3. Configure SSH keys
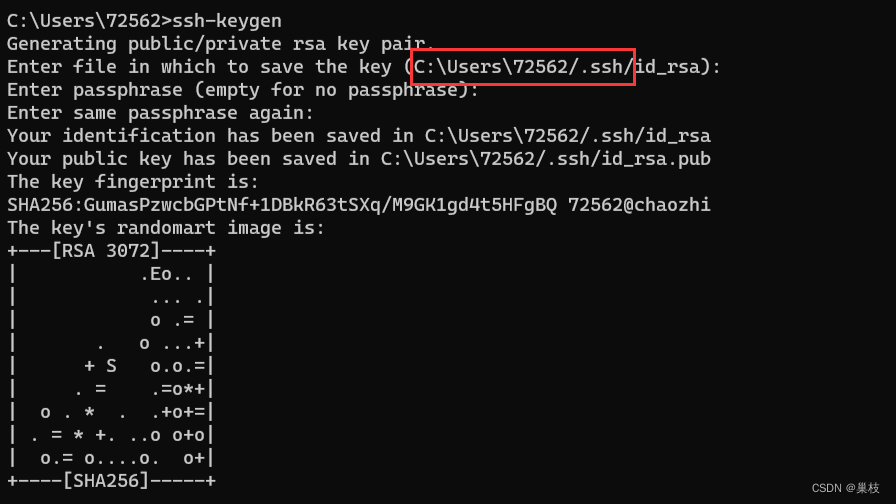
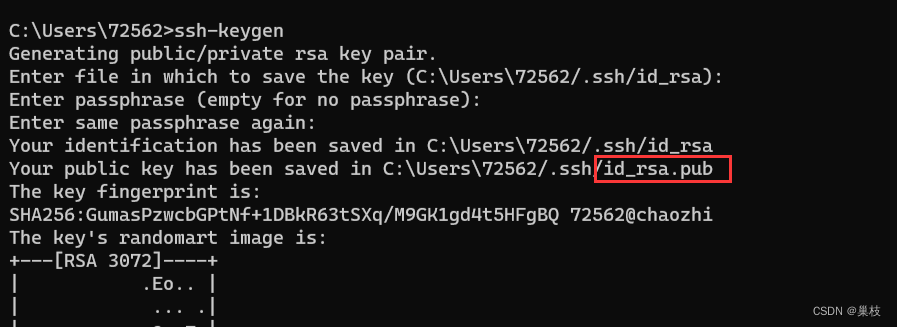
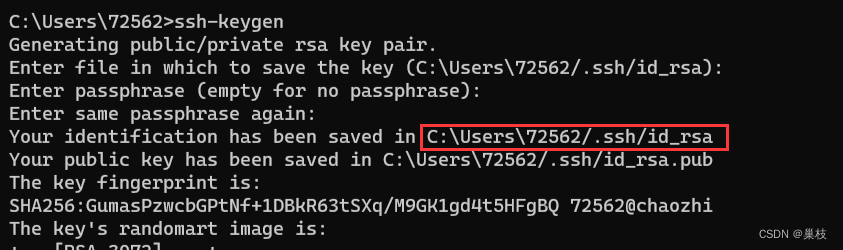
3.1 Use the following command to generate the SSH public key file. If it has been generated, it can be used directly.
ssh-keygen
path:
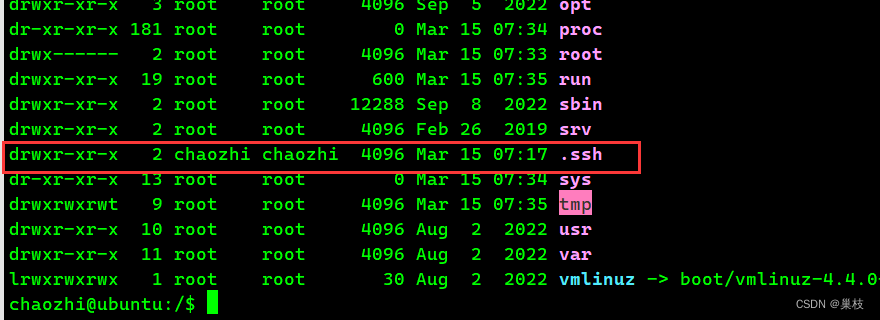
3.2 Copy the public key file id_rsa.pub to the .ssh folder in the root directory of the remote server
(create one if there is no folder in the root directory mkdir .ssh)
3.3 Enter the .ssh directory and use the following command to generate the authorized_keys file
cat id_rsa.pub > authorized_keys
//将公钥 id_rsa.pub 的内容追加写入至 authorized_keys 文件中
//authorized_keys 文件不存在则会被创建
At this point, there are two files in the .ssh directory:

3.4 Enable ssh key login
vim /etc/ssh/sshd_config
PubkeyAuthenticationUncomment the and AuthorizedKeysFileof these two options. AuthorizedKeysFileThe path after the option specifies where to read the public key file
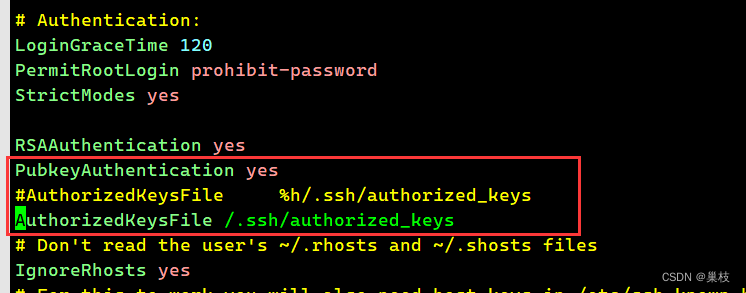
and restart the remote server after modification.
4. Configure VSCode to connect to some basic information of the remote server
Click 远程资源管理器, then click this gear, and select the corresponding configuration file: 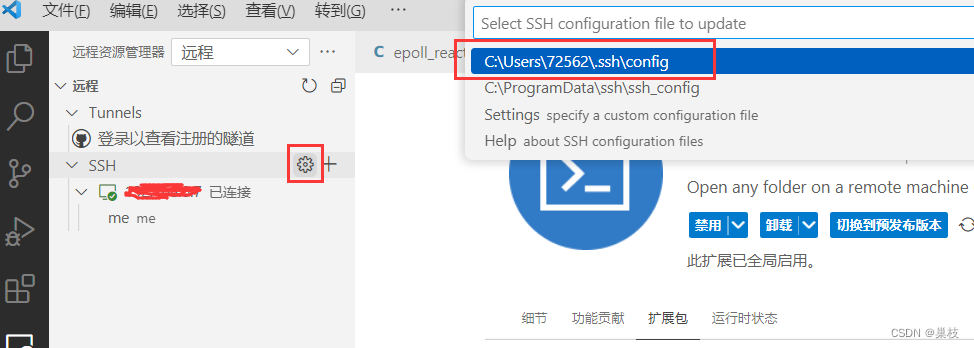
add IdentityFilethe option //Need to modify to your own private key path
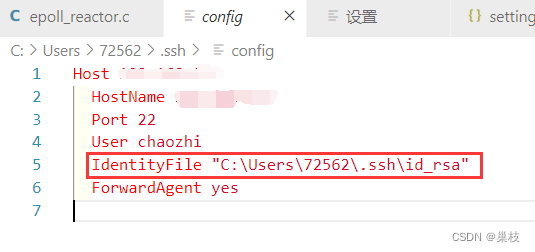
释义如下:
Host <远程主机名称>
   HostName <远程主机IP>
   User <用户名>
   Port <ssh端口,默认22>
   IdentityFile <本机SSH私钥路径>
   ForwardAgent yes <VSCode 自己添加的,不用管>

Host :连接的主机名称,可自定义;
Hostname :远程主机的 IP 地址;
User :用于登录远程主机的用户名;
Port :用于登录远程主机的端口,SSH 默认为 22 ;
IdentityFile :本地的私钥文件 id_rsa 路径;
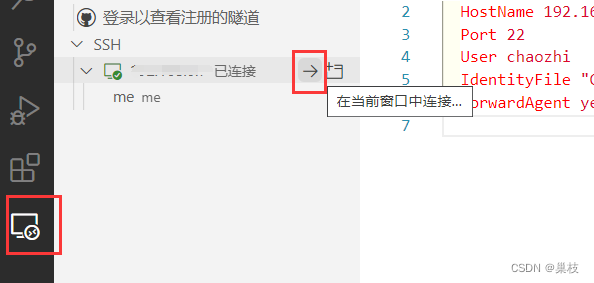
5. Connection test
In current form connection or new form connection