There are many kinds of remote login operations. The company requires the establishment of a remote control graphical desktop program that can be operated in real time, and requires multiple people to operate under the same server without affecting each other. There are many tutorials on the Internet, but they are quite disorganized. Here I take Ubuntu 18.04 as an example. The overall steps are listed as follows, with some common problems and solutions attached.
1. Install the software
sudo apt-get update
sudo apt-get install xfce4 xfce4-goodies
sudo apt-get install vnc4server
sudo apt-get install gnome-panel gnome-settings-daemon metacity nautilus gnome-terminal
sudo apt-get install lightdm    //会出现gdm3,lightdm 两个选项,选择lightdm
2. Configure the firewall
sudo ufw allow 5900
3. Switch users, provided that a new user has been created in Ubuntu
su    //进入root模式
su - user1   //切换到user1
4. Create a vnc password, both should work, the effect is the same
vncserver 或者 vnc4server
5. After successful opening, close the vncserver service
vncserver -kill :n ##这个n是上面创建的编号
6. Modify the contents of the xstartup file
sudo vi /home/user1/.vnc/xstartup
Fill in:
#!/bin/bash
export $(dbus-launch)
export XKL_XMODMAP_DISABLE=1
unset SESSION_MANAGER

gnome-panel &
gnome-settings-daemon &
metacity &
nautilus &
gnome-terminal &

# [ -x /etc/vnc/xstartup ] && exec /etc/vnc/xstartup
# [ -r $HOME/.Xresources ] && xrdb $HOME/.Xresources

xsetroot -solid grey
vncconfig -iconic &
x-terminal-emulator -geometry 80x24+10+10 -ls -title "$VNCDESKTOP Desktop" &
gnome-session &

VNCSERVERS="2:root"
VNCSERVERARGS[1]="-GEOMETRY 800×600"
I don’t think it’s necessary to add or not to the last two sentences of the above code.
7. Give the file executable permissions
sudo chmod +x /home/user1/.vnc/xstartup
restart vncserver
vncserver :n -geometry 1280x768 -depth 24 -localhost no
n is the port number, -localhost no is guaranteed to be able to connect remotely.
8. Start the newly configured service
sudo systemctl daemon-reload
9. Restart vncserver (this step can be omitted)
/etc/init.d/vncserver restart //service vncserver restart
10. View the vnc status,
ps aux | grep -i vnc
11. View port
netstat -lnp | grep 590
12. Repeat steps 3-8 to realize that each account in the Linux system can perform vnc remote login.
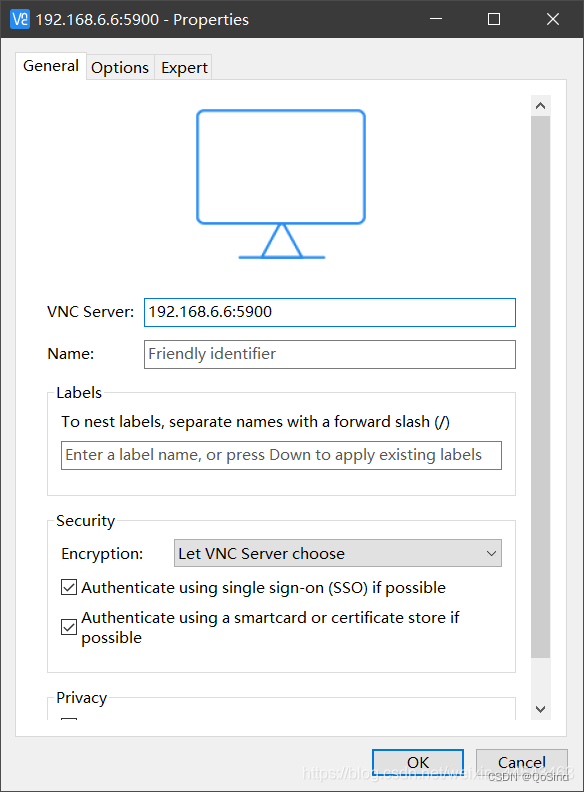
13. Click the new connection in the upper left corner, VNC Server: serverIP: port number, Name is optional, click [OK], double-click to start the connection, the password is the password when the vncserver was created just now. (:n=:1, the port number is 5900, :n=:2, the port number is 5901. And so on)
==================================================== ===============================================
Problems encountered:
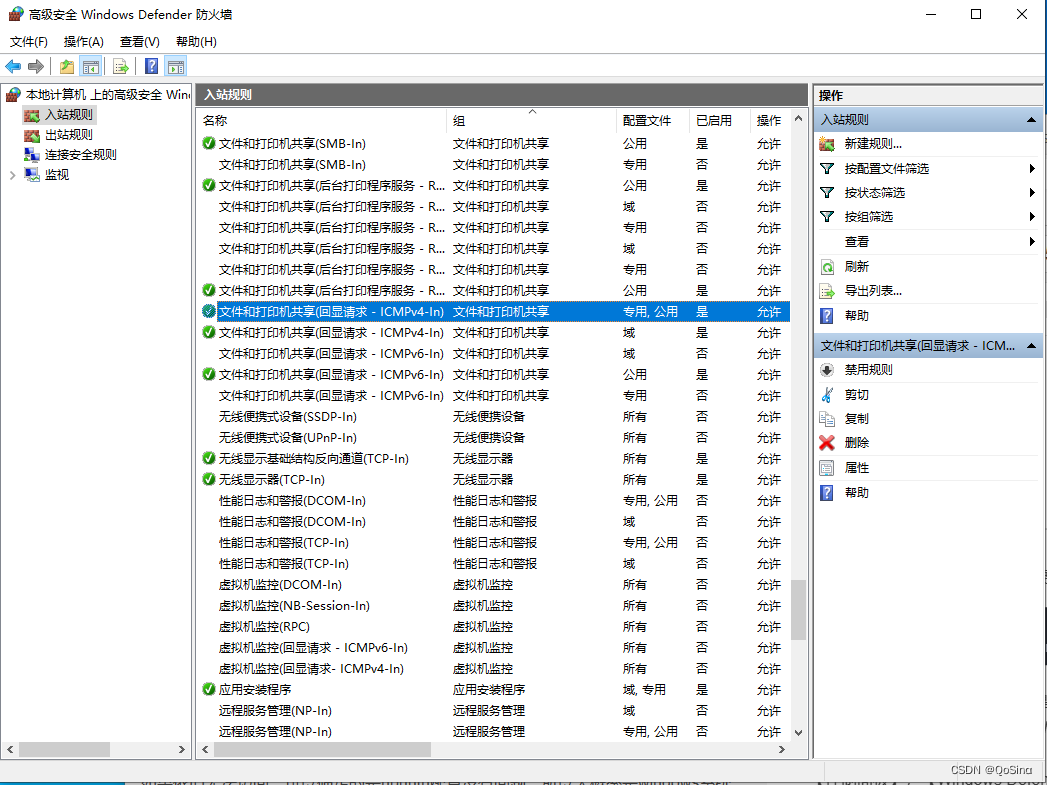
① Unable to connect
Solution, click [Control Panel], [Windows Defender Firewall], [Advanced Settings], [Inbound Rules], [File and Printer Sharing (Echo Request-ICMPv4-In)], [Enable Rules].
② Gray screen after vnc connection
The log log has the following error
error opening security policy file /etc/X11/xserver/SecurityPolicy
Could not init font path element /usr/X11R6/lib/X11/fonts/Type1/, removing from list!
Could not init font path element /usr/X11R6/lib/X11/fonts/Speedo/, removing from list!
Could not init font path element /usr/X11R6/lib/X11/fonts/misc/, removing from list!
Could not init font path element /usr/X11R6/lib/X11/fonts/75dpi/, removing from list!
Could not init font path element /usr/X11R6/lib/X11/fonts/100dpi/, removing from list!
The reason should be that the font package is not downloaded to the original folder, resulting in data loss.
==================================================== =================================================
Solution (under root ):
apt-get install xfonts-100dpi xfonts-75dpi xfonts-scalable xfonts-cyrillic
mkdir /usr/X11R6/lib ##如果报错,先mkdir /usr/X11R6, 再mkdir /usr/X11R6/lib
cd /usr/X11R6/lib
ln -s /usr/share/X11 X11
The font problem still exists, but it can be used normally. I guess it should be caused by some differences between the system version and the software version. It doesn’t affect it, as long as it works.
Restart the vncserver service or system reboot, and finally check the status of vnc:
ps aux | grep -i vnc
==============================================================================================
③ Still unable to access
If vnc still cannot be used after the above operations are completed, make sure that the above steps are correct. Then you can refer to this article , which is another method, but I have not succeeded in this method, you can try it, and I have found a video explanation for this method , if you are interested, you can take a look.
I have been working on this vnc for two days, and some small problems made me speechless, so I sorted it out after the configuration was successful. But these are all good. What makes me speechless is that I just built it here. Three minutes later, the boss told me that this is not easy to use, and I plan to use samba mapping and ssh remote login. Hehe, wqndydcnmnghp.
mutual encouragement! ! !