在前几篇博文中,我分别介绍了Node.js的简单使用,本篇我将记录下ajax请求服务端接口,之前的博文链接分享在这里,大家前往翻阅查看。
Node.js 搭建 web 程序 之 使用基础
Node.js 搭建 web 程序 之 路由配置
Node.js 搭建 web 程序 之 连接MongoDB
什么是ajax请求
ajax是通过请求服务端响应,返回少量数据的一种技术,在此之前,向服务端请求数据一般使用form表单提交的方式,但随着时间的推移,这种方式慢慢的被淘汰掉。
ajax的优缺点
ajax请求可以按需取数据,最大的减少了向服务端的请求,减轻了服务器的负担,当然在写代码的时候我们需要考虑浏览器的兼容性。
ajax的兼容性
可恶的IE在IE5及其之前,ajax请求是这样的
var xhr = new ActiveXObject('Microsoft.XMLHTTP')
但是W3C的标准是这样的
var xhr = new XMLHttpRequest()
兼容性写法
var xhr;
if(window.XMLHttpRequest){
    xhr = new XMLHttpRequest()
}else{
    xhr = new ActiveXObject('Microsoft.XMLHTTP')
}
绑定监听事件
xhr.onreadystatechange = function(){
    console.log(xhr)
}
xhr对象里记录着状态码readyState、响应码status和服务器返回的内容responseText
状态码readyState
状态码readyState记录者ajax请求的状态,从0到4,0代表着没有建立链接,4代表着ajax请求完成
响应码status
响应码status记录着响应完成后的状态
| 响应码 | 描述 | 示例 |
|---|---|---|
| 1xx | 信息类错误 | |
| 2xx | 响应成功 | 200 |
| 3xx | 重定向 | 304 |
| 4xx | 客户端错误 | 404 |
| 5xx | 服务端错误 |
当状态码为4时,响应码为200时,请求成功
xhr.onreadystatechange = function(){
    if(xhr.readyState == 4){
        if(xhr.status == 200){
            console.log(xhr.responseText)
        }
    }
}
发送请求
xhr.open('GET','/jsonp',true)
xhr.send(null)
模拟登录注册接口
html样式
<input type="text" id="username">
<br>
<input type="text" id="userpwd">
<br>
<button id='btnlogin'>登录</button>
登录点击事件
        document.getElementById('btnlogin').onclick = function() {
            var username = document.getElementById('username').value;
            var userpwd = document.getElementById('userpwd').value
            var xhr;
            if (window.XMLHttpRequest) {
                xhr = new XMLHttpRequest()
            } else {
                xhr = new ActiveXObject('Microsoft.XMLHTTP')
            }

            xhr.onreadystatechange = function() {
                if (xhr.readyState == 4) {
                    if (xhr.status == 200) {
                        if (JSON.parse(xhr.responseText).status) {
                            alert('登录成功')
                        } else {
                            alert('账号密码错误')
                        }
                    }
                }
            }
            xhr.open('GET', '/jsonp?type=login&username=' + username + '&userpwd=' + userpwd, true)
            xhr.send(null)
        };
node服务端接口
const http = require('http');
const url = require('url');
const fs = require('fs');
const querystring = require('querystring')
const mongodb = require("mongodb"); //导入mongodb的包
const server = http.createServer();
const MongoClient = mongodb.MongoClient;
const dburl = 'mongodb://localhost:27017/userDB';// 数据库地址

server.on('request', (req, res) => {
    var query = querystring.parse(req.url.split("?")[1]);
    const pathname = url.parse(req.url, true).pathname;
    if (pathname == '/index.html' && req.method == 'GET') {
        fs.readFile('./index.html', 'utf8', (err, data) => {
            res.end(data)
        })
    } else if (pathname == '/jsonp' && req.method == 'GET') {
        if (query.type == 'login') {
            MongoClient.connect(dburl, function(err, db) {
                db.collection('userinfo').find({
                    username: query.username,
                    userpwd: query.userpwd
                }).toArray(function(err, result) {
                    if (result.length == 0) {
                        res.end(JSON.stringify({
                            status: false
                        }))
                    } else {
                        res.end(JSON.stringify({
                            status: true
                        }))
                    }
                    db.close()
                })
            })
        }
    }
})
server.listen(3000)
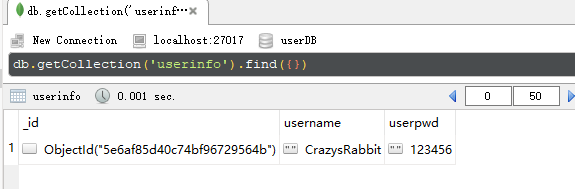
数据库里的数据
账号密码正确

账号密码错误

好了,一个简单完整的模拟接口完成了,Node.js 搭建web程序的记录就到这里结束了,我们直接向文件上到到自己的云主机上面就可以实现在线访问了,感兴趣的话还可以完善下增删改查。
