图片去燥
主要函数
cv.fastNlMeansDenoising()对灰度图像去燥
cv.fastNlMeansDenoisingColored() 对彩色图像去燥
cv.fastNlMeansDenoisingMulti()对灰度图片序列去燥
cv.fastNlMeansDenoisingColoredMulti()对彩色图片序列去燥
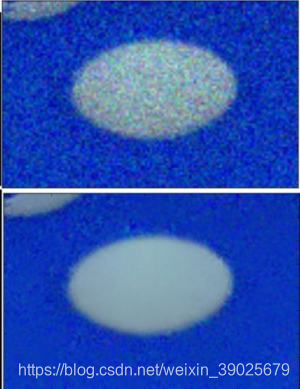
例子cv.fastNlMeansDenoisingColored()
import numpy as np
import cv2 as cv
from matplotlib import pyplot as plt
img = cv.imread('die.png')
dst = cv.fastNlMeansDenoisingColored(img,None,10,10,7,21)
plt.subplot(121),plt.imshow(img)
plt.subplot(122),plt.imshow(dst)
plt.show()
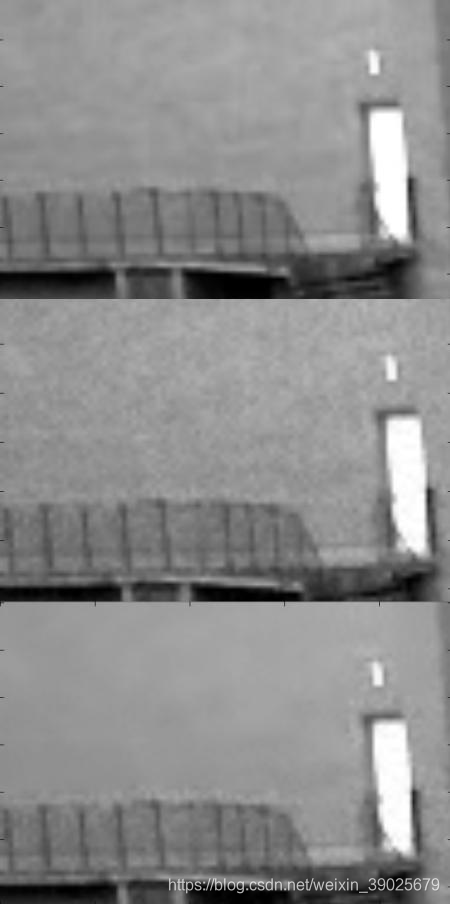
例子 cv.fastNlMeansDenoisingMulti()
import numpy as np
import cv2 as cv
from matplotlib import pyplot as plt
cap = cv.VideoCapture('vtest.avi')
# create a list of first 5 frames
img = [cap.read()[1] for i in xrange(5)]
# convert all to grayscale
gray = [cv.cvtColor(i, cv.COLOR_BGR2GRAY) for i in img]
# convert all to float64
gray = [np.float64(i) for i in gray]
# create a noise of variance 25
noise = np.random.randn(*gray[1].shape)*10
# Add this noise to images
noisy = [i+noise for i in gray]
# Convert back to uint8
noisy = [np.uint8(np.clip(i,0,255)) for i in noisy]
# Denoise 3rd frame considering all the 5 frames
dst = cv.fastNlMeansDenoisingMulti(noisy, 2, 5, None, 4, 7, 35)
plt.subplot(131),plt.imshow(gray[2],'gray')
plt.subplot(132),plt.imshow(noisy[2],'gray')
plt.subplot(133),plt.imshow(dst,'gray')
plt.show()
https://docs.opencv.org/3.4/d5/d69/tutorial_py_non_local_means.html
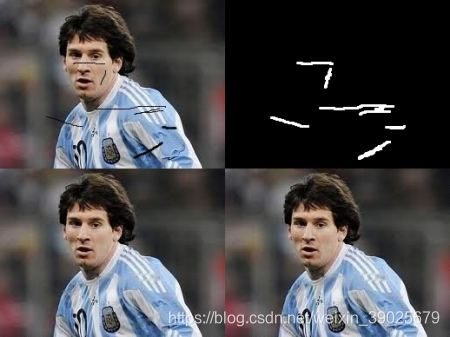
图片修补
首先需要创建一个保护罩
import numpy as np
import cv2 as cv
img = cv.imread('messi_2.jpg')
mask = cv.imread('mask2.png',0)
dst = cv.inpaint(img,mask,3,cv.INPAINT_TELEA)
cv.imshow('dst',dst)
cv.waitKey(0)
cv.destroyAllWindows()
https://docs.opencv.org/3.4/df/d3d/tutorial_py_inpainting.html
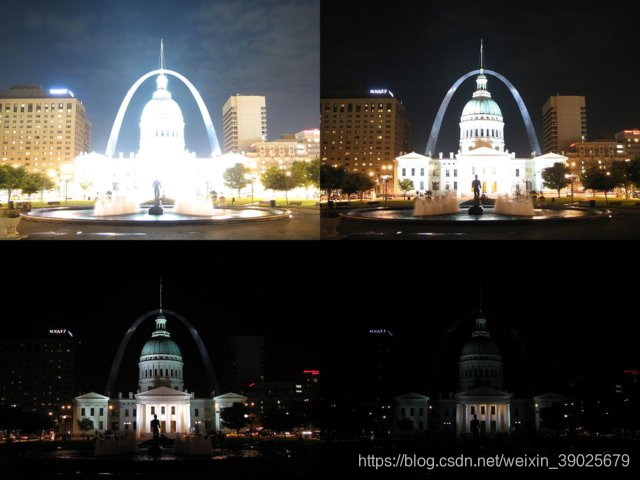
图片高动态范围成像
Goal
Learn how to generate and display HDR image from an exposure sequence.
Use exposure fusion to merge an exposure sequence.
1加载不同曝光的图片到列表中
import cv2 as cv
import numpy as np
# Loading exposure images into a list
img_fn = ["img0.jpg", "img1.jpg", "img2.jpg", "img3.jpg"]
img_list = [cv.imread(fn) for fn in img_fn]
exposure_times = np.array([15.0, 2.5, 0.25, 0.0333], dtype=np.float32)
2合并图片成HDR
# Merge exposures to HDR image
merge_debevec = cv.createMergeDebevec()
hdr_debevec = merge_debevec.process(img_list, times=exposure_times.copy())
merge_robertson = cv.createMergeRobertson()
hdr_robertson = merge_robertson.process(img_list, times=exposure_times.copy())
3对合并的图片调整
# Tonemap HDR image
tonemap1 = cv.createTonemap(gamma=2.2)
res_debevec = tonemap1.process(hdr_debevec.copy())
4使用Mertens fusion合并图片
# Exposure fusion using Mertens
merge_mertens = cv.createMergeMertens()
res_mertens = merge_mertens.process(img_list)
5转换成8位格式的图片并保存
# Convert datatype to 8-bit and save
res_debevec_8bit = np.clip(res_debevec*255, 0, 255).astype('uint8')
res_robertson_8bit = np.clip(res_robertson*255, 0, 255).astype('uint8')
res_mertens_8bit = np.clip(res_mertens*255, 0, 255).astype('uint8')
cv.imwrite("ldr_debevec.jpg", res_debevec_8bit)
cv.imwrite("ldr_robertson.jpg", res_robertson_8bit)
cv.imwrite("fusion_mertens.jpg", res_mertens_8bit)
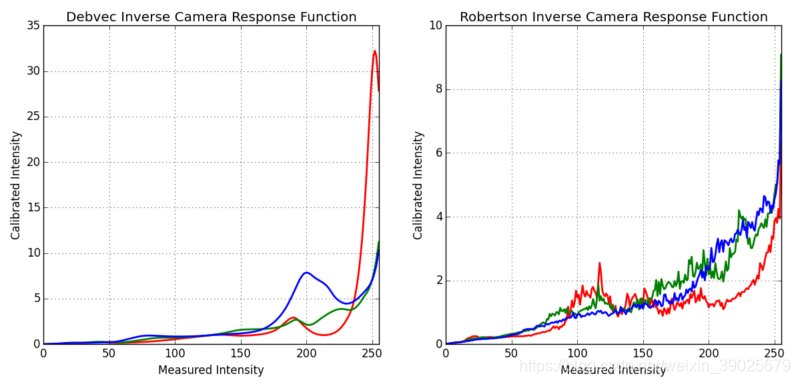
对摄像头的曲线评估
# Estimate camera response function (CRF)
cal_debevec = cv.createCalibrateDebevec()
crf_debevec = cal_debevec.process(img_list, times=exposure_times)
hdr_debevec = merge_debevec.process(img_list, times=exposure_times.copy(), response=crf_debevec.copy())
cal_robertson = cv.createCalibrateRobertson()
crf_robertson = cal_robertson.process(img_list, times=exposure_times)
hdr_robertson = merge_robertson.process(img_list, times=exposure_times.copy(), response=crf_robertson.copy())
https://docs.opencv.org/3.4/d2/df0/tutorial_py_hdr.html
