文章目录
本博客demo源码地址
https://github.com/suchahaerkang/spring-annotation.git
1 xml的方式配置自动扫描组件
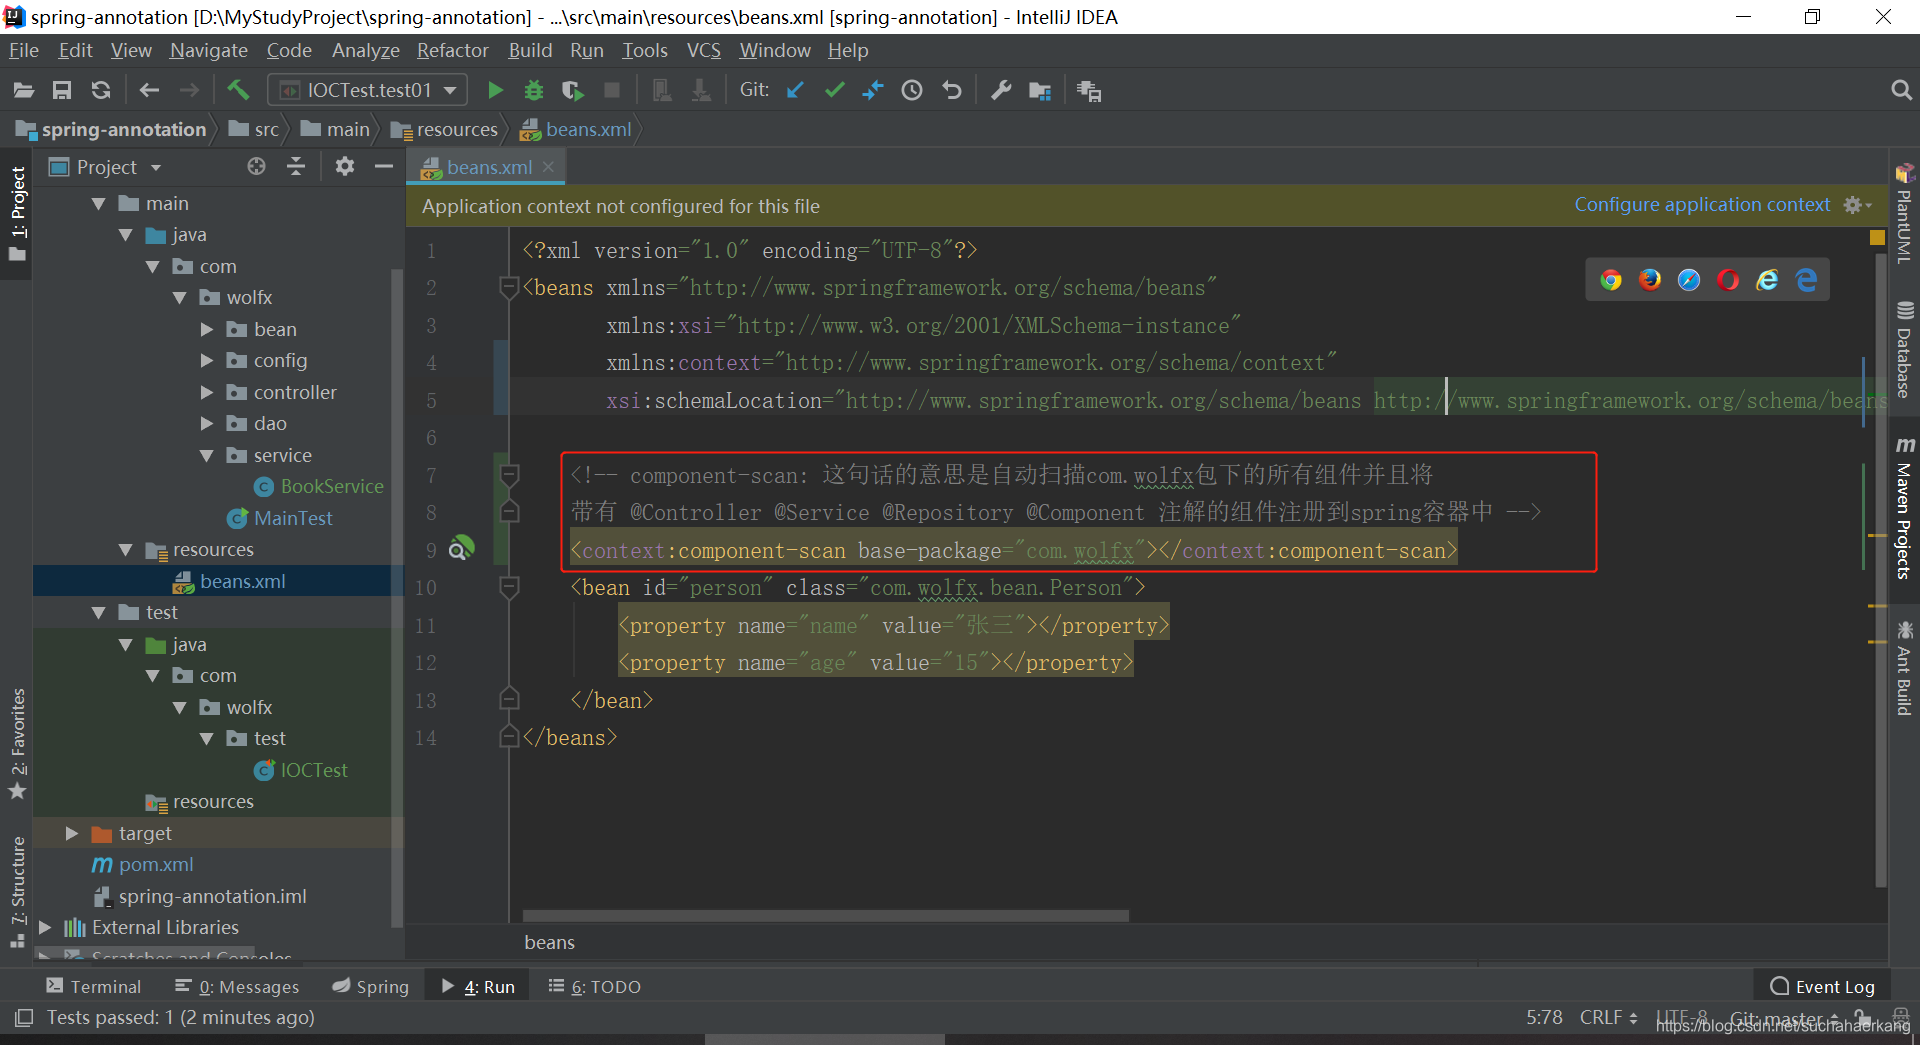
1.1 在beans.xml文件中导入context的命名空间并且配置要扫描的包

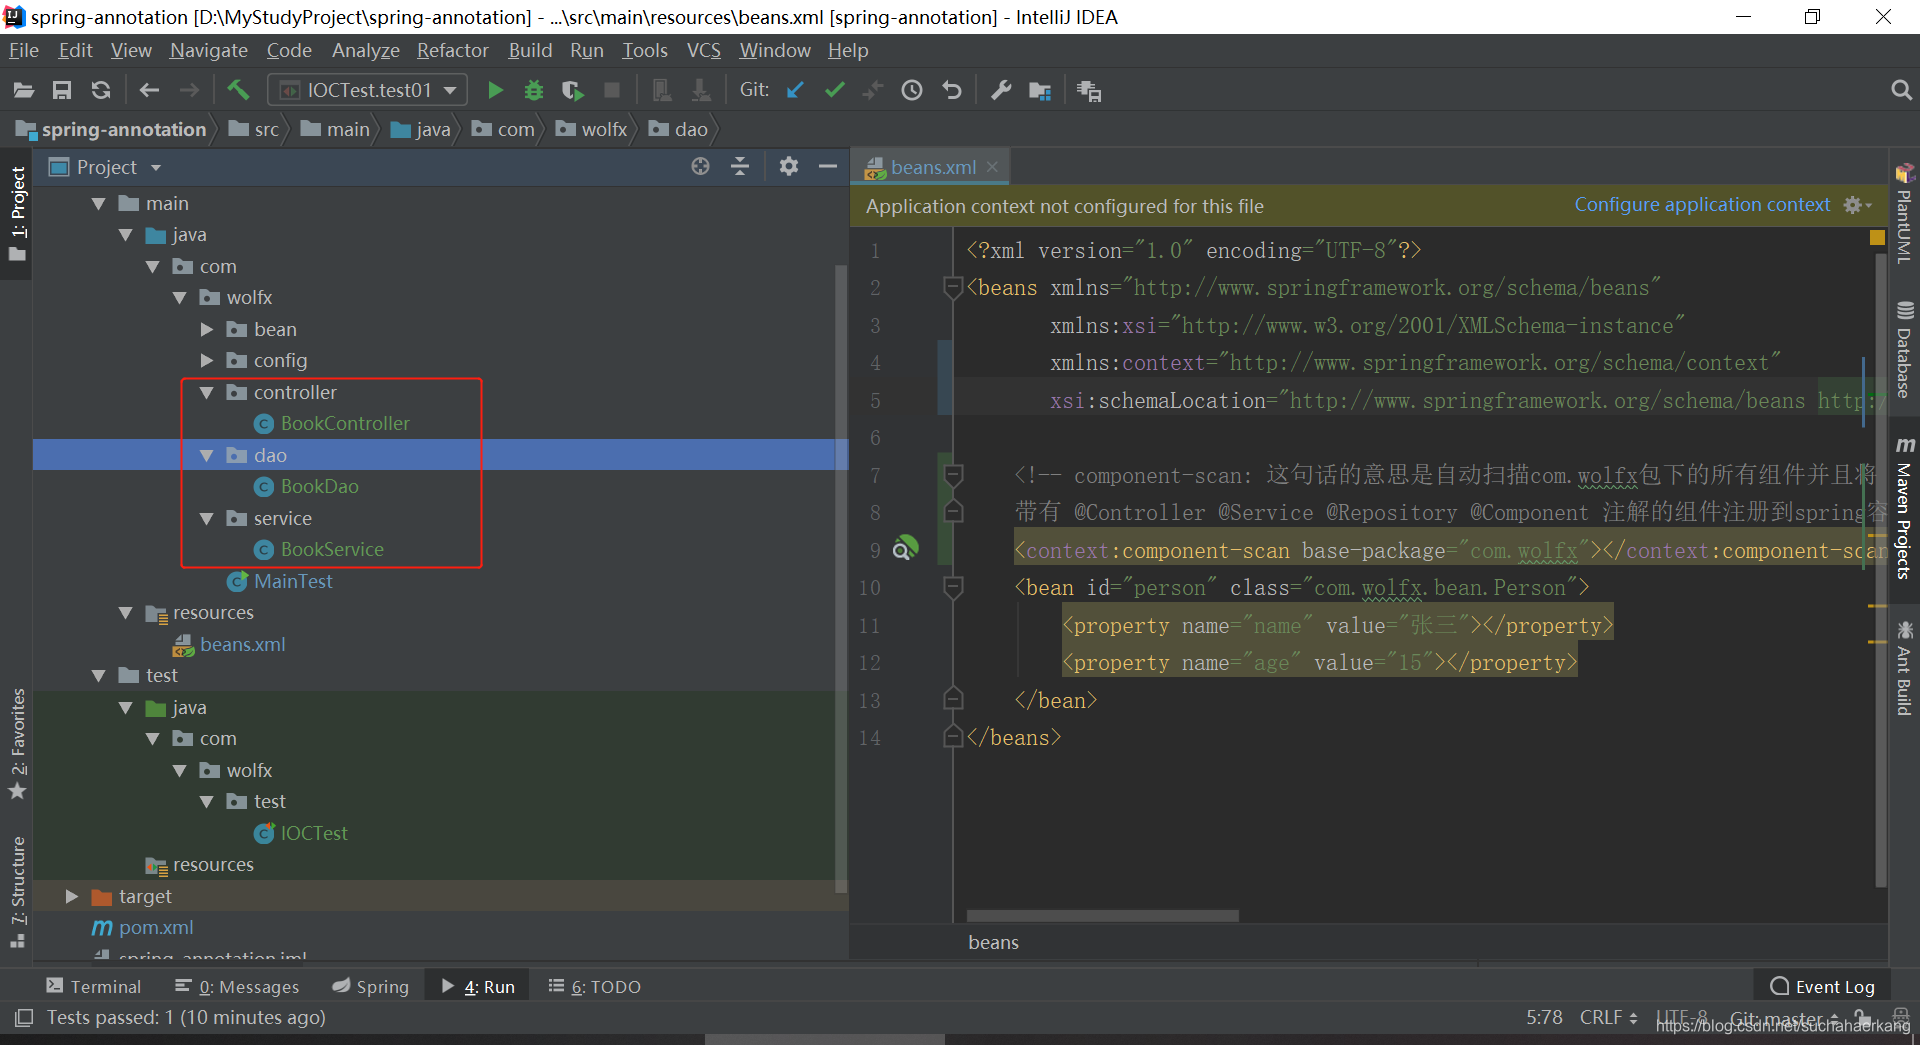
1.2 在com.wolfx的包下创建几个带@Controller,@Service,@Repository注解的组件和测试
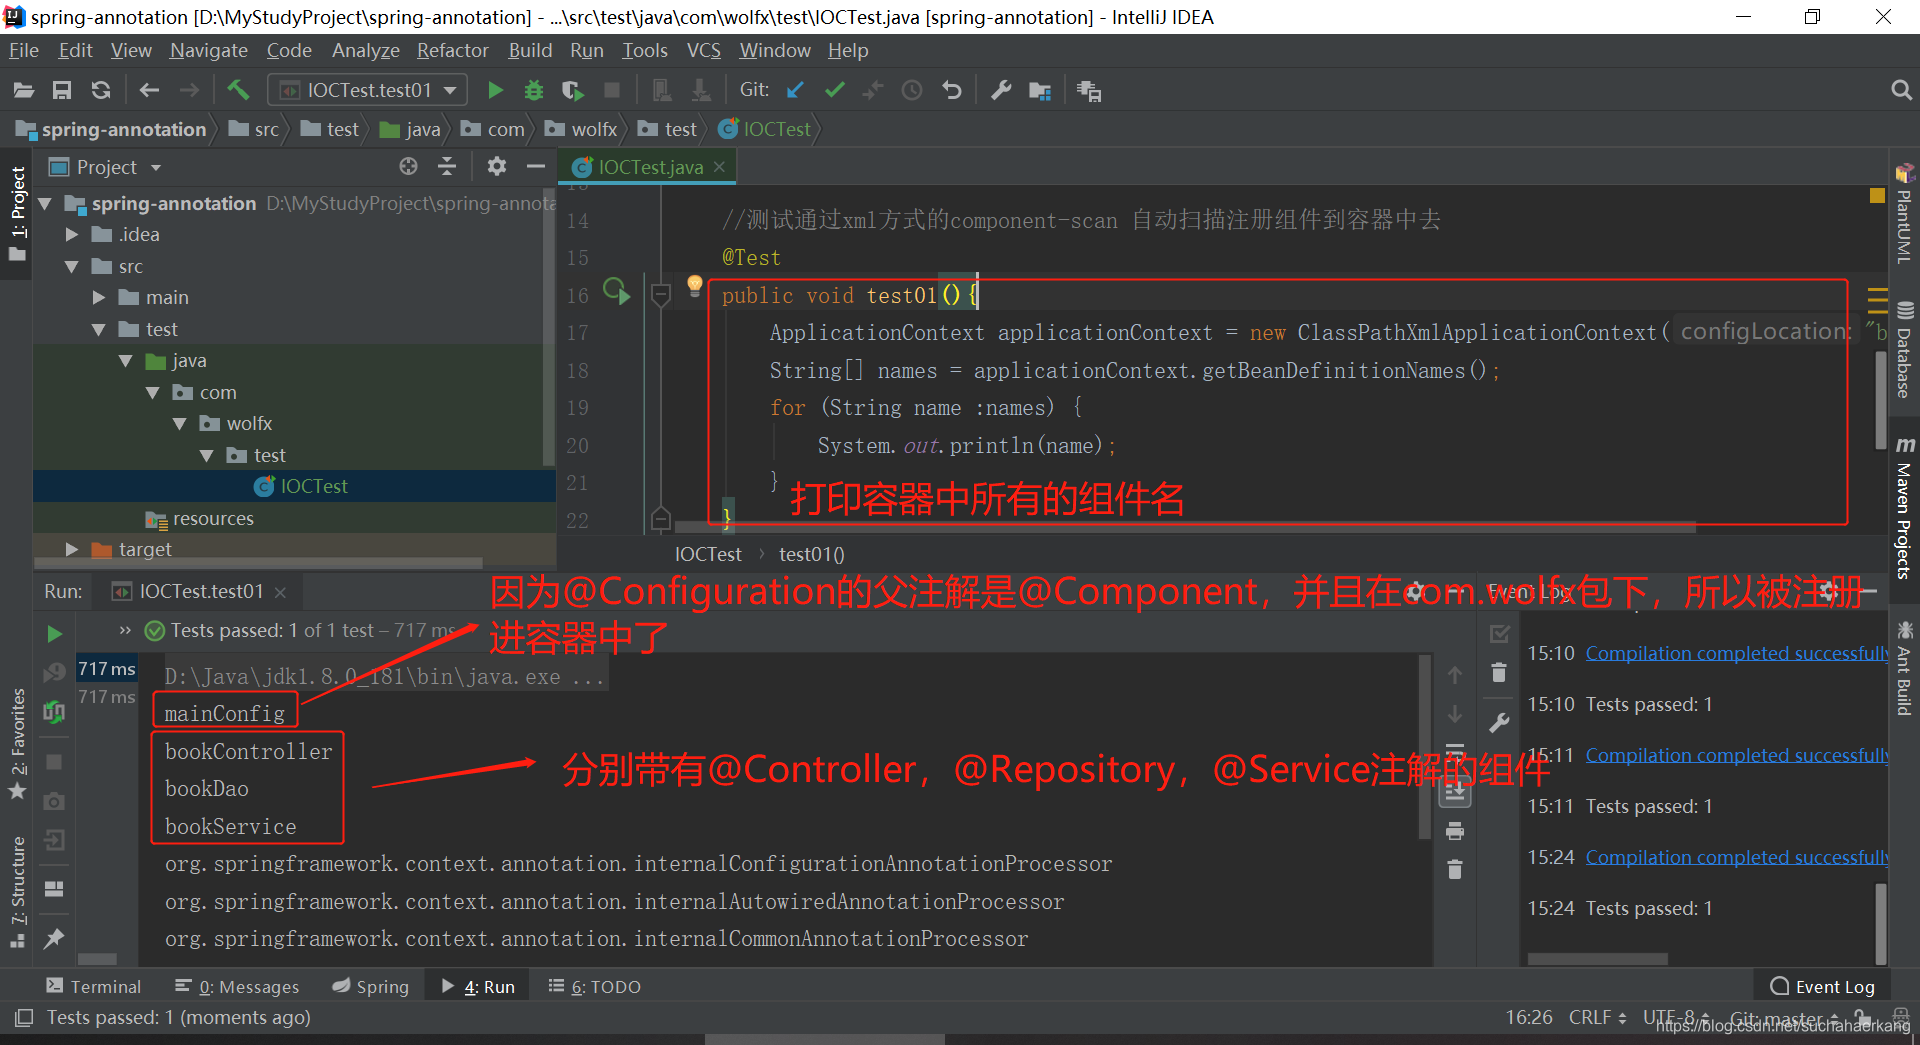
ps:@Controller,@Service,@Repository的父注解都是@Component,所以我这里就不单独再创建一个带有@Component注解的组件了
测试用的是junit,需要在pom.xml中导入junit项目的依赖包
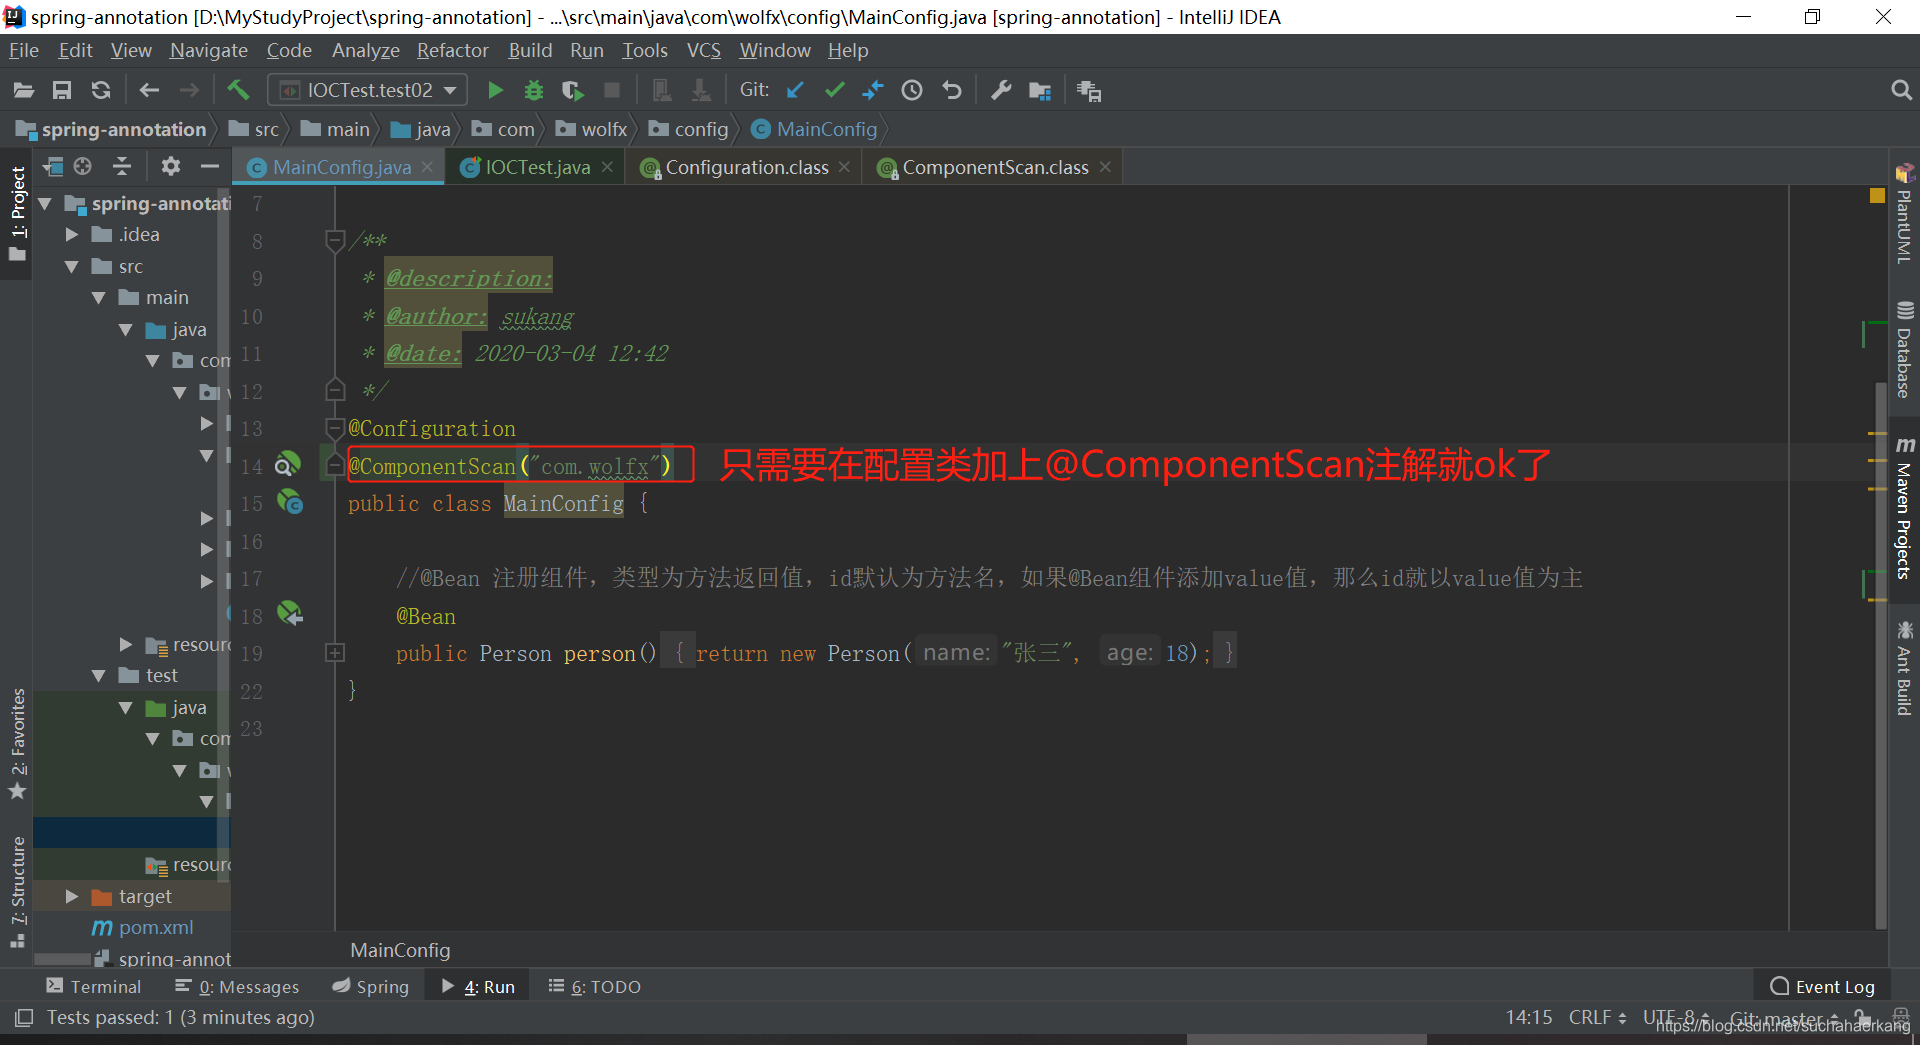
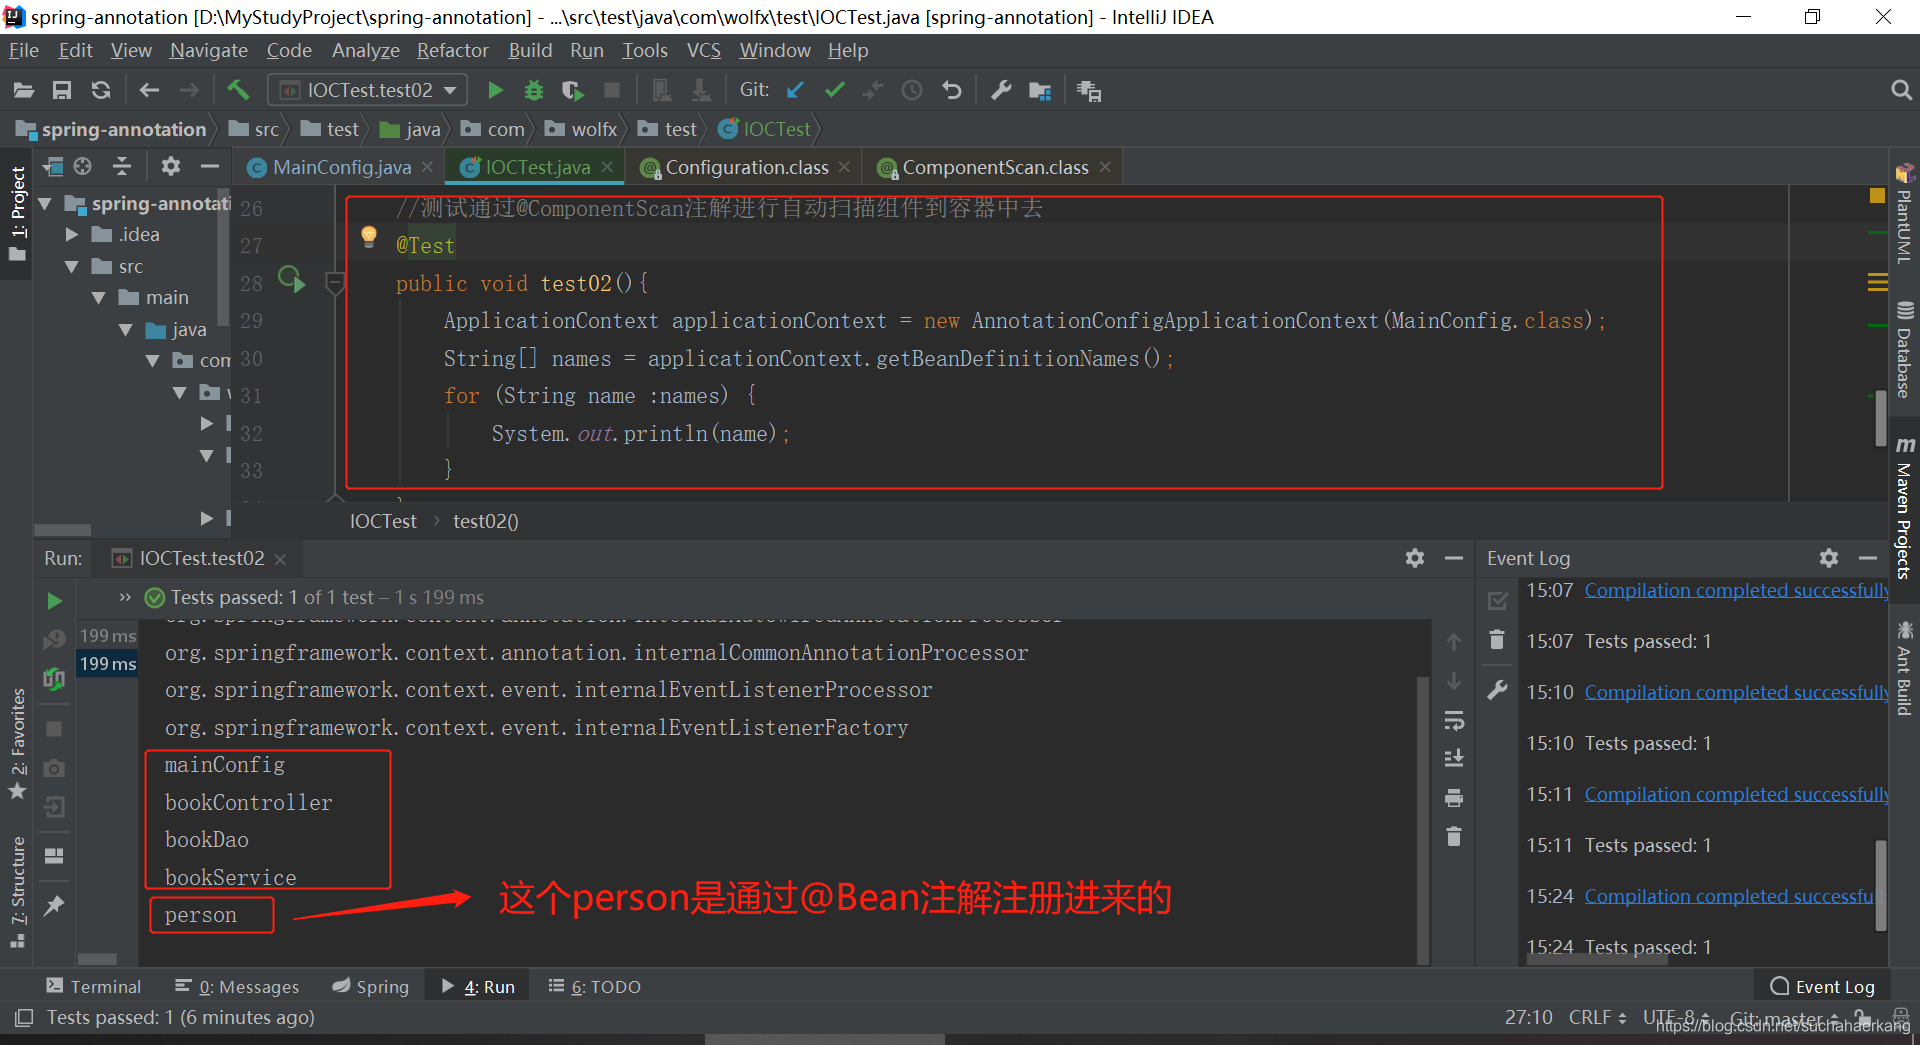
2 @Component注解的方式自动扫描配置和测试
3 @ComponentScan注解过滤规则配置
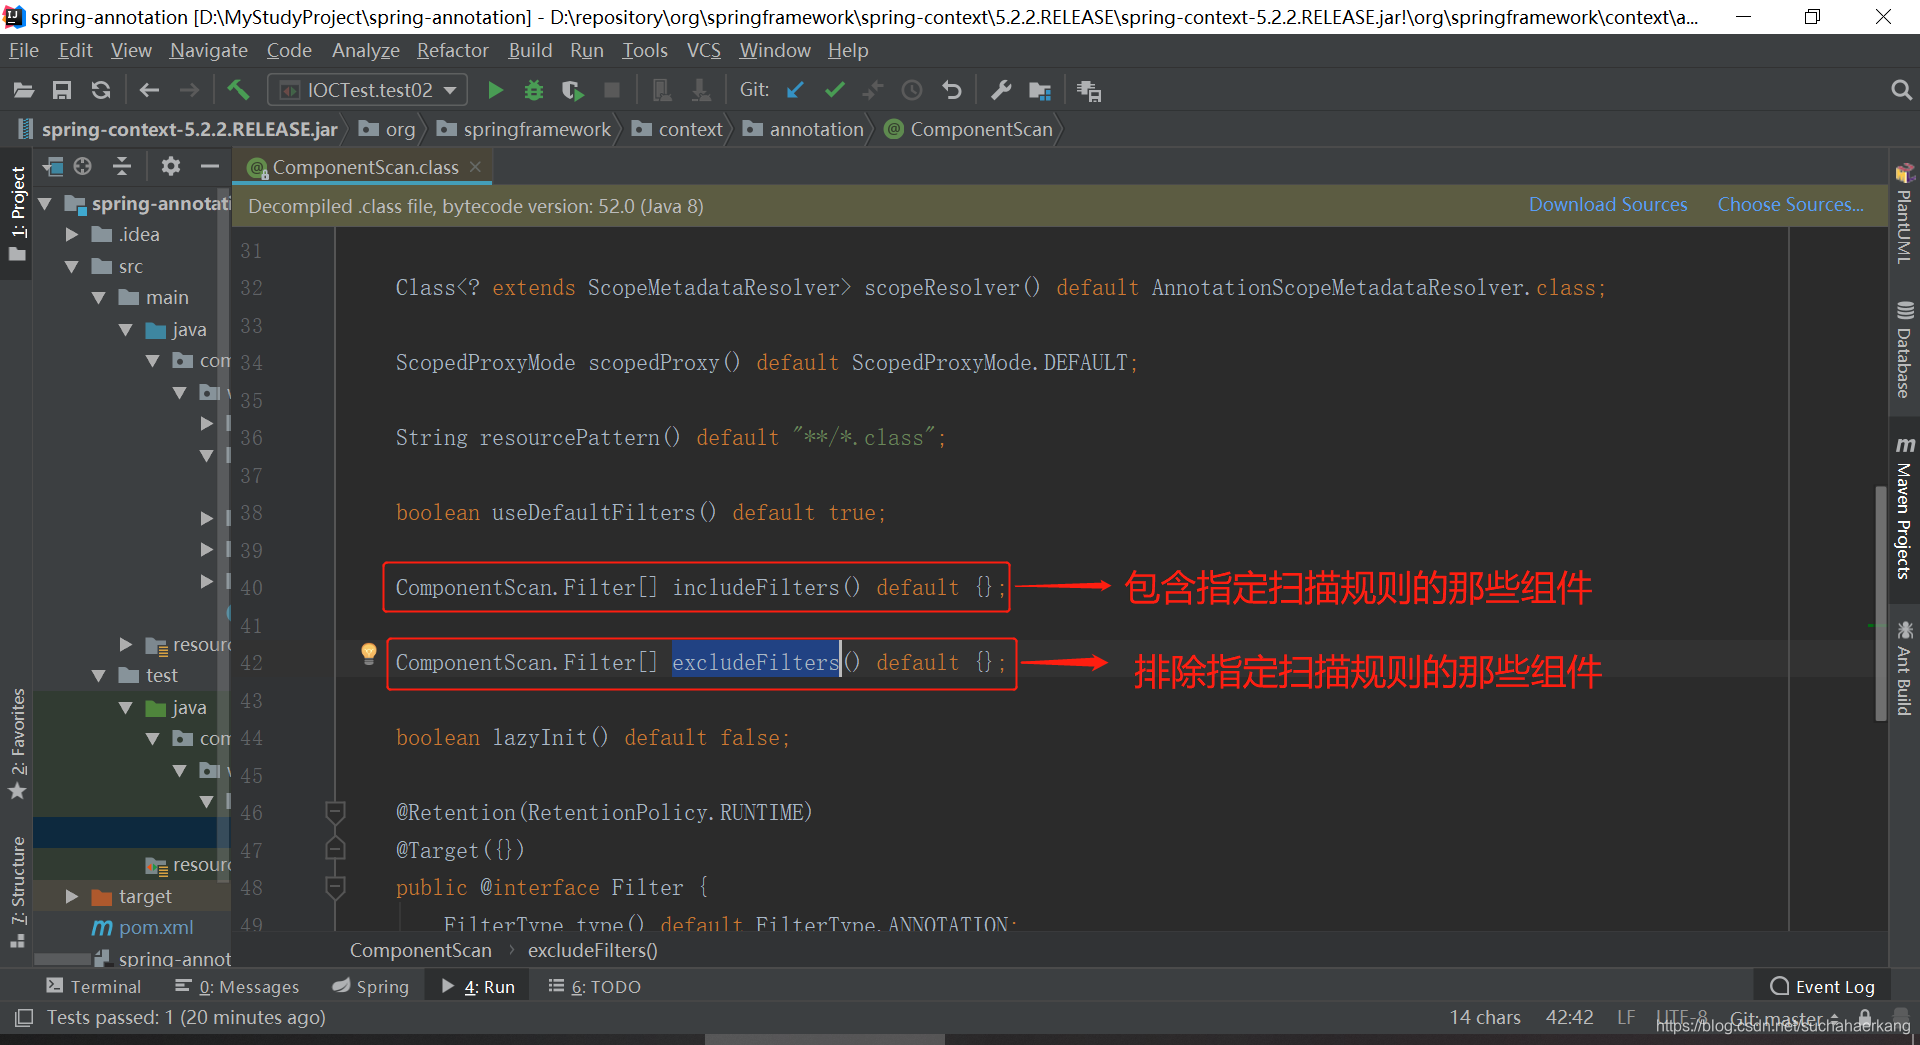
通过看@ComponentScan注解的源码知道该注解有includeFilters和excludeFilters两个参数
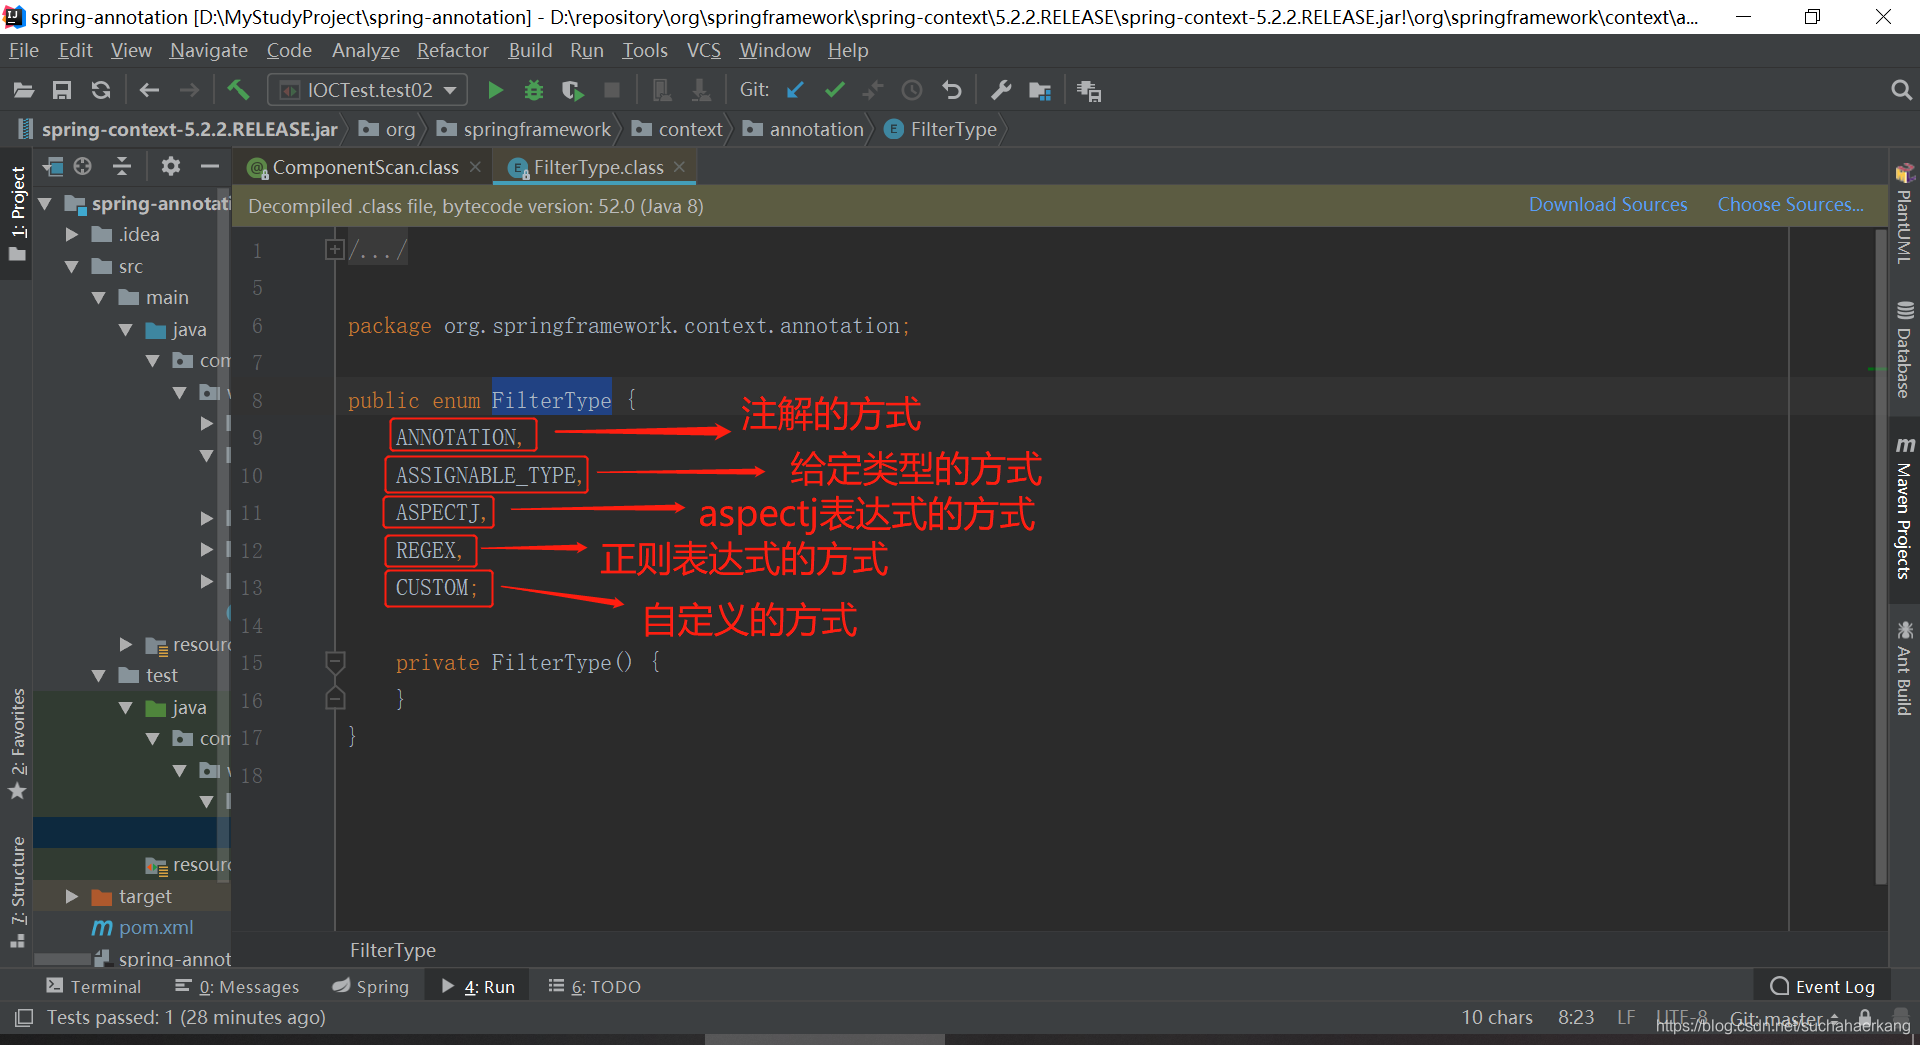
然后我们看一下过滤方式FilterType有五种方式
下面我们就来测试一下ANNOTATION,ASSIGNABLE_TYPE和CUSTOM三种方式,另外两种在此不做测试,用到的比较少,测试之前我先说明一下@ComponentScan注解的元注解是@Repeatable(重复注解),@Repeatable是java8引入的一个注解,意思是可以在一个类型上进行多次有效应用,在这里我们就不用这种方式去指定多种扫描规则的情况,因为@ComponentScans注解可以实现配置多种扫描规则
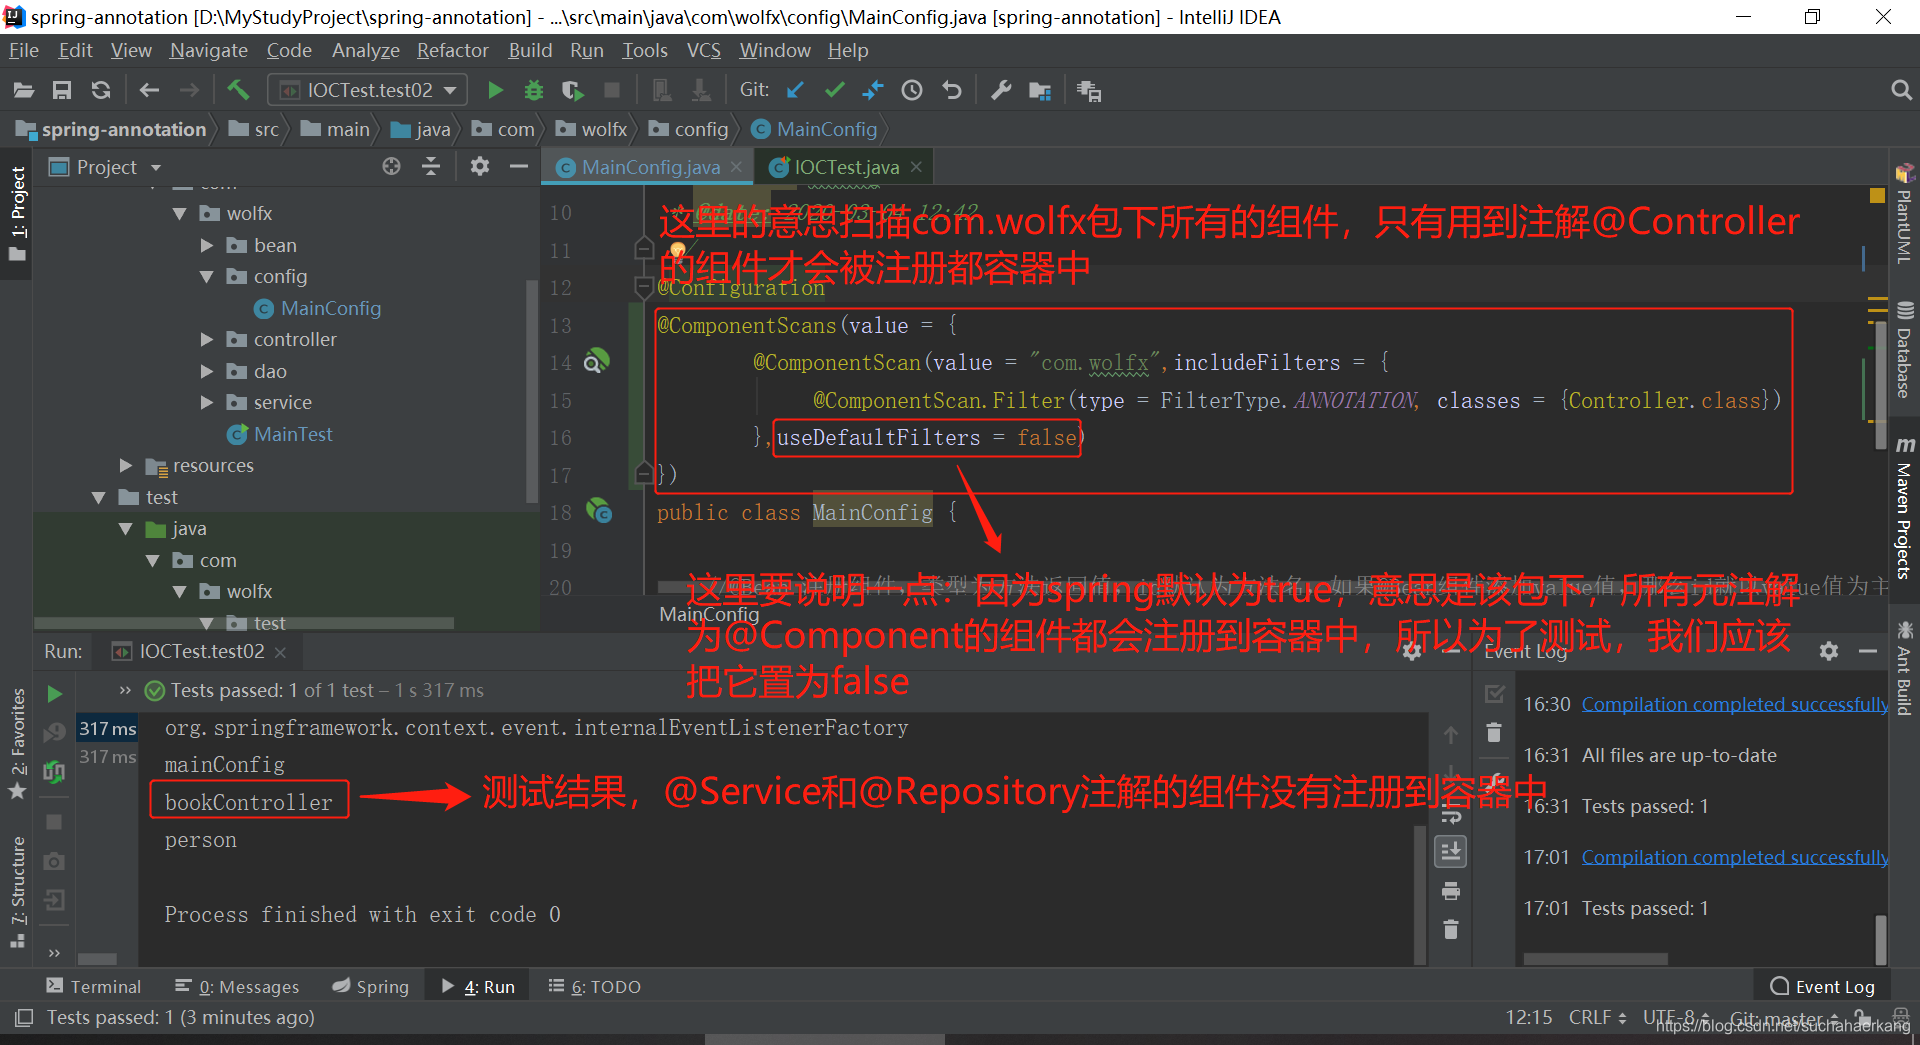
3.1 type = FilterType.ANNOTATION 注解的方式
3.2 type = FilterType.ASSIGNABLE_TYPE 注解的方式
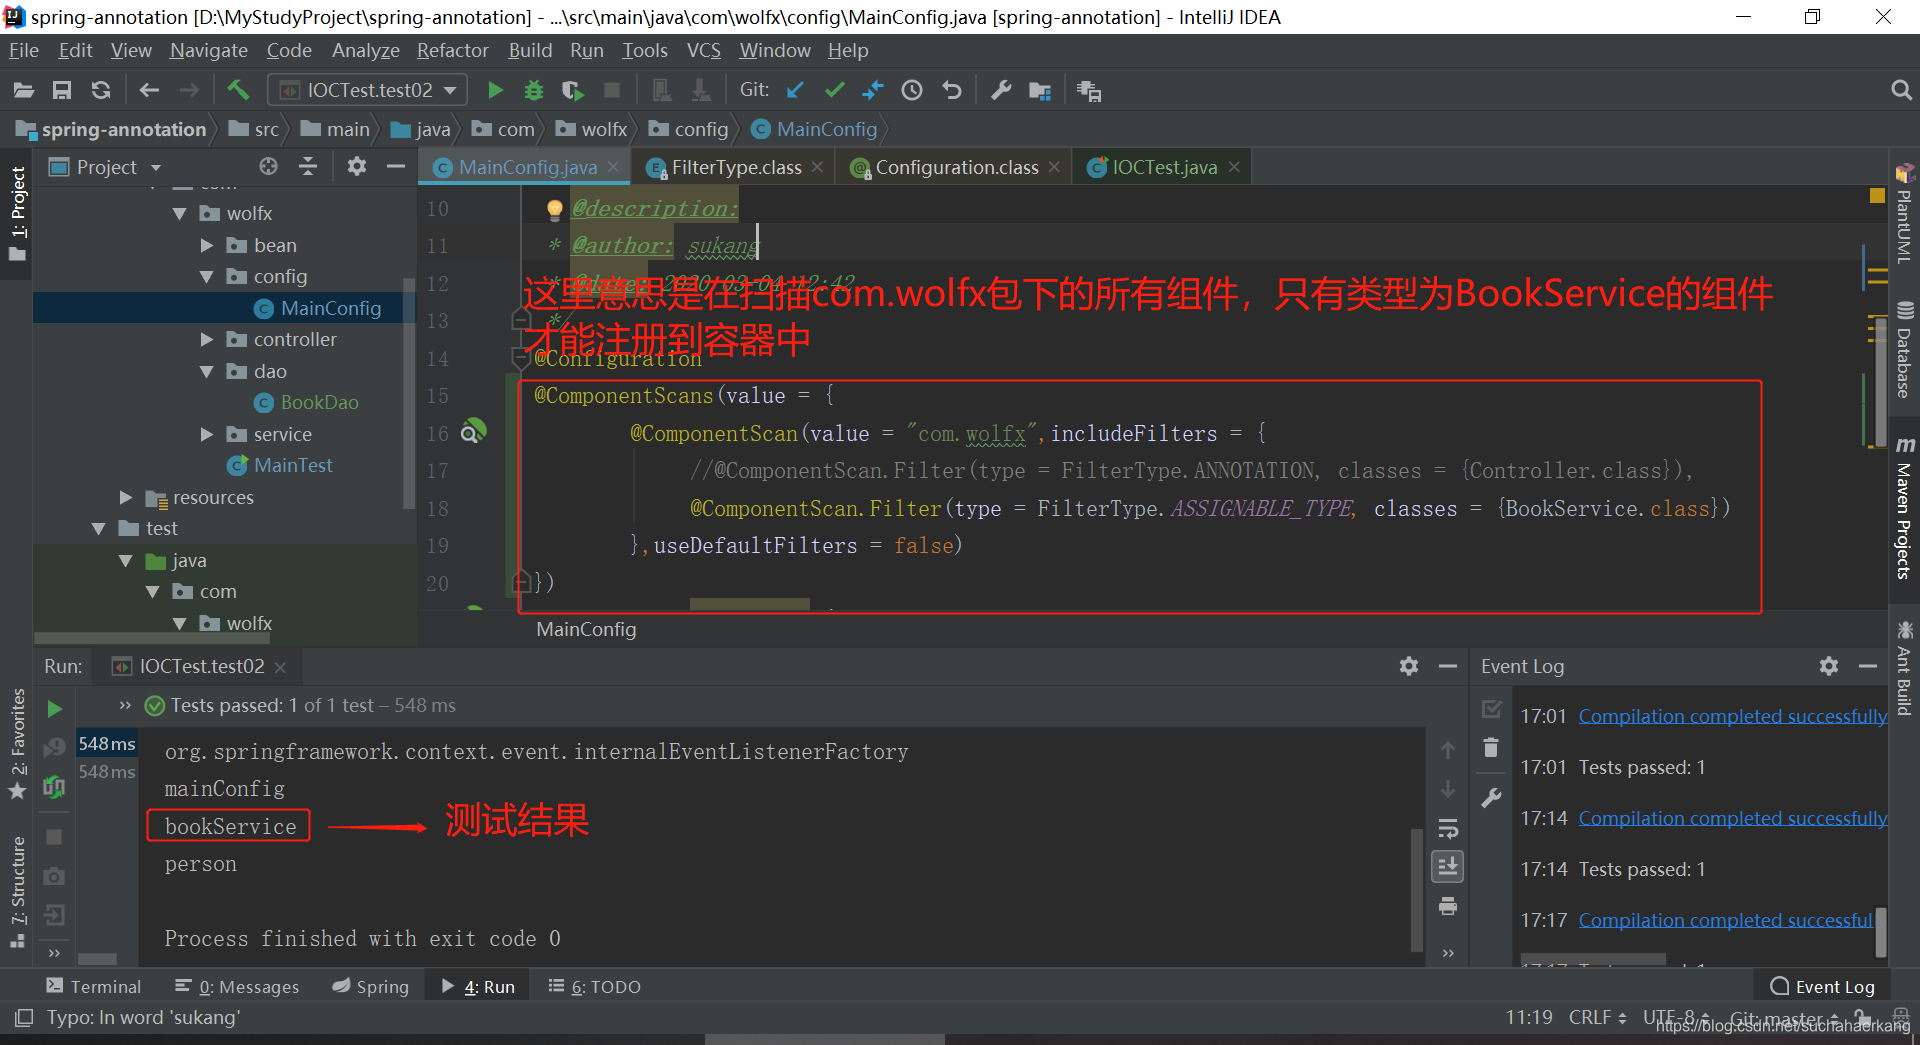
3.3 type = FilterType.CUSTOM 注解的方式
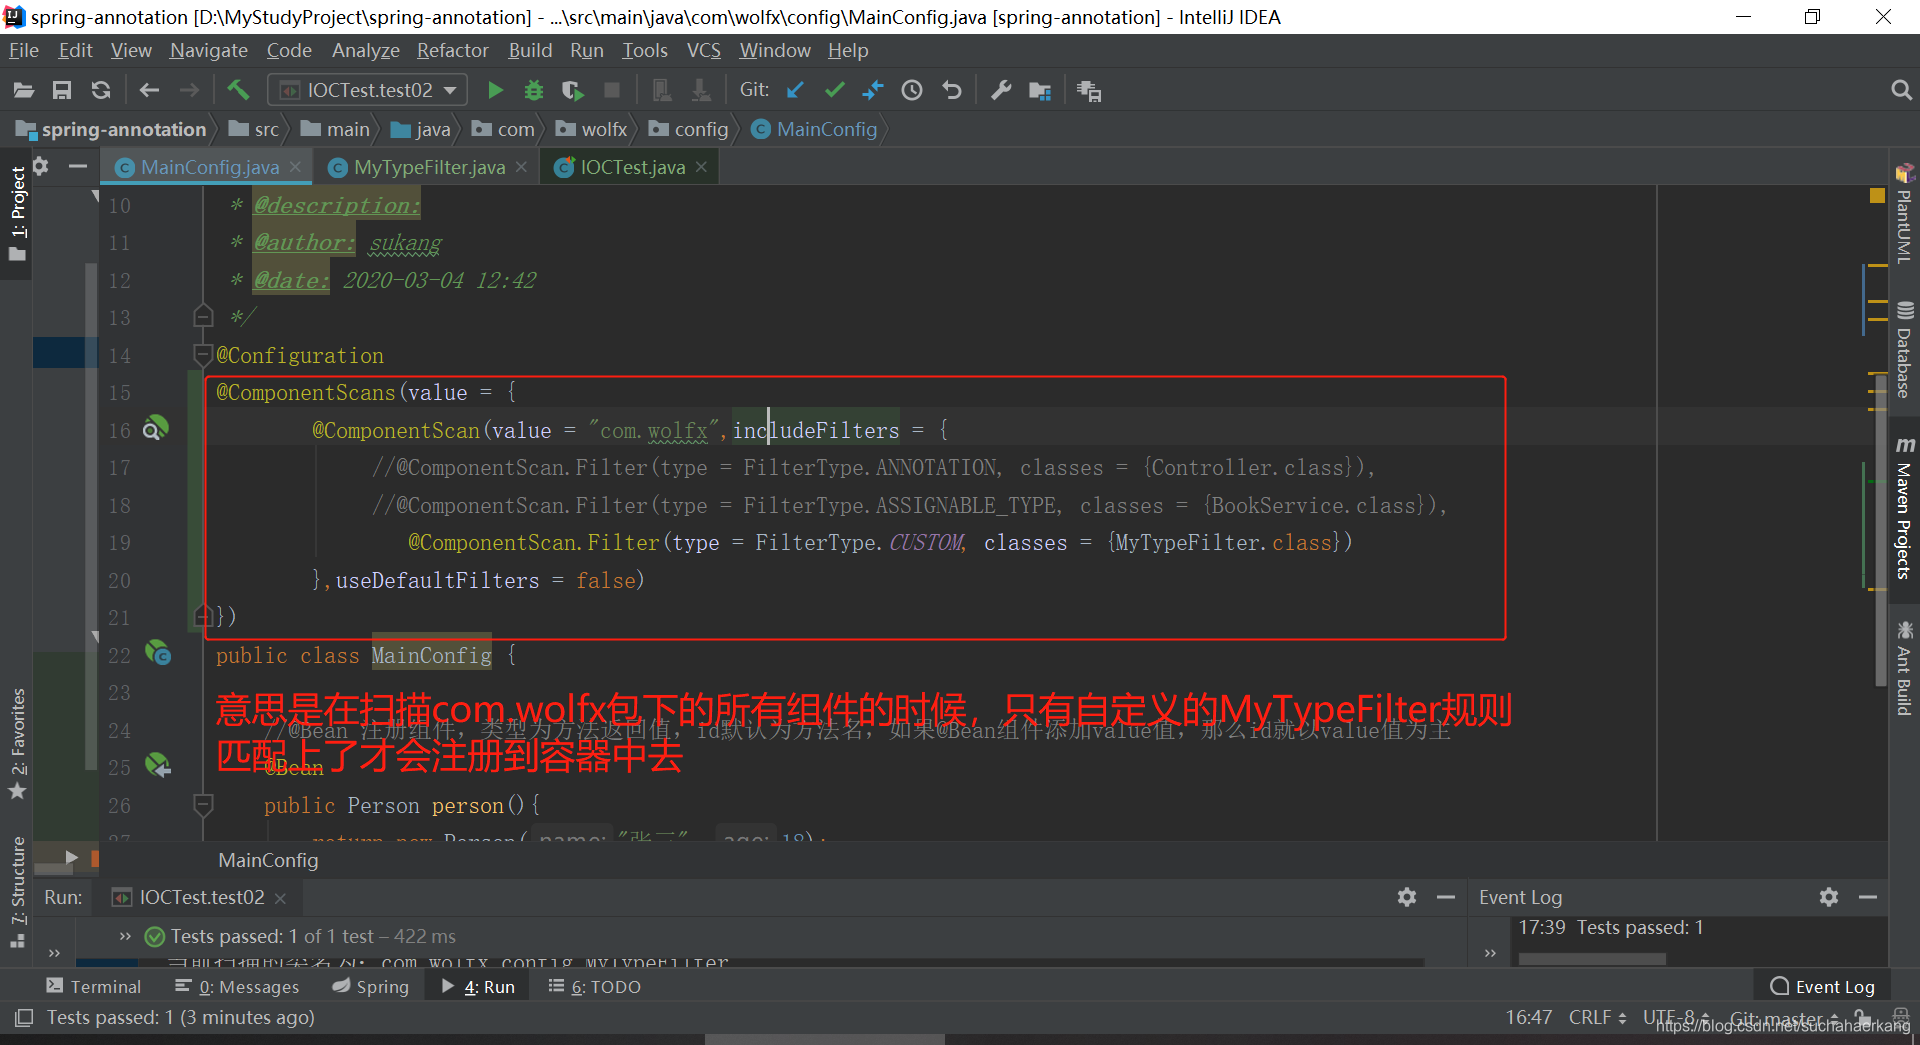
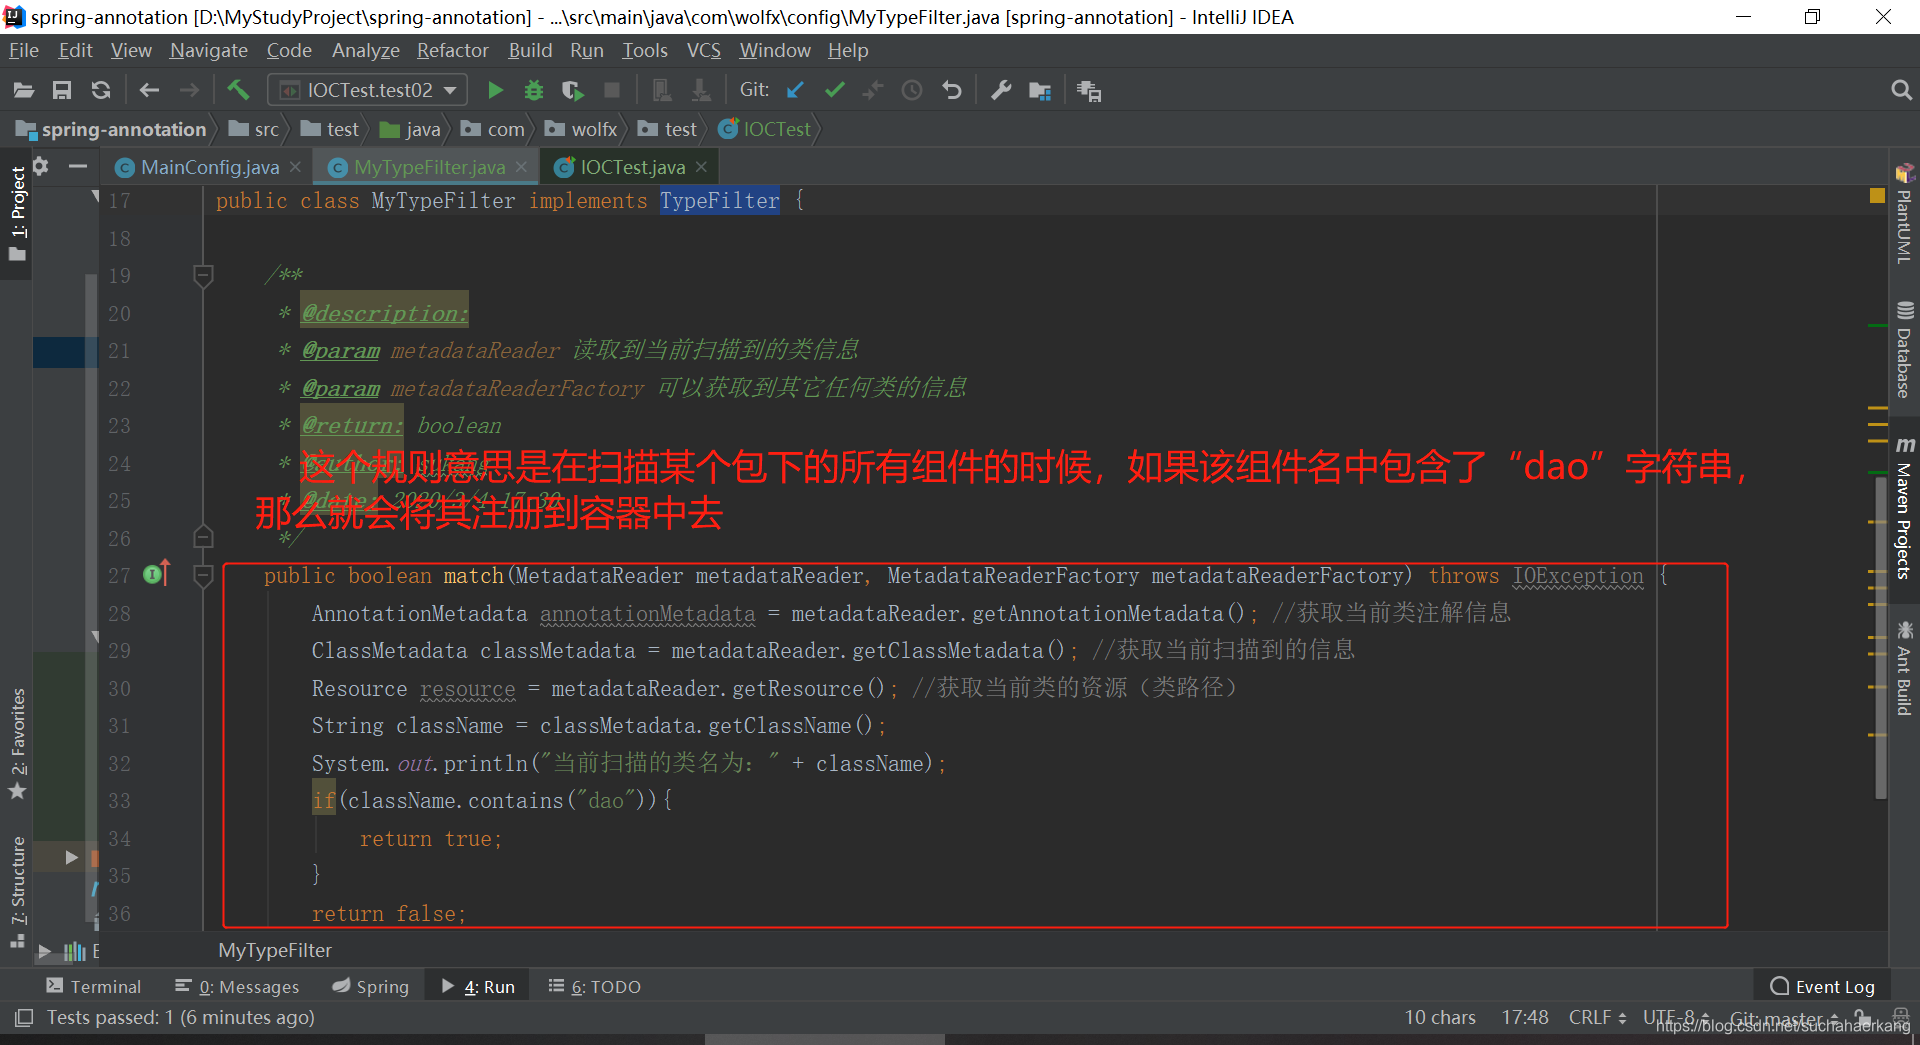
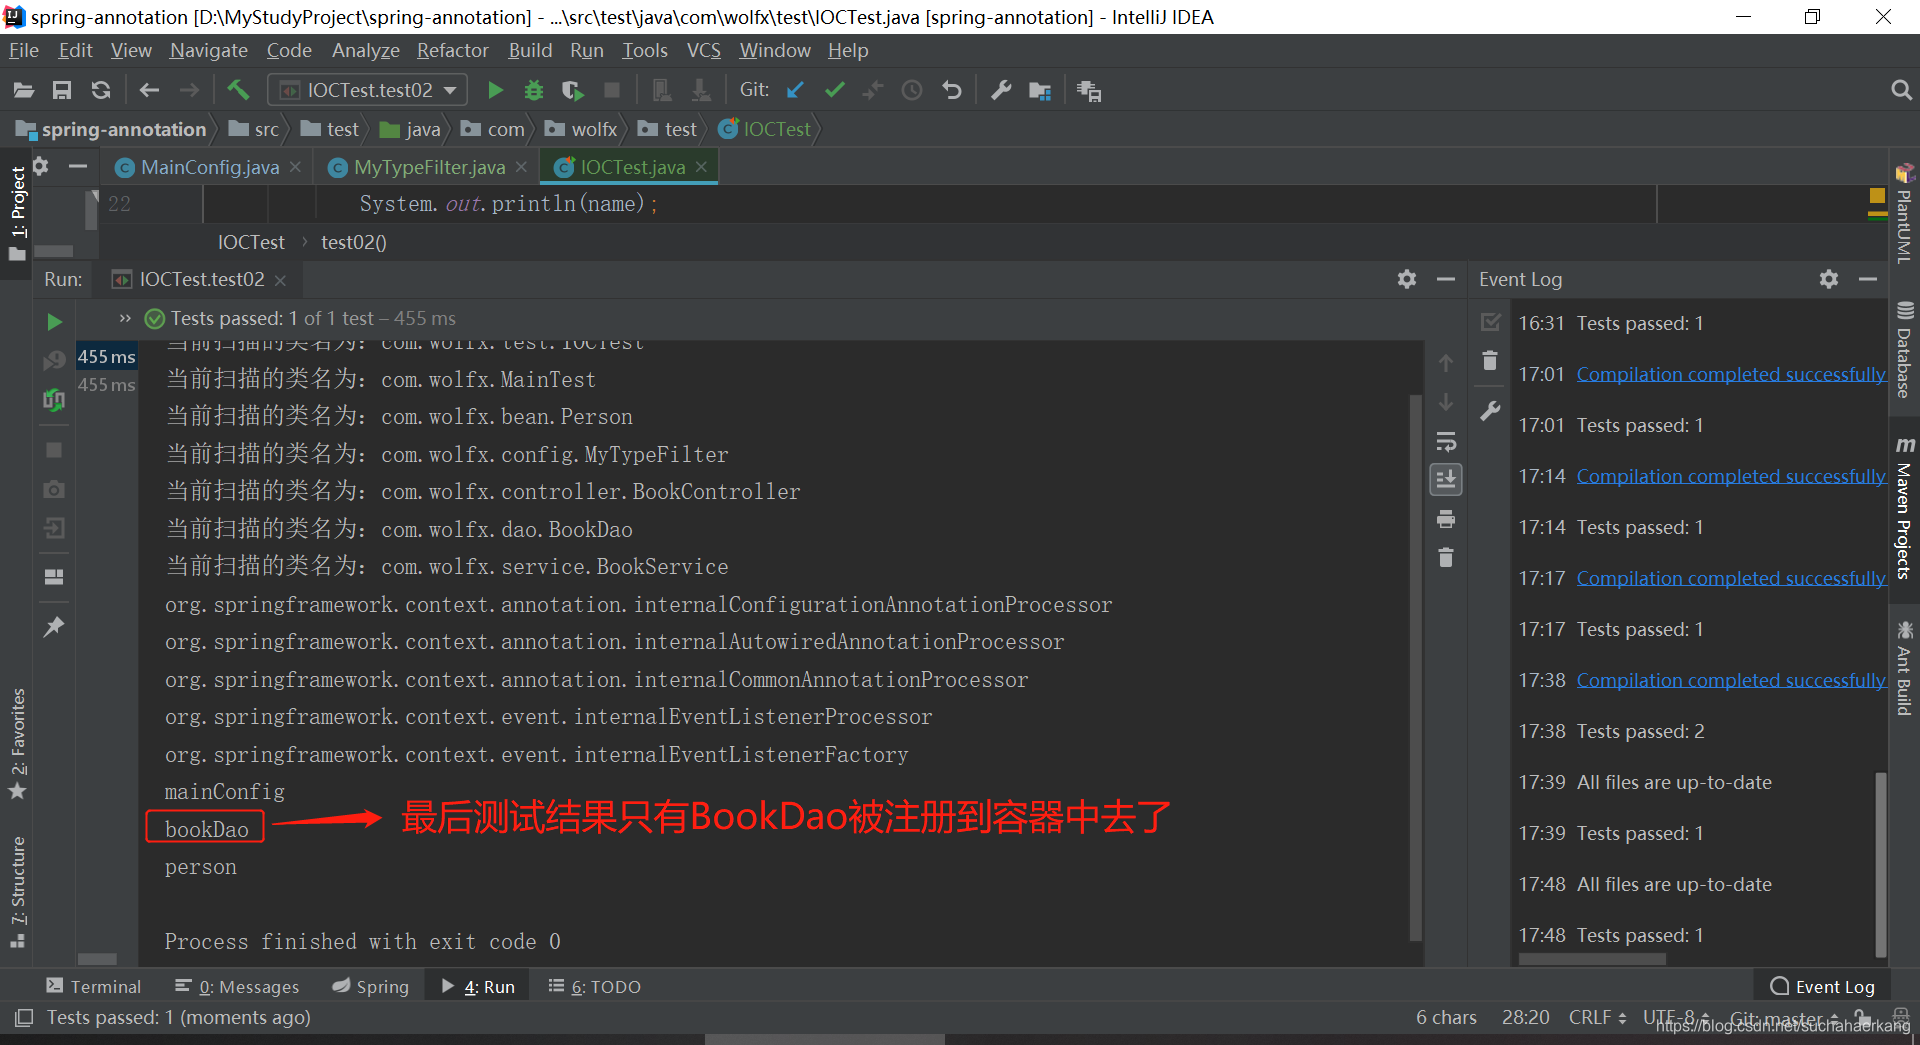
然后我们创建MyTypeFilter类,MyTypeFilter 必须要实现TypeFilter接口
4 总结
@ComponentScan的作用有两个:
- 扫描某个包下的所有组件,并且默认将带有@Controller,@Service,@Repository和@Component的组件注册到容器中去
- 扫描某个包下的所有组件,并且将带有@Configuration的组件注册到容器中去
