我的系统:Windows10 专业版,Visual Studio 2019 Professional
(MacOS上的环境搭建,请参考我的另一篇博客,环境搭建Mac版)
准备工作:
1.安装Python
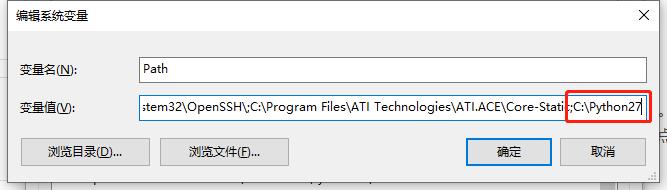
配置cocos2dx需要Python2,官方推荐的是Python2.7。注意:Python3是不行的!官网下载Python2.7,安装一路下一步即可。然后最好把Python的路径加到环境变量中去,以后用起来就会方便点。
安装在cmd窗口检查一下Python版本:python --version
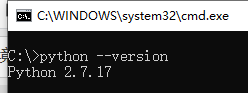
这样Python就安装好了。
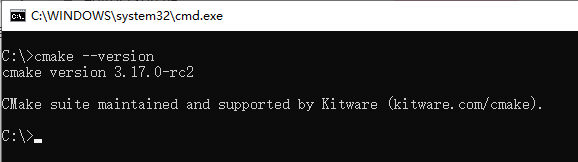
2.安装Cmake:
去官网下载,安装的时候注意这一步,选择加到环境变量里:

然后再cmd窗口看一下版本,是否安装成功:
3.还需要Visual Studio 2015之后的版本。(这个自己想办法吧)
正式配置:
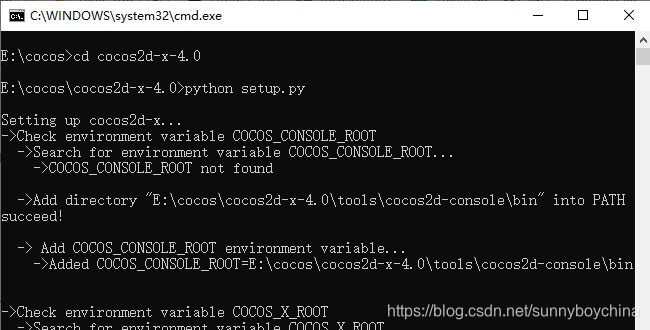
再cocos官网下载稳定版cocos2d-x-4.0.zip。解压。
开始安装,进入cocos2d-x-4.0文件夹,运行setup.py。安装过程中会问你NDK和Android SDK的路径,如果没有,直接回车就行。
C:\>cd cocos2d-x-4.0
C:\>python setup.py
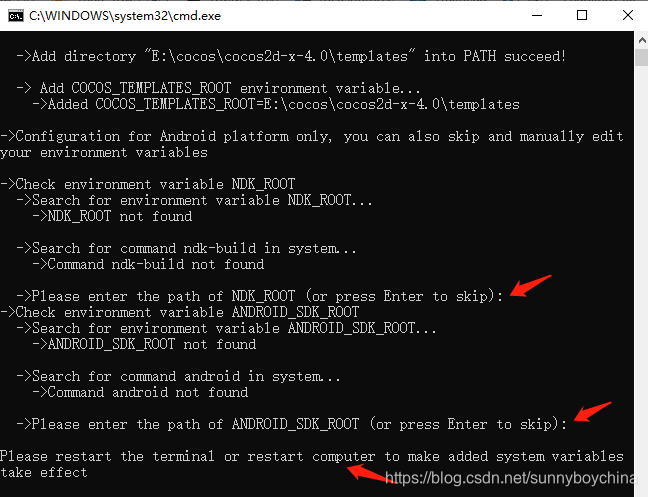
然后重启电脑。
这时候cocos就装好了,来看一下版本信息吧:cocos --version
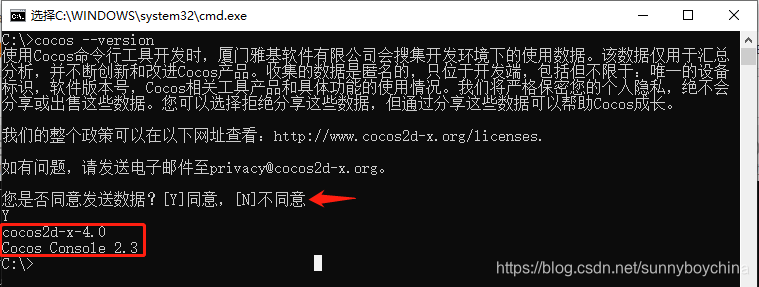
这中间会问你是否同意发送数据,以便帮助Cocos成长,选是选否都可以。既然您选择用cocos,那为啥不贡献的力量呢,如果不是啥保密项目的话。
接下来,创建一个自己项目HelloWorld。
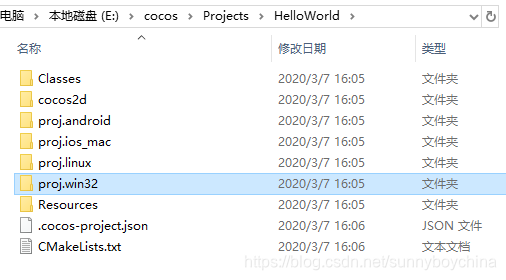
cocos new HelloWorld -l cpp -d E:\cocos\Projects
cocos new后面的HelloWorld是项目名,-l 指定语言(cpp,lua,js),-d是项目存放的路径。还可以用-p指定工程的包名。详细可以看cocos new --help。

执行完了后,可以看到HelloWorld文件夹内容是这样:
之后就是启动这个HelloWorld看效果了。不过,当你进到proj.win32里面,是没有VS的工程文件的。这里跟很多博客和书介绍的用VisualStudio启动,是不一样的。4.0是需要你先手动编译一下的,我按照官方的顺序来,进入到HelloWorld文件夹,建立一个build文件夹(至于为啥要建这个文件夹,我还不清楚)。下面是官方给的编译命令:
$ cd NEW_PROJECTS_DIR/HelloWorld
$ mkdir build
$ cd build
$ cocos run --proj-dir .. -p [mac|windows|android|linux|ios]
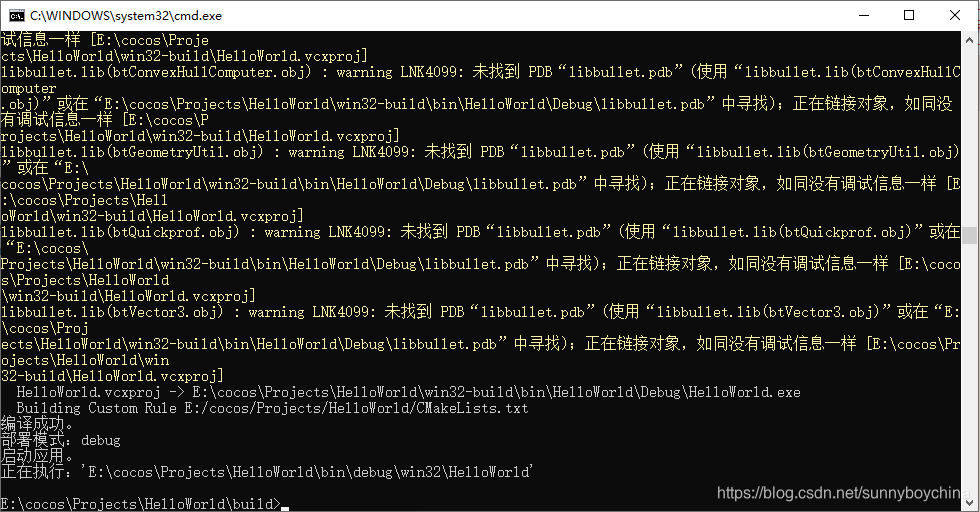
这里面要注意一个小坑:cocos run的最有一个参数-p后面,不要写windows,要写win32。下面是我执行的命令后的效果:

—小插曲—
我做的过程中,出现了下面的错误,找不到cl的位置。我最终是解决了,但是尝试的比较凌乱。我先是吧VS中的cl.exe的路径加到了环境变量,结果说是什么不兼容,然后我又把cl.exe路径的环境变量删除了,尝试用错误信息中提到的Visual Studio Command Prompt (vcvarsall.bat)来运行,结果还是一样的,貌似环境变量中还存在cl.exe的路径。结果我重启电脑,还是提示不兼容的错误,我猜测应该是编译中把信息留在文件中。之后我就把HelloWorld文件夹中的win32-build文件夹删除了。再运行,OK了。至于为什么OK了, 我也不清楚,非常抱歉。(win32-build文件夹呢,就是最终我们生成HelloWorld工程的文件夹)
-- The C compiler identification is unknown
CMake Error at CMakeLists.txt:3 (PROJECT):
  The CMAKE_C_COMPILER:

    cl

  is not a full path and was not found in the PATH.

  To use the NMake generator with Visual C++, cmake must be run from a shell
  that can use the compiler cl from the command line.  This environment is
  unable to invoke the cl compiler.  To fix this problem, run cmake from the
  Visual Studio Command Prompt (vcvarsall.bat).

  Tell CMake where to find the compiler by setting either the environment
  variable "CC" or the CMake cache entry CMAKE_C_COMPILER to the full path to
  the compiler, or to the compiler name if it is in the PATH.
—小插曲结束—
第一次编译会花点时间,大概5-10分钟。以后在运行就会很快了。
最后编译成功的显示,有我们熟悉的HelloWorld界面:
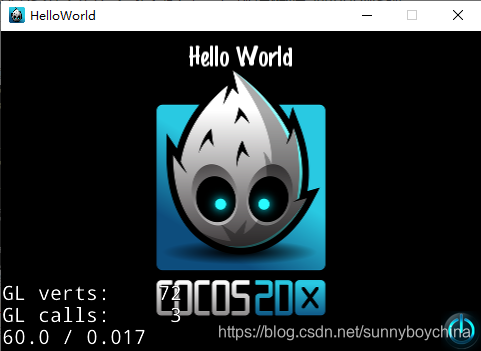
点右下角的图标,或者右上角的叉,都可以关掉HelloWorld
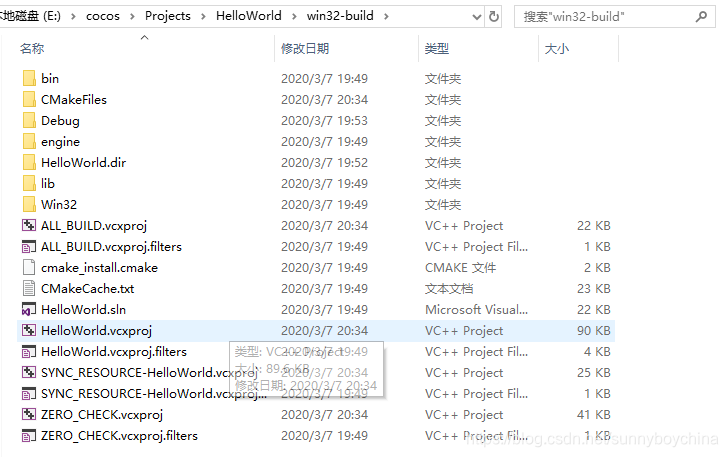
到这里我们的项目工程就做好了,工程生成在WorldWorld中win32-build中。
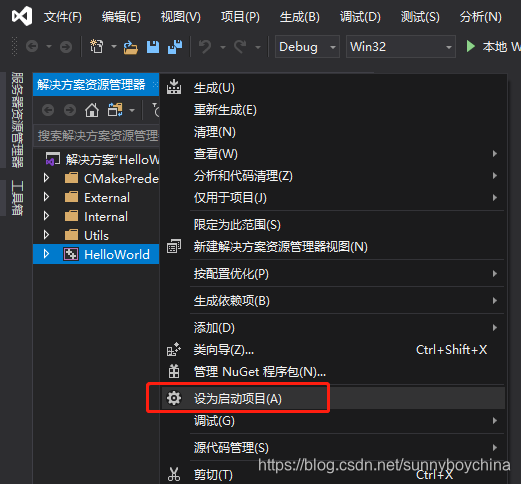
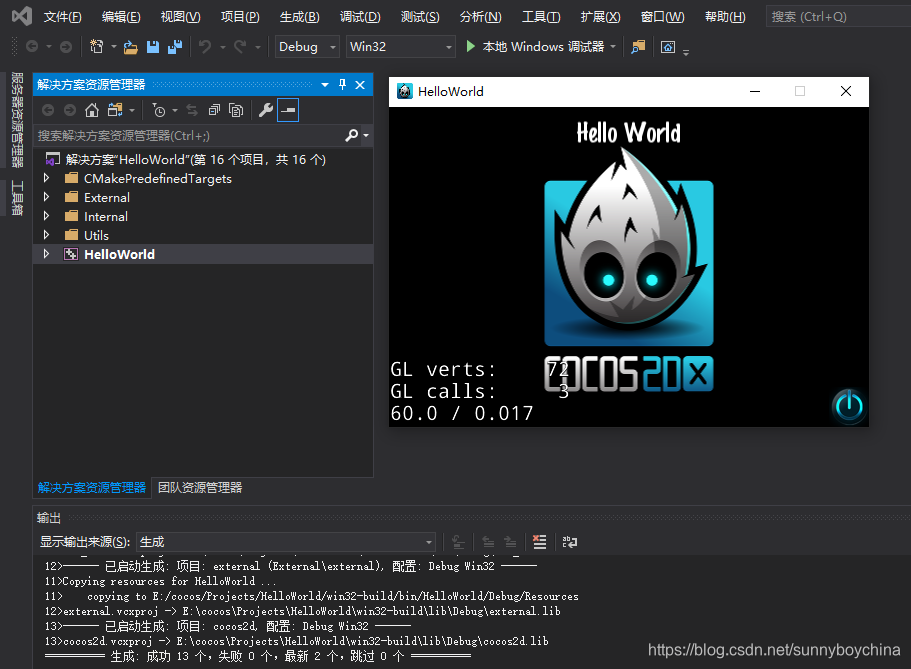
双击执行HelloWorld.sln,在VS中启动工程。然后在HelloWorld上右键->设为启动项目,如下图。Ctrl+F5运行程序。
开发环境搭建完成。
