使用 Nginx 在 Ubuntu 16.04 上托管 ASP.NET Core
准备工作
服务器主机:腾讯云主机 Ubuntu 16.04 64位
客户端软件:putty.exe; WinSCP 5.13.2
在 Ubuntu 中安装 ASP.NET Core
微软在 .NET Core指南 提供了在不同操作系统中安装运行 ASP.NET Core 的帮助文档,请选择 linux-prerequisites 部分,并找到和自己服务器所安装操作系统相同的内容进行安装即可。
注册Microsoft密钥为被信任的
在Linux环境中运行ASP.NET Core网站,我们需要安装.NET Core运行时(当然也可以自己实现.NET Core程序的宿主)。
在安装 .NET 之前,需要注册Microsoft密钥,注册产品存储库,并安装所需的依赖项。这只需要在每台机器上完成一次。
打开命令提示符并运行以下命令:
wget -q packages-microsoft-prod.deb https://packages.microsoft.com/config/ubuntu/16.04/packages-microsoft-prod.deb
sudo dpkg -i packages-microsoft-prod.deb
.NET Core Runtime 和 .NET Core SDK 的区别:
- .NET Core = 应用运行依赖的 .NET Core Runtime
- .NET Core SDK = 使用 .NET Core 开发应用 .NET Core Runtime 和 SDK+CLI(Software Development Kit/Command Line Interface) 工具
安装 .NET Core SDK
更新可用于安装的产品,然后安装 .NET SDK。
在命令提示符中,运行以下命令:
sudo apt-get install apt-transport-https
sudo apt-get update
sudo apt-get install dotnet-sdk-2.1.105
.NET Core SDK 可能会发布新的版本,将
dotnet-sdk-2.1.105更新为对应的版本号即可。
检查安装情况
在终端输入以下命令检查安装是否成功:
dotnet --versionASP.NET Core 示例程序
创建程序目录
在用户的主目录(/home/ubuntu/)中创建新目录 firstapp,然后进入该目录:
mkdir firstapp
cd firstapp
创建示例程序
直接使用 .NET Core 的命令创建一个 ASP.NET Core 示例网站应用程序,在目录 /home/ubuntu/firstapp 执行命令:
dotnet new mvc命令运行结果:
The template "ASP.NET Core Web App (Model-View-Controller)" was created successfully.
This template contains technologies from parties other than Microsoft, see https://aka.ms/template-3pn for details.

Processing post-creation actions...
Running 'dotnet restore' on /home/ubuntu/firstapp/firstapp.csproj...
  Restoring packages for /home/ubuntu/firstapp/firstapp.csproj...
  Generating MSBuild file /home/ubuntu/firstapp/obj/firstapp.csproj.nuget.g.props.
  Generating MSBuild file /home/ubuntu/firstapp/obj/firstapp.csproj.nuget.g.targets.
  Restore completed in 857.05 ms for /home/ubuntu/firstapp/firstapp.csproj.
  Restore completed in 24.33 ms for /home/ubuntu/firstapp/firstapp.csproj.

Restore succeeded.
还原整个项目的依赖库
执行命令:
dotnet restore命令运行结果:
Restore completed in 59.28 ms for /home/ubuntu/firstapp/firstapp.csproj.
Restore completed in 10.83 ms for /home/ubuntu/firstapp/firstapp.csproj.
更改 MVC 项目默认端口号
为防止冲突,先将 ASP.NET Core MVC 程序的默认端口号改为9000。更改端口号的办法:打开项目的 program.cs 文件,添加以下有注释的两行:
    public class Program
    {
        public static void Main(string[] args)
        {
            BuildWebHost(args).Run();
        }

        public static IWebHost BuildWebHost(string[] args) =>
            WebHost.CreateDefaultBuilder(args)
                .UseStartup<Startup>()
                .UseUrls("http://*:9000")   //指定端口号
                .UseKestrel()  //使用 Kestrel 服务器
                .Build();
    }
发布项目
执行命令:
dotnet publish -c release命令运行结果:
Microsoft (R) Build Engine version 15.7.177.53362 for .NET Core
Copyright (C) Microsoft Corporation. All rights reserved.

  Restore completed in 62.23 ms for /home/ubuntu/firstapp/firstapp.csproj.
  Restore completed in 11.54 ms for /home/ubuntu/firstapp/firstapp.csproj.
  firstapp -> /home/ubuntu/firstapp/bin/release/netcoreapp2.0/firstapp.dll
  firstapp -> /home/ubuntu/firstapp/bin/release/netcoreapp2.0/publish/
命令执行完毕后,项目被发布到 /home/ubuntu/firstapp/bin/release/netcoreapp2.0/publish/ 目录下,这个路径太长,访问的时候比较不方便,所以可以创建一个项目运行的目录:/var/www/firstapp/,并将刚才项目发布后的内容复制到该目录中。
创建项目运行目录,执行命令:
sudo mkdir /var/www/firstapp将发布后的结果复制到运行目录中,执行命令:
sudo scp -r /home/ubuntu/firstapp/bin/release/netcoreapp2.0/publish/* /var/www/firstapp进入运行目录,运行、测试项目:
 cd /var/www/firstapp
 dotnet firstapp.dll
程序运行结果:
Hosting environment: Production
Content root path: /var/www/firstapp
Now listening on: http://[::]:9000
Application started. Press Ctrl+C to shut down.
根据以上提示,通过地址 http://localhost:9000/ 或 http://127.0.0.1:9000 就可以访问到网站。但是,这个只能在服务器网站内部访问,通过外网并不能访问的。
使用 Nginx 反向代理
反向代理是为动态 web 应用程序提供服务的常见设置。 反向代理终止 HTTP 请求,并将其转发到 ASP.NET 核心应用程序。
安装 Nginx
安装命令:
sudo apt-get install nginx因为是首次安装 Nginx,通过运行以下命令显式启动:
sudo service nginx start在浏览器地址栏中输入类似于 http://192.168.XXX.XXX:9000 的IP地址或 http://域名:9000 就可以显示 Nginx 的默认登陆页了。
配置 Nginx
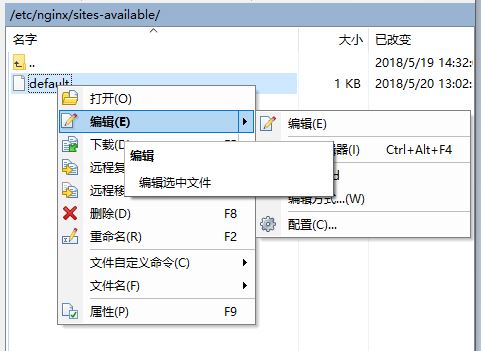
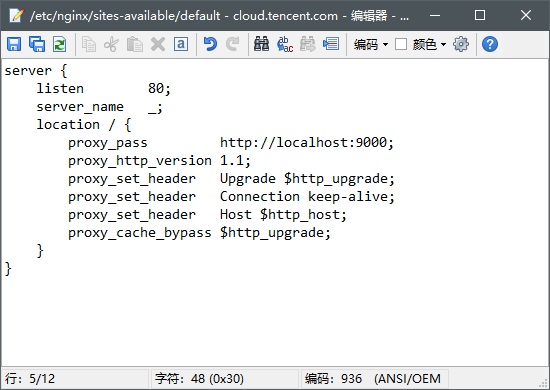
若要将 Nginx 配置为转发请求向 ASP.NET Core 应用程序的反向代理,修改 /etc/nginx/sites-available/default。 在文本编辑器中打开它,并将内容替换为以下内容:
server {
    listen        80;
    server_name   example.com *.example.com;
    location / {
        proxy_pass         http://localhost:5000;
        proxy_http_version 1.1;
        proxy_set_header   Upgrade $http_upgrade;
        proxy_set_header   Connection keep-alive;
        proxy_set_header   Host $http_host;
        proxy_cache_bypass $http_upgrade;
    }
}
Nginx 接受主机标头使用的端口 80 上的公共流量, Nginx 将匹配的请求转发到在 Kestrel http://localhost:9000。
测试配置:
sudo nginx -t显示结果如下所示:
nginx: the configuration file /etc/nginx/nginx.conf syntax is ok
nginx: configuration file /etc/nginx/nginx.conf test is successful
重新加载配置:
sudo nginx -s reload在浏览器中直接输入你的服务器IP地址并访问,就可以看到 ASP.NET Core MVC 应用程序运行的结果了。

监视应用程序
服务器已设置为转发到发出的请求 http://<serveraddress>:80 Kestrel 在上运行 ASP.NET Core 应用到 http://127.0.0.1:9000。 但是,Nginx 未设置来管理 Kestrel 过程。 systemd可以用于创建服务文件以启动和监视基础的 web 应用。 systemd 是一个 init 系统,可以提供用于启动、停止和管理进程的许多强大的功能。
创建服务文件
创建服务定义文件:
sudo nano /etc/systemd/system/kestrel-firstapp.service下面是应用程序的示例服务文件:
[Unit]
Description=firstapp .NET MVC App running on Ubuntu

[Service]
WorkingDirectory=/var/www/firstapp
ExecStart=/usr/bin/dotnet /var/www/firstapp.dll
Restart=always
RestartSec=10  # Restart service after 10 seconds if dotnet service crashes
SyslogIdentifier=dotnet-example
User=www-data
Environment=ASPNETCORE_ENVIRONMENT=Production
Environment=DOTNET_PRINT_TELEMETRY_MESSAGE=false

[Install]
WantedBy=multi-user.target
保存该文件并启用该服务。
systemctl enable kestrel-firstapp.service启动服务并验证它正在运行。
systemctl start kestrel-firstapp.service
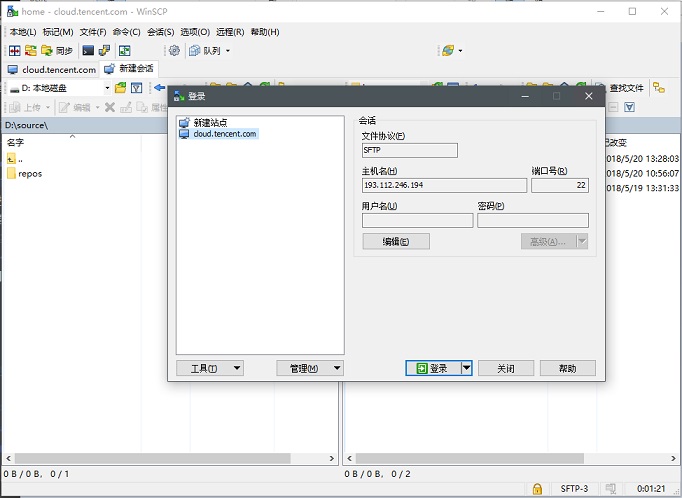
systemctl status kestrel-firstapp.service使用 WinSCP 管理服务器
腾讯云主机提供了 Web 界的命令窗口,不过这个窗口不支持粘贴,所以在编辑需要输入很多内容的配置文件时,比较不方便。虽然使用 putty.exe 可以进行复制粘贴,但使用 Linux 的 vi/vim 进行文本编辑估计也是很多不熟悉终端操作方式的人的恶梦。
WinSCP 是一个 Windows 环境下使用 SSH 的开源图形化 SFTP 客户端。同时支持 SCP 协议,它的主要功能就是在本地与远程计算机间安全的复制文件,同时也可以在 WinSCP 上直接对 Ubuntu 中的文件进行编辑。
WinSCP 中的管理员限
在编辑 Ubuntu 中某些服务的配置文件、或是上传文件到非用户目录时,需要使用 root 权限,比较简单的做法是开启 root 账号,在需要使用管理员权限的地方使用 root 登录进行操作
启用 root 账号
执行命令:
sudo passwd root按提示输入 root 账号的密码,如果不怕安全问题,可以使用和 ubuntu 账号一样的密码,方便使用。
Password: //输入密码
Enter new UNIX password: //提示输入新的root帐户密码
Retype new UNIX password:  //再输入一次确认密码
修改成功之后你就可以使用root账号了.
WinSCP 使用 root 连接服务器
在 WinSCP 中编辑配置文件
配置文件的编辑窗口
管理服务器中的文件
使用 root 账号登录,左边窗口定位到要上传文件(如在 Visual Studio 中编辑并发布的项目),右边窗口选到服务器中上传的目录,把文件从左边拖到右边就可以 。