前言
本文将讲解app的升级与更新。一般而言用户使用App的时候升级提醒有两种方式获得:
- 一种是通过应用市场 获取
- 一种是打开应用之后提醒用户更新升级
而更新操作一般是在用户点击了升级按钮之后开始执行的,这里的升级操作也分为两种形式:
- 一般升级
- 强制升级
app升级操作:
- 应用市场的app升级
在App Store中升级需要为App Store上传新版App,我们在新版本完成之后都会上传到App Store中,在审核完成之后就相当于完成了这个应用市场的发布了,也就是发布上线了。这时候如果用户安装了这个应用市场,那么就能看到我们的App有新版本的升级提醒了。
- 应用内升级
除了可以在应用市场升级,我们还可以在应用内升级,在应用内升级主要是通过调用服务器端接口获取应用的升级信息,然后通过获取的服务器升级应用信息与本地的App版本比对,若服务器下发的最新的App版本高于本地的版本号,则说明有新版本发布,那么我们就可以执行更新操作了,否则忽略掉即可。
显然应用市场提醒的升级不是我们的重点,本篇主要是对于app升级的场景来进行不同角度的实现,便于以后开发过程中直接拿去用就ok了。
服务器端:
- 服务端提供一个接口,或者网址,这里提供一个网址如下:
http://192.168.191.1:8081/update一般作为一个安卓程序员要测试还得写一个服务端(醉了),这里我就使用nodejs来搞一个本地的服务器来测试下app的版本更新检验。
- 根据请求的结果,我这里就写一个简单的json
{"data":{
  "appname": "hoolay.apk",
  "serverVersion": "1.0.2",
  "serverFlag": "1",
  "lastForce" : "1",
  "updateurl": "http://releases.b0.upaiyun.com/hoolay.apk",
  "upgradeinfo": "V1.0.2版本更新,你想不想要试一下哈!!!"
},
  "error_code":"200","error_msg" :"蛋疼的认识"}
然后我电脑上是装了webstrom的,没有装也没有关系但是必须有nodejs,现在都自带了express,表示并没有学过,所以简单的写个express_demo.js:
var express = require('express');
var app = express();
var fs = require("fs");
//此处设置为get请求,app里面直接写 (本机ip:8081/update)
app.get('/update', function (req, res) {//http://127.0.0.1:8081/update
    fs.readFile( __dirname + "/" + "version.json", 'utf8', function (err, data) {//读取相同目录下的version.json文件
        console.log( data );//打印json数据
        res.end( data );//把json数据response回去
    });
})
var server = app.listen(8081, function () {//端口我这里写的是8081
    var host = server.address().address
    var port = server.address().port
    console.log("应用实例,访问地址为 http://%s:%s", host, port)

})
有webstrom的直接选中文件run就ok了,没有直接 node express_demo.js,可以直接浏览器打开:http://127.0.0.1:8081/update
- 效果如下:

上图为打开浏览器后的显示结果。

上图为webstrom的终端显示结果。
客户端需要实现:
我们知道不同的需求有不同的操作方法和界面显示:
从是否为app内部下载还是通知栏更新:
- app内下载更新
这时我们必须等下载安装完全后才能进行操作,效果是这样的:
- 通知栏下载更新
这种情况是不在应用内更新,放在通知栏并不会影响当前app的使用,效果是这样的:
app更新分3种:强制更新,推荐更新,无需更新
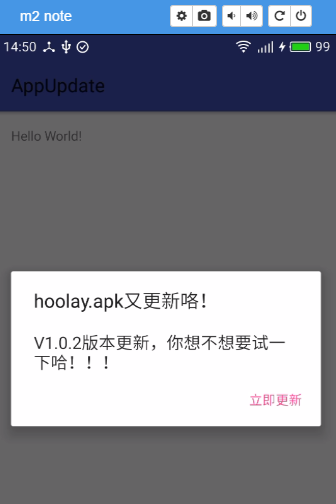
强制更新
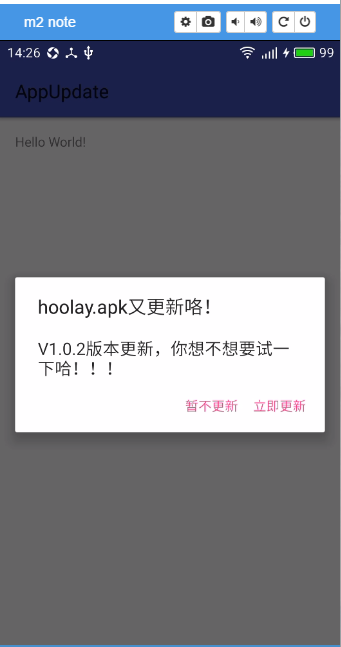
推荐更新
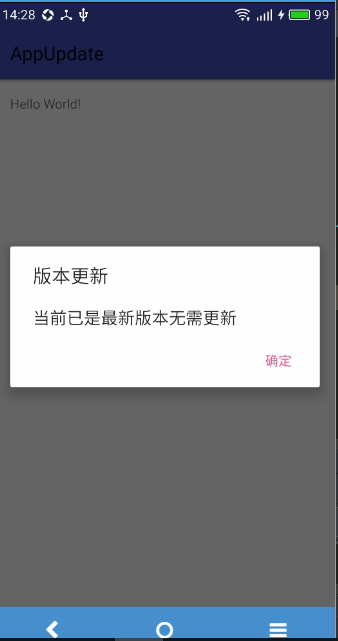
无需更新
具体思路:
- 实现bean用于对接后端接口实现app的更新(不写网络请求模拟本地数据也需要这个模型)
- 使用retrofit来请求版本更新接口
- 下载apk我们分别使用DownloadManager和普通的httpurlconnection
- 通过BroadcastReceiver来监听是否下载完成
准备bean
首先我们要去解析服务端给的json,那么我们就要来创建一个bean类了,这里是严格根据json文件的格式来的:
package com.losileeya.appupdate.bean;
/**
 * User: Losileeya ([email protected])
 * Date: 2016-09-27
 * Time: 11:20
 * 类描述:版本更新的实体与你服务器的字段相匹配
 * @version :
 */
public class UpdateAppInfo  {
    public UpdateInfo data; // 信息
    public Integer error_code; // 错误代码
    public String error_msg; // 错误信息
    public static class UpdateInfo{
        // app名字
        public String appname;
        //服务器版本
        public String serverVersion;
        //服务器标志
        public String serverFlag;
        //强制升级
        public String lastForce;
        //app最新版本地址
        public String updateurl;
        //升级信息
        public String upgradeinfo;
        get...
        set...
    }
        get...
        set...
}
网络接口的实现
这里使用retrofit和rxjava来练笔
先加入 依赖
  compile 'io.reactivex:rxandroid:1.1.0' // RxAndroid
  compile 'io.reactivex:rxjava:1.1.0' // 推荐同时加载RxJava

  compile 'com.squareup.retrofit:retrofit:2.0.0-beta2' // Retrofit网络处理
  compile 'com.squareup.retrofit:adapter-rxjava:2.0.0-beta2' // Retrofit的rx解析库
  compile 'com.squareup.retrofit:converter-gson:2.0.0-beta2' // Retrofit的gson库
接下来网络接口的定制:
public interface ApiService {
    //实际开发过程可能的接口方式
     @GET("update")
    Observable<UpdateAppInfo> getUpdateInfo(@Query("appname") String   appname, @Query("serverVersion") String appVersion);
    //以下方便版本更新接口测试
    @GET("update")
    Observable<UpdateAppInfo> getUpdateInfo();
}
通过工厂模式来创建ApiService :
public class ServiceFactory {
    private static final String BASEURL="http://192.168.191.1:8081/";
    public static <T> T createServiceFrom(final Class<T> serviceClass) {
        Retrofit adapter = new Retrofit.Builder()
                .baseUrl(BASEURL)
             .addCallAdapterFactory(RxJavaCallAdapterFactory.create()) // 添加Rx适配器
                .addConverterFactory(GsonConverterFactory.create()) // 添加Gson转换器
                .build();
        return adapter.create(serviceClass);
    }
}
版本检测接口的使用:
 /**
     * 检查更新
     */
    @SuppressWarnings("unused")
    public static void checkUpdate(String appCode, String curVersion,final CheckCallBack updateCallback) {
     ApiService apiService=   ServiceFactory.createServiceFrom(ApiService.class);
        apiService.getUpdateInfo()//测试使用
                //   .apiService.getUpdateInfo(appCode, curVersion)//开发过程中可能使用的
                .subscribeOn(Schedulers.newThread())
                .observeOn(AndroidSchedulers.mainThread())
                .subscribe(new Subscriber<UpdateAppInfo>() {
                    @Override
                    public void onCompleted() {
                    }
                    @Override
                    public void onError(Throwable e) {
                    }
                    @Override
                    public void onNext(UpdateAppInfo updateAppInfo) {
                        if (updateAppInfo.error_code == 0 || updateAppInfo.data == null ||
                                updateAppInfo.data.updateurl == null) {
                            updateCallback.onError(); // 失败
                        } else {
                            updateCallback.onSuccess(updateAppInfo);
                        }
                    }
                });
}以上就是版本更新接口的调用,具体的rxjava+retrofit请自行学习你真的会用Retrofit2吗?Retrofit2完全教程
附上结果回调监听:
  public interface CheckCallBack{//检测成功或者失败的相关接口
        void onSuccess(UpdateAppInfo updateInfo);
        void onError();
    }
具体使用接口的处理:
 //网络检查版本是否需要更新
        CheckUpdateUtils.checkUpdate("apk", "1.0.0", new CheckUpdateUtils.CheckCallBack() {
            @Override
            public void onSuccess(UpdateAppInfo updateInfo) {
               String isForce=updateInfo.data.getLastForce();//是否需要强制更新
               String downUrl= updateInfo.data.getUpdateurl();//apk下载地址
               String updateinfo = updateInfo.data.getUpgradeinfo();//apk更新详情
               String appName = updateInfo.data.getAppname();
                if(isForce.equals("1")&& !TextUtils.isEmpty(updateinfo)){//强制更新
                    forceUpdate(MainActivity.this,appName,downUrl,updateinfo);
                }else{//非强制更新
                    //正常升级
    normalUpdate(MainActivity.this,appName,downUrl,updateinfo);
                }
            }
            @Override
            public void onError() {
                noneUpdate(MainActivity.this);
            }
        });
实在不想写网络也好,直接使用假想数据做相关操作如下:
  UpdateAppInfo.UpdateInfo  info =new UpdateAppInfo.UpdateInfo();
             info.setLastForce("1");
        info.setAppname("我日你");
        info.setUpgradeinfo("whejjefjhrherkjreghgrjrgjjhrh");
       info.setUpdateurl("http://releases.b0.upaiyun.com/hoolay.apk");
        if(info.getLastForce().equals("1")){//强制更新      forceUpdate(MainActivity.this,info.getAppname(),info.getUpdateurl(),info.getUpgradeinfo());
                }else{//非强制更新
                    //正常升级   normalUpdate(MainActivity.this,info.getAppname(),info.getUpdateurl(),info.getUpgradeinfo());
                }
更新dialog的使用注意:
 private void forceUpdate(final Context context, final String appName, final String downUrl, final String updateinfo) {
        mDialog = new AlertDialog.Builder(context);
        mDialog.setTitle(appName+"又更新咯!");
        mDialog.setMessage(updateinfo);
        mDialog.setPositiveButton("立即更新", new DialogInterface.OnClickListener() {
            @Override
            public void onClick(DialogInterface dialog, int which) {
                if (!canDownloadState()) {
                    showDownloadSetting();
                    return;
                }
                //      DownLoadApk.download(MainActivity.this,downUrl,updateinfo,appName);
     AppInnerDownLoder.downLoadApk(MainActivity.this,downUrl,appName);
            }
        }).setCancelable(false).create().show();
    }
上面以强制更新举个例子,因为AlertDialog在不同的版本下面表现的美观度不一致,所以我们需要
import android.support.v7.app.AlertDialog;
然后显然是不能按返回键取消的,我们需要
.setCancelable(false)
使用谷歌推荐的DownloadManager实现下载
Android自带的DownloadManager模块来下载,在api level 9之后,我们通过通知栏知道, 该模块属于系统自带, 它已经帮我们处理了下载失败、重新下载等功能。整个下载 过程全部交给系统负责,不需要我们过多的处理。
DownLoadManager.Query:主要用于查询下载信息。
DownLoadManager.Request:主要用于发起一个下载请求。
先看下简单的实现:
创建Request对象的代码如下:
DownloadManager.Request request = new DownloadManager.Request(Uri.parse(apkurl));
   //设置在什么网络情况下进行下载
   request.setAllowedNetworkTypes(Request.NETWORK_WIFI);
   //设置通知栏标题
   request.setNotificationVisibility(Request.VISIBILITY_VISIBLE);
   request.setTitle("下载");
   request.setDescription("apk正在下载");
   request.setAllowedOverRoaming(false);
   //设置文件存放目录
   request.setDestinationInExternalFilesDir(this, Environment.DIRECTORY_DOWNLOADS, "mydown");
取得系统服务后,调用downloadmanager对象的enqueue方法进行下载,此方法返回一个编号用于标示此下载任务:
downManager = (DownloadManager)getSystemService(Context.DOWNLOAD_SERVICE);
id= downManager.enqueue(request);
这里我们可以看下request的一些属性:
addRequestHeader(String header,String value):添加网络下载请求的http头信息
allowScanningByMediaScanner():用于设置是否允许本MediaScanner扫描。
setAllowedNetworkTypes(int flags):设置用于下载时的网络类型,默认任何网络都可以下载,提供的网络常量有:NETWORK_BLUETOOTH、NETWORK_MOBILE、NETWORK_WIFI。
setAllowedOverRoaming(Boolean allowed):用于设置漫游状态下是否可以下载
setNotificationVisibility(int visibility):用于设置下载时时候在状态栏显示通知信息
setTitle(CharSequence):设置Notification的title信息
setDescription(CharSequence):设置Notification的message信息
setDestinationInExternalFilesDir、setDestinationInExternalPublicDir、 setDestinationUri等方法用于设置下载文件的存放路径,注意如果将下载文件存放在默认路径,那么在空间不足的情况下系统会将文件删除,所 以使用上述方法设置文件存放目录是十分必要的。
具体实现思路:
我们通过downloaderManager来下载apk,并且本地保存downManager.enqueue(request)返回的id值,并且通过这个id获取apk的下载文件路径和下载的状态,并且通过状态来更新通知栏的显示。
第一次下载成功,弹出安装界面
如果用户没有点击安装,而是按了返回键,在某个时候,又再次使用了我们的APP
如果下载成功,则判断本地的apk的包名是否和当前程序是相同的,并且本地apk的版本号大于当前程序的版本,如果都满足则直接启动安装程序。
具体代码实现:
文件下载管理的实现,包括创建request和加入队列下载,通过返回的id来获取下载路径和下载状态。
public class FileDownloadManager {
    private DownloadManager downloadManager;
    private Context context;
    private static FileDownloadManager instance;

    private FileDownloadManager(Context context) {
        downloadManager = (DownloadManager) context.getSystemService(Context.DOWNLOAD_SERVICE);
        this.context = context.getApplicationContext();
    }

    public static FileDownloadManager getInstance(Context context) {
        if (instance == null) {
            instance = new FileDownloadManager(context);
        }
        return instance;
    }
    /**
     * @param uri
     * @param title
     * @param description
     * @return download id
     */
    public long startDownload(String uri, String title, String description,String appName) {
        DownloadManager.Request req = new DownloadManager.Request(Uri.parse(uri));
        req.setAllowedNetworkTypes(DownloadManager.Request.NETWORK_WIFI);
        //req.setAllowedOverRoaming(false);
 req.setNotificationVisibility(DownloadManager.Request.VISIBILITY_VISIBLE_NOTIFY_COMPLETED);
        //设置文件的保存的位置[三种方式]
        //第一种
        //file:///storage/emulated/0/Android/data/your-package/files/Download/update.apk
        req.setDestinationInExternalFilesDir(context, Environment.DIRECTORY_DOWNLOADS, appName+".apk");
        //第二种
        //file:///storage/emulated/0/Download/update.apk
        //req.setDestinationInExternalPublicDir(Environment.DIRECTORY_DOWNLOADS, "update.apk");
        //第三种 自定义文件路径
        //req.setDestinationUri()


        // 设置一些基本显示信息
        req.setTitle(title);
        req.setDescription(description);
        //req.setMimeType("application/vnd.android.package-archive");
        return downloadManager.enqueue(req);//异步
        //dm.openDownloadedFile()
    }
    /**
     * 获取文件保存的路径
     *
     * @param downloadId an ID for the download, unique across the system.
     *                   This ID is used to make future calls related to this download.
     * @return file path
     * @see FileDownloadManager#getDownloadUri(long)
     */
    public String getDownloadPath(long downloadId) {
        DownloadManager.Query query = new DownloadManager.Query().setFilterById(downloadId);
        Cursor c = downloadManager.query(query);
        if (c != null) {
            try {
                if (c.moveToFirst()) {
                    return c.getString(c.getColumnIndexOrThrow(DownloadManager.COLUMN_LOCAL_URI));
                }
            } finally {
                c.close();
            }
        }
        return null;
    }

    /**
     * 获取保存文件的地址
     *
     * @param downloadId an ID for the download, unique across the system.
     *                   This ID is used to make future calls related to this download.
     * @see FileDownloadManager#getDownloadPath(long)
     */
    public Uri getDownloadUri(long downloadId) {
        return downloadManager.getUriForDownloadedFile(downloadId);
    }

    public DownloadManager getDownloadManager() {
        return downloadManager;
    }

    /**
     * 获取下载状态
     *
     * @param downloadId an ID for the download, unique across the system.
     *                   This ID is used to make future calls related to this download.
     * @return int
     * @see DownloadManager#STATUS_PENDING
     * @see DownloadManager#STATUS_PAUSED
     * @see DownloadManager#STATUS_RUNNING
     * @see DownloadManager#STATUS_SUCCESSFUL
     * @see DownloadManager#STATUS_FAILED
     */
    public int getDownloadStatus(long downloadId) {
        DownloadManager.Query query = new DownloadManager.Query().setFilterById(downloadId);
        Cursor c = downloadManager.query(query);
        if (c != null) {
            try {
                if (c.moveToFirst()) {
                    return c.getInt(c.getColumnIndexOrThrow(DownloadManager.COLUMN_STATUS));
                }
            } finally {
                c.close();
            }
        }
        return -1;
    }
}
app的检测安装的实现:
public class DownLoadApk {
    public static final String TAG = DownLoadApk.class.getSimpleName();

    public static void download(Context context, String url, String title,final String appName) {
        // 获取存储ID
        SharedPreferences sp = PreferenceManager.getDefaultSharedPreferences(context);
        long downloadId =sp.getLong(DownloadManager.EXTRA_DOWNLOAD_ID,-1L);
        if (downloadId != -1L) {
            FileDownloadManager fdm = FileDownloadManager.getInstance(context);
            int status = fdm.getDownloadStatus(downloadId);
            if (status == DownloadManager.STATUS_SUCCESSFUL) {
                //启动更新界面
                Uri uri = fdm.getDownloadUri(downloadId);
                if (uri != null) {
                    if (compare(getApkInfo(context, uri.getPath()), context)) {
                        startInstall(context, uri);
                        return;
                    } else {
                        fdm.getDownloadManager().remove(downloadId);
                    }
                }
                start(context, url, title,appName);
            } else if (status == DownloadManager.STATUS_FAILED) {
                start(context, url, title,appName);
            } else {
                Log.d(TAG, "apk is already downloading");
            }
        } else {
            start(context, url, title,appName);
        }
    }

    private static void start(Context context, String url, String title,String appName) {
        long id = FileDownloadManager.getInstance(context).startDownload(url,
                title, "下载完成后点击打开",appName);
        SharedPreferences sp = PreferenceManager.getDefaultSharedPreferences(context);
        sp.edit().putLong(DownloadManager.EXTRA_DOWNLOAD_ID,id).commit();
        Log.d(TAG, "apk start download " + id);
    }

    public static void startInstall(Context context, Uri uri) {
        Intent install = new Intent(Intent.ACTION_VIEW);
        install.setDataAndType(uri, "application/vnd.android.package-archive");
        install.addFlags(Intent.FLAG_ACTIVITY_NEW_TASK);
        context.startActivity(install);
    }


    /**
     * 获取apk程序信息[packageName,versionName...]
     *
     * @param context Context
     * @param path    apk path
     */
    private static PackageInfo getApkInfo(Context context, String path) {
        PackageManager pm = context.getPackageManager();
        PackageInfo info = pm.getPackageArchiveInfo(path, PackageManager.GET_ACTIVITIES);
        if (info != null) {
            return info;
        }
        return null;
    }


    /**
     * 下载的apk和当前程序版本比较
     *
     * @param apkInfo apk file's packageInfo
     * @param context Context
     * @return 如果当前应用版本小于apk的版本则返回true
     */
    private static boolean compare(PackageInfo apkInfo, Context context) {
        if (apkInfo == null) {
            return false;
        }
        String localPackage = context.getPackageName();
        if (apkInfo.packageName.equals(localPackage)) {
            try {
                PackageInfo packageInfo = context.getPackageManager().getPackageInfo(localPackage, 0);
                if (apkInfo.versionCode > packageInfo.versionCode) {
                    return true;
                }
            } catch (PackageManager.NameNotFoundException e) {
                e.printStackTrace();
            }
        }
        return false;
    }
}
上面的代码可知:我们通过获取当前app的信息来比较是否需要下载和是否立即安装。第一次下载把downloadId保存到本地,用户下次进来的时候,取出保存的downloadId,然后通过downloadId来获取下载的状态信息。如果下载失败,则重新下载并且把downloadId存起来。如果下载成功,则判断本地的apk的包名是否和当前程序是相同的,并且本地apk的版本号大于当前程序的版本,如果都满足则直接启动安装程序。
监听app是否安装完成
public class ApkInstallReceiver extends BroadcastReceiver {
    @Override
    public void onReceive(Context context, Intent intent) {
        if(intent.getAction().equals(DownloadManager.ACTION_DOWNLOAD_COMPLETE)){
              long downloadApkId =intent.getLongExtra(DownloadManager.EXTRA_DOWNLOAD_ID, -1);
              installApk(context, downloadApkId);
        }
    }

    /**
     * 安装apk
     */
    private void installApk(Context context,long downloadApkId) {
        // 获取存储ID
        SharedPreferences sp = PreferenceManager.getDefaultSharedPreferences(context);
        long downId =sp.getLong(DownloadManager.EXTRA_DOWNLOAD_ID,-1L);
        if(downloadApkId == downId){
            DownloadManager downManager= (DownloadManager) context.getSystemService(Context.DOWNLOAD_SERVICE);
            Uri downloadFileUri = downManager.getUriForDownloadedFile(downloadApkId);
            if (downloadFileUri != null) {
            Intent install= new Intent(Intent.ACTION_VIEW);
            install.setDataAndType(downloadFileUri, "application/vnd.android.package-archive");
            install.addFlags(Intent.FLAG_ACTIVITY_NEW_TASK);
            context.startActivity(install);
            }else{
                Toast.makeText(context, "下载失败", Toast.LENGTH_SHORT).show();
            }
        }
    }
}
DownloadManager下载完成后会发出一个广播 android.intent.action.DOWNLOAD_COMPLETE 新建一个广播接收者即可:
清单配置:
先添加网络下载的权限:
 <uses-permission android:name="android.permission.INTERNET"/>
    <uses-permission android:name="android.permission.WRITE_EXTERNAL_STORAGE"/>
再添加静态广播:
 <receiver android:name=".ApkInstallReceiver">
            <intent-filter>
                <action android:name="android.intent.action.DOWNLOAD_COMPLETE" />
            </intent-filter>
        </receiver>
使用HttpUrlConnection下载
这种情况下载的话我们就不需要考虑id的问题,因为是直接在项目中下载,所以我们就是一个网络下载的过程,并且使用ProgressDialog显示下载信息及进度更新就ok了。
public class AppInnerDownLoder {
    public final static String SD_FOLDER = Environment.getExternalStorageDirectory()+ "/VersionChecker/";
    private static final String TAG = AppInnerDownLoder.class.getSimpleName();

    /**
     * 从服务器中下载APK
     */
    @SuppressWarnings("unused")
    public static void downLoadApk(final Context mContext,final String downURL,final String appName ) {

        final ProgressDialog pd; // 进度条对话框
        pd = new ProgressDialog(mContext);
        pd.setCancelable(false);// 必须一直下载完,不可取消
        pd.setProgressStyle(ProgressDialog.STYLE_HORIZONTAL);
        pd.setMessage("正在下载安装包,请稍后");
        pd.setTitle("版本升级");
        pd.show();
        new Thread() {
            @Override
            public void run() {
                try {
                    File file = downloadFile(downURL,appName, pd);
                    sleep(3000);
                    installApk(mContext, file);
                    // 结束掉进度条对话框
                    pd.dismiss();
                } catch (Exception e) {
                    pd.dismiss();

                }
            }
        }.start();
    }

    /**
     * 从服务器下载最新更新文件
     *
     * @param path
     *            下载路径
     * @param pd
     *            进度条
     * @return
     * @throws Exception
     */
    private static File downloadFile(String path,String appName ,ProgressDialog pd) throws Exception {
        // 如果相等的话表示当前的sdcard挂载在手机上并且是可用的
        if (Environment.MEDIA_MOUNTED.equals(Environment
                .getExternalStorageState())) {
            URL url = new URL(path);
            HttpURLConnection conn = (HttpURLConnection) url.openConnection();
            conn.setConnectTimeout(5000);
            // 获取到文件的大小
            pd.setMax(conn.getContentLength());
            InputStream is = conn.getInputStream();
            String fileName = SD_FOLDER
                     + appName+".apk";
            File file = new File(fileName);
            // 目录不存在创建目录
            if (!file.getParentFile().exists())
                file.getParentFile().mkdirs();
            FileOutputStream fos = new FileOutputStream(file);
            BufferedInputStream bis = new BufferedInputStream(is);
            byte[] buffer = new byte[1024];
            int len;
            int total = 0;
            while ((len = bis.read(buffer)) != -1) {
                fos.write(buffer, 0, len);
                total += len;
                // 获取当前下载量
                pd.setProgress(total);
            }
            fos.close();
            bis.close();
            is.close();
            return file;
        } else {
            throw new IOException("未发现有SD卡");
        }
    }

    /**
     * 安装apk
     */
    private static void installApk(Context mContext, File file) {
        Uri fileUri = Uri.fromFile(file);
        Intent it = new Intent();
        it.setAction(Intent.ACTION_VIEW);
        it.setDataAndType(fileUri, "application/vnd.android.package-archive");
        it.addFlags(Intent.FLAG_ACTIVITY_NEW_TASK);// 防止打不开应用
        mContext.startActivity(it);
    }

    /**
     * 获取应用程序版本(versionName)
     *
     * @return 当前应用的版本号
     */

    private static double getLocalVersion(Context context) {
        PackageManager manager = context.getPackageManager();
        PackageInfo info = null;
        try {
            info = manager.getPackageInfo(context.getPackageName(), 0);
        } catch (NameNotFoundException e) {
            Log.e(TAG, "获取应用程序版本失败,原因:" + e.getMessage());
            return 0.0;
        }

        return Double.valueOf(info.versionName);
    }
    /**
     * byte(字节)根据长度转成kb(千字节)和mb(兆字节)
     *
     * @param bytes
     * @return
     */
    public static String bytes2kb(long bytes) {
        BigDecimal filesize = new BigDecimal(bytes);
        BigDecimal megabyte = new BigDecimal(1024 * 1024);
        float returnValue = filesize.divide(megabyte, 2, BigDecimal.ROUND_UP)
                .floatValue();
        if (returnValue > 1)
            return (returnValue + "MB");
        BigDecimal kilobyte = new BigDecimal(1024);
        returnValue = filesize.divide(kilobyte, 2, BigDecimal.ROUND_UP)
                .floatValue();
        return (returnValue + "KB");
    }
}基本上具体的代码就写完了,但是说如果停止了下载管理程序 调用dm.enqueue(req);就会上面的错误,从而程序闪退.
所以在使用该组件的时候,需要判断该组件是否可用:
    private boolean canDownloadState() {
        try {
            int state = this.getPackageManager().getApplicationEnabledSetting("com.android.providers.downloads");
            if (state == PackageManager.COMPONENT_ENABLED_STATE_DISABLED
                    || state == PackageManager.COMPONENT_ENABLED_STATE_DISABLED_USER
                    || state == PackageManager.COMPONENT_ENABLED_STATE_DISABLED_UNTIL_USED) {
                return false;
            }

        } catch (Exception e) {
            e.printStackTrace();
            return false;
        }
        return true;
    }
可以通过如下代码进入 启用/禁用 下载管理 界面:
 String packageName = "com.android.providers.downloads";
    Intent intent = new Intent(android.provider.Settings.ACTION_APPLICATION_DETAILS_SETTINGS);
    intent.setData(Uri.parse("package:" + packageName));
    startActivity(intent);
总结
本文意在讲解app的更新逻辑以及不同的表现形式的处理附带的介绍了使用nodejs写一个简单的api接口,重点是如何使用DownloadManager来实现apk的下载更新安装,顺带讲一下retrofit+rxjava的使用以及如何监听app是否下载完成。
DownloadManager的使用概括:
构建下载请求:
new DownloadManager.Request(url)设置请求属性
request.setXXX()调用downloadmanager对象的enqueue方法进行下载,此方法返回一个编号用于标示此下载任务:
downManager = (DownloadManager)getSystemService(Context.DOWNLOAD_SERVICE);

id= downManager.enqueue(request);
DownManager会对所有的现在任务进行保存管理,那么我们如何获取这些信息呢?这个时候就要用到DownManager.Query对象,通过此对象,我们可以查询所有下载任务信息。
setFilterById(long… ids):根据任务编号查询下载任务信息
setFilterByStatus(int flags):根据下载状态查询下载任务
如果想取消下载,则可以调用remove方法完成,此方法可以将下载任务和已经下载的文件同时删除:
downManager.remove(id);
好了具体的都讲的差不多了,本文以同步到我的github
demo 传送门:AppUpdate.rar
后记
鉴于版本更新没有对6.0的权限和7.0的FileProvider做适配,导致6.0和7.0的安装失败或者7.0直接crash,本文将不再解释,自行处理这里提供一个已经适配的demo下载