前言
APP的版本升级主要分为两种方式:
1.应用市场升级
2.应用内升级
而应用内升级的方式是目前大多数APP采用的升级更新方式。
应用内升级的模式
按照不同的业务需求又可以分为两种:
1,强制性更新
如果APP有更新,那么则弹出更新提示对话框,并且该对话框上只有一个升级按钮,并且按返回键该对话框不会消失,用户想要继续使用APP,必须等完成升级覆盖安装之后。
2,选择性更新
如果APP有更新,那么则弹出更新提示对话框,并且该对话框上同时包含升级按钮和暂不升级按钮。
APP的更新方式
1,APP内下载更新
这时我们必须等下载安装完全后才能进行操作
2,通知栏下载更新
这种情况是不在应用内更新,放在通知栏并不会影响当前app的使用
APP的下载方式
Android中下载的方式很多种:HttpUrlConnection,Retrofit,okHttp,以及android原生的下载工具类DownLoadManager 等等。本篇我们采用的方式是Google推荐的下载工具类DownLoadManager。
APP升级更新流程
1,获取当前应用的版本号
2,获取服务器端的apk的版本号
3,对比两个版本号,如果服务器端版本号大于当前版本号,说明有新版本,则弹出更新对话框
4,点击立即更新按钮,开始更新安装
使用系统DownloadManager在通知栏更新下载
1.请求接口,获取服务器端的json格式的新版本信息
private void JudgeVersion() {
            String path = GlobalUrl.BASE_URL + GlobalUrl.VERSION_UPDATE;
            RequestParams params = new RequestParams(path);
            x.http().get(params, new Callback.CommonCallback<String>() {
                @Override
                public void onSuccess(String result) {
//  {"versionName":"asdfasfasddf","versionCode":123,"versionSize":"123M","versionDesc":"<p>123123123<\/p>","downloadUrl":"upload\/apk\/20170509\/17101494317003.apk"}
                   //将json字符串转换为Bean对象
                    versionBean = new Gson().fromJson(result, VersionBean.class);
                    // 获取当前应用的版本号
                    int versionCode = AppUtils.getVersionCode(mActivity);
                    // 比较版本号
                    if(versionBean.getVersionCode() > versionCode && versionBean.getVersionCode() != PrefUtils.getInt(mActivity,"ignoreVersion",0)){
                        // 说明有新版本存在,弹出版本升级提示对话框
                        showUpdateDialog();
                    }
                }

                @Override
                public void onError(Throwable ex, boolean isOnCallback) {
//                    Toast.makeText(mActivity, "版本检测失败,请稍后重试!", Toast.LENGTH_SHORT).show();
                }

                @Override
                public void onCancelled(CancelledException cex) {

                }

                @Override
                public void onFinished() {

                }
            });
    }
2,versionBean的代码如下:
public class VersionBean {

    private String versionName; // 版本名称
    private int versionCode;    // 版本号
    private String versionSize; //版本大小
    private String versionDesc; //版本描述
    private String downloadUrl; //下载地址

    // 各个属性对应的getter和setter方法

}
3,AppUtils工具类代码:
public class AppUtils {
    /**
     * 获取版本名称
     *
     * @return
     */
    public static String getVersionName(Context context) {
        PackageManager packageManager = context.getPackageManager();
        try {
            PackageInfo packageInfo = packageManager.getPackageInfo(
                    context.getPackageName(), 0);// 获取包的信息

            int versionCode = packageInfo.versionCode;
            String versionName = packageInfo.versionName;

            System.out.println("versionName=" + versionName + ";versionCode="
                    + versionCode);

            return versionName;
        } catch (PackageManager.NameNotFoundException e) {
            // 没有找到包名的时候会走此异常
            e.printStackTrace();
        }

        return "";
    }

    /**
     * 获取app的版本号
     *
     * @return
     */
    public static int getVersionCode(Context context) {
        PackageManager packageManager = context.getPackageManager();
        try {
            PackageInfo packageInfo = packageManager.getPackageInfo(
                    context.getPackageName(), 0);// 获取包的信息

            int versionCode = packageInfo.versionCode;
            return versionCode;
        } catch (PackageManager.NameNotFoundException e) {
            // 没有找到包名的时候会走此异常
            e.printStackTrace();
        }

        return -1;
    }
}
DisplayUtil 代码:

public class DisplayUtil {

    public static int dp2px(Context context, float dipValue){
        final float scale = context.getResources().getDisplayMetrics().density;
        return (int)(dipValue * scale + 0.5f);
    }
    public static int px2dp(Context context, float pxValue){
        final float scale = context.getResources().getDisplayMetrics().density;
        return (int)(pxValue / scale + 0.5f);
    }

    /**
     * 将px值转换为sp值,保证文字大小不变
     *
     * @param pxValue
     * @param fontScale
     *            (DisplayMetrics类中属性scaledDensity)
     * @return
     */
    public static int px2sp(Context context, float pxValue) {
        final float fontScale = context.getResources().getDisplayMetrics().scaledDensity;
        return (int) (pxValue / fontScale + 0.5f);
    }


    public static int sp2px(Context context, float pxValue) {
        final float fontScale = context.getResources().getDisplayMetrics().scaledDensity;
        return (int) (pxValue * fontScale + 0.5f);
    }
}
4,弹出更新对话框的方法如下:
// 弹出版本更新对话框
    private void showUpdateDialog() {
        AlertDialog.Builder builder = new AlertDialog.Builder(mActivity);
        View v = View.inflate(mActivity, R.layout.update_view, null);
        TextView tvNum1 = (TextView) v.findViewById(R.id.tvNum1);
        TextView tvNum2 = (TextView) v.findViewById(R.id.tvNum2);
        TextView tvNum3 = (TextView) v.findViewById(R.id.tvNum3);
        CheckBox ignore = (CheckBox) v.findViewById(R.id.ignore);
        // 为忽略此版本添加选中监听
        ignore.setOnCheckedChangeListener(new CompoundButton.OnCheckedChangeListener() {
            @Override
            public void onCheckedChanged(CompoundButton compoundButton, boolean b) {
                // 获取到当前的版本号,此处选择保存版本号而非版本名称是因为判断是否有新版本时使用的是版本号来进行比较,保存在SharedPreference里面
                if(b){
                    // 被选中
                    // 保存当前版本号
                    PrefUtils.setInt(mActivity,"ignoreVersion",versionBean.getVersionCode());
                }else{
                    // 取消选中
                    PrefUtils.setInt(mActivity,"ignoreVersion",0);
                }
            }
        });
        TextView tvDesc = (TextView) v.findViewById(R.id.tvDesc);
        tvNum1.setText("v"+AppUtils.getVersionName(mActivity));
        tvNum2.setText(versionBean.getVersionName());
        tvNum3.setText(versionBean.getVersionSize());
        tvDesc.setText(Html.fromHtml(versionBean.getVersionDesc()));  // 显示带html标签的更新描述
        TextView tvCancel = (TextView) v.findViewById(R.id.tvCancel);
        TextView tvOk = (TextView) v.findViewById(R.id.tvOk);
        tvCancel.setOnClickListener(new View.OnClickListener() {
            @Override
            public void onClick(View view) {
                dialog.dismiss();
            }
        });
        tvOk.setOnClickListener(new View.OnClickListener() {
            @Override
            public void onClick(View view) {
                dialog.dismiss();
                dialog = null;
                // 执行下载更新,建议将工具类的调用逻辑封装进一个方法,然后需要添加6.0的SD卡写入权限,此处省略。。。
                // 调用下载工具类
                DownLoadUtils downloadUtils =   new DownLoadUtils(getContext());
                        downloadUtils.downloadAPK("http://ip地址:端口/服务名/resources/app/app-release.apk", "smartonet.apk");
            }
        });
        builder.setView(v, 0, 0, 0, 0); // 设置内容试图并去除边框
        builder.setCancelable(false);
        dialog = builder.create();
        dialog.show();
        // 设置AlertDialog的宽高
        WindowManager.LayoutParams params = dialog.getWindow().getAttributes();
        params.width = DisplayUtil.dp2px(mActivity,350);
        params.height = DisplayUtil.dp2px(mActivity,345);
        dialog.getWindow().setAttributes(params);
    }
5,dialog的自定义View的布局代码:
<?xml version="1.0" encoding="utf-8"?>
<!--aa-->
<LinearLayout xmlns:android="http://schemas.android.com/apk/res/android"
    android:layout_width="match_parent"
    android:layout_height="match_parent"
    android:paddingLeft="15dp"
    android:paddingTop="15dp"
    android:paddingRight="15dp"
    android:paddingBottom="10dp"
    android:background="@mipmap/update_bg"
    android:orientation="vertical">
    <TextView
        android:layout_width="wrap_content"
        android:layout_height="wrap_content"
        android:textSize="17sp"
        android:paddingBottom="13dp"
        android:textColor="#000"
        android:layout_gravity="center_horizontal"
        android:text="发现新版本"/>
    <View
        android:layout_width="match_parent"
        android:layout_height="1dp"
        android:visibility="gone"
        android:layout_marginBottom="10dp"
        android:background="#eeeff3"></View>
    <RelativeLayout
        android:layout_width="match_parent"
        android:paddingBottom="5dp"
        android:layout_height="wrap_content"
        android:layout_marginLeft="5dp">
    <TextView
        android:id="@+id/tv1"
        android:layout_width="wrap_content"
        android:layout_height="wrap_content"
        android:layout_marginLeft="5dp"
        android:textSize="14sp"
        android:visibility="gone"
        android:text="当前版本:"/>
    <TextView
        android:id="@+id/tvNum1"
        android:layout_width="wrap_content"
        android:layout_height="wrap_content"
        android:layout_toRightOf="@id/tv1"
        android:textSize="14sp"
        android:visibility="gone"
        android:text="v0.1"/>
    <TextView
        android:id="@+id/tv2"
        android:layout_width="wrap_content"
        android:layout_height="wrap_content"
        android:layout_toRightOf="@id/tvNum1"
        android:textSize="15sp"
        android:textColor="#474747"
        android:text="最新版本:"/>
    <TextView
        android:id="@+id/tvNum2"
        android:layout_width="wrap_content"
        android:layout_height="wrap_content"
        android:layout_toRightOf="@id/tv2"
        android:textColor="#474747"
        android:textSize="15sp"
        android:text="v0.2"/>
    <TextView
        android:id="@id/tv3"
        android:layout_width="wrap_content"
        android:layout_height="wrap_content"
        android:layout_below="@id/tv2"
        android:textSize="15sp"
        android:paddingTop="3dp"
        android:textColor="#474747"
        android:paddingBottom="3dp"
        android:text="新版本大小:"/>
    <TextView
        android:id="@+id/tvNum3"
        android:layout_width="wrap_content"
        android:layout_height="wrap_content"
        android:layout_below="@id/tv2"
        android:layout_toRightOf="@id/tv3"
        android:paddingTop="3dp"
        android:paddingBottom="10dp"
        android:textColor="#474747"
        android:textSize="15sp"
        android:text="40.0M"/>
    </RelativeLayout>
    <!--<WebView
        android:id="@+id/webView"
        android:layout_below="@id/tvNum3"
        android:layout_marginTop="5dp"
        android:layout_width="match_parent"
        android:layout_height="wrap_content">
    </WebView>-->

    <ScrollView
        android:layout_width="match_parent"
        android:layout_height="120dp"
        android:scrollbars="none"
        >
        <RelativeLayout
            android:layout_width="match_parent"
            android:paddingBottom="10dp"
            android:layout_height="match_parent"
            android:layout_marginLeft="6dp">
            <TextView
                android:id="@+id/tvDesc"
                android:layout_width="match_parent"
                android:layout_height="wrap_content"
                android:textColor="#000"
                android:textSize="15sp"
                android:lineSpacingExtra="4dp"
                android:text="更新描述"/>
        </RelativeLayout>
    </ScrollView>
    <CheckBox
        android:id="@+id/ignore"
        style="@style/mycheckbox"
        android:layout_width="wrap_content"
        android:layout_height="wrap_content"
        android:textSize="13sp"
        android:layout_marginLeft="5dp"
        android:padding="5dp"
        android:textColor="#474747"
        android:layout_marginTop="15dp"
        android:layout_marginBottom="5dp"
        android:text="忽略此版本"/>
    <View
        android:layout_width="match_parent"
        android:layout_height="1dp"
        android:background="#eeeff3"></View>
    <LinearLayout
        android:layout_width="match_parent"
        android:layout_gravity="right"
        android:orientation="horizontal"
        android:layout_height="wrap_content">
        <TextView
            android:id="@+id/tvCancel"
            android:layout_width="0dp"
            android:layout_weight="1"
            android:layout_height="wrap_content"
            android:textSize="16sp"
            android:textColor="#000"
            android:gravity="center"
            android:paddingTop="10dp"
            android:clickable="true"
            android:text="以后再说"/>
        <View
            android:layout_width="1dp"
            android:layout_height="match_parent"
            android:layout_marginTop="10dp"
            android:background="#eeeff3"></View>
        <TextView
            android:id="@+id/tvOk"
            android:layout_width="0dp"
            android:layout_weight="1"
            android:paddingTop="10dp"
            android:layout_height="match_parent"
            android:textSize="16sp"
            android:textColor="@color/title"
            android:gravity="center"
            android:clickable="true"
            android:text="立即更新"/>
    </LinearLayout>
</LinearLayout>
6,app版本更新的工具类
public class DownLoadUtils {
    //下载器
    private DownloadManager downloadManager;
    //上下文
    private Context mContext;
    //下载的ID
    private long downloadId;

    public  DownLoadUtils(Context context){
        this.mContext = context;
    }

    //下载apk
    public void downloadAPK(String url, String name) {
        //创建下载任务
         DownloadManager.Request request = new DownloadManager.Request(Uri.parse(url));
         //设置用于下载时的网络类型,默认任何网络都可以下载,提供的网络常量有:NETWORK_BLUETOOTH、NETWORK_MOBILE、NETWORK_WIFI
         // 一般不配置该句,以默认任何网络都可以下载
        // request.setAllowedNetworkTypes(Request.NETWORK_WIFI);
        // 设置漫游状态下是否可以下载
        request.setAllowedOverRoaming(false);
        // 下载过程和下载完成后通知栏有通知消息
        request.setNotificationVisibility(DownloadManager.Request.VISIBILITY_VISIBLE | DownloadManager.Request.VISIBILITY_VISIBLE_NOTIFY_COMPLETED);
        request.setTitle("新版本Apk");
        request.setDescription("apk正在下载");
        //此句配置不配置都可以
        request.setVisibleInDownloadsUi(true);
        //设置下载的路径
        //设置文件的保存的位置[三种方式],setDestinationInExternalFilesDir、setDestinationInExternalPublicDir、 setDestinationUri等方法用于设置下载文件的存放路径,
        //注意如果将下载文件存放在默认路径,那么在空间不足的情况下系统会将文件删除,所以使用上述方法设置文件存放目录是十分必要的。
        //第一种 //file:///storage/emulated/0/Android/data/your-package/files/Download/update.apk
        //request.setDestinationInExternalFilesDir(context, Environment.DIRECTORY_DOWNLOADS, name);
        //第二种 //file:///storage/emulated/0/Download/update.apk
        //request.setDestinationInExternalPublicDir(Environment.DIRECTORY_DOWNLOADS, name);
        //第三种 自定义文件路径
        //request.setDestinationUri()
        // 此处使用该句设置保存路径
        request.setDestinationInExternalPublicDir(Environment.getExternalStorageDirectory().getAbsolutePath() , name);
        //获取DownloadManager
        downloadManager = (DownloadManager) mContext.getSystemService(Context.DOWNLOAD_SERVICE);
        //将下载请求加入下载队列,加入下载队列后会给该任务返回一个long型的id,通过该id可以取消任务,重启任务、获取下载的文件等等
        downloadId = downloadManager.enqueue(request);
        //注册广播接收者,监听下载状态
        mContext.registerReceiver(receiver,
                new IntentFilter(DownloadManager.ACTION_DOWNLOAD_COMPLETE));
    }

    //广播监听下载的各个状态
    private BroadcastReceiver receiver = new BroadcastReceiver() {
        @Override
        public void onReceive(Context context, Intent intent) {
            checkStatus(context,intent);
        }
    };


    //检查下载状态
    private void checkStatus(Context context, Intent intent) {
        DownloadManager.Query query = new DownloadManager.Query();
        //通过下载的id查找
        query.setFilterById(downloadId);
        Cursor c = downloadManager.query(query);
        if (c.moveToFirst()) {
            int status = c.getInt(c.getColumnIndex(DownloadManager.COLUMN_STATUS));
            switch (status) {
                //下载暂停
                case DownloadManager.STATUS_PAUSED:
                    break;
                //下载延迟
                case DownloadManager.STATUS_PENDING:
                    break;
                //正在下载
                case DownloadManager.STATUS_RUNNING:
                    break;
                //下载完成
                case DownloadManager.STATUS_SUCCESSFUL:
                    //下载完成安装APK
                    installAPK(context,intent);
                    break;
                //下载失败
                case DownloadManager.STATUS_FAILED:
                    Toast.makeText(mContext, "下载失败", Toast.LENGTH_SHORT).show();
                    break;
            }
        }
        c.close();
    }

    //下载到本地后执行安装
    private void installAPK(Context context, Intent intent) {
        //获取下载文件的Uri
        Uri downloadFileUri = downloadManager.getUriForDownloadedFile(downloadId);
        if (downloadFileUri != null) {
            Intent intent= new Intent(Intent.ACTION_VIEW);
            intent.setDataAndType(downloadFileUri, "application/vnd.android.package-archive");
            intent.addFlags(Intent.FLAG_ACTIVITY_NEW_TASK);
            mContext.startActivity(intent);
            mContext.unregisterReceiver(receiver);
        }
    }

}
为了适配安卓7.0,将上面的installAPK()方法修改如下:
//下载到本地后执行安装
    private void installAPK(Context context, Intent intent) {
        long longExtra = intent.getLongExtra(DownloadManager.EXTRA_DOWNLOAD_ID, -1);
                if (id == longExtra){
//                    Uri downloadUri = mDownloadManager.getUriForDownloadedFile(id);
                    Intent install = new Intent(Intent.ACTION_VIEW);
                    File apkFile = getExternalFilesDir("DownLoad/jiaogeyi.apk");
                    if (Build.VERSION.SDK_INT >= Build.VERSION_CODES.N){
                        install.setFlags(Intent.FLAG_GRANT_READ_URI_PERMISSION);
                        Uri uriForFile = FileProvider.getUriForFile(context, "com.example.administrator.updateapkdemo.fileprovider", apkFile);
                        install.setDataAndType(uriForFile,"application/vnd.android.package-archive");
                    }else {
                        install.setDataAndType(Uri.fromFile(apkFile),"application/vnd.android.package-archive");
                    }

                    install.addFlags(Intent.FLAG_ACTIVITY_NEW_TASK);
                    mContext.startActivity(install);
                    mContext.unregisterReceiver(receiver);
                }
    }
或者直接修改工具类中的代码如下:去掉检查更新状态的那部分代码。
//广播监听下载的各个状态
    private BroadcastReceiver receiver = new BroadcastReceiver() {
        @Override
        public void onReceive(Context context, Intent intent) {
            long longExtra = intent.getLongExtra(DownloadManager.EXTRA_DOWNLOAD_ID, -1);
                if (id == longExtra){
//                    Uri downloadUri = mDownloadManager.getUriForDownloadedFile(id);
                    Intent install = new Intent(Intent.ACTION_VIEW);
                    File apkFile = getExternalFilesDir("DownLoad/jiaogeyi.apk");
                    if (Build.VERSION.SDK_INT >= Build.VERSION_CODES.N){
                        install.setFlags(Intent.FLAG_GRANT_READ_URI_PERMISSION);
                        Uri uriForFile = FileProvider.getUriForFile(context, "com.example.administrator.updateapkdemo.fileprovider", apkFile);
                        install.setDataAndType(uriForFile,"application/vnd.android.package-archive");
                    }else {
                        install.setDataAndType(Uri.fromFile(apkFile),"application/vnd.android.package-archive");
                    }

                    install.addFlags(Intent.FLAG_ACTIVITY_NEW_TASK);
                    mContext.startActivity(install);
                    mContext.unregisterReceiver(receiver);
                }
        }
    };
Android 7.0 的文件权限变得尤为严格,所以之前的一些代码在高一点的系统可能导致崩溃,如果不做版本判断,在7.0的手机就会抛出FileUriExposedException异常,说app不能访问你的app以外的资源。官方文档建议的做法,是用FileProvider来实现文件共享,即使用FileProvider来间接的获取文件。也就是说在你项目的src/res新建个xml文件夹再自定义一个文件,并在清单文件里面进行相关的配置。
这里首先需要做的是在manifests中声明FileProvider:
<provider
    android:name="android.support.v4.content.FileProvider"
    android:authorities="com.example.administrator.updateapkdemo.fileprovider"
    /**注意参数统一性 FileProvider.getUriForFile(appContext, "com.example.administrator.updateapkdemo.fileprovider", apkFile);*/
    android:exported="false"
    android:grantUriPermissions="true">
    <meta-data
        android:name="android.support.FILE_PROVIDER_PATHS"
        android:resource="@xml/file_paths" />
</provider>
其中authorities是需要注意的地方,这个属性的值最好让他独一无二,所以我这里采用包名加fileprovider来设置,你如果非要设置成xxx.ooo也不是不可以,但是必须和以下这行代码中的第二个参数一致:
Uri uriForFile = FileProvider.getUriForFile(context, "com.example.administrator.updateapkdemo.fileprovider", apkFile);
其次就是在res下的xml文件夹下创建file_paths.xml文件:
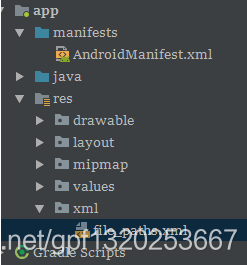 其中file_paths.xml代码如下:
<?xml version="1.0" encoding="utf-8"?>
<paths>
    <!--path:需要临时授权访问的路径(.代表所有路径) name:就是你给这个访问路径起个名字-->
    <external-path
        name="external_files"
        path="." />
</paths>
当然还有在清单中声明一些权限:
 即可。
即可。
使用okhttp,retrofit等下载apk到SD卡指定位置,下载完成后执行自动安装
1,首先判断SD卡是否可用
if(Environment.getExternalStorageState().equals(Environment.MEDIA_MOUNTED)) {
    // SD卡可用
} else {
    Toast.makeText(MainActivity.this,"SD卡不可用,请检查SD卡",Toast.LENGTH_LONG).show();
}
2,执行网络下载操作,将服务器apk文件下载保存在sd卡的指定位置
3,执行自动安装,适配android 7.0
Intent intent = new Intent(Intent.ACTION_VIEW);

      if (Build.VERSION.SDK_INT >= Build.VERSION_CODES.N) { //aandroid N的权限问题
          intent.setFlags(Intent.FLAG_GRANT_READ_URI_PERMISSION);
          String authority = getApplicationContext().getPackageName() + ".fileProvider";
          Uri contentUri = FileProvider.getUriForFile(MainActivity.this, authority,       new File(Environment.getExternalStorageDirectory(), "软件名.apk"));//注意修改
          intent.setDataAndType(contentUri, "application/vnd.android.package-archive");
       } else {
          intent.setDataAndType(Uri.fromFile(new File(Environment.getExternalStorageDirectory(), "软件名.apk")), "application/vnd.android.package-archive");
          intent.setFlags(Intent.FLAG_ACTIVITY_NEW_TASK);
       }

 startActivity(intent);
 //弹出安装窗口把原程序关闭,避免安装完毕点击打开时没反应
 killProcess(android.os.Process.myPid());
最后别忘了android7.0适配的配置,配置方式和上面一致。