SpringBoot简介:
SpringBoot对Spring的缺点进行改善和优化,基于约定优于配置的思想,可以让开发人员不必在配置与逻辑业务之间进行思维的切换,
全身心的投入到逻辑业务的代码编写中,从而大大提高了开发的效率,一定程度上缩短了项目周期。
SpringBoot的特点:
1.为基于Spring的开发提供更快的入门体验
2.开箱即用,没有代码生成,也无需XML配置。同时也可以修改默认值来满足特定的需求
3.提供了一些大型项目中常见的非功能性特性,如嵌入式服务器、安全、指标,健康检测、外部配置等
4.SpringBoot不是对Spring功能上的增强,而是提供了一种快速使用Spring的方式
SpringBoot的核心功能:
1.起步依赖
起步依赖本质上是一个Maven项目对象模型(Project Object Model,POM),定义了对其他库的传递依赖,这些东西加在一起即支持某项功能。
简单的说,起步依赖就是将具备某种功能的坐标打包到一起,并提供一些默认的功能。
2.自动配置
SpringBoot的自动配置是一个运行时(更准确地说,是应用程序启动时)的过程,考虑了众多因素,
才决定Spring配置应该用哪个,不该用哪个。该过程是Spring自动完成的。
SpringBoot快速入门:
1.创建一个maven工程,该工程为普通的java工程即可
2.添加SpringBoot的起步依赖
SpringBoot要求,项目要继承SpringBoot的起步依赖spring-boot-starter-parent
<parent>
    <groupId>org.springframework.boot</groupId>
    <artifactId>spring-boot-starter-parent</artifactId>
    <version>2.0.1.RELEASE</version>
</parent>
SpringBoot如果要集成SpringMVC进行Controller的开发,项目要导入web的启动依赖
<dependencies>
    <dependency>
        <groupId>org.springframework.boot</groupId>
        <artifactId>spring-boot-starter-web</artifactId>
    </dependency>
</dependencies>
3.编写SpringBoot引导类
要通过SpringBoot提供的引导类起步SpringBoot才可以进行访问
@SpringBootApplication
public class MySpringBootApplication {
    public static void main(String[] args) {
        SpringApplication.run(MySpringBootApplication.class);
    }
}
4.编写Controller
在引导类MySpringBootApplication同级包或者子级包中创建QuickStartController
@Controller
public class QuickStartController {
    @RequestMapping("/quick")
    @ResponseBody
    public String quick(){
        return "springboot 访问成功!";
    }
}
5.测试
执行SpringBoot起步类的主方法,控制台打印出日志
打开浏览器访问url地址为:http://localhost:8080/quick
快速入门解析:
@SpringBootApplication:标注SpringBoot的启动类
SpringApplication.run(MySpringBootApplication.class) 代表运行SpringBoot的启动类,参数为SpringBoot启动类的字节码对象
SpringBoot工程热部署:
我们在开发中反复修改类、页面等资源,每次修改后都是需要重新启动才生效,这样每次启动都很麻烦,浪费了大量的时间,
我们可以在修改代码后不重启就能生效,在 pom.xml 中添加如下配置就可以实现这样的功能
<!--热部署配置-->
<dependency>
    <groupId>org.springframework.boot</groupId>
    <artifactId>spring-boot-devtools</artifactId>
</dependency>
注意:IDEA进行SpringBoot热部署如果出现失败,可能是因为IEDA默认情况下不会自动编译,需要对IDEA进行自动编译的设置
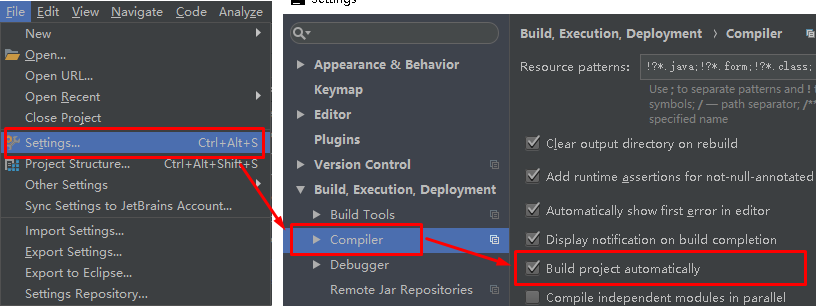
然后 Shift+Ctrl+Alt+/,选择Registry

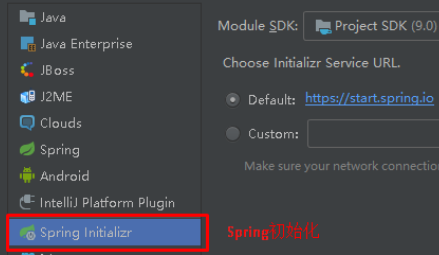
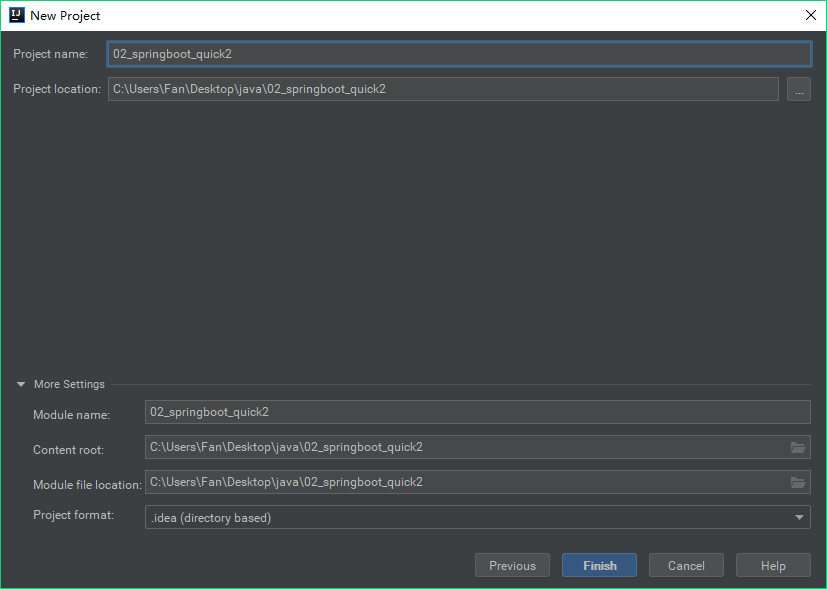
使用idea快速创建SpringBoot项目

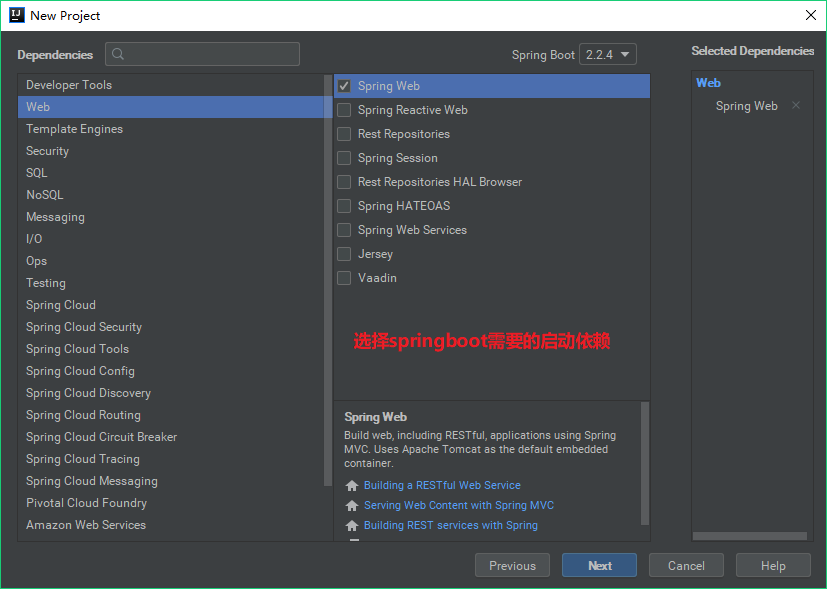
通过idea快速创建的SpringBoot项目的pom.xml中已经导入了我们选择的web的起步依赖的坐标
<?xml version="1.0" encoding="UTF-8"?>
<project xmlns="http://maven.apache.org/POM/4.0.0" xmlns:xsi="http://www.w3.org/2001/XMLSchema-instance"
         xsi:schemaLocation="http://maven.apache.org/POM/4.0.0 https://maven.apache.org/xsd/maven-4.0.0.xsd">
    <modelVersion>4.0.0</modelVersion>
    <parent>
        <groupId>org.springframework.boot</groupId>
        <artifactId>spring-boot-starter-parent</artifactId>
        <version>2.2.4.RELEASE</version>
        <relativePath/>
    </parent>
    <groupId>com.fgy</groupId>
    <artifactId>02_springboot_quick2</artifactId>
    <version>0.0.1-SNAPSHOT</version>
    <name>02_springboot_quick2</name>
    <description>Demo project for Spring Boot</description>

    <properties>
        <java.version>1.8</java.version>
    </properties>

    <dependencies>
        <dependency>
            <groupId>org.springframework.boot</groupId>
            <artifactId>spring-boot-starter-web</artifactId>
        </dependency>

        <dependency>
            <groupId>org.springframework.boot</groupId>
            <artifactId>spring-boot-starter-test</artifactId>
            <scope>test</scope>
            <exclusions>
                <exclusion>
                    <groupId>org.junit.vintage</groupId>
                    <artifactId>junit-vintage-engine</artifactId>
                </exclusion>
            </exclusions>
        </dependency>
    </dependencies>

    <build>
        <plugins>
            <plugin>
                <groupId>org.springframework.boot</groupId>
                <artifactId>spring-boot-maven-plugin</artifactId>
            </plugin>
        </plugins>
    </build>

</project>