一、创建web工程
1、在lib文件夹中添加所需jar包:
2、将工程原有的src目录删除,创建如下四个Source Folder:

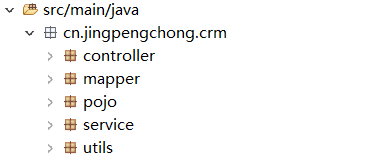
3、在“src/main/java”中创建如下包结构,包名自定义,但是最里层包名推荐与此一致:
4、在“WebContent”中的“WEB-INF”目录下创建文件夹“jsp”,根据模块需求在“jsp”目录下创建其他文件夹。
二、添加properties配置文件
在“src/main/resourde”中添加配置文件,重要的properties文件有log4j.properties和db.properties等。
### direct log messages to stdout ###
log4j.appender.stdout=org.apache.log4j.ConsoleAppender
log4j.appender.stdout.Target=System.out
log4j.appender.stdout.layout=org.apache.log4j.PatternLayout
log4j.appender.stdout.layout.ConversionPattern=[%-5p]-[%d{yyyy-MM-dd HH:mm:ss}] -%l -%m%n

### direct messages to file mylog.log ###
#log4j.appender.file=org.apache.log4j.FileAppender
#log4j.appender.file.File=D:\\mylog.log
#log4j.appender.file.layout=org.apache.log4j.PatternLayout
#log4j.appender.file.layout.ConversionPattern=%d{ABSOLUTE} %5p %c{1}:%L - %m%n

### set log levels - for more verbose logging change 'info' to 'debug' ###
# error warn info debug trace
log4j.rootLogger= debug, stdout
jdbc.driver=com.mysql.jdbc.Driver
jdbc.url=jdbc:mysql://127.0.0.1:3306/springmvc
jdbc.username=root
jdbc.password=1234
三、创建MyBatis配置文件:
在“src/main/resourde”中创建MyBatis的配置文件:sqlMapperConfig.xml(可以是其他名称),该配置文件在项目创建时只需有跟标签即可:
<?xml version="1.0" encoding="UTF-8"?>
<!DOCTYPE configuration
  PUBLIC "-//mybatis.org//DTD Config 3.0//EN"
  "http://mybatis.org/dtd/mybatis-3-config.dtd">
<configuration>

</configuration>
四、dao层开发环境的搭建:
在“src/main/resourde”中新建一个包“spring”,在其中创建一个spring的配置文件“applicationContext-dao.xml”(可以是其他名称),其内容如下:
1、加载数据库配置文件;
2、配置数据源;
3、配置SqlSessionFactoryBean;
4、配置Mapper文件扫描器MapperScannerConfigurer。
<?xml version="1.0" encoding="UTF-8"?>
<beans xmlns="http://www.springframework.org/schema/beans"
	xmlns:xsi="http://www.w3.org/2001/XMLSchema-instance"
	xmlns:context="http://www.springframework.org/schema/context"
	xsi:schemaLocation="http://www.springframework.org/schema/beans http://www.springframework.org/schema/beans/spring-beans.xsd
		http://www.springframework.org/schema/context http://www.springframework.org/schema/context/spring-context-4.2.xsd">

	<!-- 加载数据库配置文件 -->
	<context:property-placeholder location="classpath:db.properties"/>
	<!-- 配置数据源:此处用德鲁伊 -->
	<bean id="dataSource" class="com.alibaba.druid.pool.DruidDataSource">
		<property name="driverClassName" value="${jdbc.driver}"/>
		<property name="url" value="${jdbc.url}"/>
		<property name="username" value="${jdbc.userName}"/>
		<property name="password" value="${jdbc.password}"/>
	</bean>
	<!-- 配置SqlSessionFactory -->
	<bean id="sqlSessionFactory" class="org.mybatis.spring.SqlSessionFactoryBean">
		<property name="configLocation" value="classpath:sqlMapperConfig.xml"/>
		<property name="dataSource" ref="dataSource"/>
	</bean>
	<!-- 配置Mapper文件扫描器 -->
	<bean class="org.mybatis.spring.mapper.MapperScannerConfigurer">
		<property name="basePackage" value="cn.jingpengchong.crm.mapper"/>
	</bean>
</beans>
五、service层开发环境的搭建:
在包“spring”中创建一个spring的配置文件“applicationContext-service.xml”(可以是其他名称),其内容如下:配置service包扫描
<?xml version="1.0" encoding="UTF-8"?>
<beans xmlns="http://www.springframework.org/schema/beans"
	xmlns:xsi="http://www.w3.org/2001/XMLSchema-instance"
	xmlns:context="http://www.springframework.org/schema/context"
	xsi:schemaLocation="http://www.springframework.org/schema/beans http://www.springframework.org/schema/beans/spring-beans.xsd
		http://www.springframework.org/schema/context http://www.springframework.org/schema/context/spring-context-4.2.xsd">

	<!-- 配置service包扫描 -->
	<context:component-scan base-package="cn.jingpengchong.crm.service"/>

</beans>
在包“spring”中创建一个spring的配置文件“applicationContext-trans.xml”(可以是其他名称),其内容如下:
1、配置事务DataSourceTransactionManager;
2、配置通知,以确定哪些方法用到事务、哪些方法只读等;
3、配置AOP切面,用于对匹配的方法做附加操作。
<?xml version="1.0" encoding="UTF-8"?>
<beans xmlns="http://www.springframework.org/schema/beans"
	xmlns:xsi="http://www.w3.org/2001/XMLSchema-instance"
	xmlns:tx="http://www.springframework.org/schema/tx"
	xmlns:aop="http://www.springframework.org/schema/aop"
	xsi:schemaLocation="http://www.springframework.org/schema/beans http://www.springframework.org/schema/beans/spring-beans.xsd
		http://www.springframework.org/schema/aop http://www.springframework.org/schema/aop/spring-aop-4.2.xsd
		http://www.springframework.org/schema/tx http://www.springframework.org/schema/tx/spring-tx-4.2.xsd">

	<!-- 配置事务 -->
	<bean id="transactionManager" class="org.springframework.jdbc.datasource.DataSourceTransactionManager">
		<property name="dataSource" ref="dataSource"/>
	</bean>

	<!-- 配置通知:哪些方法用到事务 -->
	<tx:advice id="txActive" transaction-manager="transactionManager">
		<tx:attributes>
			<tx:method name="save*" propagation="REQUIRED"/>
			<tx:method name="insert*" propagation="REQUIRED"/>
			<tx:method name="add*" propagation="REQUIRED"/>
			<tx:method name="update*" propagation="REQUIRED"/>
			<tx:method name="delete*" propagation="REQUIRED"/>
			<tx:method name="create*" propagation="REQUIRED"/>
			<tx:method name="find*" propagation="SUPPORTS" read-only="true"/>
			<tx:method name="get*" propagation="SUPPORTS" read-only="true"/>
			<tx:method name="select*" propagation="SUPPORTS" read-only="true"/>
			<tx:method name="query*" propagation="SUPPORTS" read-only="true"/>
		</tx:attributes>
	</tx:advice>

	<!-- 配置AOP切面 -->
	<aop:config>
		<aop:advisor advice-ref="txActive" pointcut="execution(* cn.jingpengchong.crm.service.*.*(..))"/>
	</aop:config>
</beans>
六、web层开发环境的搭建:
在包“spring”中创建一个spring的配置文件“springMvc.xml”(可以是其他名称),其内容如下:
1、配置Controller扫描器;
2、配置注解驱动:采用最新处理器映射器和处理器适配器,并且支持json;
3、配置视图解析器InternalResourceViewResolver。
<?xml version="1.0" encoding="UTF-8"?>
<beans xmlns="http://www.springframework.org/schema/beans"
	xmlns:xsi="http://www.w3.org/2001/XMLSchema-instance"
	xmlns:context="http://www.springframework.org/schema/context"
	xmlns:mvc="http://www.springframework.org/schema/mvc"
	xsi:schemaLocation="http://www.springframework.org/schema/mvc http://www.springframework.org/schema/mvc/spring-mvc-4.2.xsd
		http://www.springframework.org/schema/beans http://www.springframework.org/schema/beans/spring-beans.xsd
		http://www.springframework.org/schema/context http://www.springframework.org/schema/context/spring-context-4.2.xsd">

	<!-- 配置Controller扫描器 -->
	<context:component-scan base-package="cn.jingpengchong.crm.controller"/>

	<!-- 配置注解驱动:采用最新处理器映射器和处理器适配器,并且支持json -->
	<mvc:annotation-driven/>

	<!-- 配置视图解析器 -->
	<bean class="org.springframework.web.servlet.view.InternalResourceViewResolver">
		<property name="prefix" value="/WEB-INF/jsp/"/>
		<property name="suffix" value=".jsp"/>
	</bean>
</beans>
七、web.xml文件的配置:
在web.xml文件中做如下配置:
1、配置spring配置文件的路径;
2、配置监听器ContextLoaderListener加载spring配置文件;
3、配置字符编码过滤器CharacterEncodingFilter;
4、配置springmvc的前端控制器DispatcherServlet。
<?xml version="1.0" encoding="UTF-8"?>
<web-app xmlns:xsi="http://www.w3.org/2001/XMLSchema-instance"
	xmlns="http://java.sun.com/xml/ns/javaee"
	xsi:schemaLocation="http://java.sun.com/xml/ns/javaee http://java.sun.com/xml/ns/javaee/web-app_2_5.xsd"
	id="WebApp_ID" version="2.5">
	<display-name>springmvc03-crm</display-name>
	<welcome-file-list>
		<welcome-file>index.jsp</welcome-file>
	</welcome-file-list>

	<!-- 配置spring -->
	<context-param>
		<param-name>contextConfigLocation</param-name>
		<param-value>classpath:spring/applicationContext-*.xml</param-value>
	</context-param>

	<!-- 配置监听器加载spring -->
	<listener>
		<listener-class>org.springframework.web.context.ContextLoaderListener</listener-class>
	</listener>

	<!-- 配置字符编码过滤器 -->
	<filter>
		<filter-name>encodingFilter</filter-name>
		<filter-class>org.springframework.web.filter.CharacterEncodingFilter</filter-class>
		<init-param>
			<param-name>encoding</param-name>
			<param-value>UTF-8</param-value>
		</init-param>
	</filter>
	<filter-mapping>
		<filter-name>encodingFilter</filter-name>
		<url-pattern>/*</url-pattern>
	</filter-mapping>

	<!-- 配置springmvc -->
	<servlet>
		<servlet-name>dispatcherServlet</servlet-name>
		<servlet-class>org.springframework.web.servlet.DispatcherServlet</servlet-class>
		<init-param>
			<param-name>contextConfigLocation</param-name>
			<param-value>classpath:spring/springMvc.xml</param-value>
		</init-param>
		<load-on-startup>1</load-on-startup>
	</servlet>
	<servlet-mapping>
		<servlet-name>dispatcherServlet</servlet-name>
		<url-pattern>*.action</url-pattern>
	</servlet-mapping>
</web-app>
