一、LNMP架构概述
在前几十年,互联网公司最常用的Web组合莫过于LAMP(Linux+Apache+MySQL+PHP),那时候使用LAMP架构来部署Web应用是一种非常流行的方式
但是在近些年,随着Nginx服务的流行,又出现了一种新的Web组合,那就是LNMP(Linux+Nginx+MySQL+PHP)
Nginx是一款轻量级的Web服务器,同时支持负载均衡与反向代理,由于Nginx的种种特点,所以国内很多大型企业都选择了Nginx来做为自己的Web服务器
其实LNMP架构与LAMP架构差不多,其主要的区别就是在于Nginx与PHP的协作配置上,这个后面部署的时候我会提到,下面我们先来看一下它的组件与优势
1)LNMP架构组件
Linux:	作为LNMP架构的基础,提供用于支撑Web站点的操作系统
Nginx: 	作为LNMP架构的前端,是一款高性能,功能强大,轻量级的Web服务器程序
MySQL:	作为LNMP架构的后端,在业务系统等应用中,各种账户信息,产品信息 客户资料,都可存放与此
PHP:	作为三种开发动态网页的编程语言,PHP负责解释网页动态文件,并提供Web程序的开发和运行环境
2)LNMP架构优势
方便使用:PHP属于解释性语言,开发的各种Web程序不需要编译,方便进行移植使用
可定制性:拥有大量的额外组件和可扩展功能模块,能够满足大部分企业应用的定制需要求
易于开发:基于LNMP的动态网站中,页面代码简介,非专业程序员都可以轻松修改网页代码
安全稳定:这个益于开源的优势,大量程序员关注并改进LNMP的组件,发现的问题能很快的得到解决
成本低廉:因为构成组件都是开放源代码的软件,可以自由获得和免费使用,大大降低了企业的实施成本
3)LNMP工作流程
第一步:
用户从浏览器输入域名发送 http request 请求到Web服务器上,Web服务器响应并处理客户端的请求

第二步:
如果客户端请求的是静态资源,则由Nginx本身进行解析并直接返回给用户
如果是动态请求,则由Nginx将这个请求通过Fast-cgi接口转发给PHP-FPM这个进程管理程序,然后PHP-FPM会调用PHP解析器进程进行解析

第三步:
解析完成以后,解析器进程会将解析过后的脚本返回到PHP-FPM,然后PHP-FPM再通过Fast-cgi的形式将脚本信息返回给Nginx

第四步:
Nginx服务器收到以后,再通过 http response 的形式传送给浏览器,浏览器再进行解析与渲染,最后将渲染过后的页面进行呈现
二、LNMP架构部署
本次所部署的LNMP架构,基于:(CentOS7.5+Nginx-1.16.1+MySQL-5.7.27+PHP-7.3.15)
1)Nginx部署
1、安装依赖包
[root@lnmp ~]# yum -y install gcc gcc-c++ pcre pcre-devel zlib zlib-devel openssl openssl-devel
2、为Nginx创建运行用户
[root@lnmp ~]# useradd -M -s /sbin/nologin nginx
3、下载软件包
[root@lnmp ~]# wget -c http://www.nginx.org/download/nginx-1.16.1.tar.gz
4、编译安装Nginx
[root@lnmp ~]# tar xf nginx-1.16.1.tar.gz -C /usr/src/
[root@lnmp ~]# cd /usr/src/nginx-1.16.1/
[root@lnmp nginx-1.16.1]# ./configure --prefix=/etc/nginx --user=nginx --group=nginx --with-http_ssl_module --with-http_stub_status_module
[root@lnmp nginx-1.16.1]# make -j 8 && make install -j 8 && cd ~
5、添加Nginx至环境变量并启动Nginx
[root@lnmp ~]# echo 'export PATH=/etc/nginx/sbin:$PATH' >> /etc/profile
[root@lnmp ~]# source /etc/profile && nginx
[root@lnmp ~]# netstat -anput | grep nginx
tcp        0      0 0.0.0.0:80              0.0.0.0:*               LISTEN      3759/nginx: master
6、将Nginx添加为系统服务
[root@lnmp ~]# cat > /usr/lib/systemd/system/nginx.service << EOF
[Unit]
Description=nginx
After=network.target

[Service]
Type=forking
PIDFile=/etc/nginx/logs/nginx.pid
ExecStart=/etc/nginx/sbin/nginx
ExecReload=killall -s HUP $(cat /etc/nginx/logs/nginx.pid)
ExecStop=killall -s QUIT $(cat /etc/nginx/logs/nginx.pid)
PrivateTmp=Flase

[Install]
WantedBy=multi-user.target
EOF
7、检查并启动Nginx
[root@lnmp ~]# nginx -t
nginx: the configuration file /etc/nginx/conf/nginx.conf syntax is ok
nginx: configuration file /etc/nginx/conf/nginx.conf test is successful

[root@lnmp ~]# systemctl daemon-reload && pkill -9 nginx
[root@lnmp ~]# systemctl restart nginx && systemctl enable nginx

[root@lnmp ~]# netstat -anput | grep nginx
tcp        0      0 0.0.0.0:80              0.0.0.0:*               LISTEN      3793/nginx: master
2)MySQL部署
1、下载软件包
[root@lnmp ~]# wget -c https://downloads.mysql.com/archives/get/file/mysql-5.7.27.tar.gz
[root@lnmp ~]# wget -c https://nchc.dl.sourceforge.net/project/boost/boost/1.59.0/boost_1_59_0.tar.gz
2、安装相应的依赖包
[root@lnmp ~]# yum -y install ncurses ncurses-devel cmake libaio libaio-devel pcre pcre-devel \
zlib zlib-devel bison bison-devel libverto libverto-devel libstdc++ libstdc++-devel \
dbus dbus-devel libss libss-devel gcc gcc-c++ autoconf m4 libgcc e2fsprogs perl-Data-Dumper
3、为MySQL创建运行用户与组
[root@lnmp ~]# groupadd mysql
[root@lnmp ~]# useradd -M -s /sbin/nologin mysql -g mysql
4、解压boost工具、并移动到指定位置即可、无需编译安装
[root@lnmp ~]# tar xf boost_1_59_0.tar.gz
[root@lnmp ~]# mv boost_1_59_0 /usr/local/boost
5、编译安装MySQL
[root@lnmp ~]# tar xf mysql-5.7.27.tar.gz -C /usr/src/
[root@lnmp ~]# cd /usr/src/mysql-5.7.27/
[root@lnmp mysql-5.7.27]# cmake -DCMAKE_INSTALL_PREFIX=/usr/local/mysql \
-DMYSQL_DATADIR=/usr/local/mysql/data \
-DSYSCONFDIR=/etc \
-DDEFAULT_CHARSET=utf8 \
-DDEFAULT_COLLATION=utf8_general_ci \
-DWITH_EXTRA_CHARSETS=all \
-DENABLED_LOCAL_INFILE=ON \
-DWITH_DEBUG=0 \
-DWITH_BOOST=/usr/local/boost \
-DWITH_FEDERATED_STORAGE_ENGINE=1 \
-DMYSQL_UNIX_ADDR=/usr/local/mysql/tmp/mysql.sock
make -j 8 && make install -j 8 && cd ~
6、编译安装完成以后、创建对应的目录、并调整相应的参数
[root@lnmp ~]# mkdir /usr/local/mysql/pid
[root@lnmp ~]# mkdir /usr/local/mysql/logs
[root@lnmp ~]# mkdir /usr/local/mysql/socket
[root@lnmp ~]# mkdir /usr/local/mysql/tmp
[root@lnmp ~]# mkdir /usr/local/mysql/ibtmp
[root@lnmp ~]# mkdir /usr/local/mysql/binlog
[root@lnmp ~]# mkdir /usr/local/mysql/relaylog
[root@lnmp ~]# mkdir /usr/local/mysql/outcsv/
[root@lnmp ~]# mkdir /usr/local/mysql/ibdata
[root@lnmp ~]# mkdir /usr/local/mysql/undolog
[root@lnmp ~]# mkdir /usr/local/mysql/redolog
[root@lnmp ~]# chown -R mysql:mysql /usr/local/mysql
[root@lnmp ~]# chmod -R 750 /usr/local/mysql/outcsv
[root@lnmp ~]# echo 'export PATH=/usr/local/mysql/bin:$PATH' >> /etc/profile
[root@lnmp ~]# source /etc/profile
7、定义MySQL配置文件
[root@lnmp ~]# cat > /etc/my.cnf << EOF
[client]
port = 3635
socket = /usr/local/mysql/socket/mysql.sock

[mysqld]
user = mysql
port = 3635
federated
skip_ssl
bind_address = 0.0.0.0
max_connections = 3600
max_connect_errors = 200
autocommit = ON
skip-name-resolve
symbolic-links = 0
skip-external-locking
log_timestamps = system
explicit_defaults_for_timestamp = ON
transaction_isolation = read-committed
binlog_gtid_simple_recovery = ON
show_compatibility_56 = ON
transaction_write_set_extraction = OFF
socket = /usr/local/mysql/socket/mysql.sock
pid-file = /usr/local/mysql/pid/mysql.pid
log-error = /usr/local/mysql/logs/mysql_error.log
secure-file-priv = /usr/local/mysql/outcsv
innodb_tmpdir = /usr/local/mysql/ibtmp
basedir = /usr/local/mysql
datadir = /usr/local/mysql/data
tmpdir = /usr/local/mysql/tmp

character-set-server = utf8
init_connect = SET NAMES utf8
collation-server = utf8_general_ci

slow_query_log = ON
long_query_time = 1
min_examined_row_limit = 960
log_slow_admin_statements = ON
log_slow_slave_statements = ON
log_queries_not_using_indexes = OFF
slow_query_log_file = /usr/local/mysql/logs/mysql_slow.log

back_log = 360
tmp_table_size = 64M
max_allowed_packet = 64M
max_heap_table_size = 64M
sort_buffer_size = 1M
join_buffer_size = 1M
read_buffer_size = 2M
read_rnd_buffer_size = 2M
thread_cache_size = 64
thread_stack = 256K
query_cache_size = 32M
query_cache_limit = 2M
query_cache_min_res_unit = 2K
table_open_cache = 4096
open_files_limit = 65535
connect_timeout = 9
interactive_timeout = 21600
wait_timeout = 21600

innodb_data_file_path = ibdata1:12M;ibdata:12M:autoextend
innodb_autoextend_increment = 12
innodb_data_home_dir = /usr/local/mysql/ibdata

innodb_undo_tablespaces = 4
innodb_undo_logs = 128
innodb_max_undo_log_size = 1G
innodb_undo_log_truncate = ON
innodb_purge_rseg_truncate_frequency = 10
innodb_undo_directory = /usr/local/mysql/undolog

innodb_log_file_size = 128M
innodb_log_buffer_size = 16M
innodb_log_files_in_group = 3
innodb_flush_log_at_trx_commit = 2
innodb_flush_log_at_timeout = 1
innodb_flush_method = O_DIRECT
innodb_log_group_home_dir = /usr/local/mysql/redolog

innodb_temp_data_file_path = ibtmp1:12M:autoextend:max:5G
innodb_fast_shutdown = 0

default-storage-engine = InnoDB
innodb_buffer_pool_size = 2G
table_open_cache_instances = 8
innodb_buffer_pool_chunk_size = 256MB
innodb_page_size = 16k
innodb_sort_buffer_size = 1MB
innodb_file_per_table = ON
innodb_large_prefix = ON
innodb_purge_threads = 8
innodb_page_cleaners = 8
innodb_read_io_threads = 8
innodb_write_io_threads = 8
innodb_thread_concurrency = 16
innodb_flush_neighbors = 0
innodb_lru_scan_depth = 1024
innodb_lock_wait_timeout = 60
innodb_print_all_deadlocks = ON
innodb_deadlock_detect = ON
innodb_strict_mode = ON
innodb_buffer_pool_load_at_startup = ON
innodb_buffer_pool_dump_at_shutdown = ON
EOF
8、对MySQL进行初始化
[root@lnmp ~]# /usr/local/mysql/bin/mysqld --initialize-insecure --user=mysql --basedir=/usr/local/mysql --datadir=/usr/local/mysql/data
[root@lnmp ~]# echo $?
0
9、将MySQL添加为系统服务
[root@lnmp ~]# cp /usr/local/mysql/support-files/mysql.server /usr/local/mysql/bin/mysql.sh
[root@lnmp ~]# chmod +x /usr/local/mysql/bin/mysql.sh
[root@lnmp ~]# cat > /usr/lib/systemd/system/mysql.service << EOF
[Unit]
Description=MySQL
After=network.target

[Service]
User=mysql
Group=mysql
Type=forking
PrivateTmp=false
LimitNOFILE=65535
ExecStart=/usr/local/mysql/bin/mysql.sh start
ExecStop=/usr/local/mysql/bin/mysql.sh stop

[Install]
WantedBy=multi-user.target
EOF
10、启动MySQL并为root用户设置密码
[root@lnmp ~]# systemctl start mysql
[root@lnmp ~]# systemctl enable mysql
[root@lnmp ~]# netstat -anput | grep mysql
tcp        0      0 0.0.0.0:3635            0.0.0.0:*               LISTEN      34411/mysqld
[root@mysql ~]# mysql -e"update mysql.user set authentication_string=password('abc-123') where user='root';flush privileges;"
11、对root用户进行授权
mysql> select host,user,authentication_string from mysql.user;
+-----------+---------------+-------------------------------------------+
| host      | user          | authentication_string                     |
+-----------+---------------+-------------------------------------------+
| localhost | root          | *717D3436D5EC09E2941FEA929907C61FE8CE3E19 |
| localhost | mysql.session | *THISISNOTAVALIDPASSWORDTHATCANBEUSEDHERE |
| localhost | mysql.sys     | *THISISNOTAVALIDPASSWORDTHATCANBEUSEDHERE |
+-----------+---------------+-------------------------------------------+
3 rows in set (0.01 sec)

mysql> grant all privileges on *.* to 'root'@'10.2.3.%' identified by 'abc-123';
Query OK, 0 rows affected, 1 warning (0.00 sec)

mysql> select host,user,authentication_string from mysql.user;
+-----------+---------------+-------------------------------------------+
| host      | user          | authentication_string                     |
+-----------+---------------+-------------------------------------------+
| localhost | root          | *717D3436D5EC09E2941FEA929907C61FE8CE3E19 |
| localhost | mysql.session | *THISISNOTAVALIDPASSWORDTHATCANBEUSEDHERE |
| localhost | mysql.sys     | *THISISNOTAVALIDPASSWORDTHATCANBEUSEDHERE |
| 10.2.3.%  | root          | *717D3436D5EC09E2941FEA929907C61FE8CE3E19 |
+-----------+---------------+-------------------------------------------+
4 rows in set (0.00 sec)
3)PHP部署
1、安装依赖包
yum -y install libxml2 libxml2-devel gd gd-devel libpng libpng-devel bzip2 bzip2-devel \
curl curl-devel gmp gmp-devel openldap openldap-devel libevent libevent-devel libxslt libxslt-devel
2、下载软件包
[root@lnmp ~]# wget -c https://www.php.net/distributions/php-7.3.15.tar.gz
3、安装libzip
注意:如果部署的PHP版本为7.X,则需要安装libzip,否则就会提示:Please reinstall the libzip distribution
[root@lnmp ~]# wget -c https://nih.at/libzip/libzip-1.2.0.tar.gz
[root@lnmp ~]# tar xf libzip-1.2.0.tar.gz -C /usr/src/
[root@lnmp ~]# cd /usr/src/libzip-1.2.0/
[root@lnmp libzip-1.2.0]# ./configure && make -j 8 && make install -j 8 && cd ~
[root@lnmp ~]# cp /usr/local/lib/libzip/include/zipconf.h /usr/local/include/zipconf.h
[root@lnmp ~]# cat > /etc/ld.so.conf.d/local.conf << EOF
/usr/local/lib64
/usr/local/lib
/usr/lib
/usr/lib64
EOF
[root@lnmp ~]# ldconfig -v
4、编译安装PHP
[root@lnmp ~]# tar xf php-7.3.15.tar.gz -C /usr/src/
[root@lnmp ~]# cd /usr/src/php-7.3.15/
[root@lnmp php-7.3.15]# ./configure --prefix=/usr/local/php7 --with-config-file-path=/usr/local/php7 --enable-fpm --enable-mbstring  \
--with-gd --with-zlib --enable-inline-optimization --with-jpeg-dir=/usr/lib --disable-debug --disable-rpath \
--enable-shared --with-libxml-dir --with-xmlrpc --enable-soap  --with-openssl --enable-exif --enable-fileinfo \
--enable-filter --with-pcre-dir --enable-ftp --with-openssl-dir --with-jpeg-dir --with-png-dir --with-zlib-dir \
--with-freetype-dir  --enable-gd-jis-conv --with-gettext --with-gmp --enable-json --enable-mbregex --enable-mbregex-backtrack \
--with-onig --enable-pdo --with-mysqli=mysqlnd --with-pdo-mysql=mysqlnd --with-zlib-dir  --with-pdo-sqlite  --enable-session --enable-shmop \
--enable-simplexml --enable-sockets --enable-sysvmsg --enable-sysvsem --enable-sysvshm --enable-wddx --with-libxml-dir --with-xsl --enable-zip \
--enable-mysqlnd-compression-support --with-pear --enable-opcache --with-mhash --with-pcre-regex --with-sqlite3 --enable-bcmath --with-iconv --with-bz2 \
--enable-calendar --with-curl --with-cdb --enable-dom --without-pear --disable-phar && make -j 8 && make install -j 8
4、复制参考文件并为PHP创建软链接
[root@lnmp php-7.3.15]# cp php.ini-production /usr/local/php7/php.ini
[root@lnmp php-7.3.15]# ln -s /usr/local/php7/bin/* /usr/local/bin/
[root@lnmp php-7.3.15]# ln -s /usr/local/php7/sbin/* /usr/local/sbin/ && cd ~
5、安装opcache模块、用于提升性能
[root@lnmp ~]# cd /usr/src/php-7.3.15/ext/opcache/
[root@lnmp opcache]# /usr/local/php7/bin/phpize
Configuring for:
PHP Api Version:         20180731
Zend Module Api No:      20180731
Zend Extension Api No:   320180731
[root@lnmp opcache]# ./configure --with-php-config=/usr/local/php7/bin/php-config && make -j 8 && make install -j 8 && cd ~
[root@lnmp ~]# cp /usr/local/php7/lib/php/extensions/no-debug-non-zts-20180731/opcache.so /usr/local/php7/include/php/ext/
6、编辑PHP配置文件
[root@lnmp ~]# cp /usr/local/php7/php.ini /usr/local/php7/php.ini.bak
[root@lnmp ~]# vim /usr/local/php7/php.ini
memory_limit = 1024M
max_execution_time = 0
post_max_size = 10800M
upload_max_filesize = 10240M
max_input_time = 360

[opcache]
opcache.enable=1
opcache.enable_cli=1
opcache.fast_shutdown = 1
opcache.save_comments = 1
opcache.revalidate_freq = 5
opcache.validate_timestamps = 0
opcache.memory_consumption = 512
opcache.interned_strings_buffer = 8
opcache.max_accelerated_files = 10000
zend_extension = /usr/local/php7/include/php/ext/opcache.so

[Date]
date.timezone = Asia/Shanghai

[Pdo_mysql]
pdo_mysql.default_socket=/usr/local/mysql/socket/mysql.sock
7、复制模板文件、并将PID的路径改为绝对路径
[root@lnmp ~]# cp /usr/local/php7/etc/php-fpm.conf.default  /usr/local/php7/etc/php-fpm.conf
[root@lnmp ~]# cp /usr/local/php7/etc/php-fpm.d/www.conf.default  /usr/local/php7/etc/php-fpm.d/www.conf
[root@lnmp ~]# sed -i 's#;pid = run/php-fpm.pid#pid = /usr/local/php7/var/run/php-fpm.pid#' /usr/local/php7/etc/php-fpm.conf
8、更改属主与属组、并开启动态模式、调整动态参数
[root@lnmp ~]# cp /usr/local/php7/etc/php-fpm.d/www.conf /usr/local/php7/etc/php-fpm.d/www.conf.bak
[root@lnmp ~]# vim /usr/local/php7/etc/php-fpm.d/www.conf
user = nginx
group = nginx
pm = dynamic
pm.max_children = 130
pm.start_servers = 15
pm.min_spare_servers = 6
pm.max_spare_servers = 35
9、启动PHP-FPM并设置为开机自启
[root@lnmp ~]# /usr/local/sbin/php-fpm -t
[24-Feb-2020 15:14:03] NOTICE: configuration file /usr/local/php7/etc/php-fpm.conf test is successful

[root@lnmp ~]# /usr/local/sbin/php-fpm

[root@lnmp ~]# netstat -anput | grep 9000
tcp        0      0 127.0.0.1:9000          0.0.0.0:*               LISTEN      92180/php-fpm: mast

[root@lnmp ~]# vim /etc/rc.local
[root@lnmp ~]# echo "/usr/local/sbin/php-fpm" >> /etc/rc.local
10、配置Nginx支持PHP解析
[root@lnmp ~]# cp /etc/nginx/conf/nginx.conf /etc/nginx/conf/nginx.conf.bak
[root@lnmp ~]# vim /etc/nginx/conf/nginx.conf
user  nginx;

worker_processes  auto;
worker_cpu_affinity auto;
worker_rlimit_nofile 65535;

pid             /etc/nginx/logs/nginx.pid;
error_log       /etc/nginx/logserror.log  info;


events  {
        use epoll;
        worker_connections  65535;
}


http {
    include       mime.types;
    default_type  application/octet-stream;

    log_format  mds  '$remote_addr - $remote_user [$time_local] "$request"'
                      '$status $body_bytes_sent "$http_referer" '
                      '"$http_user_agent" "$http_x_forwarded_for"';

        access_log  logs/access.log  mds;
        sendfile                on;
        tcp_nopush              on;
        tcp_nodelay             on;
        send_timeout            10;
        keepalive_timeout       60;
        server_tokens           off;
        client_max_body_size    512m;
        fastcgi_buffers 64 4K;
        client_header_buffer_size  15k;
        large_client_header_buffers  4 128k;
        open_file_cache_valid  30s;
        open_file_cache_min_uses 2;
        open_file_cache max=65535 inactive=20s;

        gzip  on;
        gzip_min_length         3k;
        gzip_buffers     4      16k;
        gzip_http_version       1.1;
        gzip_comp_level         1;
        gzip_vary               on;
        gzip_types      	    text/plain application/x-javascript text/css application/xml;

    server {
        listen          10.2.3.11:80;
	  server_name	  www.mds.com;
        charset         utf-8;

        location / {
		root	/etc/nginx/html;
		index	index.html index.htm;
	  }

	location ~ \.php$ {
		root		/etc/nginx/html;
		fastcgi_pass	127.0.0.1:9000;	  #这里填写PFP-FPM的监听地址与端口
		fastcgi_index	index.php;
		include		fastcgi_params;
		fastcgi_param	SCRIPT_FILENAME $document_root$fastcgi_script_name;
	}
  }
}
三、LNMP架构测试
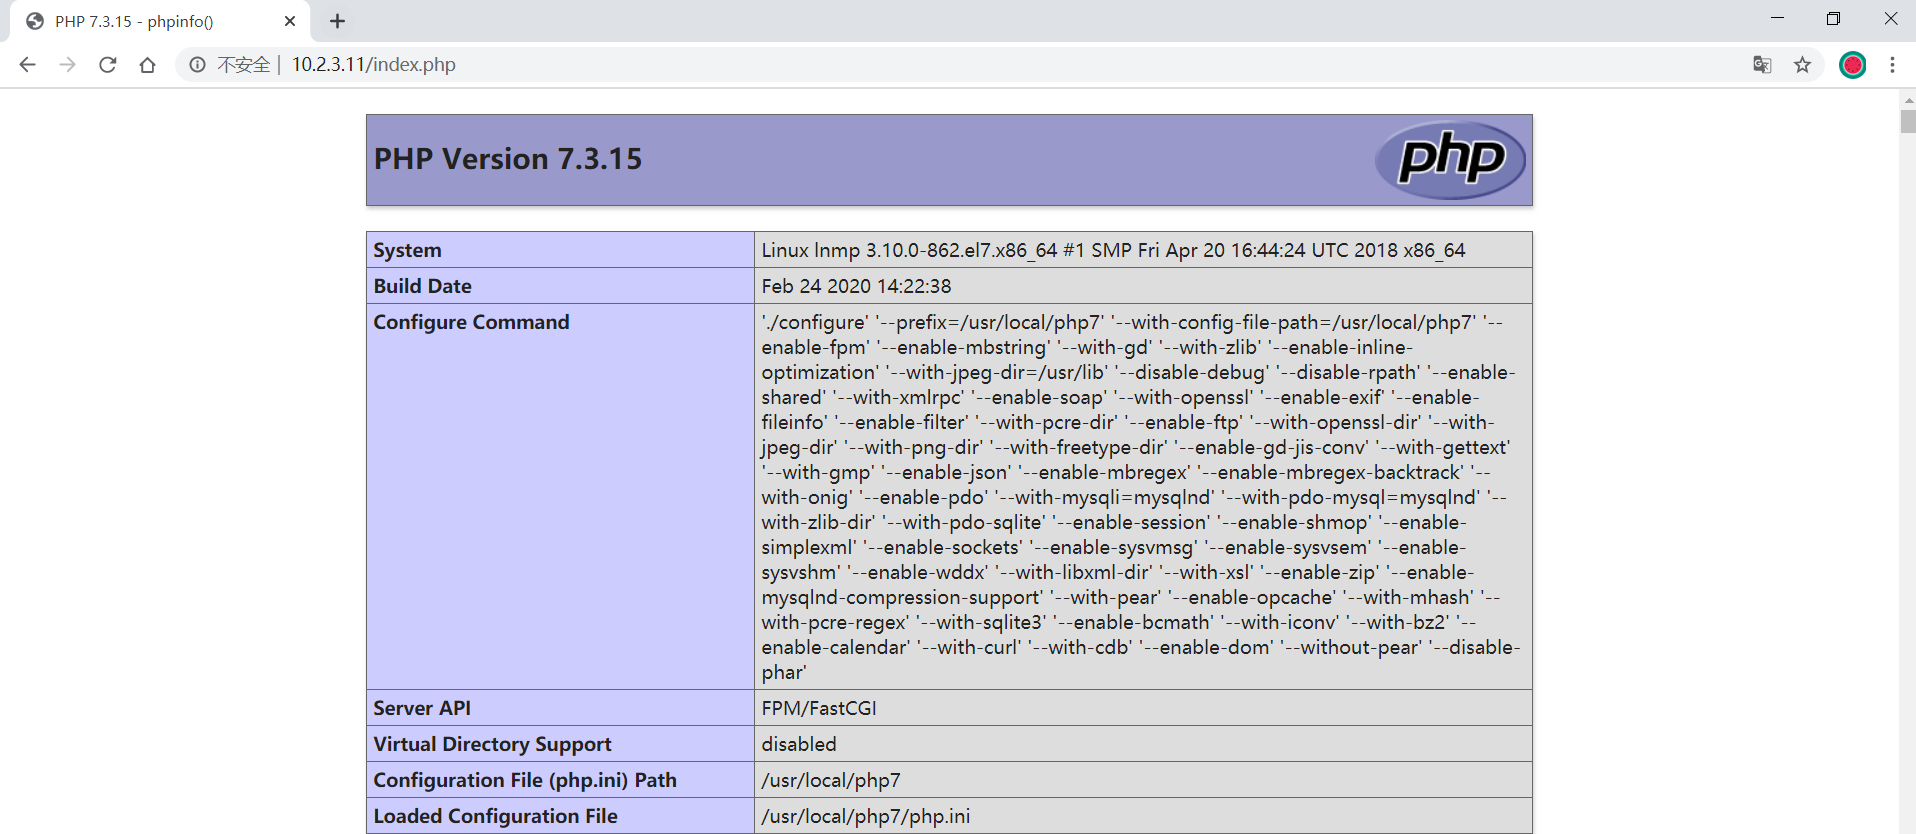
1)编写PHP测试代码
(1)网页测试代码
[root@lnmp ~]# vim /etc/nginx/html/index.php
<?php
phpinfo();
?>
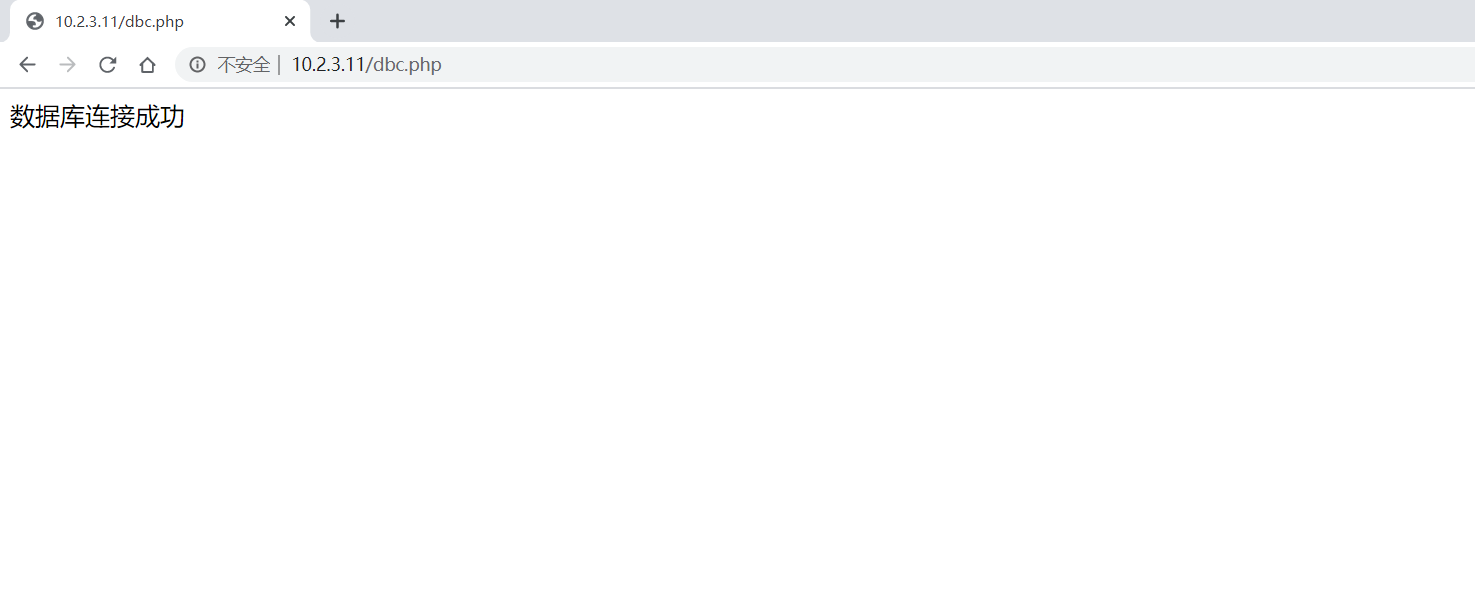
(2)数据库测试代码
[root@lnmp ~]# vim /etc/nginx/html/dbc.php
<?php
$servername = "10.2.3.11";
$username   = "root";
$password   = "abc-123";

try {
    $conn = new PDO("mysql:host=$servername:3635;",$username,$password);
    echo "数据库连接成功";
}
catch(PDOException $e)
{
    echo $e->getMessage();
}
?>
2)网页访问测试与数据库连接测试
(1)网页访问测试
(2)数据库连接测试
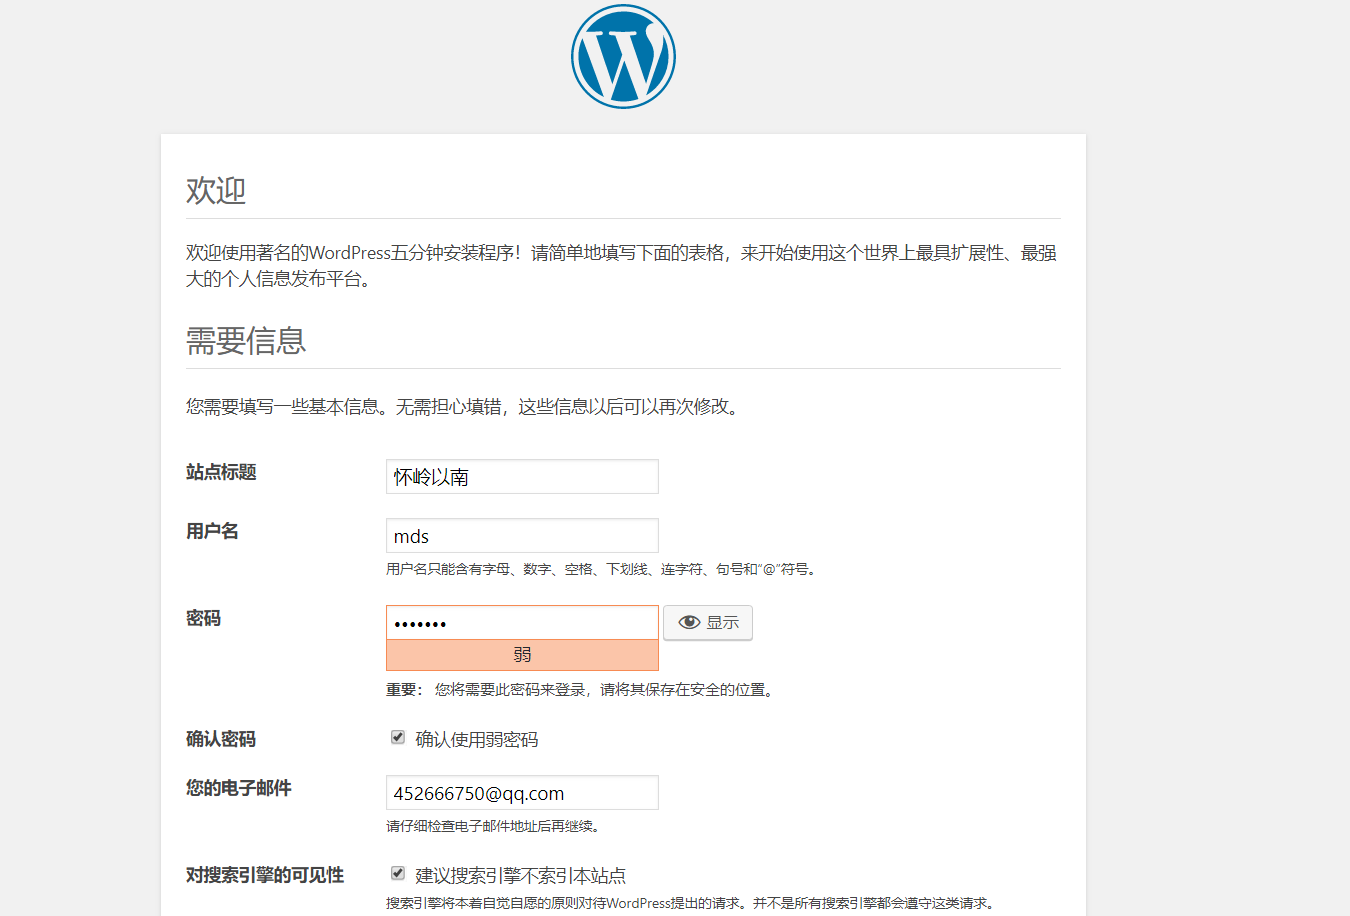
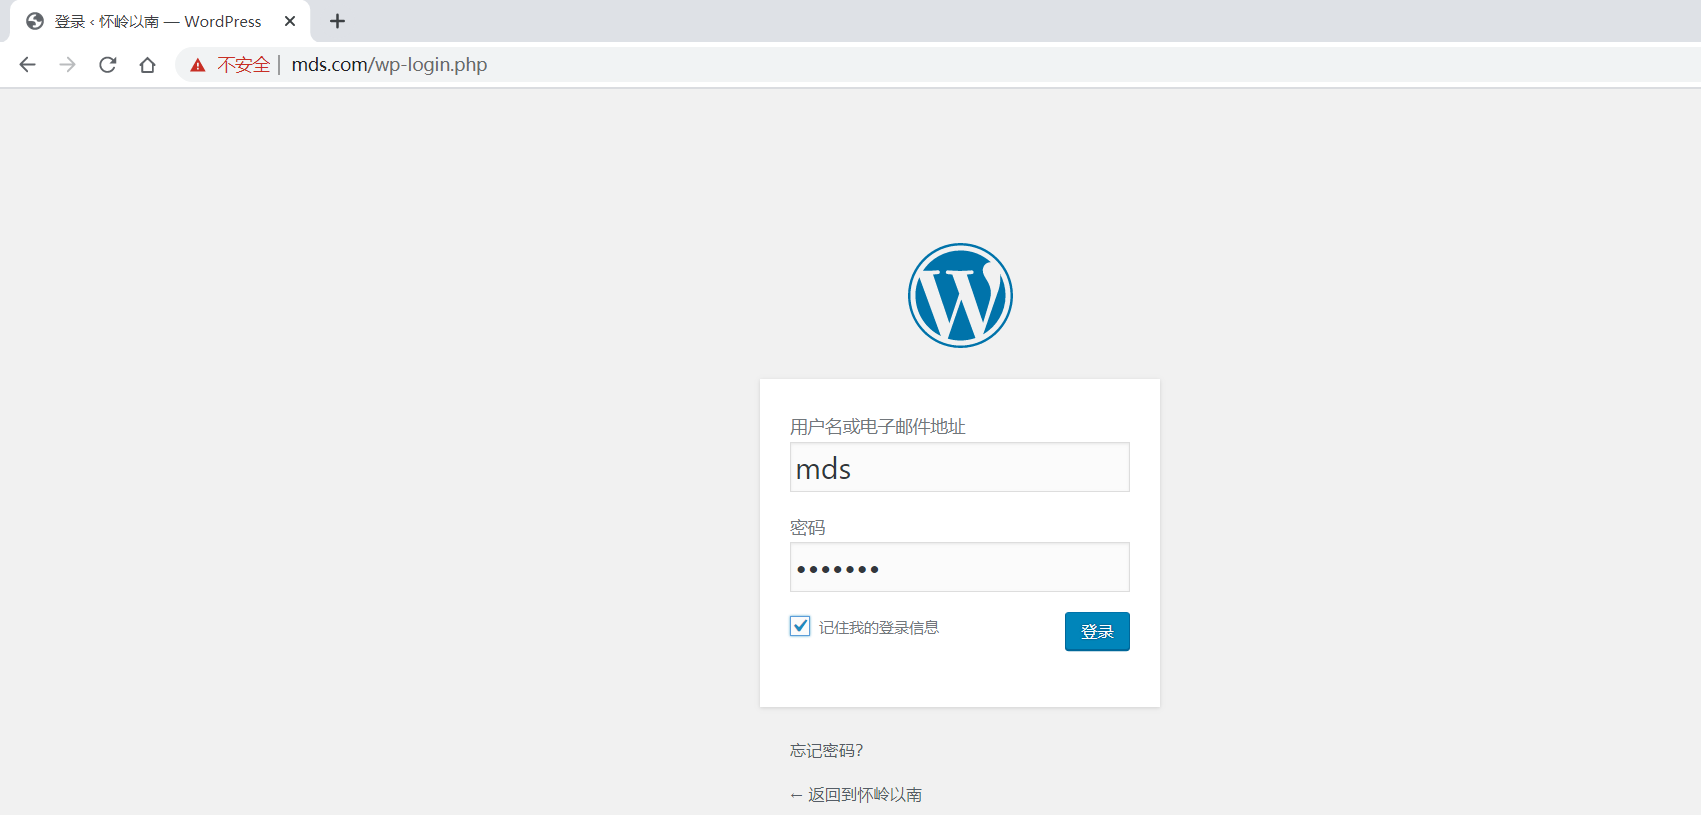
四、基于LNMP架构部署WordPress博客系统
1)解压软件包
[root@lnmp ~]# unzip /root/wordpress-4.9.4-zh_CN.zip
[root@lnmp ~]# mv wordpress /etc/nginx/html/wordpress
[root@lnmp ~]# chown -R nginx:nginx /etc/nginx/html/wordpress
2)定义Nginx配置文件
[root@lnmp ~]# cat /etc/nginx/conf/nginx.conf
user  nginx;
worker_processes  auto;
worker_cpu_affinity auto;
worker_rlimit_nofile 65535;

pid		/etc/nginx/logs/nginx.pid;
error_log		/etc/nginx/logserror.log  info;

events	{
	use epoll;
	worker_connections  65535;
}

http	{
	include	mime.types;
	default_type  application/octet-stream;

	log_format mds  '$remote_addr - $remote_user [$time_local] "$request"'
                    	'$status $body_bytes_sent "$http_referer"'
                     	'"$http_user_agent" "$http_x_forwarded_for"';

    	access_log  logs/access.log  mds;

    	sendfile			on;
    	tcp_nopush		on;
    	tcp_nodelay		on;
    	send_timeout		10;
    	keepalive_timeout		60;
    	server_tokens 		off;
    	client_max_body_size  	512m;
    	fastcgi_buffers 		64 4K;
    	client_header_buffer_size  	15k;
    	large_client_header_buffers  4 128k;
    	open_file_cache_valid  	30s;
    	open_file_cache_min_uses 	2;
    	open_file_cache max=65535 inactive=20s;

    	gzip  on;
    	gzip_min_length		3k;
    	gzip_buffers     		4 16k;
    	gzip_http_version		1.1;
    	gzip_comp_level		1;
    	gzip_vary			on;
    	gzip_types		text/plain application/x-javascript text/css application/xml;

	    upstream wordpress {
		    server 127.0.0.1:9000;
	    }

	server	{
		listen       	10.2.3.11:80;
        server_name  	www.mds.com;
        charset 	  utf-8;

    	root /etc/nginx/html/wordpress;

		location / {
			index	index.php index.html index.htm;
			try_files $uri $uri/ /index.php?$args;
		}

		location = /favicon.ico {
			log_not_found off;
			access_log off;
		}

		location = /robots.txt {
			allow all;
			log_not_found off;
			access_log off;
		}

		location ~* \.(js|css|png|jpg|jpeg|gif|ico)$ {
			expires max;
			log_not_found off;
		}

		location ~ \.php$ {
			fastcgi_index	index.php;
			fastcgi_pass 	wordpress;
			include 		fastcgi_params;
			fastcgi_param	SCRIPT_FILENAME $document_root$fastcgi_script_name;
         }
	}
}
3)为WordPress创建用户并授权
[root@lnmp ~]# mysql -uroot -pabc-123 -e"create database wordpress;" 2> /dev/null
[root@lnmp ~]# mysql -uroot -pabc-123 -e"grant all privileges on wordpress.* to 'wordpress'@'10.2.3.%' identified by 'abc-123';;" 2> /dev/null
[root@lnmp ~]# mysql -uwordpress -pabc-123 -h10.2.3.11 -P3635 -Dwordpress 2> /dev/null
Welcome to the MySQL monitor.  Commands end with ; or \g.
Your MySQL connection id is 11
Server version: 5.7.27-log Source distribution

Copyright (c) 2000, 2019, Oracle and/or its affiliates. All rights reserved.

Oracle is a registered trademark of Oracle Corporation and/or its
affiliates. Other names may be trademarks of their respective
owners.

Type 'help;' or '\h' for help. Type '\c' to clear the current input statement.

mysql> select database();
+------------+
| database() |
+------------+
| wordpress  |
+------------+
1 row in set (0.00 sec)
3)复制范本文件并填写数据库连接信息
[root@lnmp ~]# cp /etc/nginx/html/wordpress/wp-config-sample.php /etc/nginx/html/wordpress/wp-config.php
[root@lnmp ~]# vim /etc/nginx/html/wordpress/wp-config.php
/** WordPress数据库的名称 */
define('DB_NAME', 'wordpress');

/** MySQL数据库用户名 */
define('DB_USER', 'wordpress');

/** MySQL数据库密码 */
define('DB_PASSWORD', 'abc-123');

/** MySQL主机 */
define('DB_HOST', '10.2.3.11:3635');

/** 创建数据表时默认的文字编码 */
define('DB_CHARSET', 'utf8');

/** 关闭核心提示 */
add_filter('pre_site_transient_update_core',create_function('$a',"return null;"));

/** 关闭插件提示 */
add_filter('pre_site_transient_update_plugins',create_function('$a',"return null;"));

/** 关闭主题提示 */
add_filter('pre_site_transient_update_themes',create_function('$a',"return null;"));

/** 禁止WordPress检查更新 */
remove_action('admin_init','_maybe_update_core');

/** 禁止WordPress更新插件 */
remove_action('admin_init','_maybe_update_plugins');

/** 禁止WordPress更主题 */
remove_action('admin_init','_maybe_update_themes');
4)重启Nginx与PHP-FPM
[root@lnmp ~]# pkill -9 php-fpm
[root@lnmp ~]# /usr/local/sbin/php-fpm

[root@lnmp ~]# systemctl restart nginx mysql

[root@lnmp ~]# netstat -anput
Active Internet connections (servers and established)
Proto Recv-Q Send-Q Local Address           Foreign Address         State       PID/Program name
tcp        0      0 127.0.0.1:9000          0.0.0.0:*               LISTEN      2561/php-fpm: maste
tcp        0      0 10.2.3.11:80            0.0.0.0:*               LISTEN      2603/nginx: master
tcp        0      0 0.0.0.0:3635            0.0.0.0:*               LISTEN      3864/mysqld
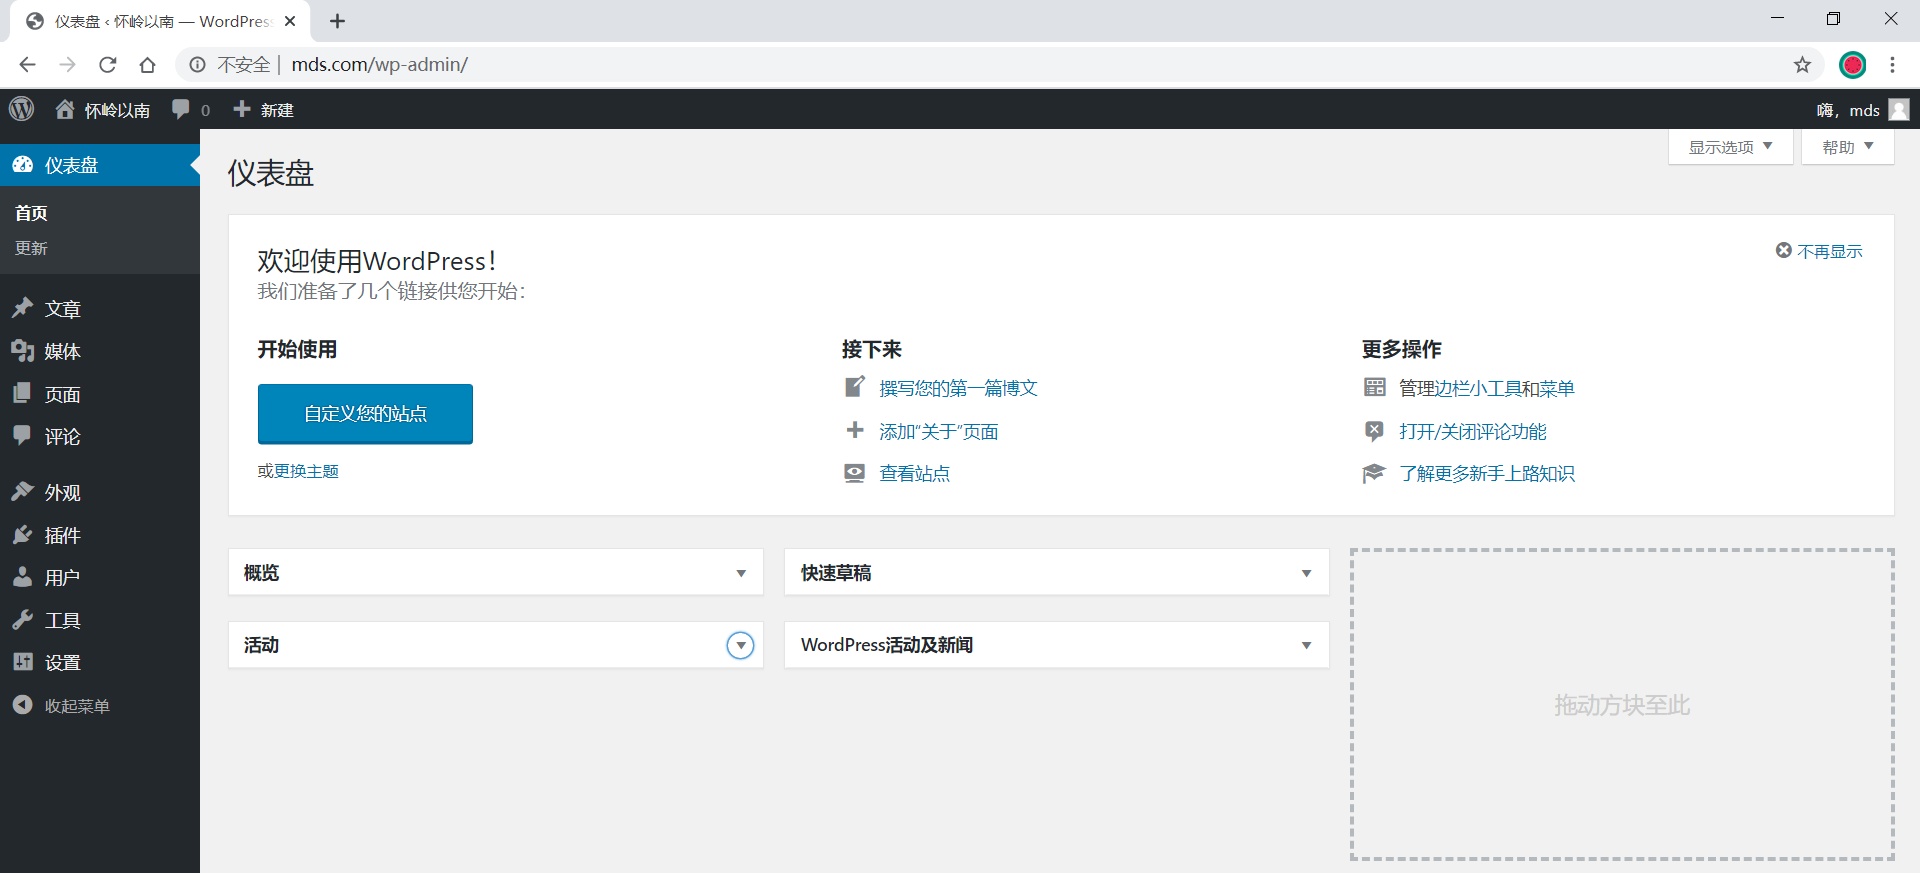
5)测试访问WordPress博客系统
【只是为了打发时间】