一.Zabix简介
Zabbix是一款开源的监控软件,它能提供对网络,系统负载,web页面等服务的监控。并且支持实时从客户端收集数据。Zabbix能帮助监控系统的健康状态,发现故障。在Zabbix客户端,我们只需要安装一个小小的agent,就能收集数据,并且发送到Zabbix server上。Zabbix还支持在客户端与服务端加密传输数据,增加了安全性。
二.Zabbix安装(服务端)
1.lamp架构搭建
(1)安装apache
yum install httpd -y
systemctl start httpd.service
systemctl enable httpd.service

注:安装apache以后,需要关掉防火墙和selinux,或者是使firewall信任http,并且通过浏览器访问,看是否能看到测试页。可以通过curl http://icanhazip.com查看自己的公网ip。
(2)安装mysql或者是mariadb
yum install mariadb-server mariadb
systemctl start mariadb
mysql_secure_installation   ##mysql安全初始化,会询问当前密码,直接回车即可。
Enter current password for root (enter for none):
OK, successfully used password, moving on...

Setting the root password ensures that nobody can log into the MariaDB
root user without the proper authorization.

New password: password
Re-enter new password: password
Password updated successfully!
Reloading privilege tables..
 ... Success!
systemctl enable mariadb.service(3)安装php
安装php
yum install php php-mysql -y  ##php与php-mysql连接数据库
 systemctl restart httpd.service
安装php模块
yum install php-fpm
注:php-fpm是fastcgi进程管理器
测试php是否正常工作
vi /var/www/html/info.php
<?php phpinfo(); ?>    ##php测试页
使防火墙信任http,https
firewall-cmd --permanent --zone=public --add-service=http
firewall-cmd --permanent --zone=public --add-service=https
firewall-cmd --reload
在浏览器输入如下:
http://your_server_IP_address/info.php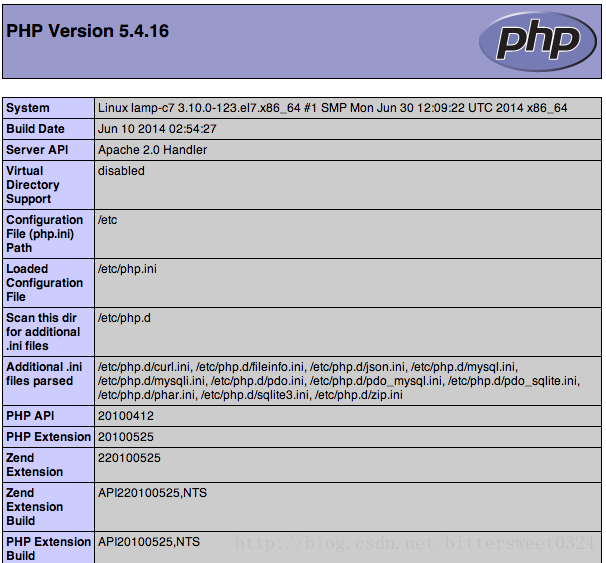
2.安装Zabbix服务端
安装zabbix服务端
rpm -ivh http://repo.zabbix.com/zabbix/3.0/rhel/7/x86_64/zabbix-release-3.0-1.el7.noarch.rpm安装Zabbix与数据库,Zabbix与web页面控件
 yum install zabbix-server-mysql zabbix-web-mysql
 yum install zabbix-agent    ##监控服务端本身
赋予数据库用户zabbix权限
mysql -uroot -p
create database zabbix character set utf8;
grant all privileges on zabbix.* to zabbix@localhost identified by 'zabbix';## 新建zabbix用户并且赋予权限
flush privileges;   ##刷新特权
导入zabbix库原始数据,sql文件
cd /usr/share/doc/zabbix-server-mysql-3.0.4/
zcat create.sql.gz | mysql -uzabbix -p zabbix  ##导入sql文件
修改zabbix配置文件
zabbix连接数据库
vi /etc/zabbix/zabbix_server.conf
### Option: DBPassword
#       Database password. Ignored for SQLite.
#       Comment this line if no password is used.
#
# Mandatory: no
# Default:
DBPassword=your_zabbix_mysql_password    ##数据库用户zabbix密码
zabbix连接php
vi /etc/httpd/conf.d/zabbix.conf
<IfModule mod_php5.c>
    php_value max_execution_time 300
    php_value memory_limit 128M
    php_value post_max_size 16M
    php_value upload_max_filesize 2M
    php_value max_input_time 300
    php_value always_populate_raw_post_data -1
    php_value date.timezone Asia/Shanghai
</IfModule>
systemctl restart httpd
systemctl start zabbix-server
systemctl status zabbix-server
Output
● zabbix-server.service - Zabbix Server
   Loaded: loaded (/usr/lib/systemd/system/zabbix-server.service; disabled; vendor preset: disabled)
   Active: :active (running) since Fri 2016-08-05 07:16:35 UTC; 2s ago
  Process: 10033 ExecStart=/usr/sbin/zabbix_server -c $CONFFILE (code=exited, status=0/SUCCESS)
  ...
以上输出代表zabbix服务端正常
systemctl enable zabbix-server
配置zabbix web接口
web页面初始化设置,在浏览器输入http://your_zabbix_server_ip_address/zabbix/,点击下一步。
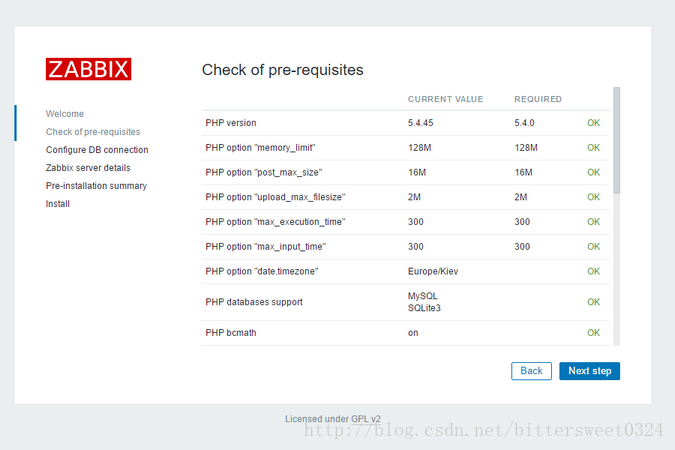
每一项都ok以后,点击下一步
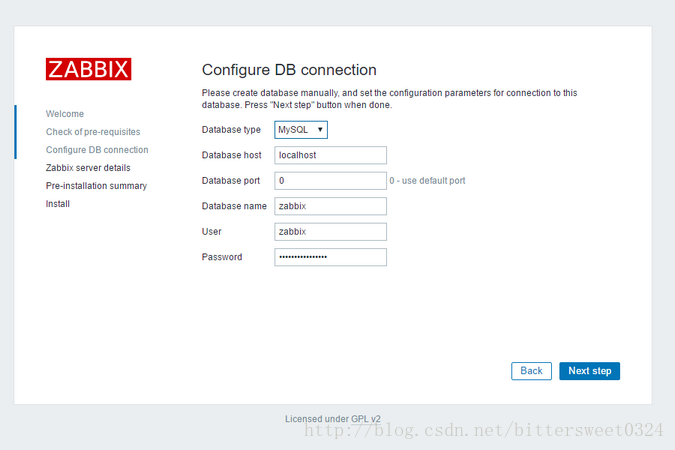
输入zabbix用户密码,点击下一步
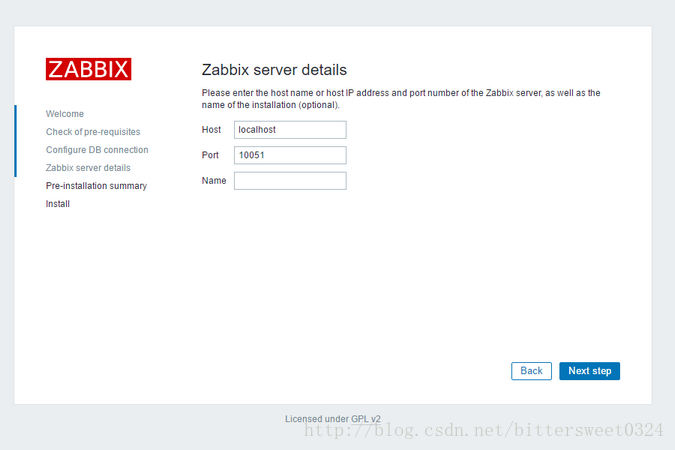
注:name是用来区分不同的zabbix server,当有一个监控集群时。对于单台zabbix服务器,该选项可以不填。
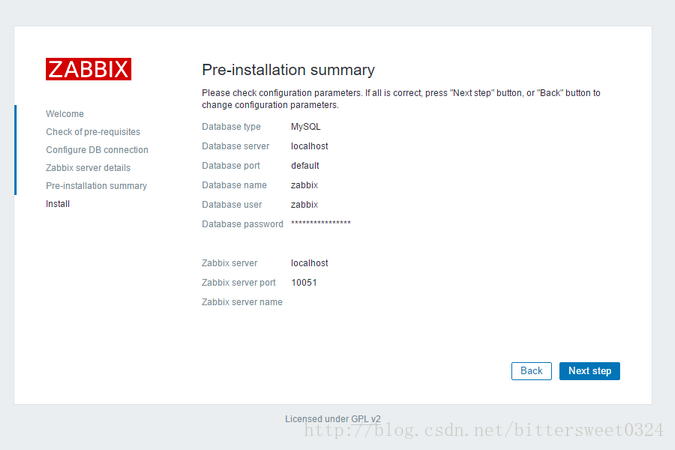
信息确认页面,如果确认无误,可以点击finish
默认的登录名为admin,登录密码为zabbix.
三.zabbix客户端
安装zabbix agent
 rpm -ivh http://repo.zabbix.com/zabbix/3.0/rhel/7/x86_64/zabbix-release-3.0-1.el7.noarch.rpm
 yum install zabbix-agent
配置加密方式传输数据
sh -c "openssl rand -hex 32 > /etc/zabbix/zabbix_agentd.psk"   ##生成一个psk密码
cat /etc/zabbix/zabbix_agentd.psk   ##会看到一连串乱码的数字
定义zabbixserver
vi /etc/zabbix/zabbix_agentd.conf
### Option: Server
#       List of comma delimited IP addresses (or hostnames) of Zabbix servers.
#       Incoming connections will be accepted only from the hosts listed here.
#       If IPv6 support is enabled then '127.0.0.1', '::127.0.0.1', '::ffff:127.0.0.1' are treated equally.
#
# Mandatory: no
# Default:
# Server=

Server=your_zabbix_server_ip_address   ##定义zabbix主机
定义传输加密方式
vi/etc/zabbix/zabbix_agentd.conf

### Option: TLSConnect
#       How the agent should connect to server or proxy. Used for active checks.
#       Only one value can be specified:
#               unencrypted - connect without encryption
#               psk         - connect using TLS and a pre-shared key
#               cert        - connect using TLS and a certificate
#
# Mandatory: yes, if TLS certificate or PSK parameters are defined (even for 'unencrypted' connection)
# Default:
TLSConnect=psk   ##定义加密方式为psk
定义psk验证id
/etc/zabbix/zabbix_agentd.conf
### Option: TLSPSKIdentity
#       Unique, case sensitive string used to identify the pre-shared key.
#
# Mandatory: no
# Default:
TLSPSKIdentity=psk 001
定义验证文件的位置
/etc/zabbix/zabbix_agentd.conf
### Option: TLSPSKFile
#       Full pathname of a file containing the pre-shared key.
#
# Mandatory: no
# Default:
TLSPSKFile=/etc/zabbix/zabbix_agentd.psk
启动zabbix agent
systemctl start zabbix-agent
systemctl enable zabbix-agent
systemctl status zabbix-agent
看到输出如下,代表agent启动正常
Output
● zabbix-agent.service - Zabbix Agent
   Loaded: loaded (/usr/lib/systemd/system/zabbix-agent.service; disabled; vendor preset: disabled)
   Active: active (running) since Fri 2016-08-05 08:17:07 UTC; 5s ago
  Process: 9507 ExecStart=/usr/sbin/zabbix_agentd -c $CONFFILE (code=exited, status=0/SUCCESS)
  ...
四.在Zabbix server 上添加新的监控主机
访问http://your_zabbix_server_ip_address/zabbix/
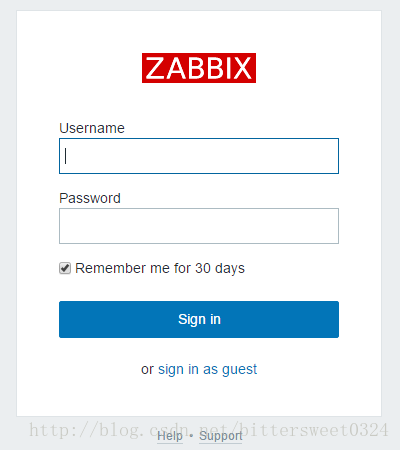
默认用户名为admin,密码是zabbix
Configuration——>Hosts ——>Create host
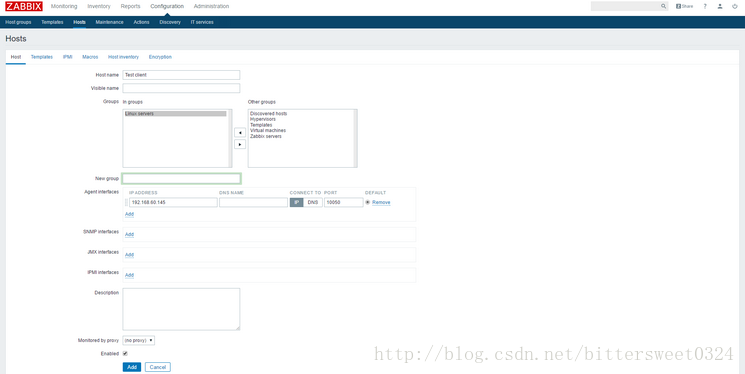
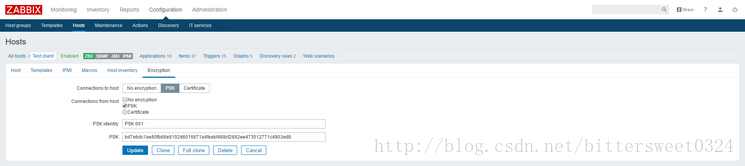
添加主机名和ip地址,接下来在template里面选择一个模板,例如linux server,最后配置加密传输的秘钥。psk 验证id 为之前设置的psk 001,psk value为agent机器上的/etc/zabbix/zabbix_agentd.psk的值。
点击add添加成功
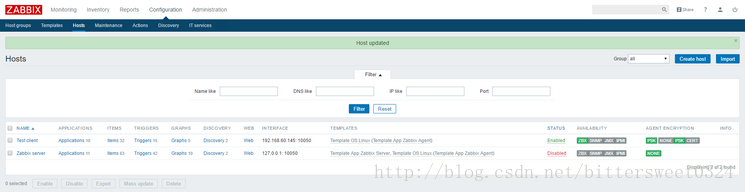
看到所添加主机enable,并且可以看到监控的数据,代表zabbix配置成功。
总结:zabbix的功能十分丰富,几乎涵盖了当前市面上所有主流的监控手段。还值得笔者在今后不断的挖掘,并且根据公司业务量不断地调整。在撰写这篇文章时也参考了前人的一些文章,使我收益颇深。
(1)https://www.digitalocean.com/community/tutorials/how-to-install-and-configure-zabbix-to-securely-monitor-remote-servers-on-centos-7
(2)https://www.digitalocean.com/community/tutorials/how-to-install-linux-apache-mysql-php-lamp-stack-on-centos-7