yaml配置和properties配置的区别:1.
yaml配置是有序的,properties配置是无序的2.自定义的
yaml目前不支持使用注解直接注入到SpringBoot项目中
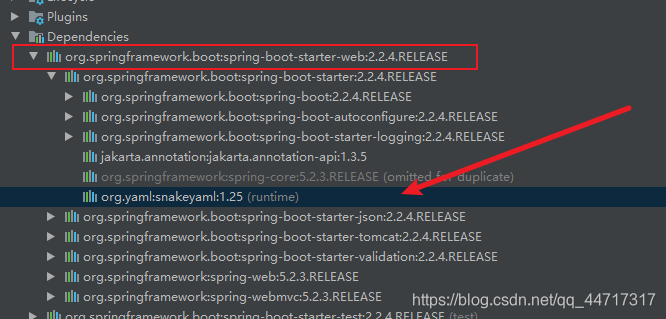
依赖
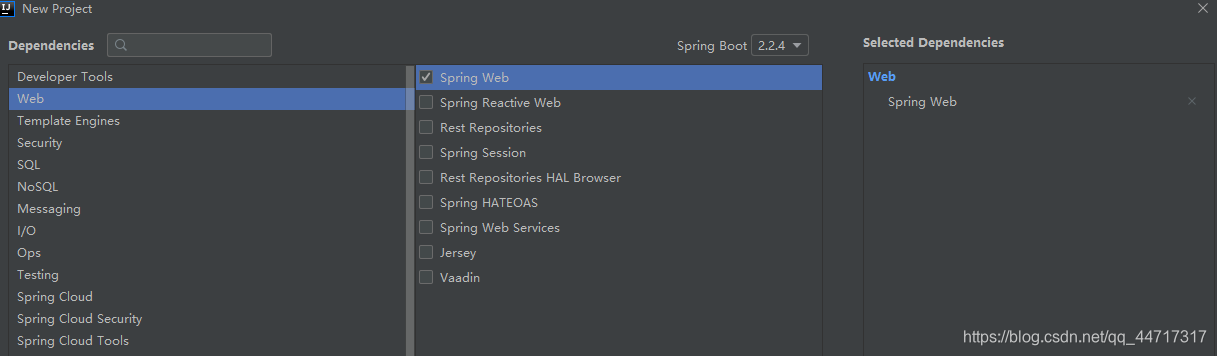
我们可以发现Spring-web中本身就包含yaml相关的包
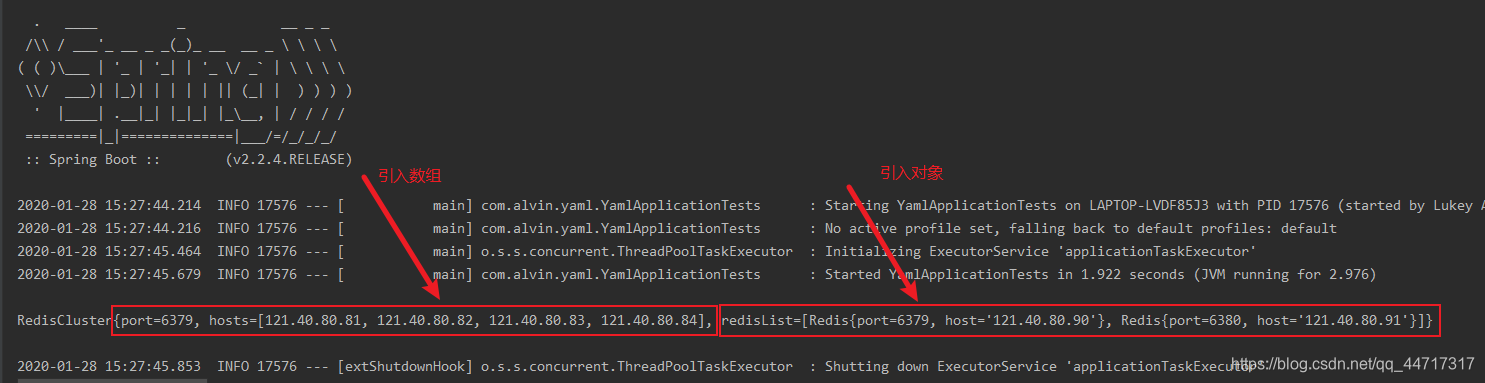
一、yaml注入数组
1.新建并配置application.yml文件
server:
  port: 8081
  servlet:
    context-path: /alvin
## 配置不同服务器Redis集群
redis:
  port: 6379
  hosts:
    - 121.40.80.81
    - 121.40.80.82
    - 121.40.80.83
    - 121.40.80.84
2.创建实体类RedisCluster.java
//将此类注入Spring容器
@Component
//引入Redid相关配置
@ConfigurationProperties("redis")
public class RedisCluster {
    private Integer port;
    private List<String> hosts;

    @Override
    public String toString() {
        return "RedisCluster{" +
                "port=" + port +
                ", hosts=" + hosts +
                '}';
    }

    public Integer getPort() {
        return port;
    }

    public void setPort(Integer port) {
        this.port = port;
    }

    public List<String> getHosts() {
        return hosts;
    }

    public void setHosts(List<String> hosts) {
        this.hosts = hosts;
    }
}
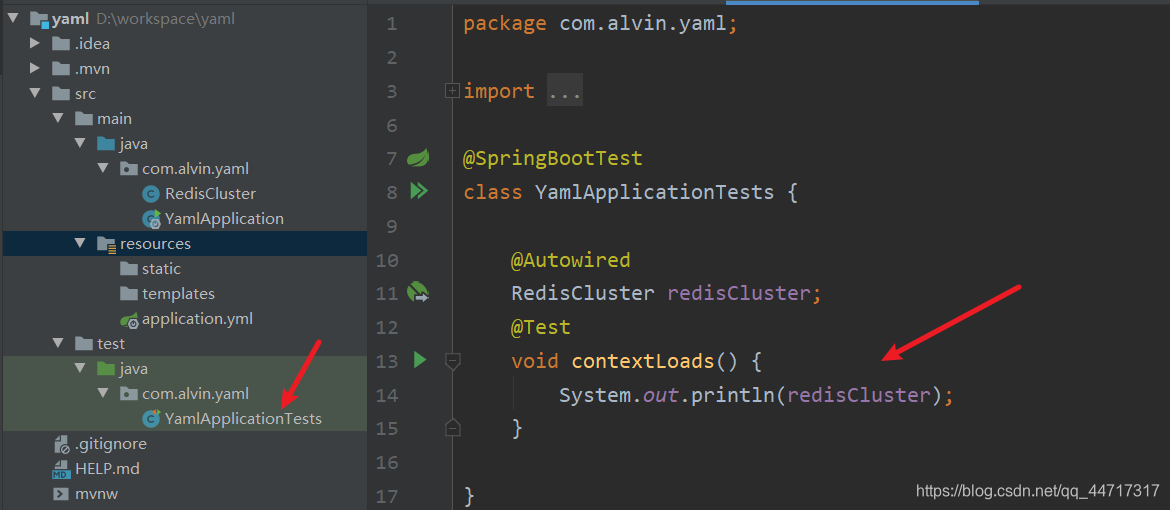
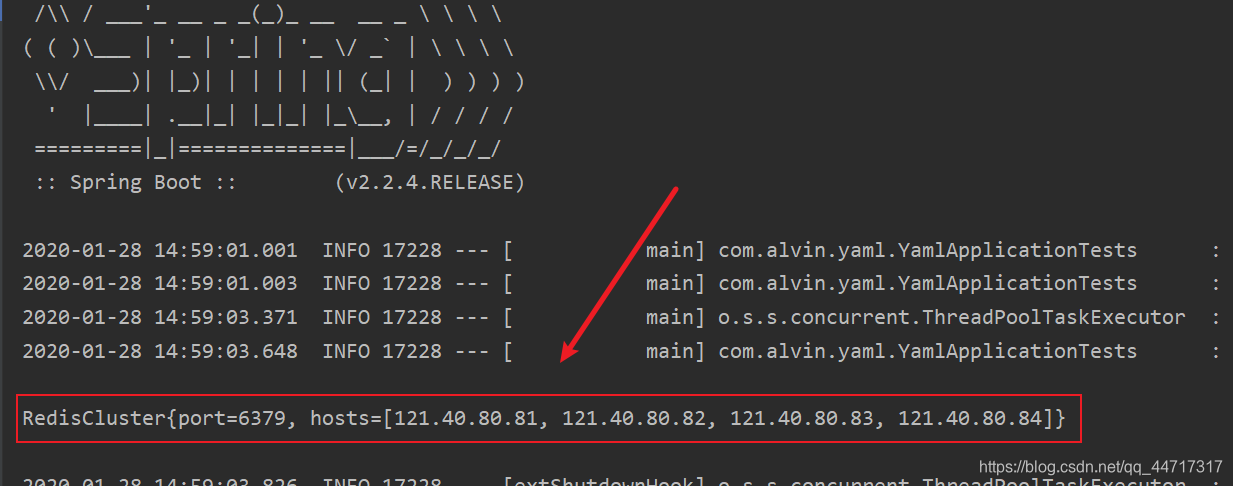
3.进行单元测试
二、yaml注入对象
1.配置application.yml
server:
  port: 8081
  servlet:
    context-path: /alvin

redis:
  port: 6379
  hosts:
    - 121.40.80.81
    - 121.40.80.82
    - 121.40.80.83
    - 121.40.80.84
  redisList:
    - port: 6379
      host: 121.40.80.90
    - port: 6380
      host: 121.40.80.91
2.修改实体类RedisCluster,创建Redis实体类
- RedisCluster
@Component
@ConfigurationProperties("redis")
public class RedisCluster {
    private Integer port;
    private List<String> hosts;
    //引入对象
    private List<Redis> redisList;

    @Override
    public String toString() {
        return "RedisCluster{" +
                "port=" + port +
                ", hosts=" + hosts +
                ", redisList=" + redisList +
                '}';
    }

    public List<Redis> getRedisList() {
        return redisList;
    }

    public void setRedisList(List<Redis> redisList) {
        this.redisList = redisList;
    }

    public Integer getPort() {
        return port;
    }

    public void setPort(Integer port) {
        this.port = port;
    }

    public List<String> getHosts() {
        return hosts;
    }

    public void setHosts(List<String> hosts) {
        this.hosts = hosts;
    }
}
- Redis
public class Redis {
    private Integer port;
    private String host;

    @Override
    public String toString() {
        return "Redis{" +
                "port=" + port +
                ", host='" + host + '\'' +
                '}';
    }

    public Integer getPort() {
        return port;
    }

    public void setPort(Integer port) {
        this.port = port;
    }

    public String getHost() {
        return host;
    }

    public void setHost(String host) {
        this.host = host;
    }
}
3.进行单元测试
三、profile实现分工配置
properties和yaml是一样的 只是文件扩展名不同
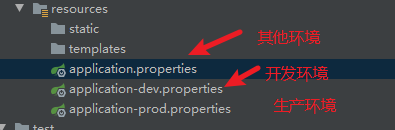
启动方式:
在需要启动的配置环境下,写激活配置:
spring.profiles.active=dev
