1. 分层开发
1.1 服务层
1.1.1 自定义服务
语法:
app.service("服务名称",function($http){});
注意:
1. App为模块名
2. 回调函数function中的参数有多个用逗号分隔
1.1.2 实战演示
app.service("brandService",function($http){
    		this.findAll = function(){
    			return $http.get("../brand/findAll.do");
    		}
    	});
注意:在service层用this表示$scope
1.2 控制层
语法:
app.controller("brandController",function($scope,$http){});
1.3 实战演练
app.controller("brandController",function($scope,$http,brandService){
    		// 查询所有品牌列表
    		$scope.findAll = function(){
    			brandService.findAll().success(function(response){
    				$scope.list = response;
    			});
    		}
         })
注意:
1. app为模块名称
2. 回调函数function中的参数可以根据实际情况添加
3. brandService为服务层名称
1.3 分层文件
我现在开始要对js代码进行分文件处理,每一层一个独立的js文件
在angular中,一般一个项目自定义一个模块,这个模块贯穿整个项目的始终,所以,我们可以将其抽取层一个base.js
例如:
var app = angular.module("pinyougou",[]);1.3.1 服务层文件
brandService.js
app.service("brandService",function($http){
	// 查询所有品牌列表
	this.findAll = function(){
		return $http.get("../brand/findAll.do");
	}

	// 查询品牌分页列表
	this.findPage = function(page,size,entity){
		return $http.post("../brand/findPage.do?page=" + page + "&size=" + size,entity);
	}

	// 添加
	this.add = function(entity){
		return $http.post("../brand/add.do",entity);
	}

	// 修改
	this.update = function(entity){
		return $http.post("../brand/update.do",entity);
	}

	// 查询单个品牌
	this.findOne = function(id){
		return $http.get("../brand/findOne.do?id="+id);
	}

	// 删除
	this.dele = function(ids){
		return $http.get("../brand/delete.do?ids="+ids);
	}

});
1.3.2 控制层文件
brandController.js
app.controller("brandController",function($scope,$http,brandService){
	// 查询所有品牌列表
	$scope.findAll = function(){
		brandService.findAll().success(function(response){
			$scope.list = response;
		});
	}

	//分页控件配置
	$scope.paginationConf = {
		 currentPage: 1,
		 totalItems: 10,
		 itemsPerPage: 10,
		 perPageOptions: [10, 20, 30, 40, 50],
		 onChange: function(){
			$scope.reloadList();
		 }
	};


	// 刷新列表
	$scope.reloadList = function(){
		$scope.findPage($scope.paginationConf.currentPage,$scope.paginationConf.itemsPerPage);
	}
	$scope.seachEntity = {};
	// 查询品牌分页列表
	$scope.findPage = function(page,size){
		brandService.findPage(page,size,$scope.seachEntity).success(function(response){
			$scope.list = response.rows;						// 显示当前页数据
			$scope.paginationConf.totalItems = response.total;  // 修改总记录数
		});
	}

	// 新增/修改
	$scope.save = function(){
		var object = null;
		if($scope.entity.id){
			object = brandService.update($scope.entity);
		} else {
			object = brandService.add($scope.entity);
		}
		object.success(function(response){
			if(response.success){
				$scope.reloadList();
			} else {
				alert(response.message);
			}
		});

	}

	// 根据id查询
	$scope.findOne = function(id){
		brandService.findOne(id).success(function(response){
			$scope.entity = response;
		});
	}

	// 定义一个变量用于记录用户选中的记录id
	$scope.selectIds = [];
	// 定义选中函数
	$scope.updateSelection = function($event,id){
		if($event.target.checked){  // 如果复选框被选中了
			$scope.selectIds.push(id);
		} else {
			$scope.selectIds.splice($scope.selectIds.indexOf(id), 1);
		}
	}

	// 删除
	$scope.dele = function(){
		brandService.dele($scope.selectIds).success(function(response){
			if(response.success){
				$scope.reloadList();
				$scope.selectIds = [];
			} else {
				alert(response.message);
			}
		});
	}
});
然后在界面引入这三个文件即可,例如:

2. 控制层继承
我们已经实现了前端的分层,但是某些功能可能不止一个页面需要调用,比如分页,复选等,如果我们在写一遍会显得很啰嗦,这里,我们可以使用继承的方式来实现代码的复用。
2.1 语法
$controller("需要继承的controller",{$scope:$scope});
参数说明:
1)需要继承的controller是我们需要继承那个controller,类似于java中的extends Object
2){$scope:$scope} 的意思是让我们当前的controller与被继承的controller的$scope相等,也即是通过共享$scope实现了继承的效果。
注意:$controller本身也是一个服务,所以我们需要在当前的controller中传进来
2.2 实例
1)自定义一个controller的文件baseController.js
app.controller("baseController",function($scope){
	/*
	 * 分页控件
	 * */
	// 1. 分页控件配置
	$scope.paginationConf = {
		 currentPage: 1,
		 totalItems: 10,
		 itemsPerPage: 10,
		 perPageOptions: [10, 20, 30, 40, 50],
		 onChange: function(){
			$scope.reloadList();
		 }
	};

	// 2. 刷新列表
	$scope.reloadList = function(){
		$scope.findPage($scope.paginationConf.currentPage,$scope.paginationConf.itemsPerPage);
	}

	/*
	 * 3. 搜索实体bean定义
	 */
	$scope.seachEntity = {};

	/*
	 * 复选框勾选
	 *
	 * */
	// 1. 定义一个变量用于记录用户选中的记录id
	$scope.selectIds = [];
	// 2. 定义选中函数
	$scope.updateSelection = function($event,id){
		if($event.target.checked){  // 如果复选框被选中了
			$scope.selectIds.push(id);
		} else {
			$scope.selectIds.splice($scope.selectIds.indexOf(id), 1);
		}
	}

});
2)在当前controller中继承baseController,例如:

3)在页面引入baseController.js

注意引入顺序
3. 复杂类型数据的提交
提交如图所示的表格

可以看出,该数据包含两部分,规格名称与规格选项部分,所以我们可以定义如下数据格式的数据来存储数据信息
{ 规格名称:{},规格选项:[] }
3.1 添加一行
html代码
<tr ng-repeat = "item in entity.specificationOptionalList">
    <td>
	<input  class="form-control" placeholder="规格选项" ng-model="item.optionName">
    </td>
    <td>
	<input  class="form-control" placeholder="排序" ng-model="item.optionName.orders">
    </td>
</tr>
js代码
/* 新增一行规格选项*/
// 1. 定义entity的初始结构
$scope.entity = {specificationOptionalList:[]};
$scope.addTableRow = function(){
	$scope.entity.specificationOptionalList.push({});
}
效果:点击新增,列表添加一行,如图:

3.2 删除一行
实现思路:在每一行将索引值传递给集合,在集合中删除
html代码:
<tr ng-repeat = "item in entity.specificationOptionalList">
    <td>
	<input  class="form-control" placeholder="规格选项" ng-model="item.optionName">
    </td>
    <td>
	<input  class="form-control" placeholder="排序" ng-model="item.orders">
    </td>
    <td>
	<button type="button" class="btn btn-default" title="删除" ng-click="deleTableRow($index)"><i class="fa fa-trash-o"></i> 删除</button>
    </td>
</tr>
注意:在angularJS中,在ng-repeat 指令中获取行索引直接用 $index 即可
js代码:
// 删除一行
	$scope.deleTableRow = function(index){
		$scope.entity.specificationOptionalList.splice(index,1);
	}
3.3 新增保存
只需要在java后端新建一个组合的实体bean即可
4. angularJs中下拉列表的使用
4.1 select2插件
插件下载链接:b037
4.1.1使用
1)引入相关文件
<link rel="stylesheet" href="../plugins/select2/select2.css" />
<link rel="stylesheet" href="../plugins/select2/select2-bootstrap.css" />
<script src="../plugins/select2/select2.min.js" type="text/javascript"></script>
<script type="text/javascript" src="../js/angular-select2.js">  </script>
2)构建数据
$scope.brandList={data:[{id:1,text:'联想'},{id:2,text:'华为'},{id:3,text:'小米'}]};注意:这里list的数据格式为:{ data:[{id:xxx,text:xxx}] }
3) 用select2组件实现多选下拉框
<input select2 select2-model="entity.brandIds" config="brandList" multiple placeholder="选择品牌(可多选)" class="form-control" type="text"/> 属性说明:
1. multiple 表示可多选
2. Config用于配置数据来源
3. select2-model用于指定用户选择后提交的变量
3)测试

4.1.2 select2的其他使用
可以参考插件案例index.html
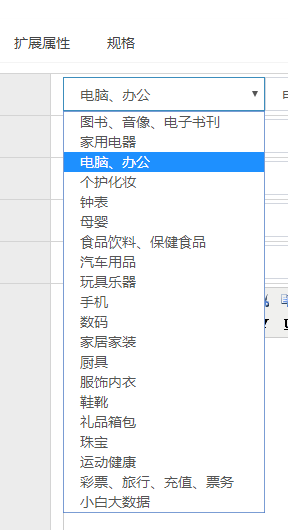
4.2 使用原生的select标签
使用原生的select标签只需要加上ng-options指令,写对应的表达式即可,用ng-model绑定变量
例如:
<td>
	<select class="form-control" ng-model="entity.goods.category1Id" ng-options="item.id as item.name for item in itemCat1List" >
	</select>
</td>
效果如图:
4.3 下拉列表联动
在angularJS中,下拉联动的实现也很简单,只需要用angularJS中的$scope.$watch函数即可实现
例如:
js
	$scope.$watch('entity.goods.category1Id',function(newValue,oldvalue){
		itemCatService.findByParentId(newValue).success(function(data) {
			$scope.itemCat2List = data;
		});
	});
html
<td>
	<select class="form-control" ng-model="entity.goods.category1Id" ng-options="item.id as item.name for item in itemCat1List" >
	</select>
</td>
<td>
	<select class="form-control select-sm" ng-model="entity.goods.category2Id" ng-options="item.id as item.name for item in itemCat2List"></select>
</td>
效果如图:

