基于TensorFlow做fine-tuning,与基于caffe做fine-tuning本质是一样的,只是caffe仅需要修改配置文件,而TensorFlow修改也是配置文件,只不过是用python写的配置文件。
fine-tuning的本质就是:移花接木。
本文讲述如何基于lenet做fine-tuning。
原始的网络,FC1与FC2,现在想在在FC1与FC2中间加入一层,即形成FC1--->FC2-->FC3
fine-tuning步骤
1.加载模型pb文件。
2.获取输入与label的tensor。
3.获取需要修改层(fc1)的tensor。
4.定义修改的层及loss、optimization等。
5.灌入数据,开始fine-tuning。
【原始网络如下】
import tensorflow as tf
from tensorflow.examples.tutorials.mnist import input_data
from tensorflow.python.framework import graph_util

mnist = input_data.read_data_sets(train_dir=r"E:\mnist_data",one_hot=True)


#定义输入数据mnist图片大小28*28*1=784,None表示batch_size
x = tf.placeholder(dtype=tf.float32,shape=[None,28*28],name="input")
#定义标签数据,mnist共10类
y_ = tf.placeholder(dtype=tf.float32,shape=[None,10],name="y_")
#将数据调整为二维数据,w*H*c---> 28*28*1,-1表示N张
image = tf.reshape(x,shape=[-1,28,28,1])

#第一层,卷积核={5*5*1*32},池化核={2*2*1,1*2*2*1}
w1 = tf.Variable(initial_value=tf.random_normal(shape=[5,5,1,32],stddev=0.1,dtype=tf.float32,name="w1"))
b1= tf.Variable(initial_value=tf.zeros(shape=[32]))
conv1 = tf.nn.conv2d(input=image,filter=w1,strides=[1,1,1,1],padding="SAME",name="conv1")
relu1 = tf.nn.relu(tf.nn.bias_add(conv1,b1),name="relu1")
pool1 = tf.nn.max_pool(value=relu1,ksize=[1,2,2,1],strides=[1,2,2,1],padding="SAME")
#shape={None,14,14,32}
#第二层,卷积核={5*5*32*64},池化核={2*2*1,1*2*2*1}
w2 = tf.Variable(initial_value=tf.random_normal(shape=[5,5,32,64],stddev=0.1,dtype=tf.float32,name="w2"))
b2 = tf.Variable(initial_value=tf.zeros(shape=[64]))
conv2 = tf.nn.conv2d(input=pool1,filter=w2,strides=[1,1,1,1],padding="SAME")
relu2 = tf.nn.relu(tf.nn.bias_add(conv2,b2),name="relu2")
pool2 = tf.nn.max_pool(value=relu2,ksize=[1,2,2,1],strides=[1,2,2,1],padding="SAME",name="pool2")
#shape={None,7,7,64}
#FC1
w3 = tf.Variable(initial_value=tf.random_normal(shape=[7*7*64,1024],stddev=0.1,dtype=tf.float32,name="w3"))
b3 = tf.Variable(initial_value=tf.zeros(shape=[1024]))
#关键,进行reshape
input3 = tf.reshape(pool2,shape=[-1,7*7*64],name="input3")
fc1 = tf.nn.relu(tf.nn.bias_add(value=tf.matmul(input3,w3),bias=b3),name="fc1")
#shape={None,1024}
#FC2
w4 = tf.Variable(initial_value=tf.random_normal(shape=[1024,10],stddev=0.1,dtype=tf.float32,name="w4"))
b4 = tf.Variable(initial_value=tf.zeros(shape=[10]))
fc2 = tf.nn.bias_add(value=tf.matmul(fc1,w4),bias=b4)
#shape={None,10}
#定义交叉熵损失
# 使用softmax将NN计算输出值表示为概率
y = tf.nn.softmax(fc2,name="out")

# 定义交叉熵损失函数
cross_entropy = tf.nn.softmax_cross_entropy_with_logits(logits=fc2,labels=y_)
loss = tf.reduce_mean(cross_entropy)
#定义solver
train = tf.train.AdamOptimizer(learning_rate=0.0001).minimize(loss=loss)

#定义正确值,判断二者下标index是否相等
correct_predict = tf.equal(tf.argmax(y,1),tf.argmax(y_,1))
#定义如何计算准确率
accuracy = tf.reduce_mean(tf.cast(correct_predict,dtype=tf.float32),name="accuracy")
#定义初始化op
init = tf.global_variables_initializer()

#训练NN
with tf.Session() as session:
    session.run(fetches=init)
    for i in range(0,1000):
        xs, ys = mnist.train.next_batch(100)
        session.run(fetches=train,feed_dict={x:xs,y_:ys})
        if i%100 == 0:
            train_accuracy = session.run(fetches=accuracy,feed_dict={x:xs,y_:ys})
            print(i,"accuracy=",train_accuracy)
    #训练完成后,将网络中的权值转化为常量,形成常量graph,注意:需要x与label
    constant_graph = graph_util.convert_variables_to_constants(sess=session,
                                                            input_graph_def=session.graph_def,
                                                            output_node_names=['out','y_','input'])
    #将带权值的graph序列化,写成pb文件存储起来
    with tf.gfile.FastGFile("lenet.pb", mode='wb') as f:
        f.write(constant_graph.SerializeToString())
【fine-tuning文件如下】
import tensorflow as tf
from tensorflow.examples.tutorials.mnist import input_data
import numpy as np

mnist = input_data.read_data_sets(train_dir=r"E:\mnist_data",one_hot=True)
pb_path = r"C:\Users\ThinkPad\PycharmProjects\tf\TensorFlow\fine-tuning\mnist\lenet.pb"
#导入pb文件到graph中
with tf.gfile.FastGFile(pb_path,'rb') as f:
    graph_def = tf.GraphDef()
    graph_def.ParseFromString(f.read())
    _ = tf.import_graph_def(graph_def, name='')
with tf.Session() as session:
    #获取输入tensor
    x = tf.get_default_graph().get_tensor_by_name("input:0")
    #获取标签ensor
    y_ = tf.get_default_graph().get_tensor_by_name("y_:0")
    #进行fine-tuning
    #获取fc1
    fc1 = tf.get_default_graph().get_tensor_by_name("fc1:0")
    #定义新的FC2
    # FC2
    fc2_w = tf.Variable(initial_value=tf.random_normal(shape=[1024, 512], stddev=0.1, dtype=tf.float32, name="w4"),name="fc2_w")
    fc2_b = tf.Variable(initial_value=tf.zeros(shape=[512]),name="fc2_b")
    fc2 = tf.nn.bias_add(value=tf.matmul(fc1, fc2_w), bias=fc2_b)

    # FC3
    fc3_w = tf.Variable(initial_value=tf.random_normal(shape=[512, 10], stddev=0.1, dtype=tf.float32, name="w4"),name="fc3_w")
    fc3_b = tf.Variable(initial_value=tf.zeros(shape=[10]),name="fc3_b")
    fc3 = tf.nn.bias_add(value=tf.matmul(fc2, fc3_w), bias=fc3_b)

    y = tf.nn.softmax(fc3, name="out")

    # 定义交叉熵损失函数
    cross_entropy = tf.nn.softmax_cross_entropy_with_logits(logits=fc3, labels=y_)
    loss = tf.reduce_mean(cross_entropy)
    # 定义solver
    train = tf.train.AdamOptimizer(learning_rate=0.0001).minimize(loss=loss)

    # 定义正确值,判断二者下标index是否相等
    correct_predict = tf.equal(tf.argmax(y, 1), tf.argmax(y_, 1))
    # 定义如何计算准确率
    accuracy = tf.reduce_mean(tf.cast(correct_predict, dtype=tf.float32), name="accuracy")
    # 定义初始化op
    init = tf.global_variables_initializer()
    session.run(init)

    for i in range(0,1000):
        xs, ys = mnist.train.next_batch(100)
        session.run(fetches=train,feed_dict={x:xs,y_:ys})
        if i%100 == 0:
            train_accuracy = session.run(fetches=accuracy,feed_dict={x:xs,y_:ys})
            print(i,"accuracy=",train_accuracy)
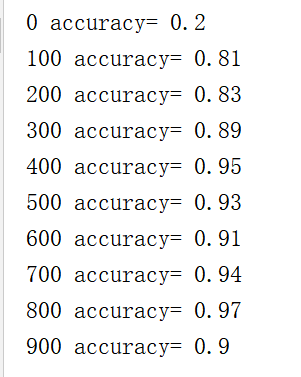
结果如下图: