ESP8266/ESP32 post上传更新固件小工具
目录(结尾提供本项目所有资源下载,开源)
功能展示
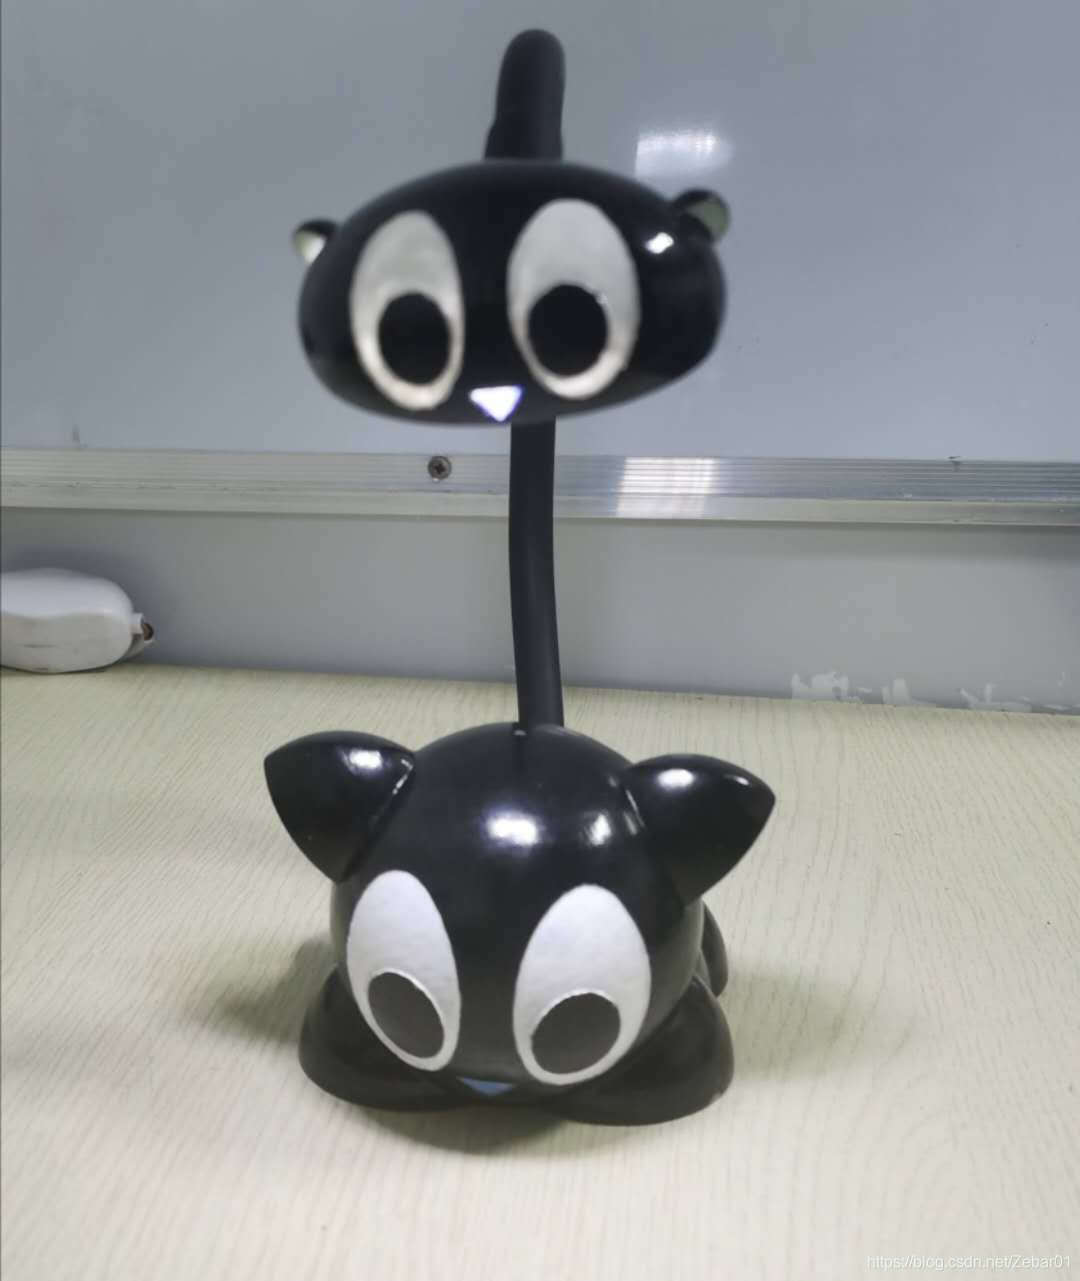
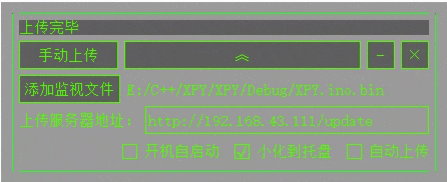
最近在用ESP8266做一个罗小黑的智能小台灯就是下图这货~如图1.1。然后用串口传输不方便,我就想直接用WiFi传输固件更新。每次编译好固件之后都要手动打开浏览器然后点击浏览文件目录最后再点击上传,本着想偷懒的原则就做了一个监控固件bin文件变化 的小工具软件,然后bin文件编译好后就直接上传到智能台灯中进行固件更新。最后是这个样子——如图1.2
ESP8266无线更新固件配置
在固件中加入固件更新代码:直接贴代码了(我用的是Arduino采用C++编写的,VS2017加插件)主要是用到了ESP8266WebServer这个类
MUpdata.h
#pragma once
#include <ESP8266WiFi.h>
#include <WiFiClient.h>
#include "ESP8266WebServer.h"
#include "ESP8266HTTPUpdateServer.h"
#include <ESP8266mDNS.h>

class MUpdata
{
public:

	MUpdata();
	bool init();					//初始化
	void setUpdataFlag(bool);		//设置是否可以更新
	void updataLoop();				//更新循环函数
	~MUpdata();

private:
	const char* host = "esp8266-webupdate";
	const char* serverIndex = "<form method='POST' action='/update' enctype='multipart/form-data'><input type='file' name='update'><input type='submit' value='Update'></form>";
	ESP8266HTTPUpdateServer httpUpdater;
	ESP8266WebServer *httpServer;
	bool updatFlag;					//更新标志
};
MUpdata.cpp
#include "MUpdata.h"

MUpdata::MUpdata()
{
	updatFlag = false;		//初始化更新关闭
}

/************************************************************************
*函数名:初始化函数
*功  能:初始化固件更新类
*输  出:bool 成功返回true 否则返回false
**************************************************************************/
bool MUpdata::init()
{
	MDNS.begin(host);
	httpServer = new ESP8266WebServer(80);
	httpUpdater.setup(httpServer);
	httpServer->begin();
}

/************************************************************************
*函数名:设置固件更新状态函数
*功  能:设置固件是否可以更新
*输  出:无
**************************************************************************/
void MUpdata::setUpdataFlag(bool set)
{
	this->updatFlag = set;
}

/************************************************************************
*函数名:固件更新循环函数
*功  能:检查固件是否可以更新
*输  出:无
**************************************************************************/
void MUpdata::updataLoop()
{
	if(updatFlag)
		httpServer->handleClient();
}


MUpdata::~MUpdata()
{
}
QT监视ESP8266固件bin文件变化
监视文件变化主要用到了QFileSystemWatcher这个类。如图2.1,在Qt文档中我们可以看到通过addPath方法可以添加需要监视的文件路径,然后当监视文件发生变化的时候会释放fileChanged(const QString &path)这一信号,所以只需要将固件.bin文件路径通过addPath添加到QFileSystemWatcher 的监视文件中去,再通过一个connect关联一下fileChanged信号和你自己写的槽函数即可。


QT中http Post方式上传文件(避坑版本)
直接上官方给出的例子
The QHttpMultiPart class resembles a MIME multipart message to be sent over HTTP.
The QHttpMultiPart resembles a MIME multipart message, as described in RFC 2046, which is to be sent over HTTP. A multipart message consists of an arbitrary number of body parts (see QHttpPart), which are separated by a unique boundary. The boundary of the QHttpMultiPart is constructed with the string "boundary_.oOo._" followed by random characters, and provides enough uniqueness to make sure it does not occur inside the parts itself. If desired, the boundary can still be set via setBoundary().
As an example, consider the following code snippet, which constructs a multipart message containing a text part followed by an image part:
官方示例:
  QHttpMultiPart *multiPart = new QHttpMultiPart(QHttpMultiPart::FormDataType);

  QHttpPart textPart;
  textPart.setHeader(QNetworkRequest::ContentDispositionHeader, QVariant("form-data; name=\"text\""));
  textPart.setBody("my text");

  QHttpPart imagePart;
  imagePart.setHeader(QNetworkRequest::ContentTypeHeader, QVariant("image/jpeg"));
  imagePart.setHeader(QNetworkRequest::ContentDispositionHeader, QVariant("form-data; name=\"image\""));
  QFile *file = new QFile("image.jpg");
  file->open(QIODevice::ReadOnly);
  imagePart.setBodyDevice(file);
  file->setParent(multiPart); // we cannot delete the file now, so delete it with the multiPart

  multiPart->append(textPart);
  multiPart->append(imagePart);

  QUrl url("http://my.server.tld");
  QNetworkRequest request(url);

  QNetworkAccessManager manager;
  QNetworkReply *reply = manager.post(request, multiPart);
  multiPart->setParent(reply); // delete the multiPart with the reply
// here connect signals etc.官方的例子中说可以不设置界限,实际上不设置的话是post不出去的。还有一个巨大的坑就是,需要在你的这个方法里面加上一个evenLoop事件循环,不然也是post不出去的。最终修改代码如下(这个是我自己写的):
我写的post方法
/**********************************************************
*函数名:post上传函数
*功  能:以post上传文件
*输  入:无
*输  出:无
***********************************************************/
void FileWatchUpdata::onPost()
{
	postRunningFlag = true;
	ui.logLab->setText(QString::fromLocal8Bit("正在上传"));
	qDebug() << QString::fromLocal8Bit("正在上传文件");
	QHttpMultiPart *multiPart = new QHttpMultiPart(QHttpMultiPart::FormDataType);
	QHttpPart FilePart;

	FilePart.setHeader(QNetworkRequest::ContentDispositionHeader, QVariant("form-data; name=\"XPY.ino.bin\""));
	QFile *file = new QFile(fileName);
	file->open(QIODevice::ReadOnly);
	FilePart.setBodyDevice(file);
	file->setParent(multiPart);
	multiPart->append(FilePart);
	uploadServiceUrl = QUrl(ui.uploadServiceIpEdt->text());
	QNetworkRequest request(uploadServiceUrl);

	QNetworkAccessManager manager;
	QString bd = "fasdlkfjaslkdgj;lkadjglk;";
	multiPart->setBoundary(bd.toLatin1());
	request.setHeader(QNetworkRequest::ContentTypeHeader, "multipart/form-data;boundary=" + bd);

	QNetworkReply *reply = manager.post(request, multiPart);
	multiPart->setParent(reply);

	QEventLoop eventloop;
	connect(reply, SIGNAL(finished()), &eventloop, SLOT(quit()));
	connect(reply, SIGNAL(finished()), this, SLOT(onFinished()));
	connect(reply, SIGNAL(uploadProgress(qint64, qint64)), this, SLOT(onUploadProgress(qint64, qint64)));
	eventloop.exec(QEventLoop::ExcludeUserInputEvents);
}
注意:这里有两点需要注意:
- 要添加界限boundary。
- 要用QeventLoop进行事件循环,并在结尾要将finished信号和quit槽函数进行绑定。
QSS
通过QSS可以改变程序的样式,我这里想用Linux黑框绿色字体主体样式。具体配置如下:
//主背景样式
background-color: rgba(0, 0, 0, 100);

//按钮的样式
QPushButton{
 	color: rgb(85, 255, 0);
	border:1px solid rgb(85, 255, 0);
}
QPushButton::pressed {
	color: rgb(85, 255, 0);
	border:1px solid rgb(85, 255, 0);
	background-color:rgba(85,255,0,100);
}
QPushButton::hover{
	color: rgb(85, 255, 0);
	border:1px solid rgb(85, 255, 0);
	background-color:rgba(85,255,0,50);
}

//QLab样式
color: rgb(85, 255, 0);
background-color: rgba(255, 255, 255, 0);

//QLineEdit样式
QLineEdit
{
	color:rgb(85, 255, 0);
	border:1px solid rgb(85, 255, 0);
	background: rgba(0, 0, 0, 0);
	border-radius: 0px;
}
QLineEdit::hover
{
	color:rgb(85, 255, 0);
	border:1px solid rgb(85, 255, 0);
	background: rgba(0, 0, 0, 100);
	border-radius: 0px;
}
//QCheckBox样式,主要想要改变其框内点击效果的话只能用图片对样式进行修改
QCheckBox{
	color: rgb(85, 255, 0);
	background-color: rgba(255, 255, 255, 0);
}

QCheckBox::indicator:unchecked{
    image:url(:/FileWatchUpdata/Resources/act1.png);
}

QCheckBox::indicator:checked{
    image:url(:/FileWatchUpdata/Resources/act2.png);
}
